BRAKES
The stock brake setup on the 190E is probably sufficient for daily use, but
since I plan on taking the car on the track, a upgrade was definitely
needed. I started out by researching what others have done (those who
race their 190's) and found that most serious race teams raid the factory MB
parts bin for their brake upgrades (just like AMG!). The most common
of all the 190E brake upgrades is the 400E brakes. Big ATE 4 piston
calipers in the front coupled with 11.6" vented rotors and for the rear,
large two piston ATE calipers and 11" vented rotors. This system
provides incredible stopping power and are almost direct bolt on items.
Here is the list of components I have gathered for the upgrade and the cost
of each item.
1. 400E 4 piston front calipers w/shields & sensors, ea.
$100, total $225 (used, w/shipping)
2. 400E 2 piston rear calipers w/brake pad sensors, ea
$40, total $95 (used with shipping)
3. 400E 11.6" vented front rotors, each $75, total $160
(new with shipping)
4. 400E 11" vented rear rotors, each $50, total $107 (new
with shipping)
5. Troutman stainless steel brake lines (dot approv.
Teflon liner) $79.00 (new, shipped)
6. Motul 600 high temp brake fluid, three bottles, $35.87
w/tax
7. PBR Metal Master brake pads, front/rear, $65.10 (new,
shipped)
8. Brake proportioning valve with meter gauge, $65.00 (new
shipped)
9. Four wire brushes for Dremel rotary tool (to clean
calipers) $18.00 w/tax
10. One can of caliper 500 degree high temp paint, $6.00 w/tax
11. Three tubes of anti-squeak synthetic brake pad lube, $3.50 w/tax
Total of $859.47, sure
beats $3000 for a front Brembo brake kit!
Alright on to the
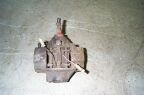
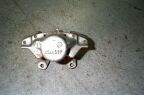
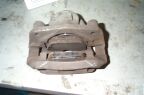
install: These pictures shows you what the calipers
 looked
like when I
looked
like when I received them. Very dirty and encrusted with years of accumulated
brakes dust. These calipers arrived loaded with OE pads and sensors,
which was nice, not because of the pads but the sensors! The local MB
dealer wants $10 a piece for sensors! These were purchased from
www.autosportsunlimited.com
these guys had the calipers in stock and also gave me the best price.
Other wrecking yards wanted anywhere from $100 for used ones to $350 ea. for
new ones. I am very happy with their service and prices!
received them. Very dirty and encrusted with years of accumulated
brakes dust. These calipers arrived loaded with OE pads and sensors,
which was nice, not because of the pads but the sensors! The local MB
dealer wants $10 a piece for sensors! These were purchased from
www.autosportsunlimited.com
these guys had the calipers in stock and also gave me the best price.
Other wrecking yards wanted anywhere from $100 for used ones to $350 ea. for
new ones. I am very happy with their service and prices!
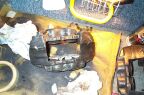
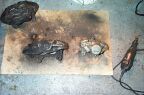 Here
you can see that the OE pads have been removed and I have used a Dremel with
a wire brush to clean off the encrusted brake pad dust. I wanted to do
a close inspection of the caliper piston seals to determine whether or not I
should rebuild the calipers, based on the condition I elected not to proceed
with a rebuild until next season. All the black dirt on the wood is
from cleaning just the rear caliper!
Here
you can see that the OE pads have been removed and I have used a Dremel with
a wire brush to clean off the encrusted brake pad dust. I wanted to do
a close inspection of the caliper piston seals to determine whether or not I
should rebuild the calipers, based on the condition I elected not to proceed
with a rebuild until next season. All the black dirt on the wood is
from cleaning just the rear caliper!
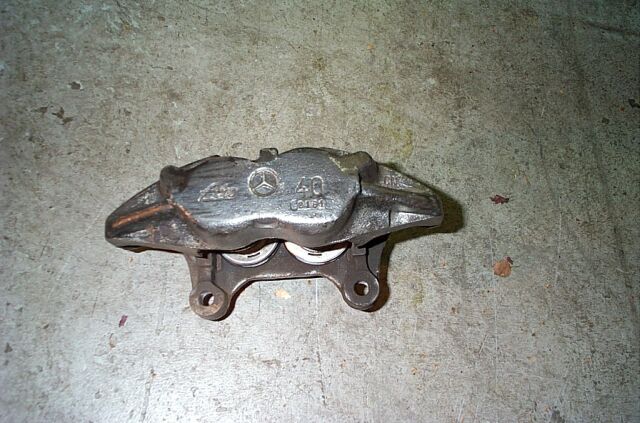
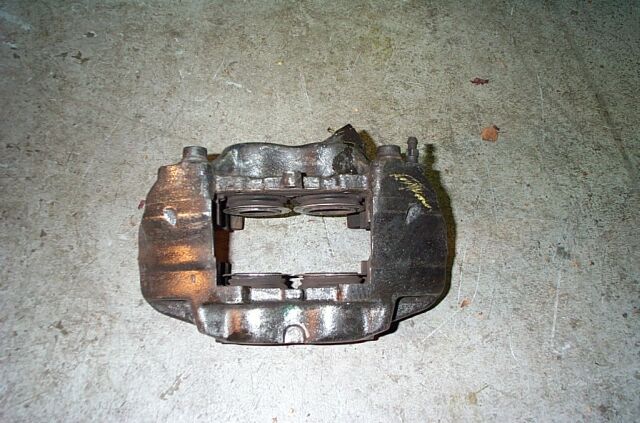
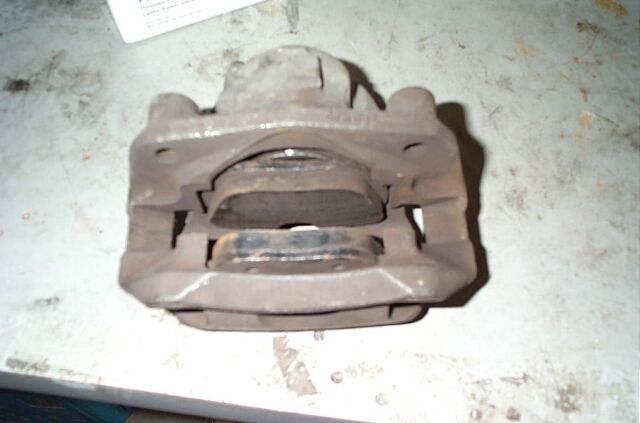
 These
are the front ATE 4 piston calipers. There made of iron and are
These
are the front ATE 4 piston calipers. There made of iron and are very heavy duty units. It took quite a while to clean these up but it
is necessary if you want to paint them, otherwise your paint is not going to
adhere very well.
very heavy duty units. It took quite a while to clean these up but it
is necessary if you want to paint them, otherwise your paint is not going to
adhere very well.
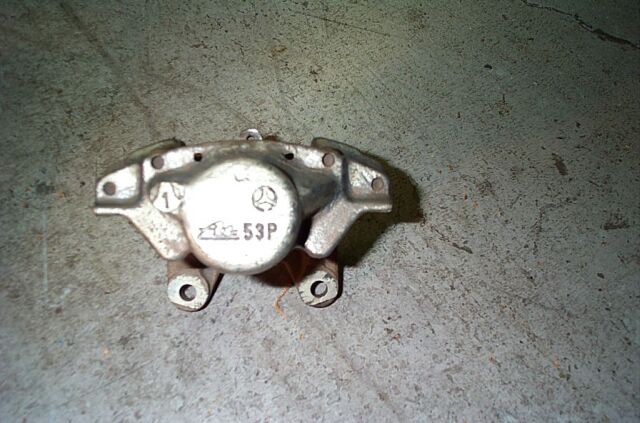
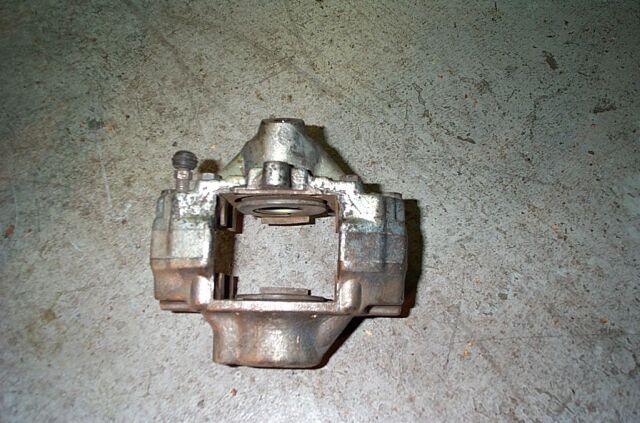
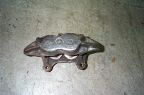
 Here
are the rear calipers. These were also in very good shape with
Here
are the rear calipers. These were also in very good shape with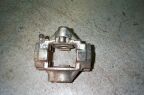 minor surface rust and lots of encrusted brake dust. These calipers
have a gold tone finish under all the crud! Again, the seals on these
items were in very good condition, very pliable with no signs of aging or
cracking.
minor surface rust and lots of encrusted brake dust. These calipers
have a gold tone finish under all the crud! Again, the seals on these
items were in very good condition, very pliable with no signs of aging or
cracking.
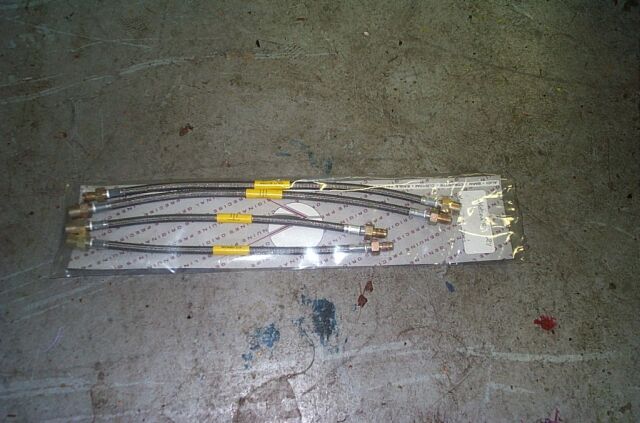
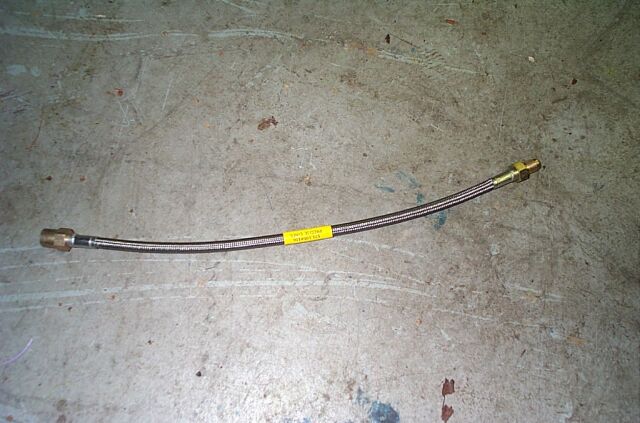
Next up are the stainless steel brake lines. These are a must have for
any performance
 oriented
driving. The SS lines prevent water absorption into your brake fluid
(when combined
oriented
driving. The SS lines prevent water absorption into your brake fluid
(when combined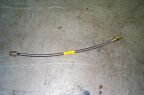 with the Teflon inner liners) and also prevents bulging of the lines which
results in a less than firm brake pedal. These were purchased from
www.germanpartsusa.com/sbb.html other wise know as Troutman.
These lines (DOT approved with the Teflon inner liner) shipped to my door
cost me only $79.00! By far the best price, excellent product and
excellent customer support. This is the 5th set of lines I have
purchased from Troutman.
with the Teflon inner liners) and also prevents bulging of the lines which
results in a less than firm brake pedal. These were purchased from
www.germanpartsusa.com/sbb.html other wise know as Troutman.
These lines (DOT approved with the Teflon inner liner) shipped to my door
cost me only $79.00! By far the best price, excellent product and
excellent customer support. This is the 5th set of lines I have
purchased from Troutman.
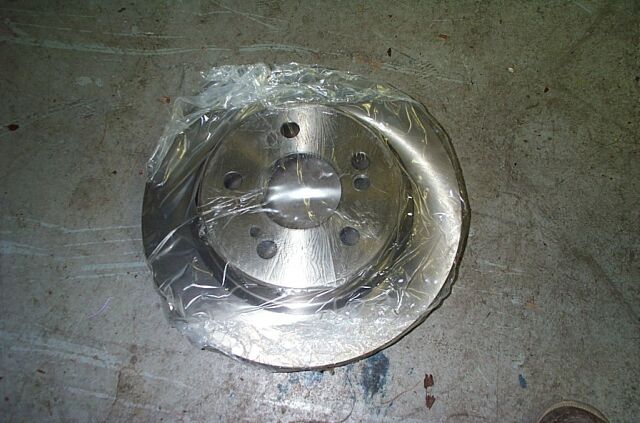
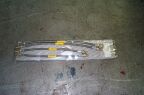
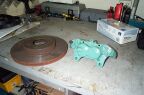
This is one of the rear 400E rotors. They are made by Balo of Germany
which is MB parts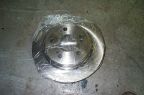 supplier. This rotor is much larger (11") than the OE 190E rotor and
also is vented where as the 190E rear rotor is solid. I picked these
up new from
http://www.adsitco.com/catalog.html for $49.00
each. This was a very good price.
www.thepartsbin.com also has them
for about $4.00 less, but they did not have any in stock at the time.
Both vendors offer excellent prices and service.
supplier. This rotor is much larger (11") than the OE 190E rotor and
also is vented where as the 190E rear rotor is solid. I picked these
up new from
http://www.adsitco.com/catalog.html for $49.00
each. This was a very good price.
www.thepartsbin.com also has them
for about $4.00 less, but they did not have any in stock at the time.
Both vendors offer excellent prices and service.
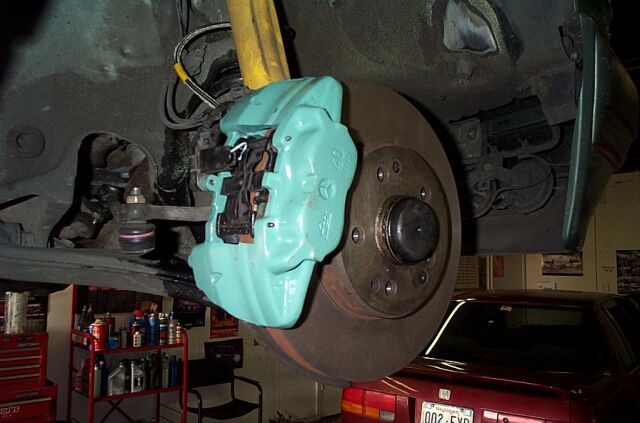
 This
picture shows the newly cleaned caliper and you can see that masking tape
has been applied to the tops of the pistons to keep paint from getting on
them. I planned on painting not only the outside of the caliper but
the inside as well. The iron calipers are prone to rust so this will
help prevent rusting in the future.
This
picture shows the newly cleaned caliper and you can see that masking tape
has been applied to the tops of the pistons to keep paint from getting on
them. I planned on painting not only the outside of the caliper but
the inside as well. The iron calipers are prone to rust so this will
help prevent rusting in the future.
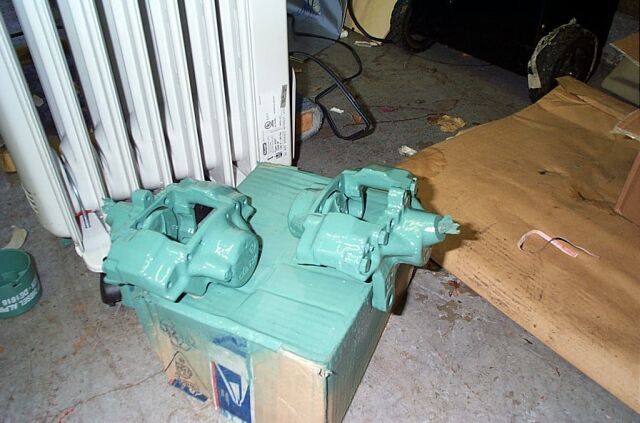
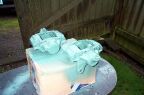
These pictures show the calipers in the middle of the painting process.
You will see the lovely shade of green that I chose (don't laugh, my 190's
green, red calipers would of looked funny!) which happens to really be the
only shade available in the 500 degree high temp engine enamel. I have
used this paint on many cars in the past, the most recent was my Corvette.
It is very durable and holds up well to hot brake dust and brake fluid.
Since its rather cold here in Washington, I use a heater in my garage to
pre-heat my paint and calipers before painting, I then take them outside and
shoot the paint. About five coats (15 minutes between each coat) and
after the last coat I bring them in and put them next to the heater.
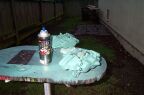
In the last picture is shot of the high temp paint I use, its available at
Shucks auto parts and is labeled as Engine Enamel. You will also
notice that the brake line opening and bleeder valve opening has been
plugged with paper to keep paint out. You must also be careful and
make sure that all the brake fluid is drained out before you start painting.
If any fluid gets on the caliper either before or during your paint session,
you will have problems with the paint adhering correctly.

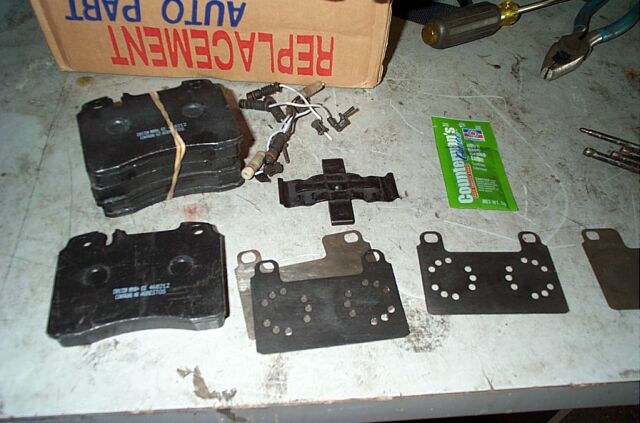
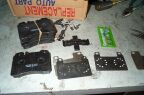
This time around I chose to
go with the PBR Metal Master brake pads (also known as Repco and Axxis).
These pads are a great street/track pad and work well when cold and also at
high
 temps
with no brake fade! They also are very quiet and generate very little
dust. Out the door, these cost me $65.10 front & rear shipped to my
door. Don't let the price fool you, these are excellent brake pads
right up their with the Hawks and Porterfields. I also like the
Porterfield R4S pads, but a complete set costs around $175 for a set.
I have been known to use up a set on a two day track event, so it can get
expensive real quick. I picked up the metal masters from
www.autohausaz.com, they quoted me
the best price, but after talking with about 8 other on line retailers, I
decided to go with Autohaus.
temps
with no brake fade! They also are very quiet and generate very little
dust. Out the door, these cost me $65.10 front & rear shipped to my
door. Don't let the price fool you, these are excellent brake pads
right up their with the Hawks and Porterfields. I also like the
Porterfield R4S pads, but a complete set costs around $175 for a set.
I have been known to use up a set on a two day track event, so it can get
expensive real quick. I picked up the metal masters from
www.autohausaz.com, they quoted me
the best price, but after talking with about 8 other on line retailers, I
decided to go with Autohaus.
I will be using the OE MB front brake shims in conjunction with the
synthetic anti squeal compound also shown in the picture.
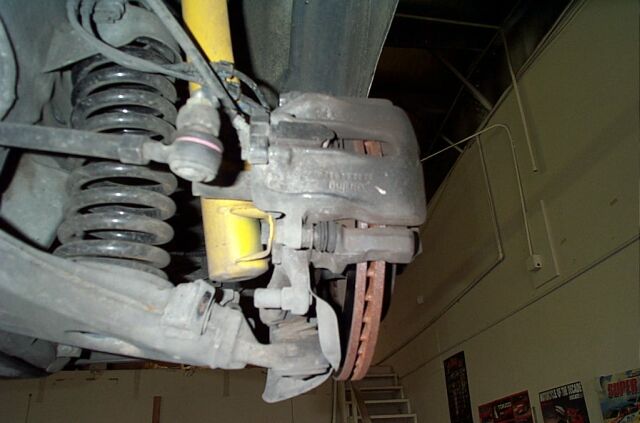
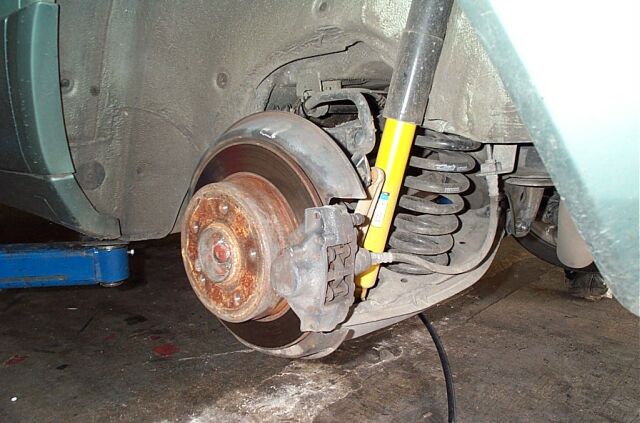
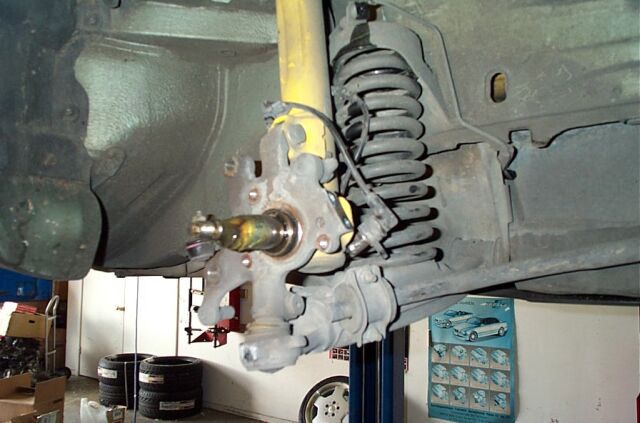
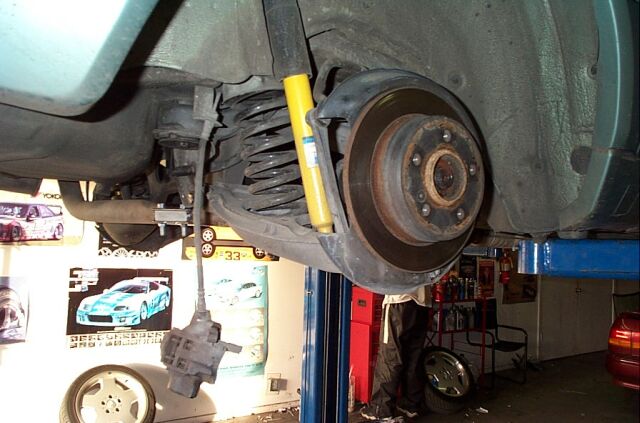
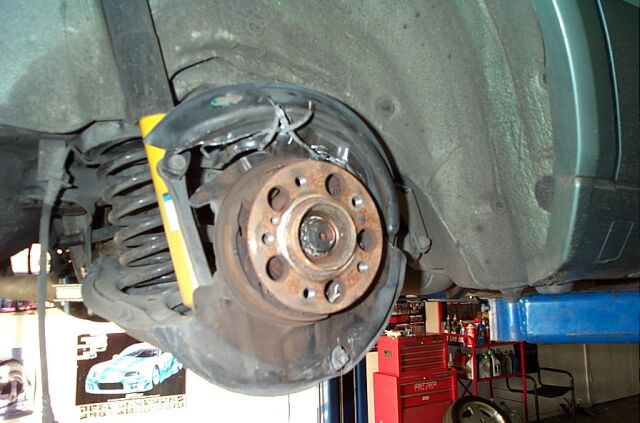
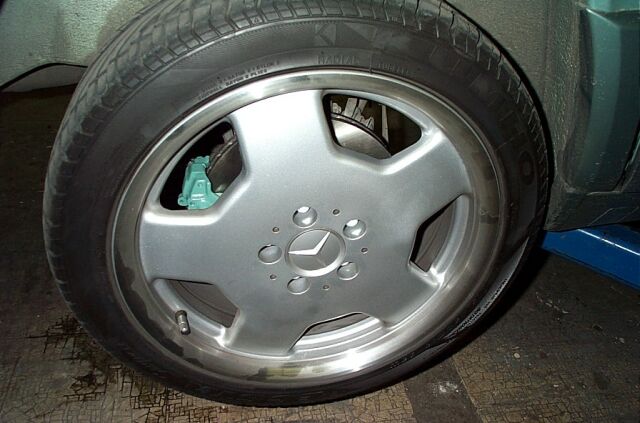
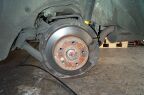
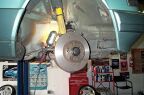
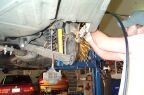
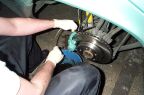
Finally had a chance to use my friends lift to finish my brake install,
these first two pictures are of the stock front brake setup and utilizes a
twin piston caliper. The second two pictures shows you the rear
which also uses a twin piston caliper but a bit smaller. Notice the
formed dust shield on the rear.


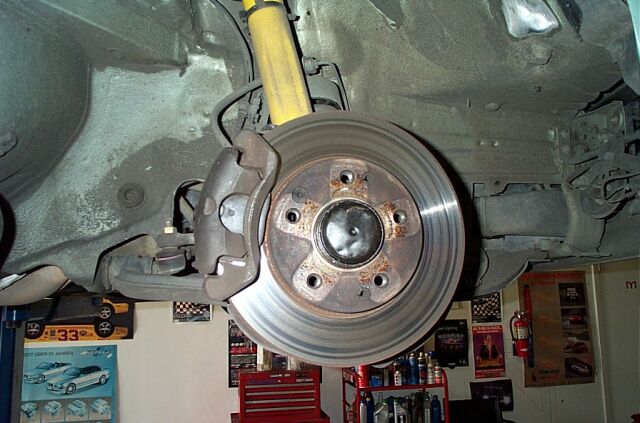
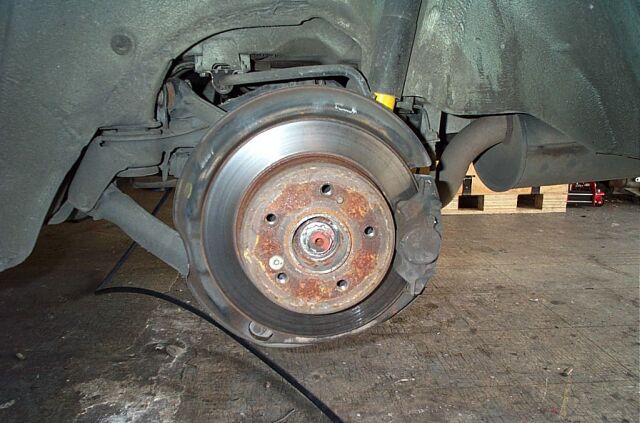
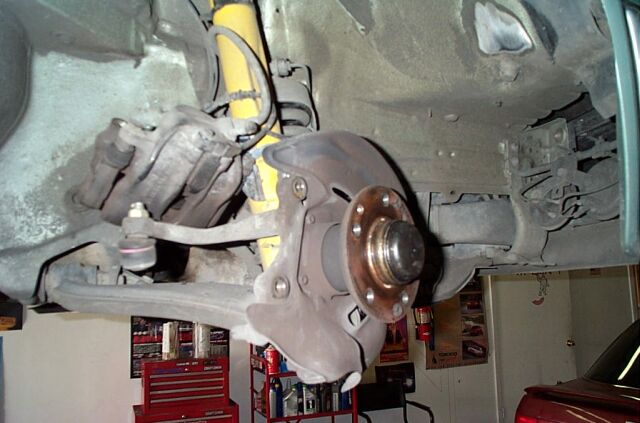
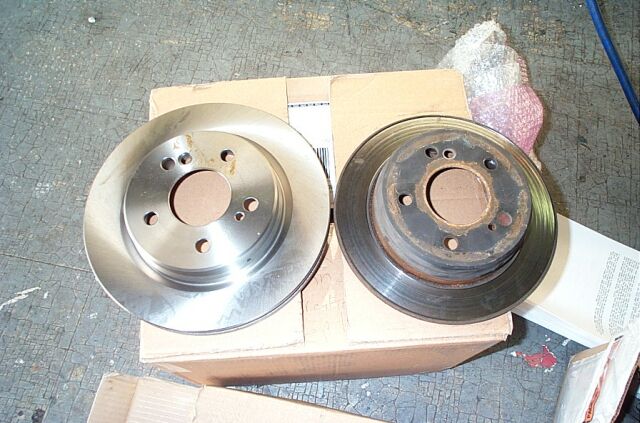
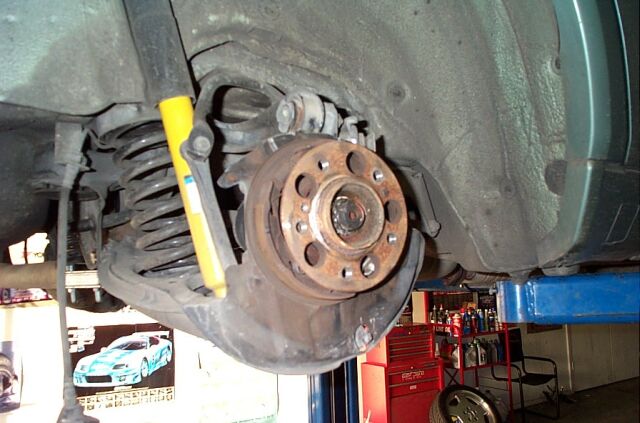
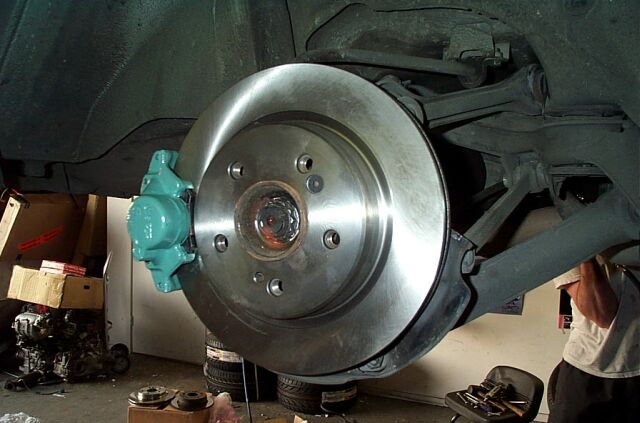
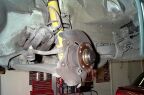
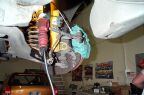
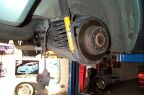
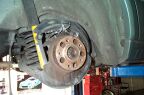
In the next round of photos we have the front axel with the rotor and
caliper removed. To get the dust shield off, the wheel bearing
needed to be pulled, simple procedure. The second picture shows the
difference in size between the stock rotor and the 400E unit. Third
picture is the OE 400E rotor and caliper. The forth picture here
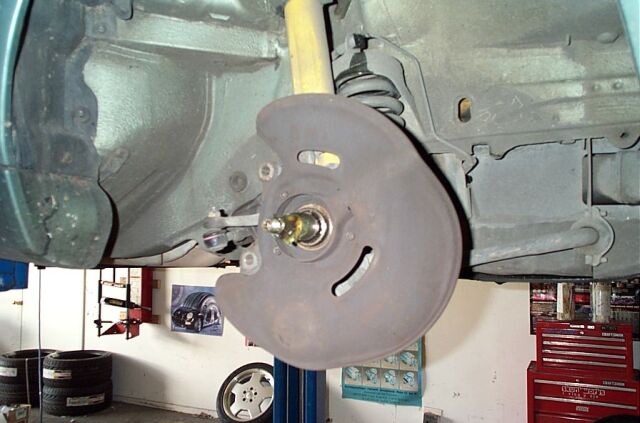
shows the 190E dust shield. In the next row of pictures we start
with the 190E wheel bearing removed and then the dust shield. The
next picture shows the 400E OE dust shield installed. The third
picture shows the dust shield and wheel bearing back in place. The
last picuture shows the new 400E rotor mounted. For exact procedures
on removing these items, do like I did and refer to your service manual or
service manual CD, I am not going to dupe the info provided there (getting
tired of typing!). Note that all of these items bolt right up and
use all factory mounting points and bolts. On some 190E's, the front
calipers using a floating caliper design, where as the caliper is mounted
to a bracket and then to the spindle, my car was not like this, the
caliper bolted right to the spindle.
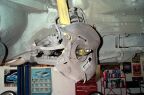

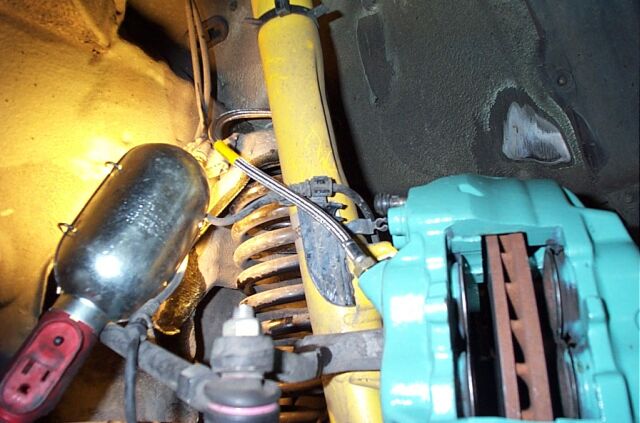
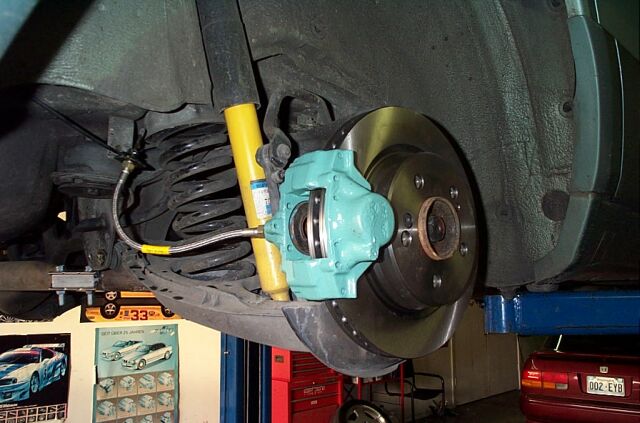
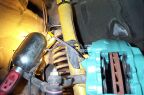
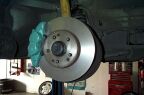
Alright, were getting close to finishing the front right side, from the
first picture you can see we have the caliper mounted and the SS brake
line installed. The second picture is a close up of the unloaded
caliper. Third picture shows the metal master brake pads, brake pad
shims and other mounting hardware. I spent about a hour cleaning up
the shims, clips and pins using my Dremel with a wire brush. Also,
to keep the brake pad clips from rusting, I painted them flat black using
a high temp enamel. The last picture is a close up shot of the OE
190 front caliper.
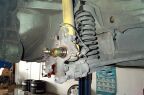
Moving on, you can see from the first picture the metal master pads
just recently having anti squeak paste applied. The second picture
here shows the new front caliper loaded and the brake sensor hooked up.
The 190E only has one connection for the low brake pad sensor, so I
installed the sensor in the inner brake pad (the one that is hard to see
with the wheel on). The last two pictures show the complete install
on the front.


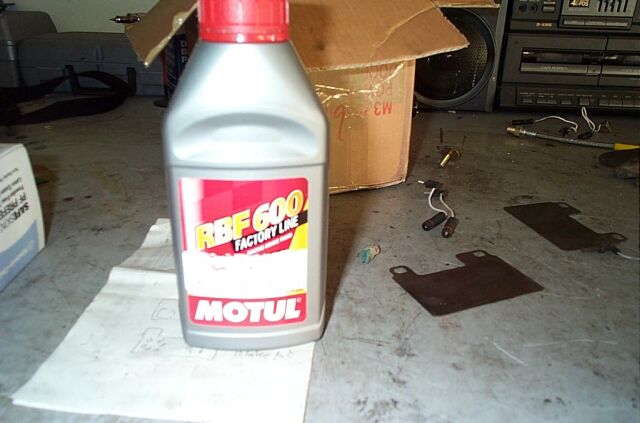
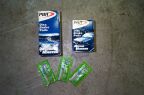
First picture here shows you the new look of the Motul PBF600 bottle,
as per much research, the only fluid that outperforms the Motul is the
Castrol SRF, but several tuners have discovered that the Castrol eats
caliper piston seals, so they no longer use it. While the Castrol is
obviously the best choice for dedicated race cars that have their calipers
rebuilt after ever race, for daily drivers and occasional track cars, the
Motul is the choice. Ok, on to the rear brakes, in these pictures
you see the OE 190E brakes and in the third picture you see the
caliper/rotor removed exposing the parking brake assembly. Not
wanted to dissemble the entire parking brake setup, I chose to just cut
the top portion of the dust shield off completely (you will see this in
the following set of pictures) the last picture here shows you the
difference between the 190E OE rear rotors and the 400E rear rotors.


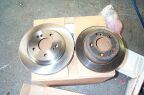
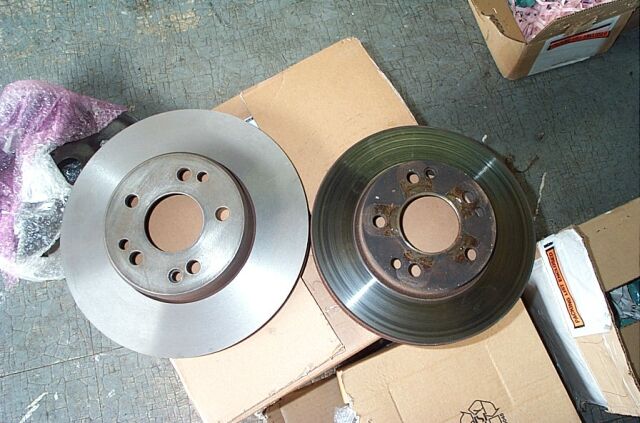
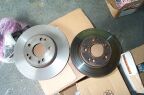
This is a better shot of the differences between the 190E rear rotors
and the 400E, not only is there a large size difference but look at how
thin the 190 OE rotor is and also the fact that is is not of the vented
variety. My friend Scott Clark so graciously volunteered his time to
assist me in this install (maybe money had something to do with his
volunteering ;-) and in this next picture you can see him diligently
cutting away at the top of the rear dust shield using a air scissors.
The next couple of pictures show what we cut off. I did try to fit
the 400E rotor with the stock dust shield in place, but since the rotor is
larger than the 190E rotor, it was hitting the dust shield, so the shield
had to be cut. View this page to see why Motul 600 is one of
the best brake fluids on the market Brake Fluid
Comparison Chart


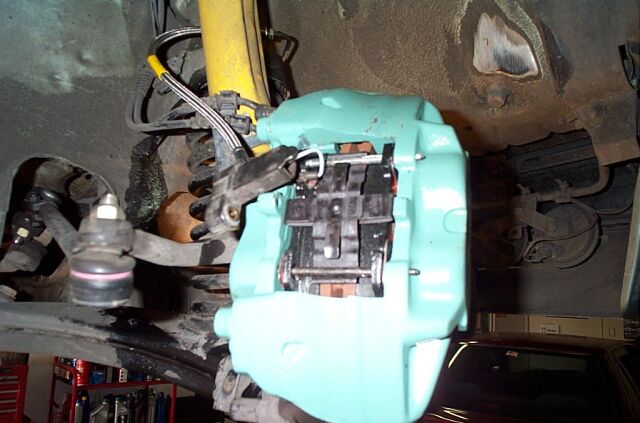
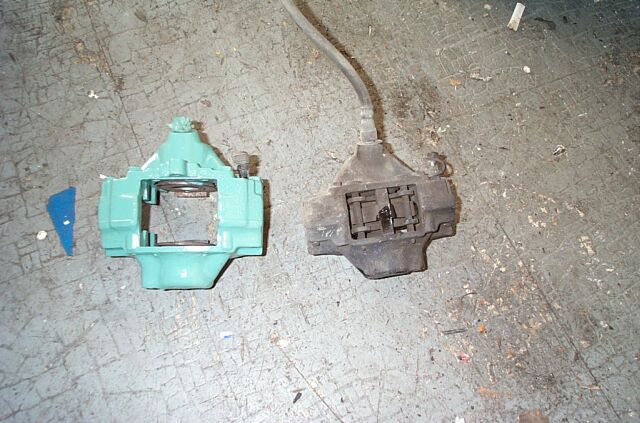
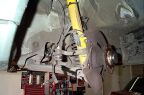
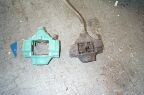
In this round of pictures you can see the differences between the OE
190E caliper and the 400E rear caliper, notice the 400E unit is larger and
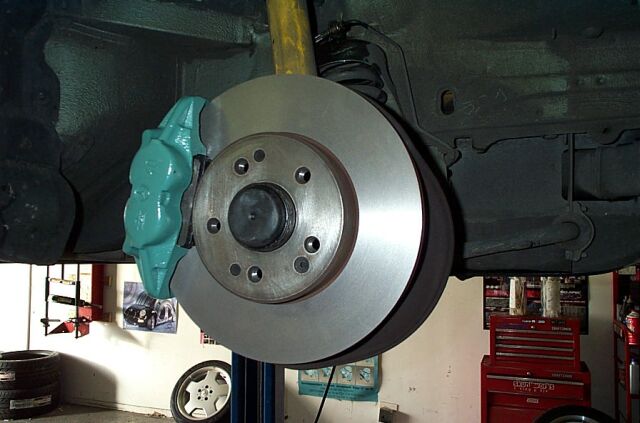
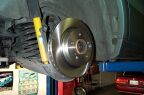
provides much more clamping force. Next we have the 400E rotor
installed. The last two pictures shows the rotor, caliper and SS
brake line installed.


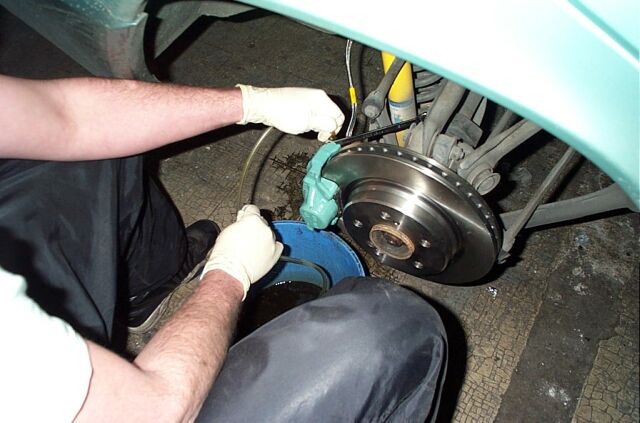
Were almost finished, last step here is to flush the old fluid and get
the Motul in, I am old school when it comes to bleeding brakes so its the
standard two man team, one pumping the pedal and one bleeding the brakes.
We start at the farthest corner away from the master cylinder and work our
way around. One thing I should note, the reservoir has three
chambers in it, and the third chamber was somewhat difficult to empty, so
I pulled the reservoir off to empty it of the OE brake fluid. Make
sure if you do this, that you keep fluid in your brake booster, you do not
want your brake system bled dry. Also, don't spill brake fluid in
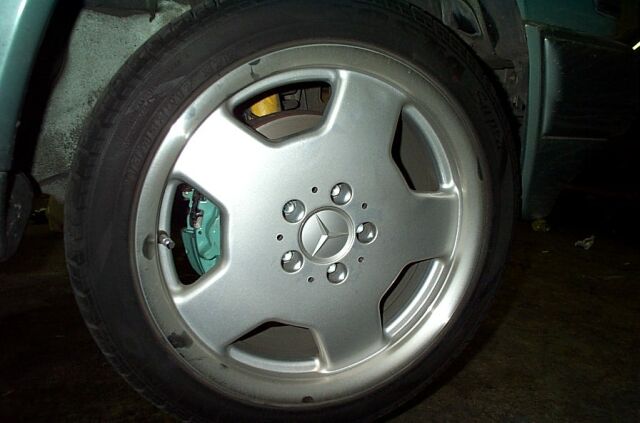
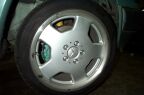
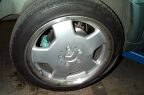
your engine compartment or on your paint, its very nasty. The last
two shots show the front and the back with the wheels installed, not much
of the calipers are visible, but enough to let you know something is
happening.
Ah, now your wondering about stopping power, while currently the brake
pads are not completely seated, thus preventing any hard core test, I can
state that this setup has incredible stopping power, superior to the SL600
brakes on the C36, the PBR on my Corvette and the OE brakes on the BMW M3.
As a matter of fact, I can't say that I have ever driven a car with this
type of stopping power before, even the Brembo equipped Porsche I have
driven does not have this type of stopping power. Incredible
modification!


<Back
 looked
like when I
looked
like when I received them. Very dirty and encrusted with years of accumulated
brakes dust. These calipers arrived loaded with OE pads and sensors,
which was nice, not because of the pads but the sensors! The local MB
dealer wants $10 a piece for sensors! These were purchased from
www.autosportsunlimited.com
these guys had the calipers in stock and also gave me the best price.
Other wrecking yards wanted anywhere from $100 for used ones to $350 ea. for
new ones. I am very happy with their service and prices!
received them. Very dirty and encrusted with years of accumulated
brakes dust. These calipers arrived loaded with OE pads and sensors,
which was nice, not because of the pads but the sensors! The local MB
dealer wants $10 a piece for sensors! These were purchased from
www.autosportsunlimited.com
these guys had the calipers in stock and also gave me the best price.
Other wrecking yards wanted anywhere from $100 for used ones to $350 ea. for
new ones. I am very happy with their service and prices!