
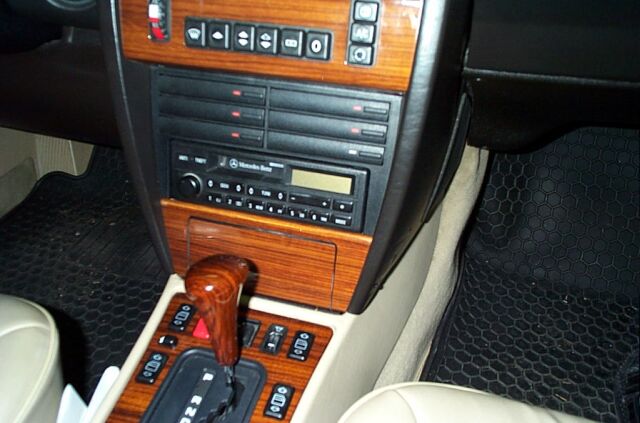
I am tossing in this picture just in case anyone is interested in seeing
leather interior in a 190E. Looks pretty much the same as a 300E,
combination leather/vinyl door panels, leather wrapped steering wheel and
leather front and rear seats.
Since the 190E came with a cheap looking vinyl shift knob, I found a
Zebrano wood shift knob on Ebay which I picked up for $35. The
installation of the shift knob is not as simple as unscrewing the knob
from the shaft, the entire shaft needs to be removed. I did not take
 detailed
pictures of this install (starting to forget things in my old age!) but
you need to start by removing the black plastic trim around the Zebrano
wood trim cover, you can do this by prying up on the sides. Once
removed you can then proceed to removing the Zebrano switch plate (very
carefully) you must exercise caution here, the wood trim cracks very
easily. My trim was already cracked and I purchased a new piece from
MB, After the cover is up, you can unplug all the switch's and put
the panel out of the way. Now the black plastic shift console (the
piece with the P, N, D, 3, 2 on it) needs to be removed. If I
remember correctly, there are some screws or nuts that need to be removed,
you can then lift this item up out of the way, you won't be able to remove
it completely, because of the shift knob, but you need to move it out of
the way so you can get down to the linkage. I also don't remember
which open end wrenches you need, but you need to loosen up the nut so you
can unscrew the shift knob. Be careful that you don't strip the nut!
Once it is loosened, the shift knob and attached shaft just unscrews.
Also while you have all this apart, if you have play in your shift lever
you should replace your shifter bushings while you have this all apart.
One last thing, check your shift console illumination light, you should
probably replace that bulb while your at it, saves you the necessity of
removing the Zebrano switch cover at a later date
detailed
pictures of this install (starting to forget things in my old age!) but
you need to start by removing the black plastic trim around the Zebrano
wood trim cover, you can do this by prying up on the sides. Once
removed you can then proceed to removing the Zebrano switch plate (very
carefully) you must exercise caution here, the wood trim cracks very
easily. My trim was already cracked and I purchased a new piece from
MB, After the cover is up, you can unplug all the switch's and put
the panel out of the way. Now the black plastic shift console (the
piece with the P, N, D, 3, 2 on it) needs to be removed. If I
remember correctly, there are some screws or nuts that need to be removed,
you can then lift this item up out of the way, you won't be able to remove
it completely, because of the shift knob, but you need to move it out of
the way so you can get down to the linkage. I also don't remember
which open end wrenches you need, but you need to loosen up the nut so you
can unscrew the shift knob. Be careful that you don't strip the nut!
Once it is loosened, the shift knob and attached shaft just unscrews.
Also while you have all this apart, if you have play in your shift lever
you should replace your shifter bushings while you have this all apart.
One last thing, check your shift console illumination light, you should
probably replace that bulb while your at it, saves you the necessity of
removing the Zebrano switch cover at a later date
DOOR PANEL REPLACEMENT
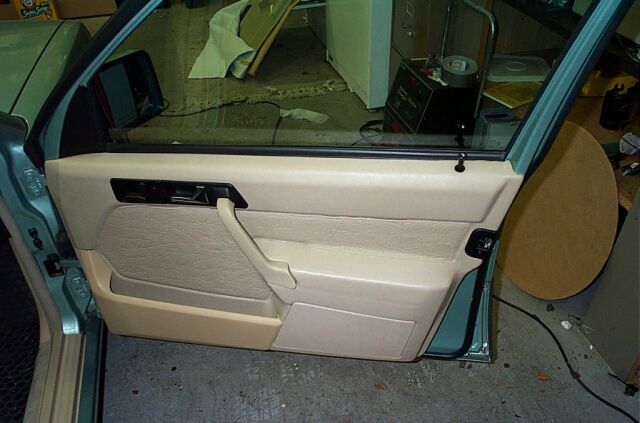 Since this car came from Texas, there was a severe problem with the adhesive on the door panels and the
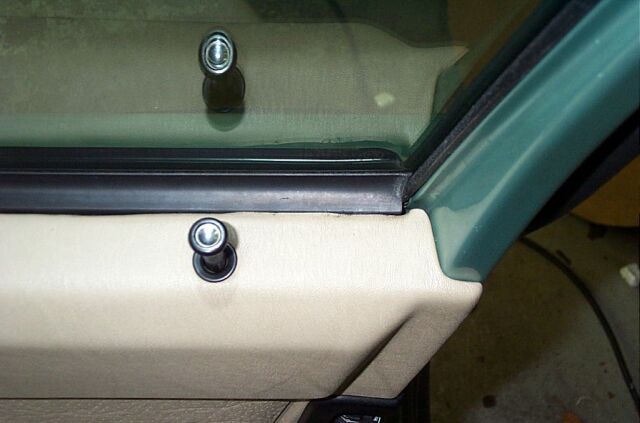 MB Tex/leather shrinking and pulling
up. I guess Mercedes dropped the ball on this one, the adhesive they used was a very poor choice. Anyway, all four of my door panels were
showing some signs of shrinkage or the material pulling away from the
panel all together. The company that shipped the vehicle up to me cracked the windshield and lost the spare tire and wheel, so after some negotiating, I received a nice fat check
from them (my
MB Tex/leather shrinking and pulling
up. I guess Mercedes dropped the ball on this one, the adhesive they used was a very poor choice. Anyway, all four of my door panels were
showing some signs of shrinkage or the material pulling away from the
panel all together. The company that shipped the vehicle up to me cracked the windshield and lost the spare tire and wheel, so after some negotiating, I received a nice fat check
from them (my
 shipping ended up costing me nothing!) and used this money
to replace the windshield and
shipping ended up costing me nothing!) and used this money
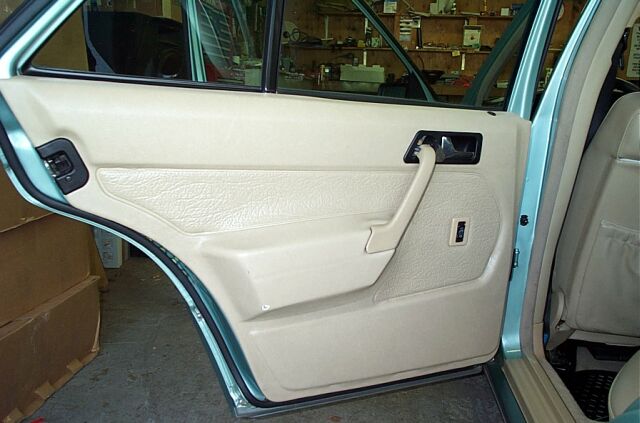
to replace the windshield and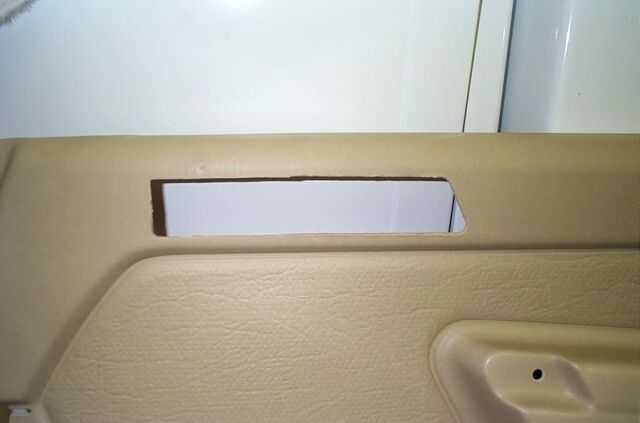 door panels.. While pictures one and
two don't really show the shrinkage, if you look around the arm rest you
can see a large area where the vinyl has shrunk. Picture two shows
the top of the panel where the material has shrunk and pulled up from the
panel. I tried repairing this several times, but the material itself
has shrunk and even heating it up and stretching it back into place did
not work. I tried three different glues, the last being a high
strength glue for exterior vinyl tops, about the most durable available.
Picture
door panels.. While pictures one and
two don't really show the shrinkage, if you look around the arm rest you
can see a large area where the vinyl has shrunk. Picture two shows
the top of the panel where the material has shrunk and pulled up from the
panel. I tried repairing this several times, but the material itself
has shrunk and even heating it up and stretching it back into place did
not work. I tried three different glues, the last being a high
strength glue for exterior vinyl tops, about the most durable available.
Picture
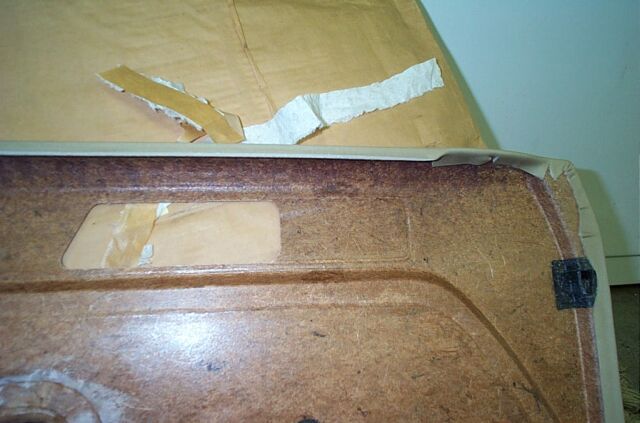
 three shows the new panel from Mercedes. One thing to note,
Mercedes does not ship these panels with the cut out for power seats, you
have to cut it out yourself,
three shows the new panel from Mercedes. One thing to note,
Mercedes does not ship these panels with the cut out for power seats, you
have to cut it out yourself, seems ridiculous to me but I guess they want to cut down on
the number of stocking parts they need to maintain.
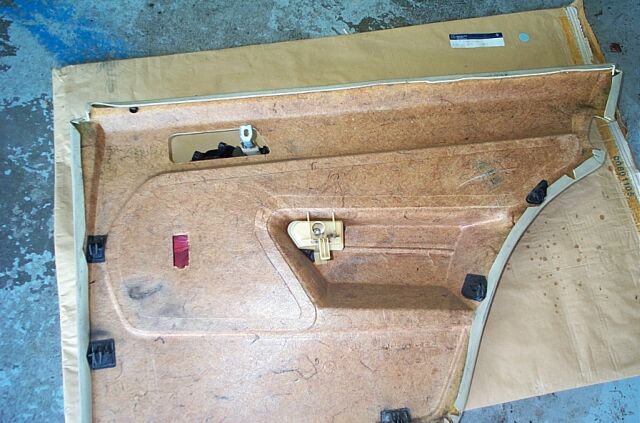
Picture four shows you a rear view and the indent where you have to cut if
you have power seats. I used a Dremel with a cutting wheel.
Picture five shows my handy work after the cutting. The last picture
is the new door panel after install.
seems ridiculous to me but I guess they want to cut down on
the number of stocking parts they need to maintain.
Picture four shows you a rear view and the indent where you have to cut if
you have power seats. I used a Dremel with a cutting wheel.
Picture five shows my handy work after the cutting. The last picture
is the new door panel after install.
 Next
up was to replace the rear panels, these run about $350 (wholesale) from
the stealership (for the leather/MB Tex combo panels).
Next
up was to replace the rear panels, these run about $350 (wholesale) from
the stealership (for the leather/MB Tex combo panels).
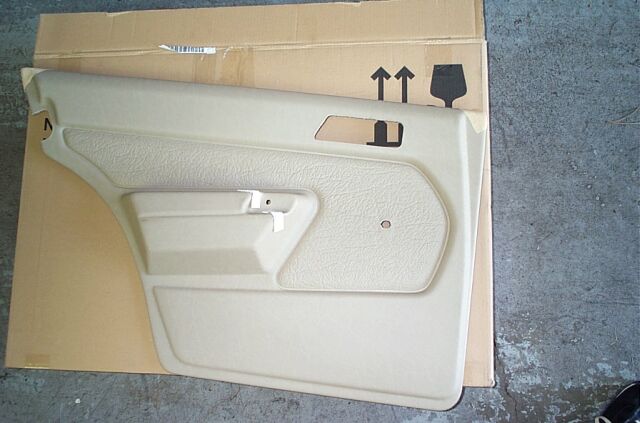 Here
is the panel, shipping foam still attached. Notice that like the
fronts, the rears are shipped "generic", that is, they are designed for
either electric windows or manual crank windows. So this means you
need to break out your trusty saw/knife and trim the hole for your power
window switch.
Here
is the panel, shipping foam still attached. Notice that like the
fronts, the rears are shipped "generic", that is, they are designed for
either electric windows or manual crank windows. So this means you
need to break out your trusty saw/knife and trim the hole for your power
window switch.
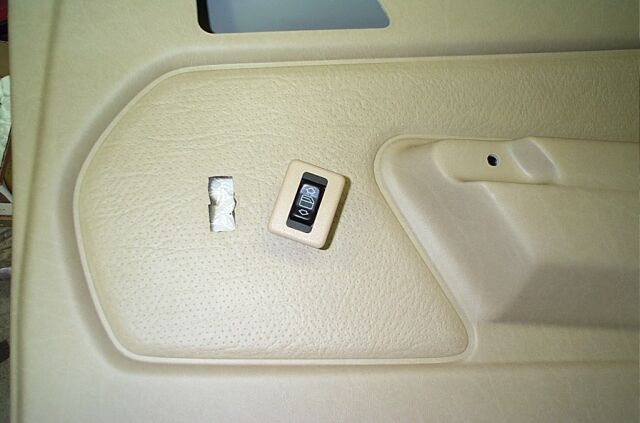
 You
can see from this picture that there is a indent for you to follow while
cutting. Even though the power window switch has a rather large trim
ring (see below) you still need to be very careful cutting the panel and
material.
You
can see from this picture that there is a indent for you to follow while
cutting. Even though the power window switch has a rather large trim
ring (see below) you still need to be very careful cutting the panel and
material.
 This
is my almost finished cut. You don't need to have a perfect cut
here, as you can tell by looking at the trim ring around the switch, there
is some margin for error. I used a razor blade and a 4" piece of
hack saw blade to make the cuts.
This
is my almost finished cut. You don't need to have a perfect cut
here, as you can tell by looking at the trim ring around the switch, there
is some margin for error. I used a razor blade and a 4" piece of
hack saw blade to make the cuts.
 One
thing to note. While testing for fitment, I broke my beige trim
ring. So don't force the trim ring into a hole that is too small,
take your time and ensure that the hole is proper size (new trim ring,
$1.99 at the stealership)
One
thing to note. While testing for fitment, I broke my beige trim
ring. So don't force the trim ring into a hole that is too small,
take your time and ensure that the hole is proper size (new trim ring,
$1.99 at the stealership)
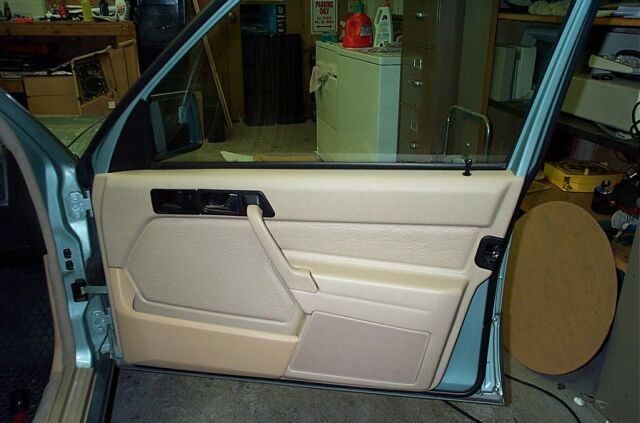
 This
is what the old panel looked like before I removed it. The previous
owner must of jammed some big stuff into the back seat as some serious
chucks of the door panel were ripped out of it. You can also see
where the material has pulled away from the panel (right above the arm
rest)
This
is what the old panel looked like before I removed it. The previous
owner must of jammed some big stuff into the back seat as some serious
chucks of the door panel were ripped out of it. You can also see
where the material has pulled away from the panel (right above the arm
rest)
 Removal
of the door panels requires you to remove a small plastic ring (above the
door pull handle) a 10 mm bolt (holding the door pull handle to the door)
and then the door lever. The door level comes out rather easy
(slides towards the door jam) and then the bar can be removed from the
door lever. You also need to remove the door lock pull, which just
unscrews. The panel just lifts up and the power window switch has a
plug on the rear that needs to be removed.
Removal
of the door panels requires you to remove a small plastic ring (above the
door pull handle) a 10 mm bolt (holding the door pull handle to the door)
and then the door lever. The door level comes out rather easy
(slides towards the door jam) and then the bar can be removed from the
door lever. You also need to remove the door lock pull, which just
unscrews. The panel just lifts up and the power window switch has a
plug on the rear that needs to be removed.
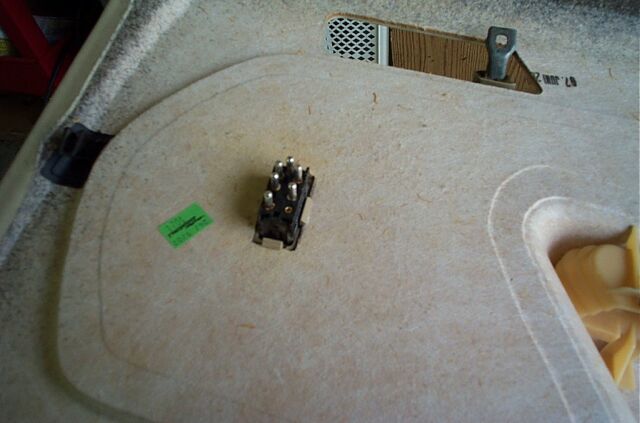
 To
remove the door handle, you need to remove the 10 mm nut that is inside
the white plastic housing shown in this picture.
To
remove the door handle, you need to remove the 10 mm nut that is inside
the white plastic housing shown in this picture.
 Make
sure your vapor barrier is intact. This barrier keeps out moisture
that can otherwise damage your door panel.
Make
sure your vapor barrier is intact. This barrier keeps out moisture
that can otherwise damage your door panel.

The
new door panel, installed and hopefully good for another 10 years (before
it starts peeling!)
REAR HEADREST INSTALL
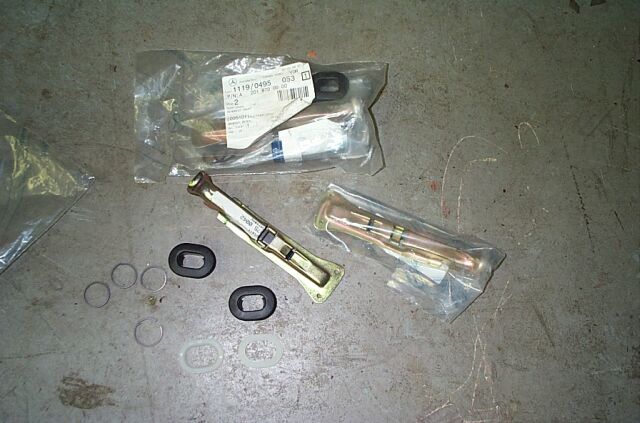 As
a option, you could get rear headrests but I have seen very few W201's
with headrests on the rear seats (the exception would be the 86-87 16
valve and Sportline models) so after some investigation, I found that rear
headrests can be easily retrofitted to any W201 using this OE install kit.
I picked up this particular kit off of Ebay for about $25 dollars.
As
a option, you could get rear headrests but I have seen very few W201's
with headrests on the rear seats (the exception would be the 86-87 16
valve and Sportline models) so after some investigation, I found that rear
headrests can be easily retrofitted to any W201 using this OE install kit.
I picked up this particular kit off of Ebay for about $25 dollars.
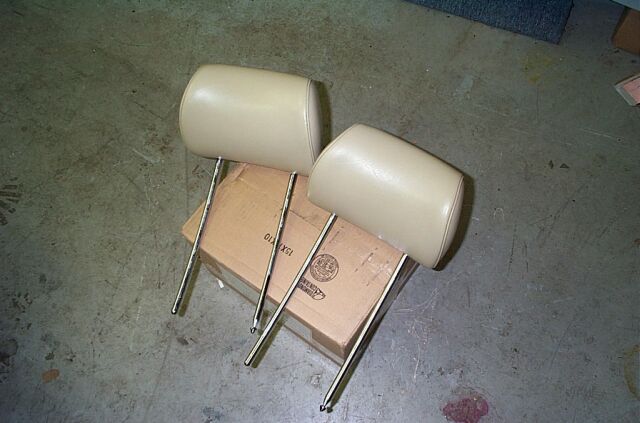 Next
step was to locate some rear headrests, easier said than done as they are
pretty rare. Of course front seat headrests are more readily
available so after a quick conversation with Pat (Potomac German Auto) I
had a seat of beige front seat headrests in the mail!
Next
step was to locate some rear headrests, easier said than done as they are
pretty rare. Of course front seat headrests are more readily
available so after a quick conversation with Pat (Potomac German Auto) I
had a seat of beige front seat headrests in the mail!
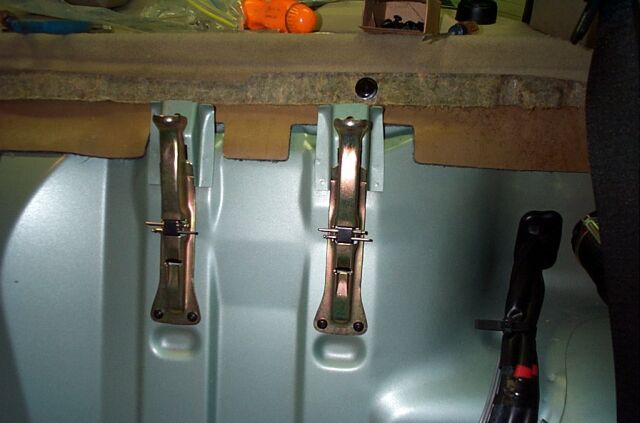
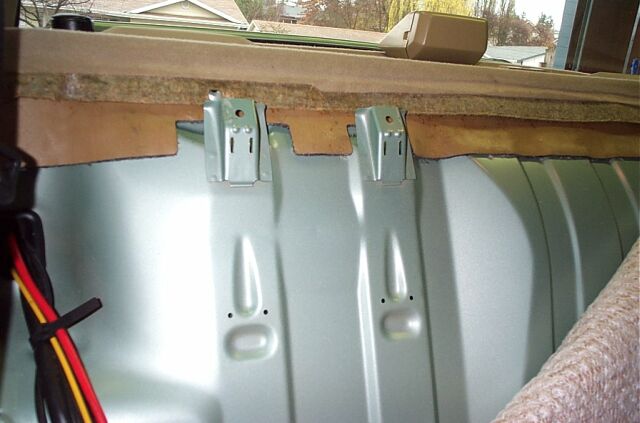 The
W201 has all of the indents and mounting points already in place for a
rear seat headrest install. This is where the brackets mount.
The
W201 has all of the indents and mounting points already in place for a
rear seat headrest install. This is where the brackets mount.
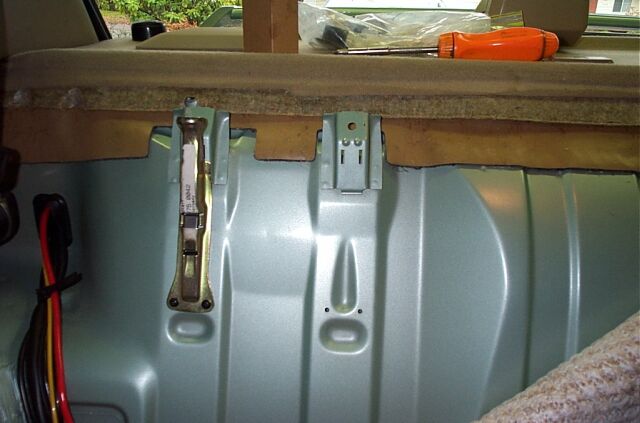 This
is one of the brackets mounted. I believe the factory pop rivets
these in place, I used short sheet metal screws instead.
This
is one of the brackets mounted. I believe the factory pop rivets
these in place, I used short sheet metal screws instead.
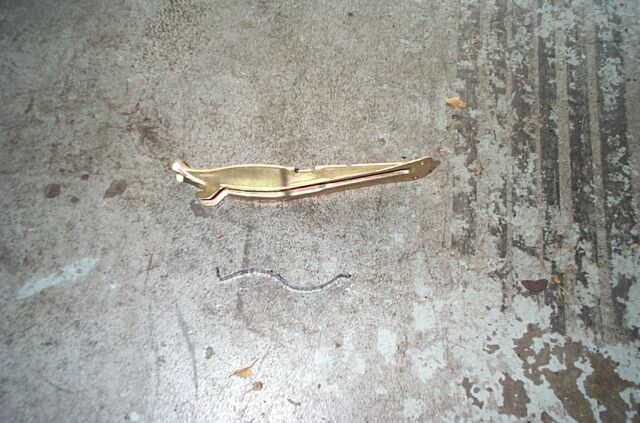 The
brackets use these black spring like clips, they need to be mounted in one
specific way to ensure a tight fit for the headrest bar.
The
brackets use these black spring like clips, they need to be mounted in one
specific way to ensure a tight fit for the headrest bar.
 Of
course front seat headrests have much longer bars on them, so it was up to
the trusty dremel to shorten these bars for a perfect fit.
Of
course front seat headrests have much longer bars on them, so it was up to
the trusty dremel to shorten these bars for a perfect fit.
 You
can see how much length needed to be removed so these headrests would work
on the rear seats. Six dremel cutting wheels and one hour later, I
had one headrest done. Very tough steel to cut, best to use the
heavy duty dremel cutting wheels!
You
can see how much length needed to be removed so these headrests would work
on the rear seats. Six dremel cutting wheels and one hour later, I
had one headrest done. Very tough steel to cut, best to use the
heavy duty dremel cutting wheels!
 Here
is one of the headrests being test fitted. You want to make sure you
don't cut too much off the headrest bars, so its best to cut a little and
measure allot!
Here
is one of the headrests being test fitted. You want to make sure you
don't cut too much off the headrest bars, so its best to cut a little and
measure allot!
 I
had some strange issues with the black mounting springs staying in place
when a headrest is removed. I corrected this by inserting a couple
of pop rivets to hold the spring tight with no headrest in place.
The service CD does not cover installing the rear headrests so I was not
able to check and see if I was missing a part or if the springs were
installed incorrectly. Never the less, my little mod keeps the
springs tight in case you need to remove the headrests.
I
had some strange issues with the black mounting springs staying in place
when a headrest is removed. I corrected this by inserting a couple
of pop rivets to hold the spring tight with no headrest in place.
The service CD does not cover installing the rear headrests so I was not
able to check and see if I was missing a part or if the springs were
installed incorrectly. Never the less, my little mod keeps the
springs tight in case you need to remove the headrests.
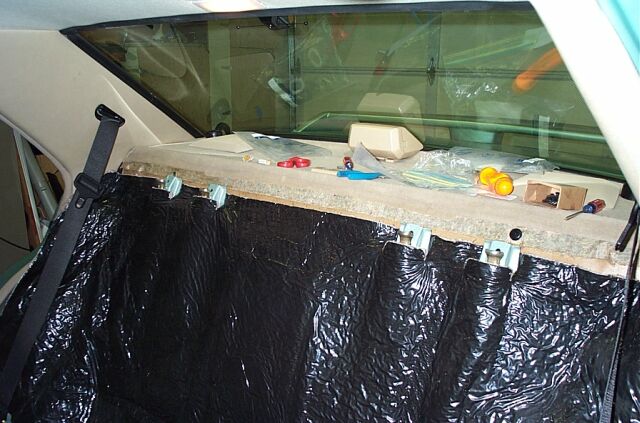 Another
picture of the rear seat area with the headrest brackets installed and the
sound deadening back in place.
Another
picture of the rear seat area with the headrest brackets installed and the
sound deadening back in place.
 Next
up was to install the plastic guide bushings onto the seats. Again,
this is one of those tasks that requires you to cut your seat material, so
you better measure twice and cut only once. You can see in this
picture where the headrest rods go, so its pretty easy to determine where
to cut.
Next
up was to install the plastic guide bushings onto the seats. Again,
this is one of those tasks that requires you to cut your seat material, so
you better measure twice and cut only once. You can see in this
picture where the headrest rods go, so its pretty easy to determine where
to cut.
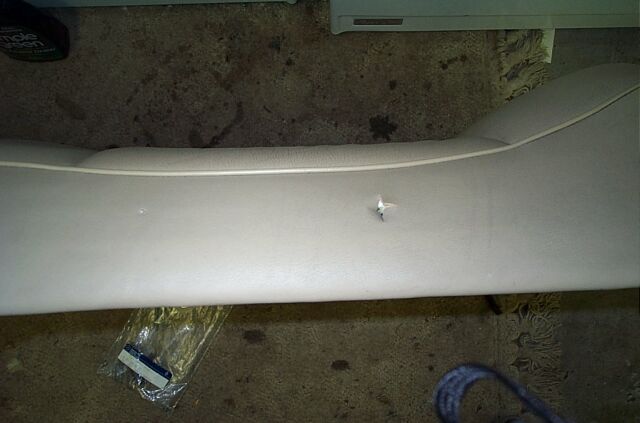 I
used a razor blade and cut very carefully, a little at a time.
I
used a razor blade and cut very carefully, a little at a time.
 I
elected to make my guide hole right in the center of this guide area.
It is in line with the opening to the headrest bracket.
I
elected to make my guide hole right in the center of this guide area.
It is in line with the opening to the headrest bracket.
 These
are the headrest guide rod bushings installed, they mount from the top
with a snap on clip that goes on the bottom, they are also oblong,
allowing for some alignment issues (just in case you don't get them
perfectly centered over the headrest brackets.)
These
are the headrest guide rod bushings installed, they mount from the top
with a snap on clip that goes on the bottom, they are also oblong,
allowing for some alignment issues (just in case you don't get them
perfectly centered over the headrest brackets.)
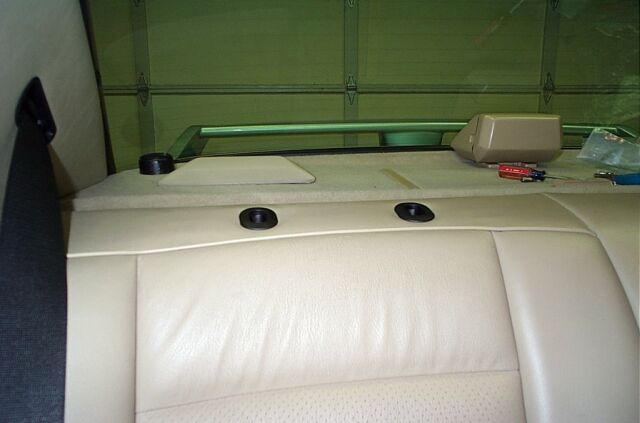 Another
picture of the rear seat with the guide bushings in place.
Another
picture of the rear seat with the guide bushings in place.
 The
finished product! Although these do no recline like the W124 rear
headrests, it is still a worthwhile upgrade to make your baby benz
look like its larger brother!
The
finished product! Although these do no recline like the W124 rear
headrests, it is still a worthwhile upgrade to make your baby benz
look like its larger brother!
 Another
picture from the rear.
Another
picture from the rear.
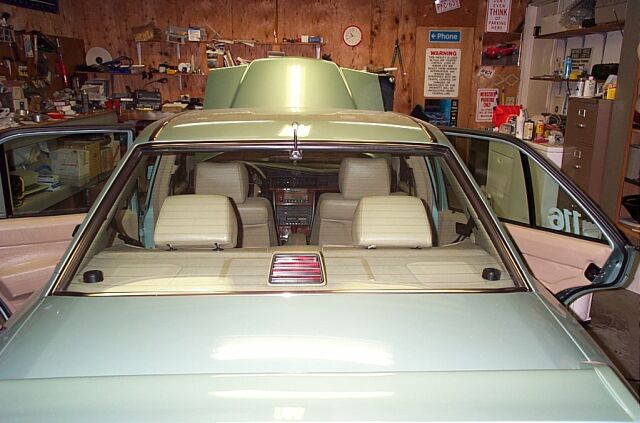
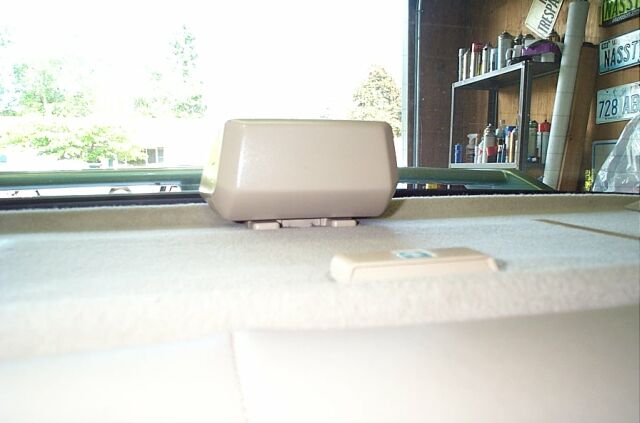
THIRD BRAKE LIGHT COVER
 One
thing I have noticed. As our cars get older, the plastic seems to
get more and more brittle. While taking off my third brake light
cover, both tabs broke off. Well, a quick trip to the dealer and
$19.00 later and I have a new matching cover.
One
thing I have noticed. As our cars get older, the plastic seems to
get more and more brittle. While taking off my third brake light
cover, both tabs broke off. Well, a quick trip to the dealer and
$19.00 later and I have a new matching cover.
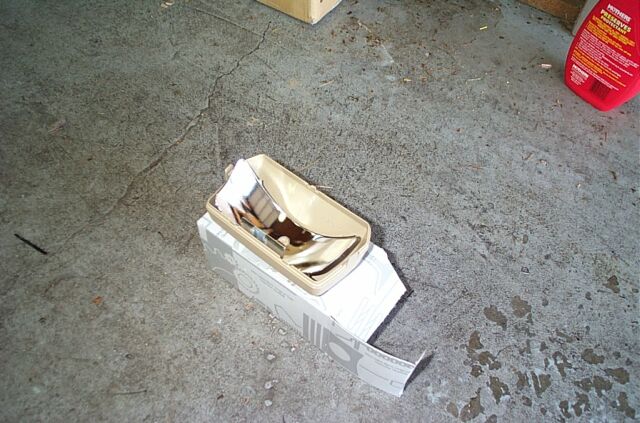
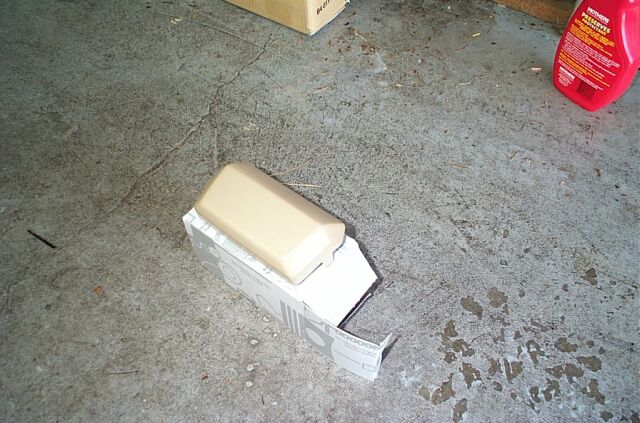
Another
picture of the cover with the reflector side up.
 Obviously,
the old cover came right off (broken tabs) and the new cover snaps right
on. Might be a good time to change your third brake light bulb also!
Obviously,
the old cover came right off (broken tabs) and the new cover snaps right
on. Might be a good time to change your third brake light bulb also!
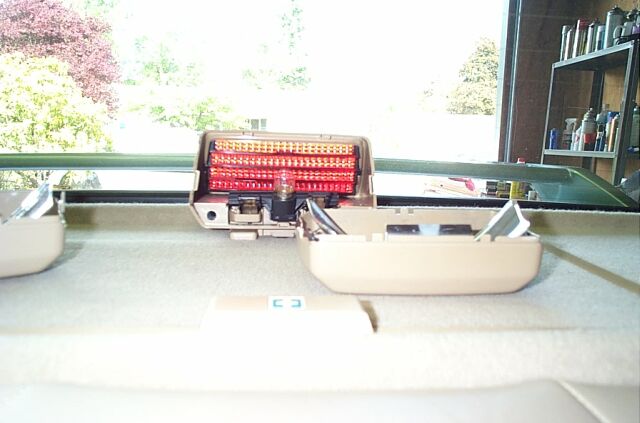
 New
cover, installed! Hopefully, this one will last 10 years like the
old one did!
New
cover, installed! Hopefully, this one will last 10 years like the
old one did!
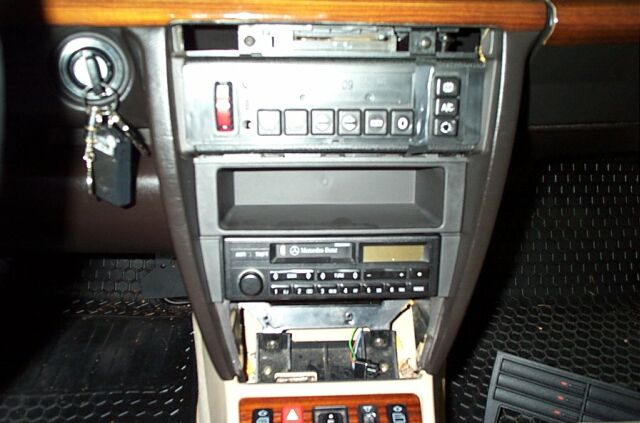
CASSETTE TRAY REPLACEMENT
My 1995 C36 came originally with a cassette holder and
Mercedes replaced it on the later model W202's with a storage tray.
So it was very easy to replace
 the
cassette holder on the earlier W202 with the tray from a later model W202.
I always thought to myself "Why is there no storage tray for the W201's
cassette holder" and I had never seen one before and just by chance I
noticed something interesting in one of the posts on the 190Evolution.net
forum. A member posted a picture of their dash, right before my
eyes, there is was, a storage tray for our W201! This member was
kind enough to post the euro part number for the tray, so I made my weekly
trip to the local stealership, dropped them the euro part number and they
ran it through their system. Five minutes later I had a
storage tray coming straight from Germany.
the
cassette holder on the earlier W202 with the tray from a later model W202.
I always thought to myself "Why is there no storage tray for the W201's
cassette holder" and I had never seen one before and just by chance I
noticed something interesting in one of the posts on the 190Evolution.net
forum. A member posted a picture of their dash, right before my
eyes, there is was, a storage tray for our W201! This member was
kind enough to post the euro part number for the tray, so I made my weekly
trip to the local stealership, dropped them the euro part number and they
ran it through their system. Five minutes later I had a
storage tray coming straight from Germany.
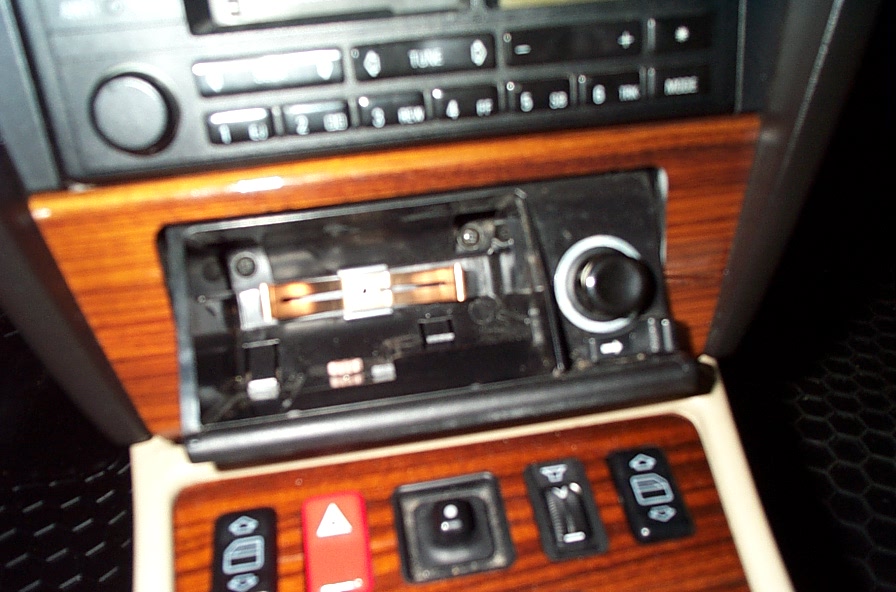
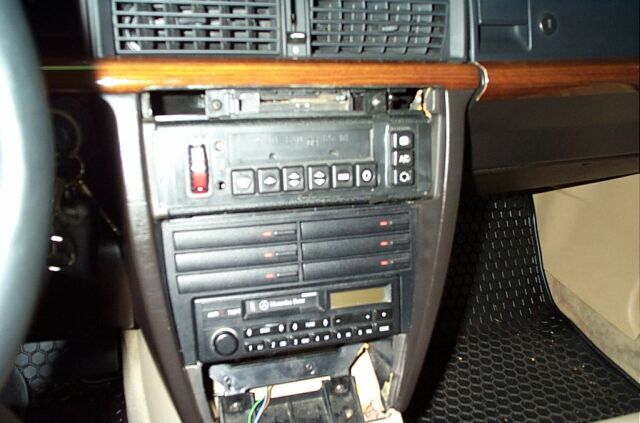
 This
is the before shot with the nasty cassette holder. Come to think of
it, I don't even own any cassettes!
This
is the before shot with the nasty cassette holder. Come to think of
it, I don't even own any cassettes!
 First
we need to remove the ash tray and the ash tray assembly. You can
see two screws that need to be removed before the assembly will lift out.
First
we need to remove the ash tray and the ash tray assembly. You can
see two screws that need to be removed before the assembly will lift out.
Here we have the ash tray removed
 Now
we need to remove the upper wood panel that covers the heater/AC controls.
There are two screws in the bottom of this piece. Once removed, the
item lifts up. Remember to remove the plastic knob for the fan
speed!
Now
we need to remove the upper wood panel that covers the heater/AC controls.
There are two screws in the bottom of this piece. Once removed, the
item lifts up. Remember to remove the plastic knob for the fan
speed!
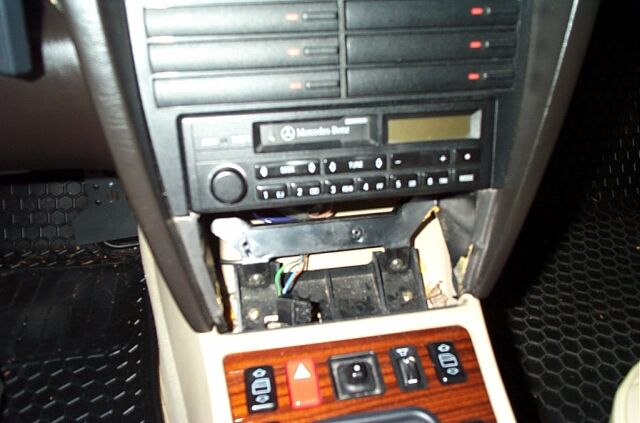
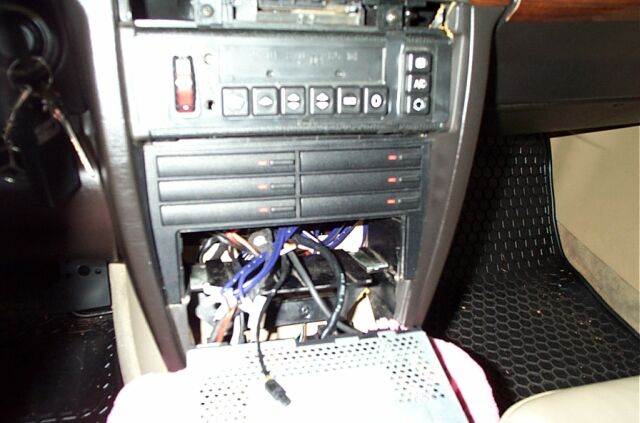 Now
the radio. It is held in place by two spring clips on the bottom,
you can feel around on the bottom of the radio to locate these. A
small flat blade screw driver works very well to bend the clips down so
you can slide the radio out. You might want to get your hand behind
the radio first, then bend one clip down with your other hand so you can
slide one side of the radio part of the way out.
Now
the radio. It is held in place by two spring clips on the bottom,
you can feel around on the bottom of the radio to locate these. A
small flat blade screw driver works very well to bend the clips down so
you can slide the radio out. You might want to get your hand behind
the radio first, then bend one clip down with your other hand so you can
slide one side of the radio part of the way out.
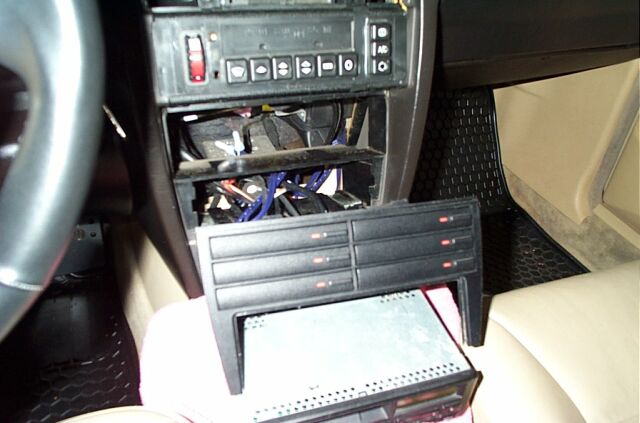 Once
the radio is out, the cassette tray just pops out, no screws!
Once
the radio is out, the cassette tray just pops out, no screws!
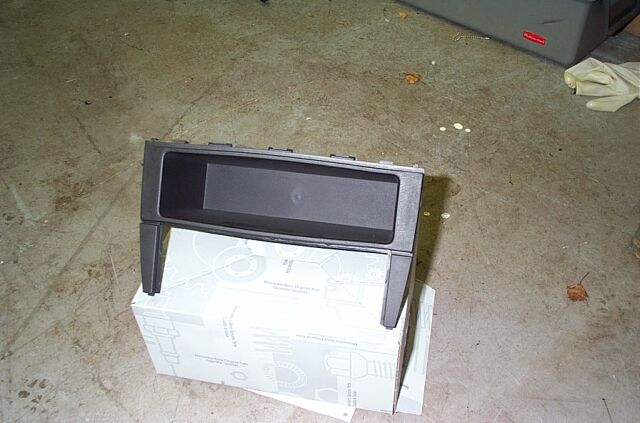
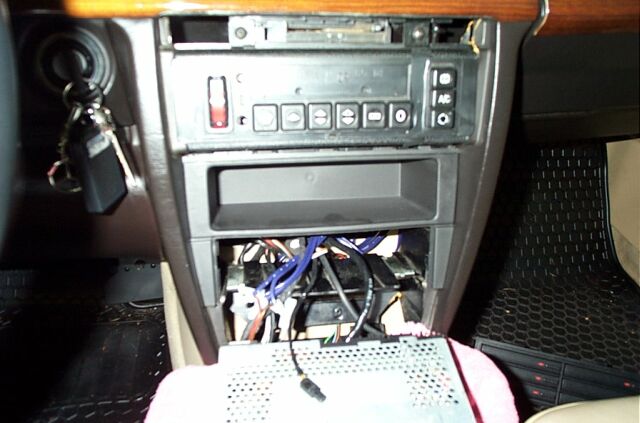 The
new tray just pops into place.
The
new tray just pops into place.
 Make
sure you get all your connectors back onto the radio before you slide it
into place. When the radio slides in, you should here it "click"
when its fully seated and locked into place.
Make
sure you get all your connectors back onto the radio before you slide it
into place. When the radio slides in, you should here it "click"
when its fully seated and locked into place.
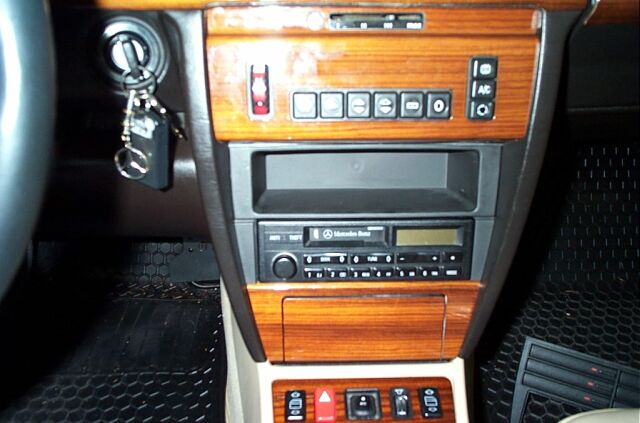 The
finished product! Makes our old W201's look just a bit more modern.
The
finished product! Makes our old W201's look just a bit more modern.
