E60 & EVOII SWAY BAR INSTALLATION
 To
improve the handling of the 190, I elected to source the largest sway bars I
could locate and fit to this car. The EVO II 190E used a large 18 mm bar.
I managed to source one of these from Europe and as I understand it, importation
of these has ceased (unless you can prove you own a EVO II)
To
improve the handling of the 190, I elected to source the largest sway bars I
could locate and fit to this car. The EVO II 190E used a large 18 mm bar.
I managed to source one of these from Europe and as I understand it, importation
of these has ceased (unless you can prove you own a EVO II)
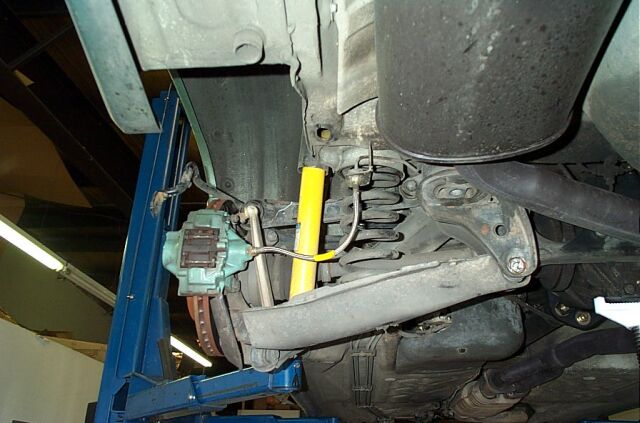
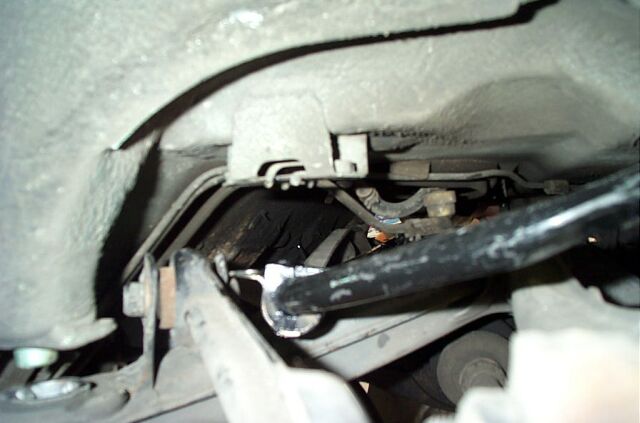
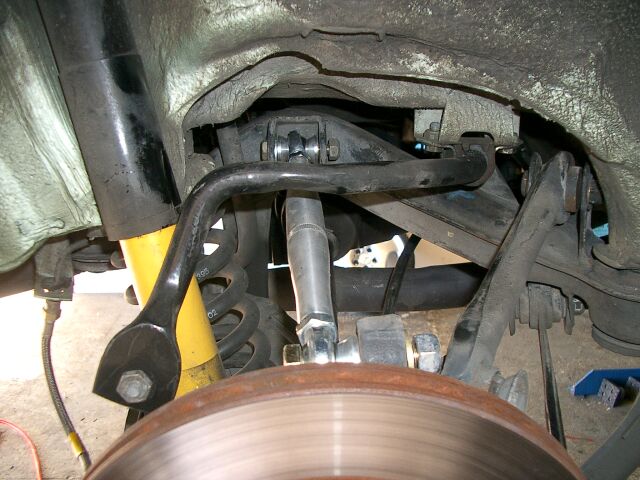
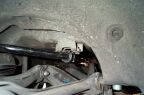
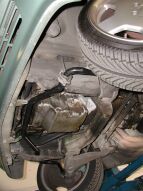
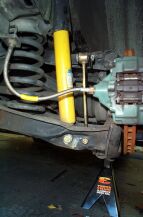
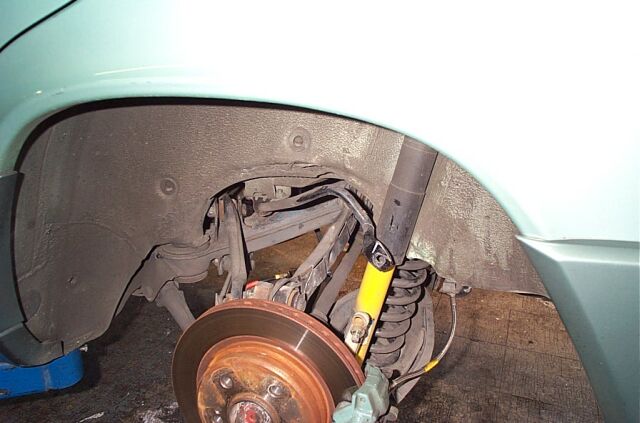
We started this by unbolting the stock rear bar from the rear arms
 To
remove the rear bar, you basically have to lower the rear differential to work
it out. You see here that we used a trans jack to support the rear diff so
we could work the bar out
To
remove the rear bar, you basically have to lower the rear differential to work
it out. You see here that we used a trans jack to support the rear diff so
we could work the bar out
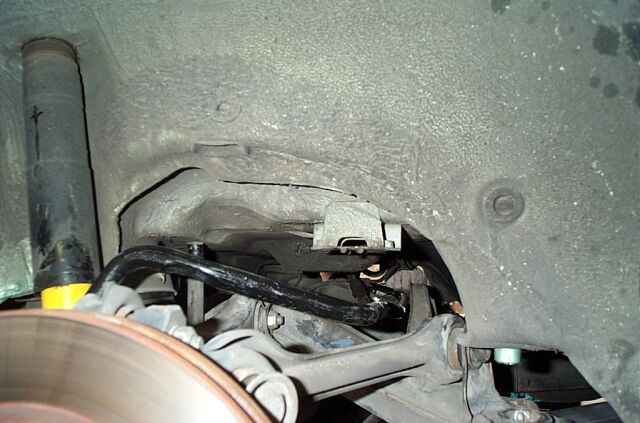
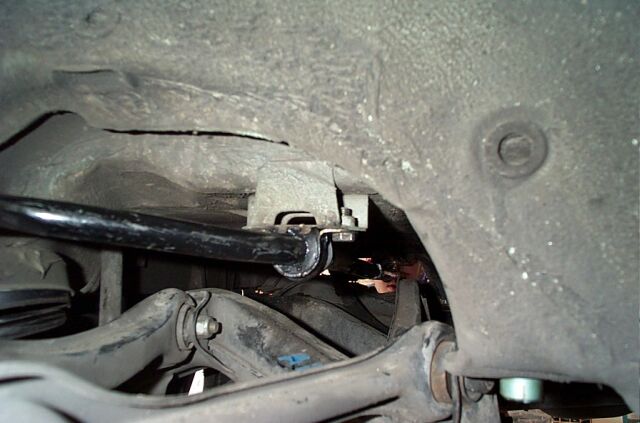
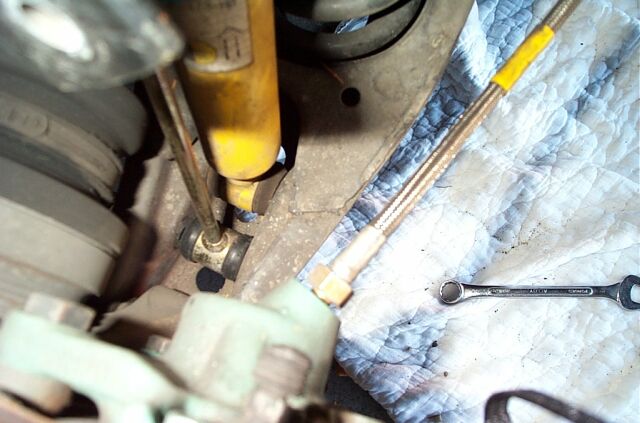
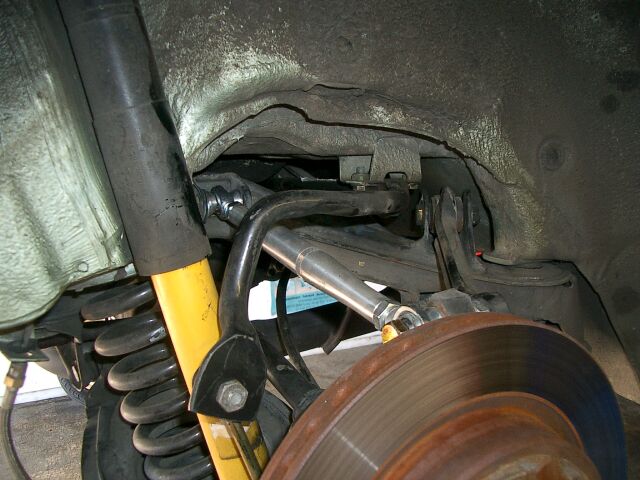
 If
you look careful at this picture, you can see how we had to pull the bar out a
bit and twist it up to get it out.
If
you look careful at this picture, you can see how we had to pull the bar out a
bit and twist it up to get it out.
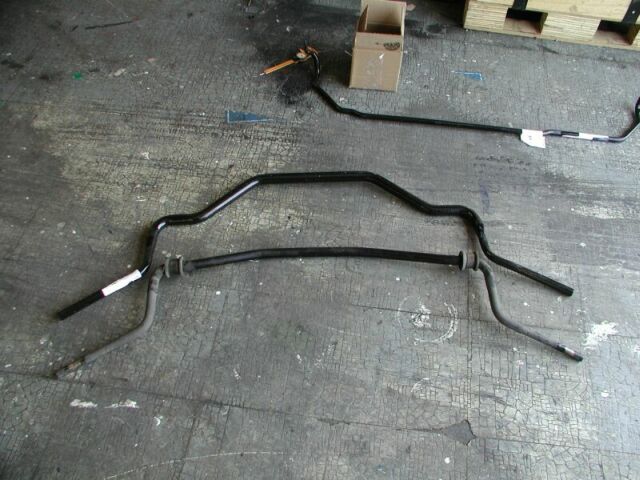
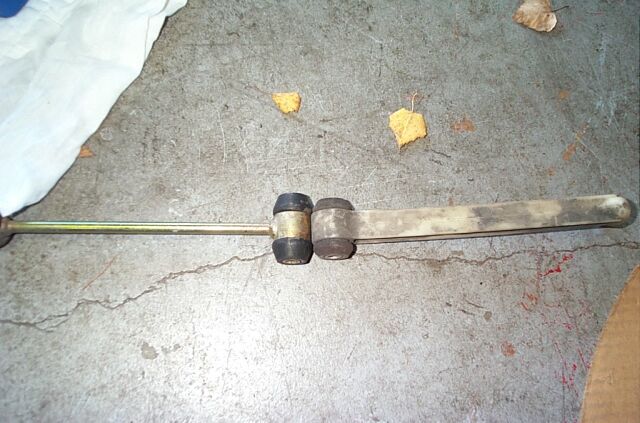
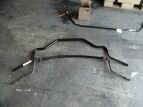
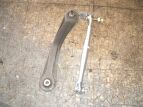
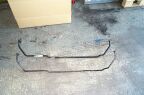 The
upper bar in this picture is the EVO II bar and the lower bar is the stock 190e
2.6l bar.
The
upper bar in this picture is the EVO II bar and the lower bar is the stock 190e
2.6l bar.
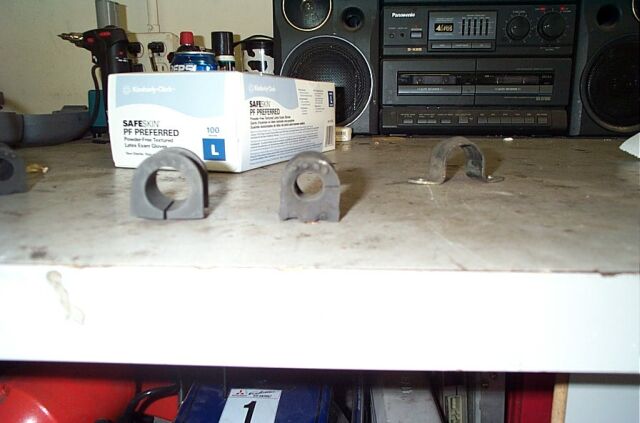
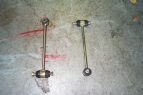
 Here
is the Integra Type R bushing I used and the stock bushing. You can gage the size
difference by looking at these bushings.
Here
is the Integra Type R bushing I used and the stock bushing. You can gage the size
difference by looking at these bushings.
 This
is the EVO II bar wedged into place before the bushings have been bolted into
place.
This
is the EVO II bar wedged into place before the bushings have been bolted into
place.
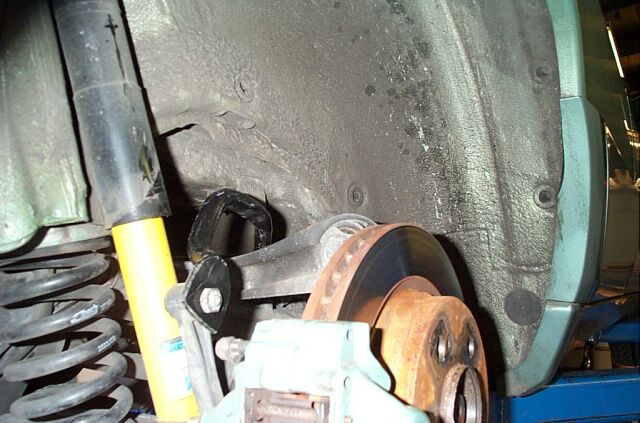
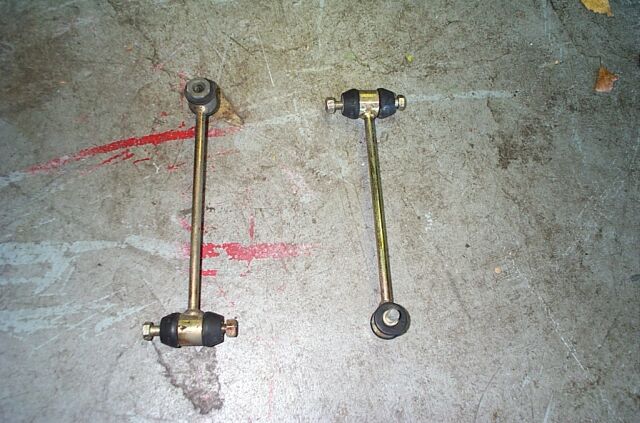
 The
EVO II bar bolted up to the end links
The
EVO II bar bolted up to the end links
 The
Integra Type R bushings fit the OE mounting bracket. You can see I greased up the
bushing a bit before install. Its a precautionary measure to ensure no
squeaking down the road.
The
Integra Type R bushings fit the OE mounting bracket. You can see I greased up the
bushing a bit before install. Its a precautionary measure to ensure no
squeaking down the road.
 EVO
II bracket and Type R bushing bolted into place
EVO
II bracket and Type R bushing bolted into place
 Moving
onto the front. The largest commercial bar available is the AMG E60 bar
(W124 500E) which is 29mm in diameter. Since this bar was not designed for
the W201 chassis, you need to cut off the ends of it to make it fit. The
curve of the bar also is slightly different as the E60 bar was designed to clear
a big V8 motor.
Moving
onto the front. The largest commercial bar available is the AMG E60 bar
(W124 500E) which is 29mm in diameter. Since this bar was not designed for
the W201 chassis, you need to cut off the ends of it to make it fit. The
curve of the bar also is slightly different as the E60 bar was designed to clear
a big V8 motor.
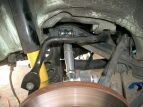
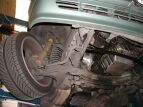 This
picture shows the stock 190 front sway bar with the end bushing/bracket removed.
Install/removal of the front bar is much simpler than the rear.
This
picture shows the stock 190 front sway bar with the end bushing/bracket removed.
Install/removal of the front bar is much simpler than the rear.
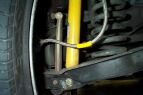
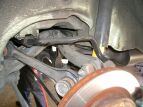
 This
view details the inner sway bar bracket/bushing removal. You can re-use
the OE sway bar brackets as the E60 bushings fit them just fine (on the 190E 2.6
this is the case, the 2.3 and 16 valves may require W124 brackets)
This
view details the inner sway bar bracket/bushing removal. You can re-use
the OE sway bar brackets as the E60 bushings fit them just fine (on the 190E 2.6
this is the case, the 2.3 and 16 valves may require W124 brackets)

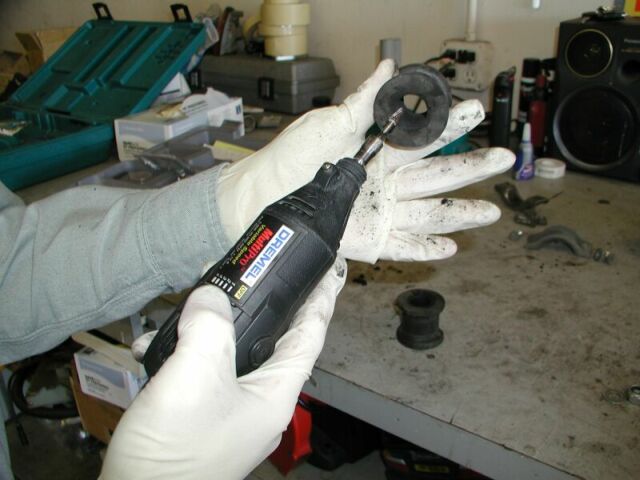
The inner bushings were easy to source but I had problems finding the correct
outer bushings, so since my original bushings were in good shape, I chose to
break out the trusty dremel and hone out the inside of the original bushings to
fit the E60 bar.
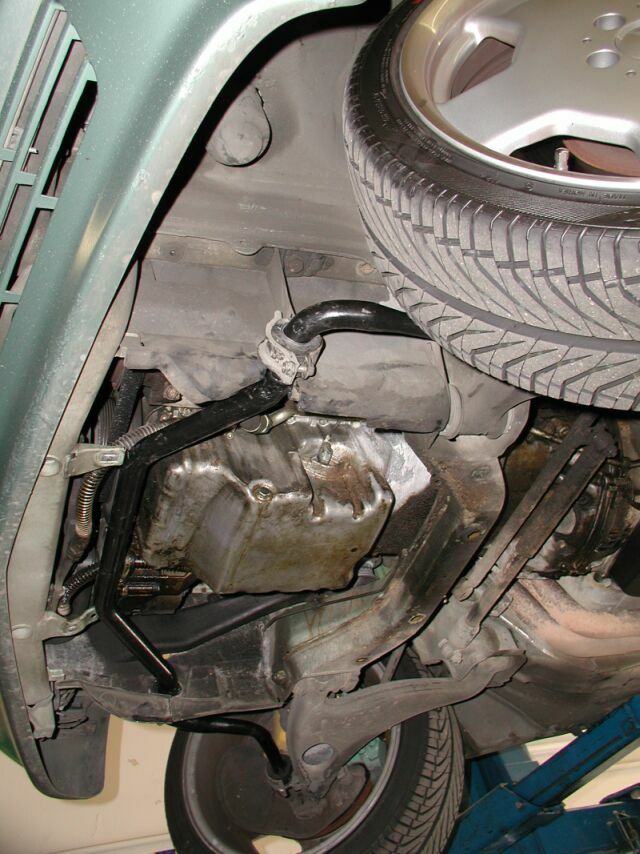
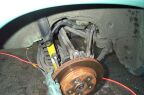
 The
E60 bar installed and bushings/brackets in place. You can see by this
picture that there are no clearance issues or fitment problems (aside from
needed to whack the ends off the bar).
The
E60 bar installed and bushings/brackets in place. You can see by this
picture that there are no clearance issues or fitment problems (aside from
needed to whack the ends off the bar).
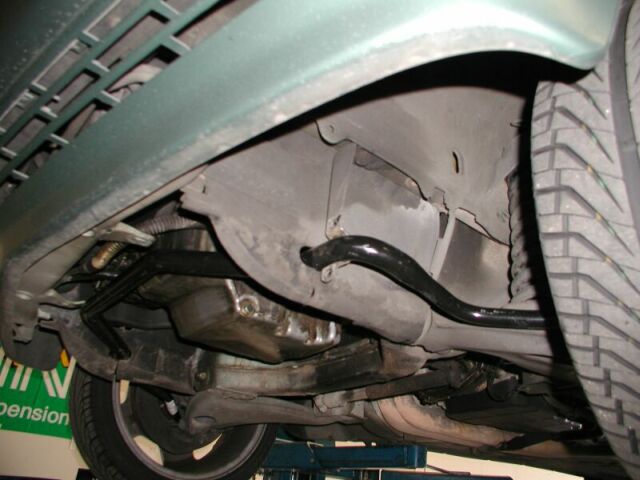
 Another
view of the E60 bar installed. This bar (at 29mm) is one of the largest
you can fit to the W201 chassis. They are extremely hard to get now (same
with the EVO II rear bar) and another alternative is the W124 Limo front sway
bar. While the limo bar is not as large (28 mm) its your next best choice.
Another
view of the E60 bar installed. This bar (at 29mm) is one of the largest
you can fit to the W201 chassis. They are extremely hard to get now (same
with the EVO II rear bar) and another alternative is the W124 Limo front sway
bar. While the limo bar is not as large (28 mm) its your next best choice.
 One
additional view of the sway bar.
One
additional view of the sway bar.
300TE METAL SWAY BAR END LINKS
 The
300TE W124's came with rear sway bar end links made from metal and not
plastic like the other W124's and W201's. The metal end links also
don't have a balled socket type end (drivers side) either. In
effect, the metal end links allow the rear bar to load quicker. Not
a must for everyday driving of course, but if you auto-x or road race,
then this is a worth wile upgrade. MB no longer makes the metal end
links, they have been superceded by plastic end links, so its off to the
wrecking yard. Luckily for me, Pat at PGA is my friend.
The
300TE W124's came with rear sway bar end links made from metal and not
plastic like the other W124's and W201's. The metal end links also
don't have a balled socket type end (drivers side) either. In
effect, the metal end links allow the rear bar to load quicker. Not
a must for everyday driving of course, but if you auto-x or road race,
then this is a worth wile upgrade. MB no longer makes the metal end
links, they have been superceded by plastic end links, so its off to the
wrecking yard. Luckily for me, Pat at PGA is my friend.
 This
is the drivers side rear plastic end link, you can see the ball pivot on
the end. A simple upgrade really, some metric open end
wrench's/sockets, floor jack, jack stands and a lug nut wrench.
This
is the drivers side rear plastic end link, you can see the ball pivot on
the end. A simple upgrade really, some metric open end
wrench's/sockets, floor jack, jack stands and a lug nut wrench.
 You really need to remove the wheel to get at the nut connected to the
sway bar, just makes life much easier.
You really need to remove the wheel to get at the nut connected to the
sway bar, just makes life much easier.
 Wish
I could say these were a direct swap but they are not. The
bolts/bushings for the 300TE are longer/wider than the W201's, so you need
to use a press to remove the hollow metal shaft and then you can shaft a
little off the rubber bushings so that they are the same width as the
300TE's.
Wish
I could say these were a direct swap but they are not. The
bolts/bushings for the 300TE are longer/wider than the W201's, so you need
to use a press to remove the hollow metal shaft and then you can shaft a
little off the rubber bushings so that they are the same width as the
300TE's.
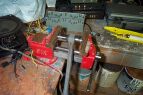 I
don't really have a press, so my bench vice and a couple of sockets were
used to press out the metal shaft from the W201's end links.
Installation of the shaft into the 300TE rear end links was the same.
I
don't really have a press, so my bench vice and a couple of sockets were
used to press out the metal shaft from the W201's end links.
Installation of the shaft into the 300TE rear end links was the same.
 I
used a razor to trim the rubber bushings to the same width as the W201's
bushings. Remember you have to re-use your W201's bolt also as the
300TE bolt is too long.
I
used a razor to trim the rubber bushings to the same width as the W201's
bushings. Remember you have to re-use your W201's bolt also as the
300TE bolt is too long.
 The
finished product. While not track proven just yet, spirited driving
has indicted that the tendency for over steer has been greatly reduced,
promoting a more neutral handling.
The
finished product. While not track proven just yet, spirited driving
has indicted that the tendency for over steer has been greatly reduced,
promoting a more neutral handling.
9/17/2003 Adjustable rear camber arms
Any time you lower a W201, you affect "toe in" and "camber". Stock,
there is really not much in the way of adjustability for the camber, so
you end up rotating your tires quite often and wearing out the insides of
the tires. MRP (mrp_products@yahoo.com)
or manufactures rear adjustable arms and front adjustable camber plates
(along with chassis stiffening bars and other items)
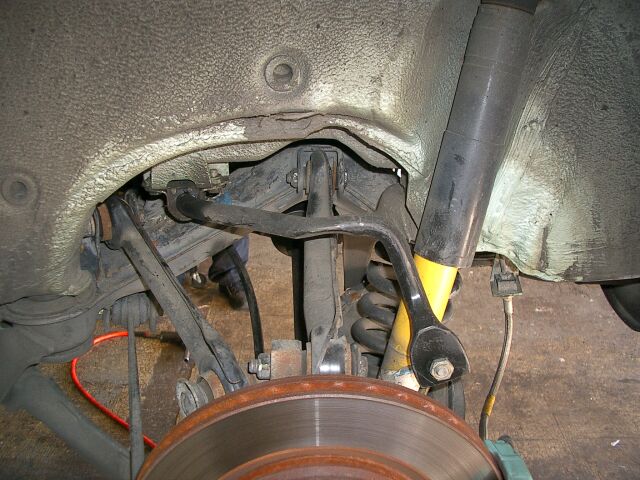
 The
OE rear arm is the top bar and here you can see its a solid one piece
item. Removal is very simple, just a couple of nuts and bolts.
You should have your car on a lift or on stands for this procedure.
The
OE rear arm is the top bar and here you can see its a solid one piece
item. Removal is very simple, just a couple of nuts and bolts.
You should have your car on a lift or on stands for this procedure.
 Another
picture of the OE rear arm.
Another
picture of the OE rear arm.
 Skipping
right to it, the bolts came out easy and so did the OE rear arm
Skipping
right to it, the bolts came out easy and so did the OE rear arm
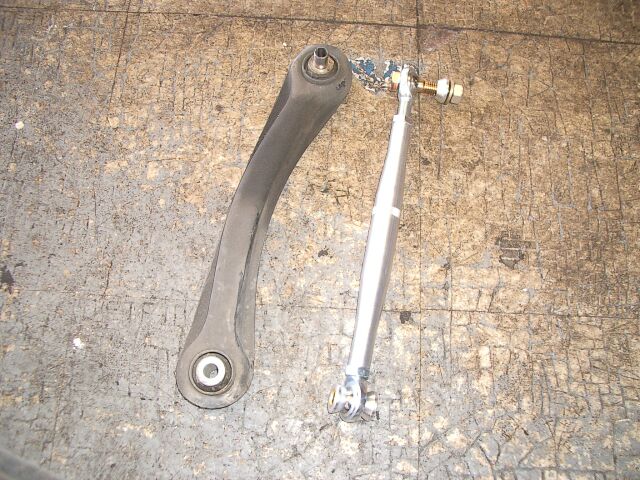
 This
is the OE arm compared to the MRP adjustable arm. You can see that
the MRP bar is shipped with washers, bolt/nut and another tapered spacer
(you will see its necessity in the following pictures). The MRP arm
is adjustable at both ends and appears to be a very high quality item.
The ball pivot ends of this bar rotate very smooth and the interior of the
ball pivots are sleeved.
This
is the OE arm compared to the MRP adjustable arm. You can see that
the MRP bar is shipped with washers, bolt/nut and another tapered spacer
(you will see its necessity in the following pictures). The MRP arm
is adjustable at both ends and appears to be a very high quality item.
The ball pivot ends of this bar rotate very smooth and the interior of the
ball pivots are sleeved.
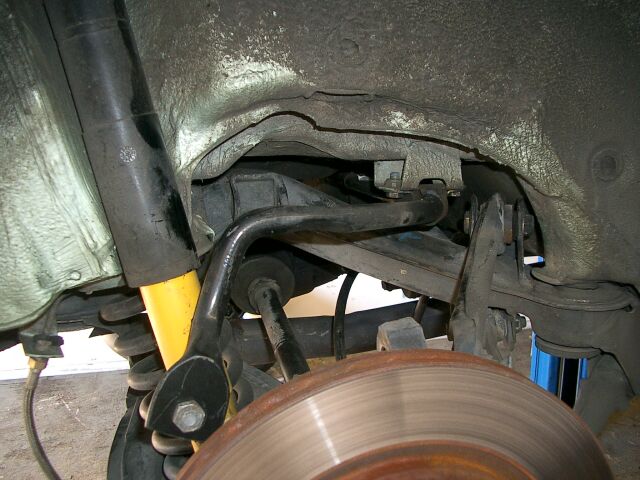
 Here
is the bar installed. MRP provides some washers to take up slack for
the rear mounting point. I ended up using only one. Near the
front of the rotor, you can see how the bar mounts and how the tapered
spacer is utilized.
Here
is the bar installed. MRP provides some washers to take up slack for
the rear mounting point. I ended up using only one. Near the
front of the rotor, you can see how the bar mounts and how the tapered
spacer is utilized.
 The
MRP arm from a different angle.
The
MRP arm from a different angle.

<Back
 To
improve the handling of the 190, I elected to source the largest sway bars I
could locate and fit to this car. The EVO II 190E used a large 18 mm bar.
I managed to source one of these from Europe and as I understand it, importation
of these has ceased (unless you can prove you own a EVO II)
To
improve the handling of the 190, I elected to source the largest sway bars I
could locate and fit to this car. The EVO II 190E used a large 18 mm bar.
I managed to source one of these from Europe and as I understand it, importation
of these has ceased (unless you can prove you own a EVO II)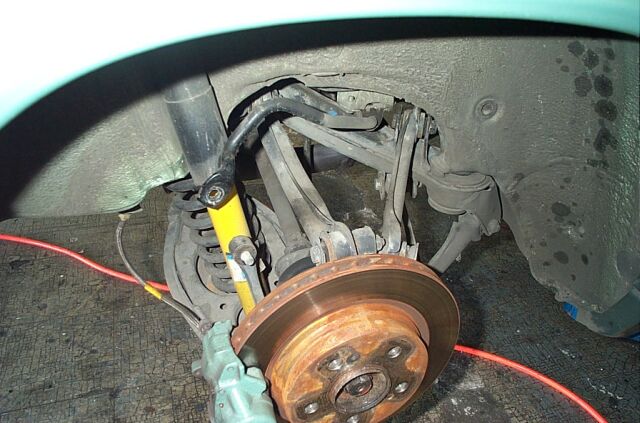
 To
remove the rear bar, you basically have to lower the rear differential to work
it out. You see here that we used a trans jack to support the rear diff so
we could work the bar out
To
remove the rear bar, you basically have to lower the rear differential to work
it out. You see here that we used a trans jack to support the rear diff so
we could work the bar out