 Since
I sold my W201 in June of 2004, I had been on the lookout for a replacement,
although I had always admired the 500E, the cost to acquire one was just too
high, so my sights were set on picking up a E420. I almost bought several E420's
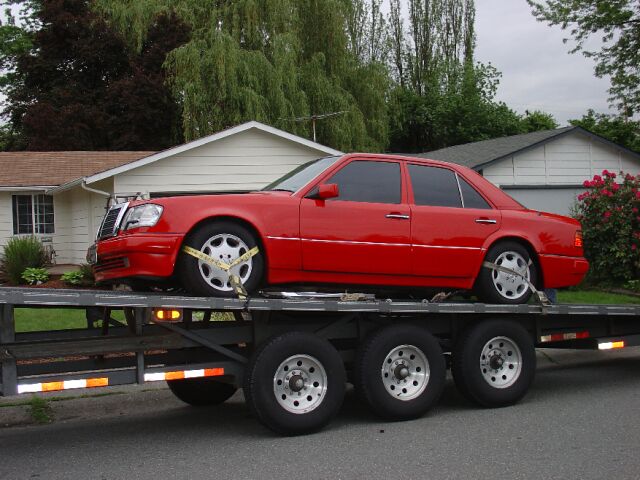
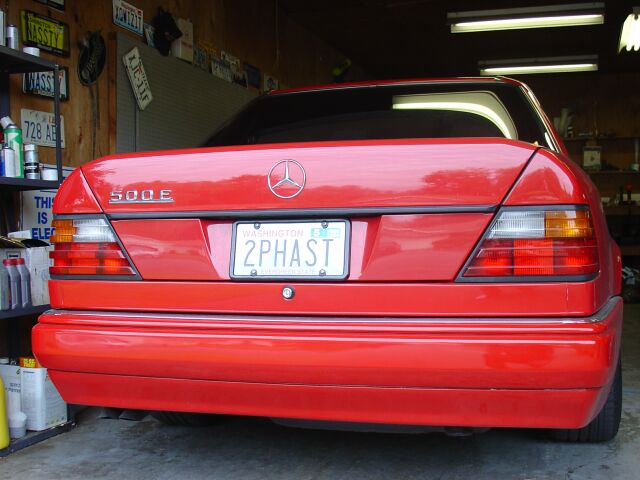
but the inspections turned up too many skeletons. I ran across this 500E
in the auto trader and it was located in southern California. The price
was only a little bit more than clean E420's were selling for! After
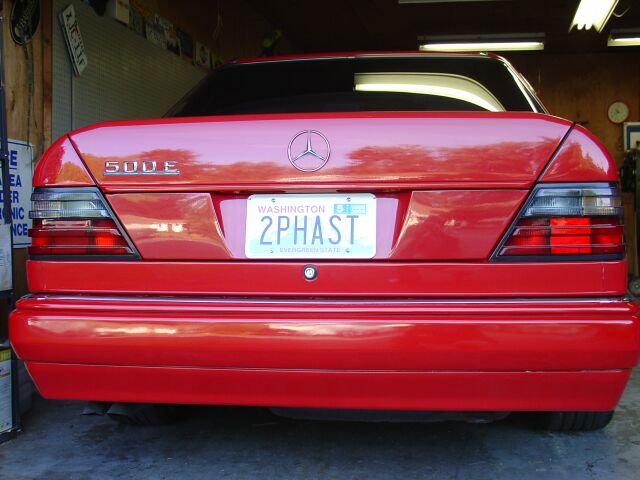
repeated phone calls and a Mercedes Benz inspection, I became the owner of this
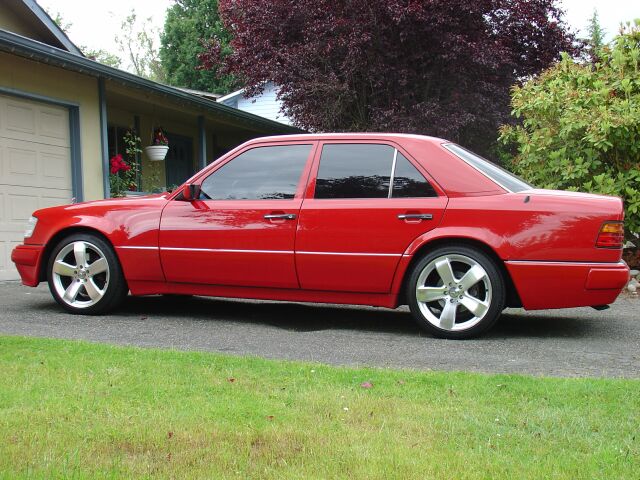
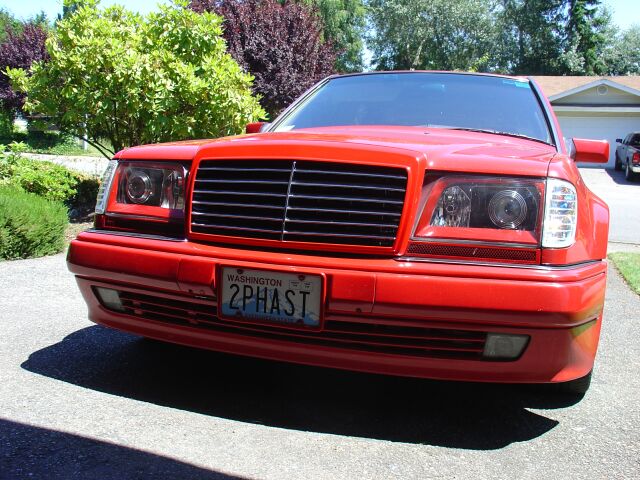
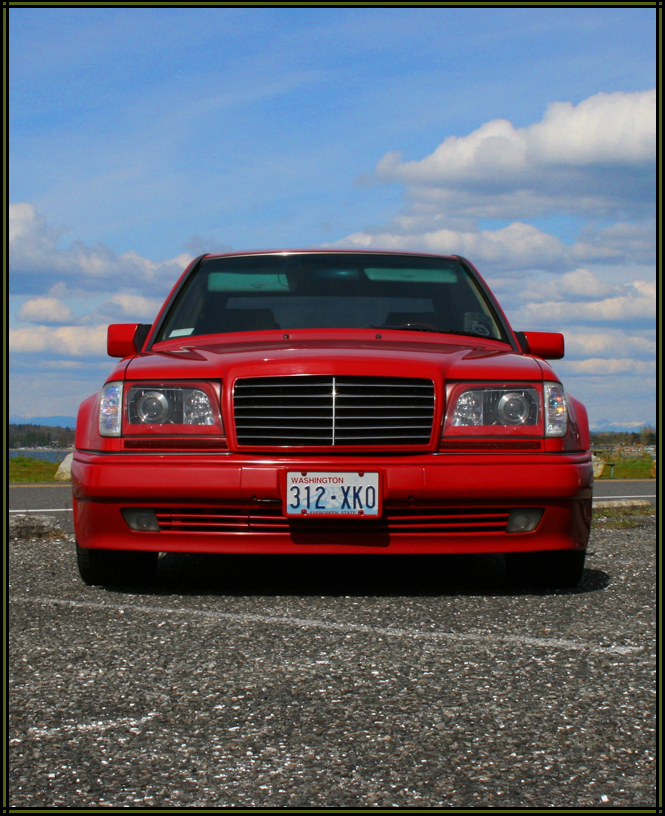
very clean signal red 1993 500E. This is her the day she was delivered to
me.
Since
I sold my W201 in June of 2004, I had been on the lookout for a replacement,
although I had always admired the 500E, the cost to acquire one was just too
high, so my sights were set on picking up a E420. I almost bought several E420's
but the inspections turned up too many skeletons. I ran across this 500E
in the auto trader and it was located in southern California. The price
was only a little bit more than clean E420's were selling for! After
repeated phone calls and a Mercedes Benz inspection, I became the owner of this
very clean signal red 1993 500E. This is her the day she was delivered to
me.
 This
particular 500E was under warranty the first four years of its life and
star-marked till 100,000 miles or the year 2000, so it was very well kept.
One of the previous owners had the car color sanded and the lower body
cladding and bumper impact strips painted the same color as the upper half of
the car. The windows have a 20% tint on them and the car arrived with a
nice sound system and lighted door sills.
This
particular 500E was under warranty the first four years of its life and
star-marked till 100,000 miles or the year 2000, so it was very well kept.
One of the previous owners had the car color sanded and the lower body
cladding and bumper impact strips painted the same color as the upper half of
the car. The windows have a 20% tint on them and the car arrived with a
nice sound system and lighted door sills.
 The
body/interior/trunk and engine bay are all very, very clean and is only in need
of some styling updates and minor interior restoration (map pockets and some
wood trim).
The
body/interior/trunk and engine bay are all very, very clean and is only in need
of some styling updates and minor interior restoration (map pockets and some
wood trim).
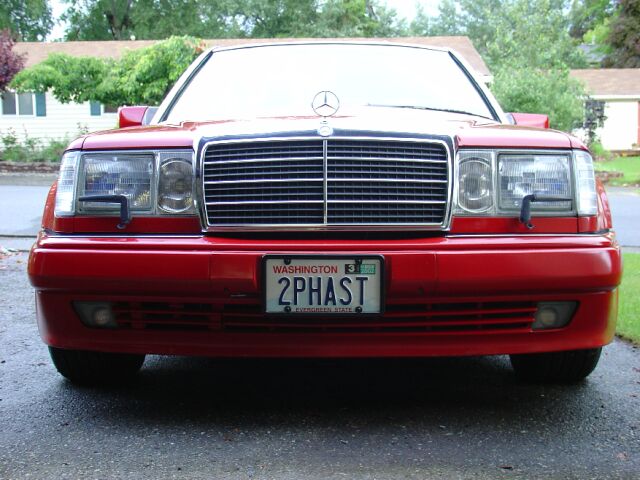
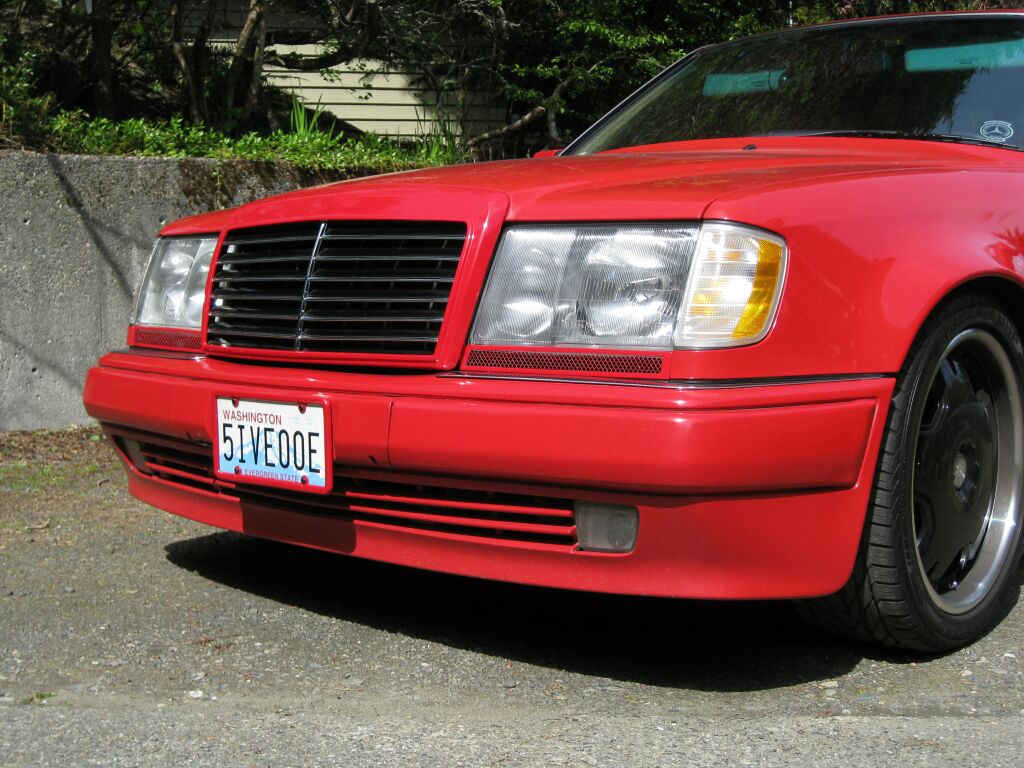
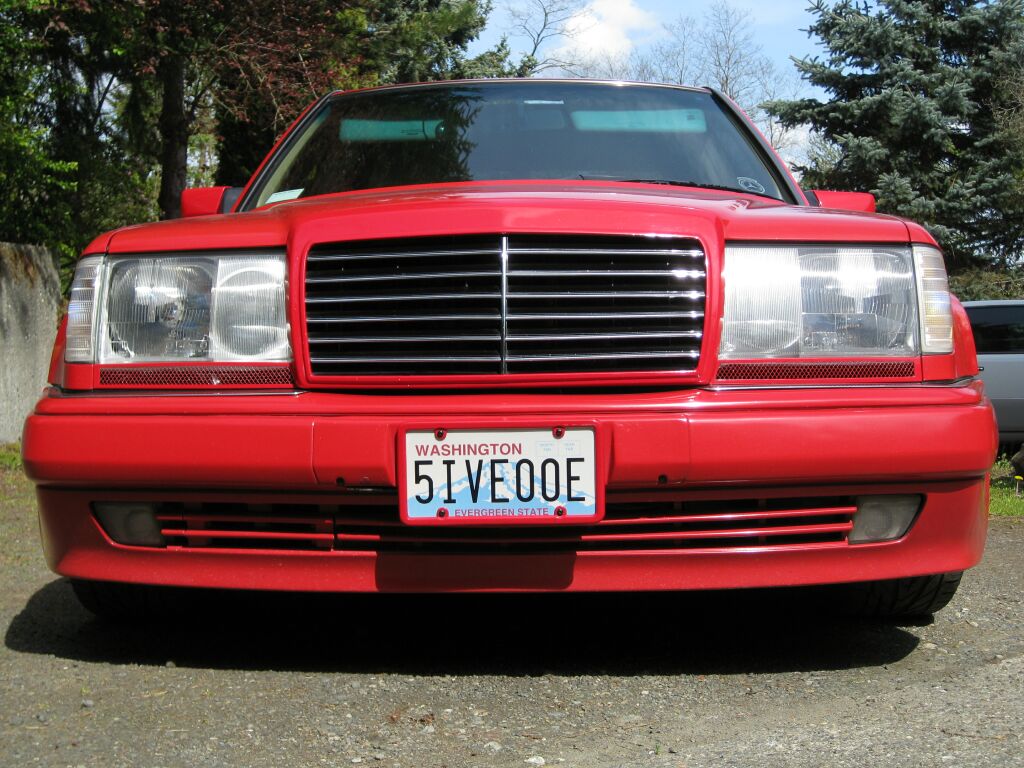
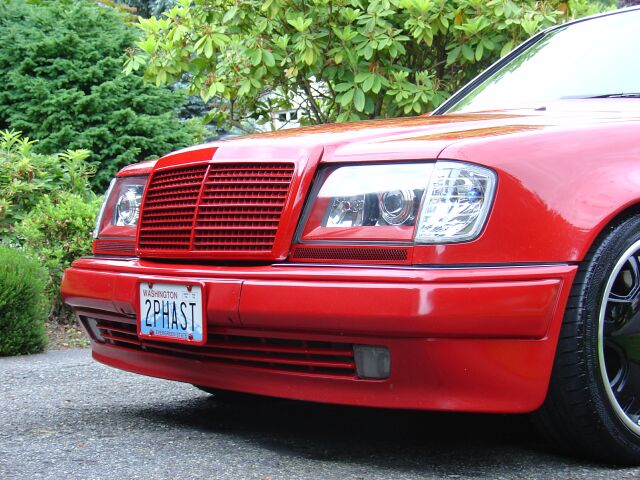
The
headlights and grill
are in excellent condition for their age, pride of ownership
really shines. My plans are to monochrome the grill and grill frame and
replace the poorly designed US spec headlights with the European equivalents.
I have already lined up a set of 94-95 W124 headlight wipers/motors to use with
the anticipated European headlights, those also will be mono-chromed.
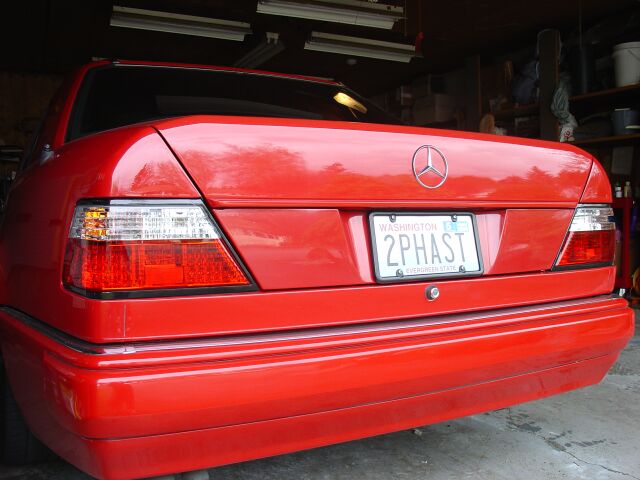
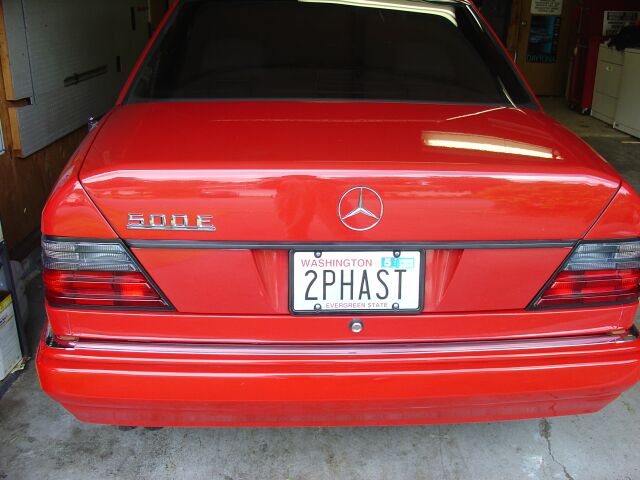
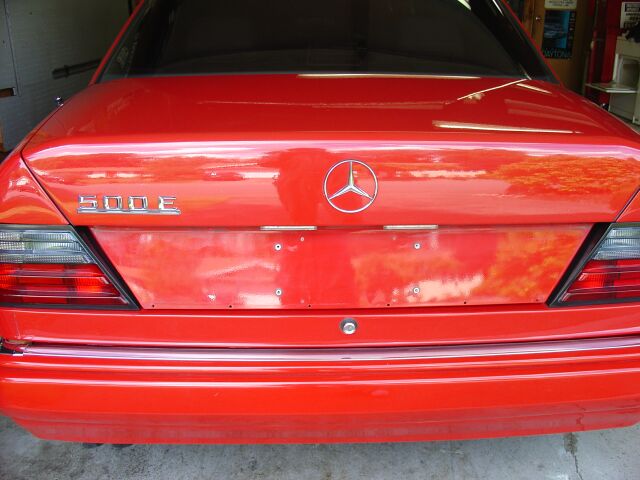
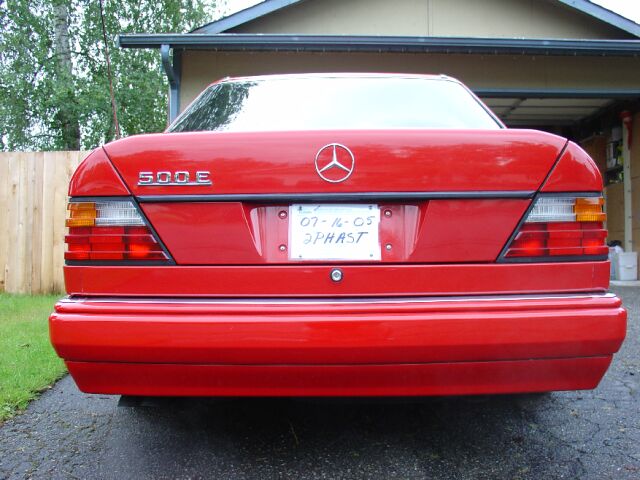 The
red/clear/amber tail lights will also be replaced with the 94-95 W124 tail
lights that are red/clear. The trunk handle will also be mono-chromed.
Currently, I have no plans to remove the 500E emblem
The
red/clear/amber tail lights will also be replaced with the 94-95 W124 tail
lights that are red/clear. The trunk handle will also be mono-chromed.
Currently, I have no plans to remove the 500E emblem
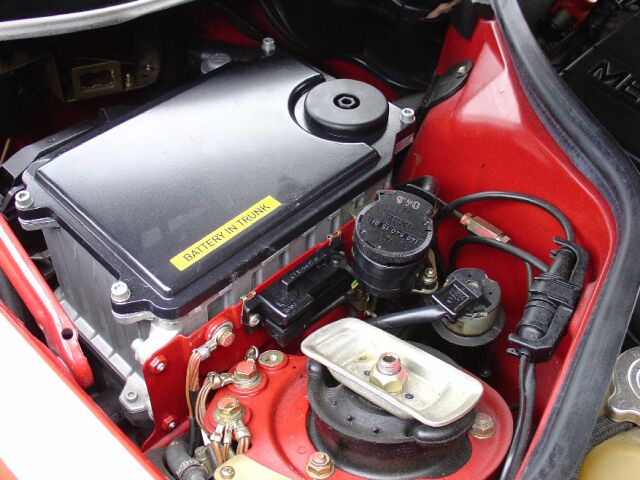
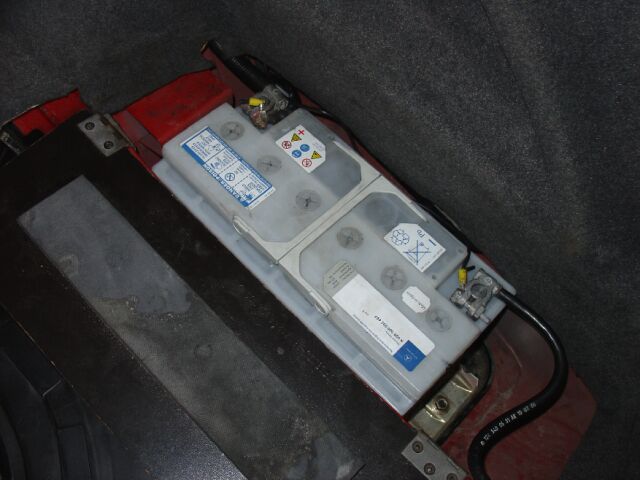
This picture shows the CAN bus system of the 500E, there is also a covered
diagnostic port that gives you a visual readout of error codes generated by the
system. The battery of course is located in the trunk.
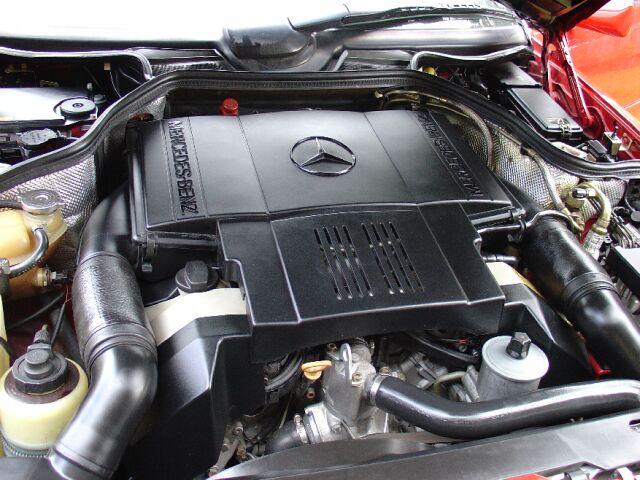 The
M119 5.0l V8 was sourced from the 500SL and was lightly massaged to achieve
additional torque and hp. This engine and its associated components is
very clean and well taken care of. I really can't find much of anything
that needs attention, even the vulnerable main wire harness looks as though it
is new (probably is).
The
M119 5.0l V8 was sourced from the 500SL and was lightly massaged to achieve
additional torque and hp. This engine and its associated components is
very clean and well taken care of. I really can't find much of anything
that needs attention, even the vulnerable main wire harness looks as though it
is new (probably is).
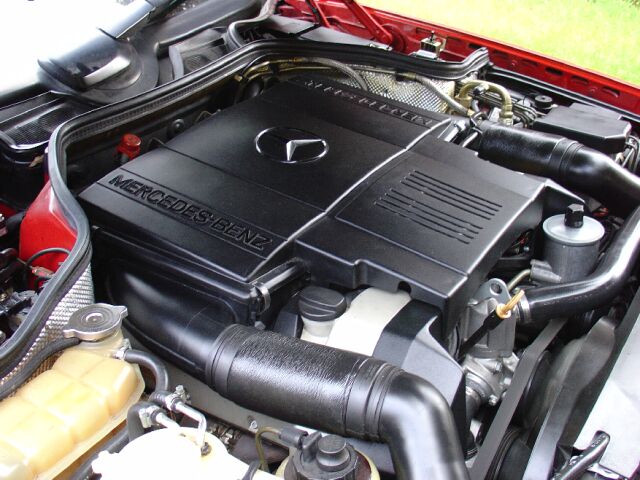 Another
angle of the engine bay, I won't be going into any great detail about the
pedigree of the 500E here, but I may reserve a page to regurgitate the history
behind this awesome Mercedes.
Another
angle of the engine bay, I won't be going into any great detail about the
pedigree of the 500E here, but I may reserve a page to regurgitate the history
behind this awesome Mercedes.
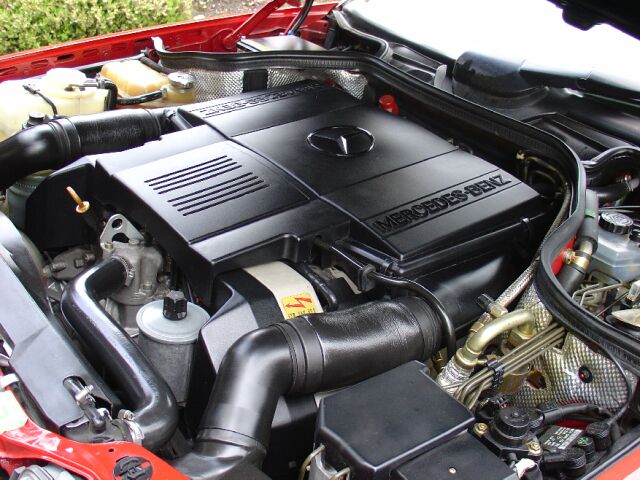 One
more angle on the engine bay.
One
more angle on the engine bay.
 This
picture shows the M119 bare without its air filter box and front cover.
Had to give the wire harness, distributor caps/rotors and other under hood items
a through cleaning and inspection.
This
picture shows the M119 bare without its air filter box and front cover.
Had to give the wire harness, distributor caps/rotors and other under hood items
a through cleaning and inspection.
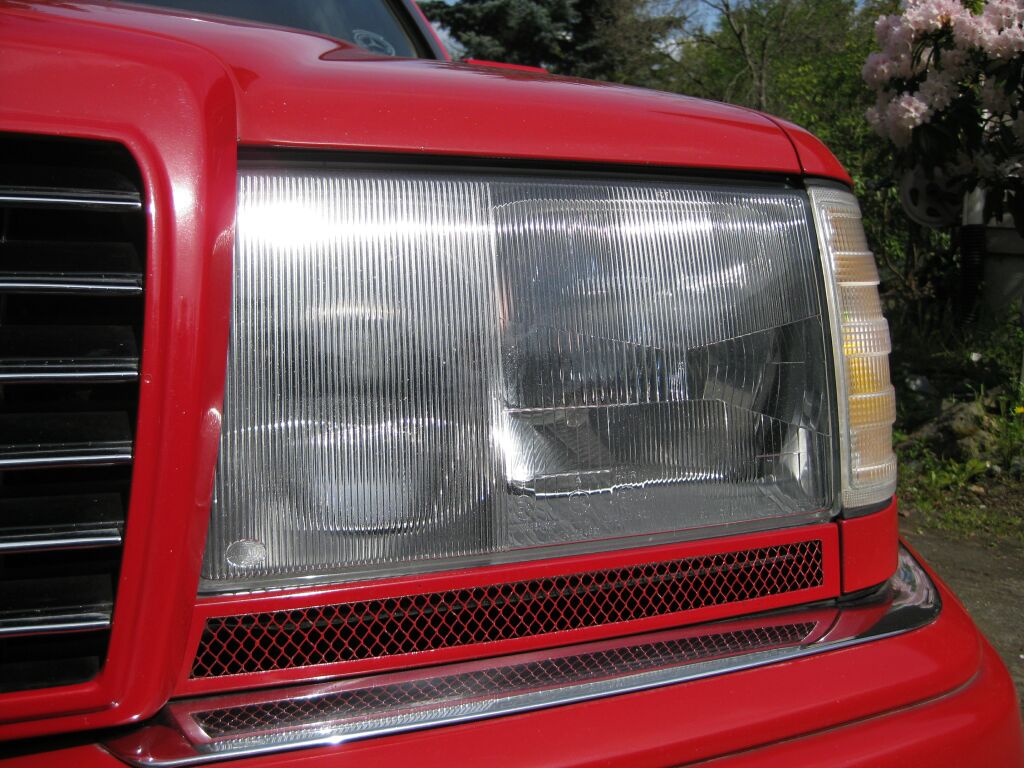
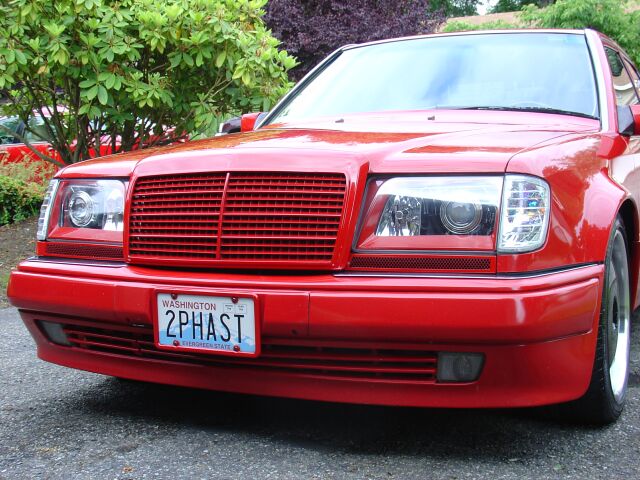
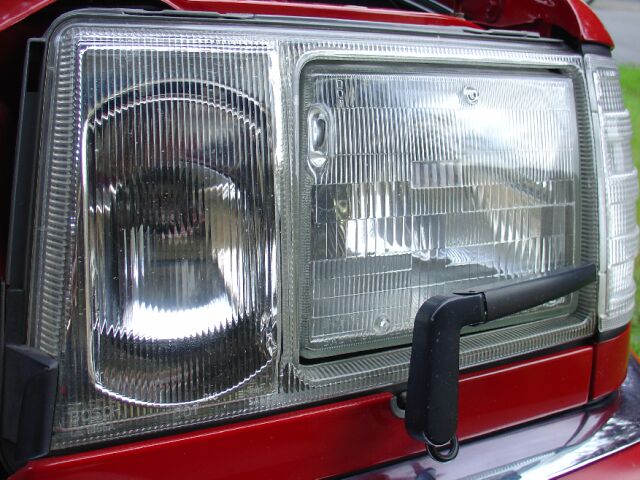 Although
very clean for their age, the stock lighting leaves a lot to be desired.
Definitely time for some euro headlights and HID's. Not sure if the clear
corners will stay though, if I can get my hands on some 94-95 W124 markers, I
will go that route.
Although
very clean for their age, the stock lighting leaves a lot to be desired.
Definitely time for some euro headlights and HID's. Not sure if the clear
corners will stay though, if I can get my hands on some 94-95 W124 markers, I
will go that route.
The
battery that came in the car was an after market item and wasn't holding a
charge very well. A good friend of mine (Steve Geyer) donated a nice
factory Mercedes battery to my cause and I don't expect to have anymore charging
problems for a long time!
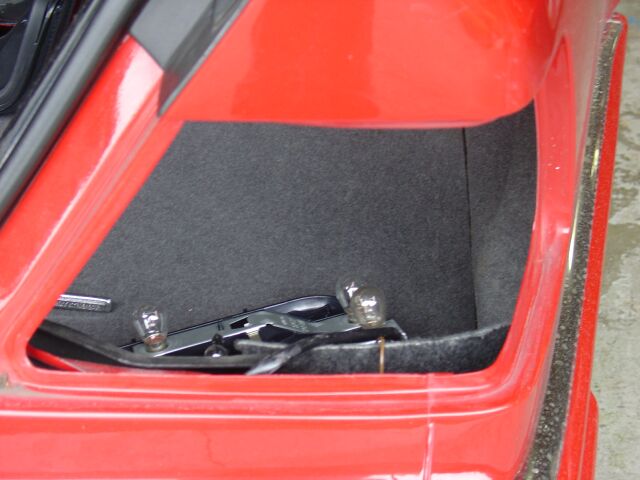
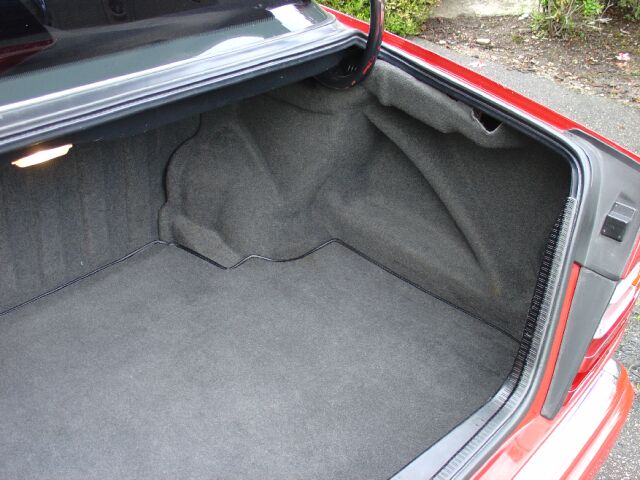 The
trunk is also very clean, although the trunk mat did require some steam
cleaning. The tool kit is still in its original plastic bag (sealed) and
the jack also still has its hang tag on it and shows no sign of use....wow!
The
trunk is also very clean, although the trunk mat did require some steam
cleaning. The tool kit is still in its original plastic bag (sealed) and
the jack also still has its hang tag on it and shows no sign of use....wow!
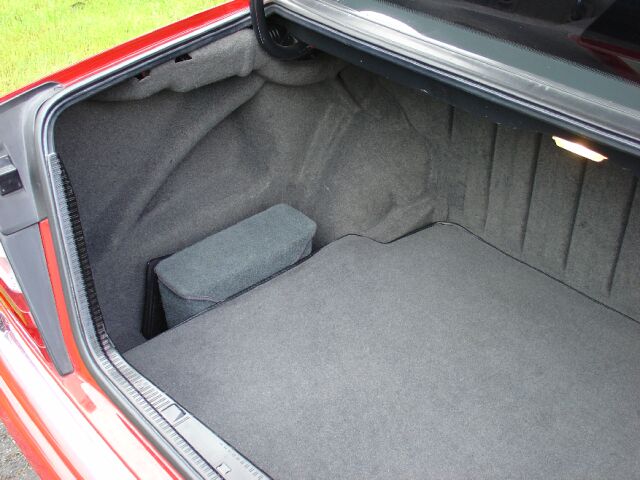 A
Pioneer CD changer occupies the left side of the trunk, although the head and
the changer are high quality items, neither play MP3's which is a
disappointment.
A
Pioneer CD changer occupies the left side of the trunk, although the head and
the changer are high quality items, neither play MP3's which is a
disappointment.
94-95 Tail light upgrade
 The
1993 W124's tail lights have a white/yellow/red tail light. In 1994,
Mercedes updated the W124 chassis styling and one of the updates was changing to
a white/red tail light. Although I don't really consider this a "have to
do" type of modification, especially at the crazy prices the new style tail
lights go for, but I managed to pick up a nice set of after market tail lights
from Ebay for $50. This was affordable enough for me to justify the
cosmetic face life.
The
1993 W124's tail lights have a white/yellow/red tail light. In 1994,
Mercedes updated the W124 chassis styling and one of the updates was changing to
a white/red tail light. Although I don't really consider this a "have to
do" type of modification, especially at the crazy prices the new style tail
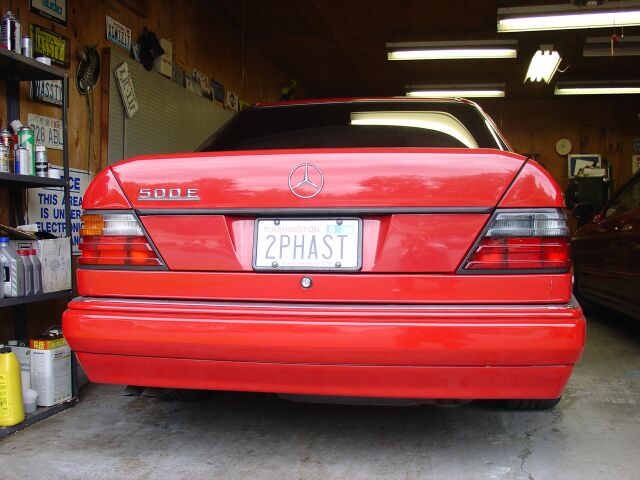
lights go for, but I managed to pick up a nice set of after market tail lights
from Ebay for $50. This was affordable enough for me to justify the
cosmetic face life.
 This
is a close up of the OE tail light, the red is not as deep as the new style tail
lights.
This
is a close up of the OE tail light, the red is not as deep as the new style tail
lights.
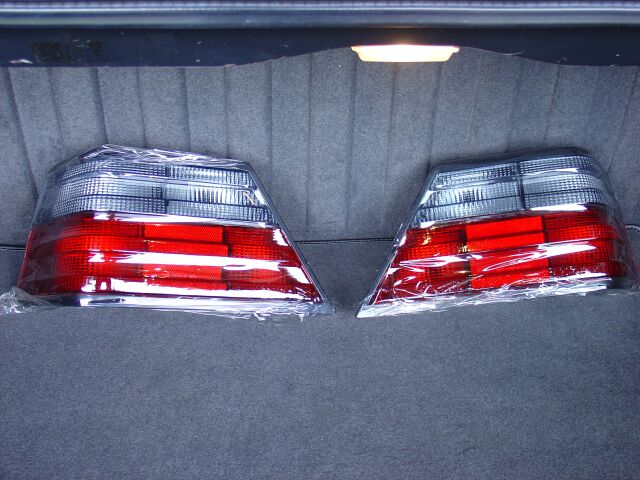 These
are the new style tail lights, still with their plastic protective wrap.
The white lenses on these tail lights are more of a smoke color, which looks
very nice.
These
are the new style tail lights, still with their plastic protective wrap.
The white lenses on these tail lights are more of a smoke color, which looks
very nice.
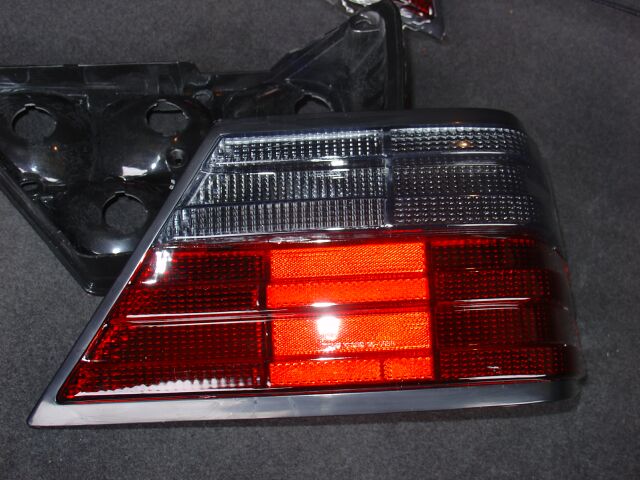 A
closer picture of the new tail light, although my cameras flash takes away from
how nice these really are.
A
closer picture of the new tail light, although my cameras flash takes away from
how nice these really are.
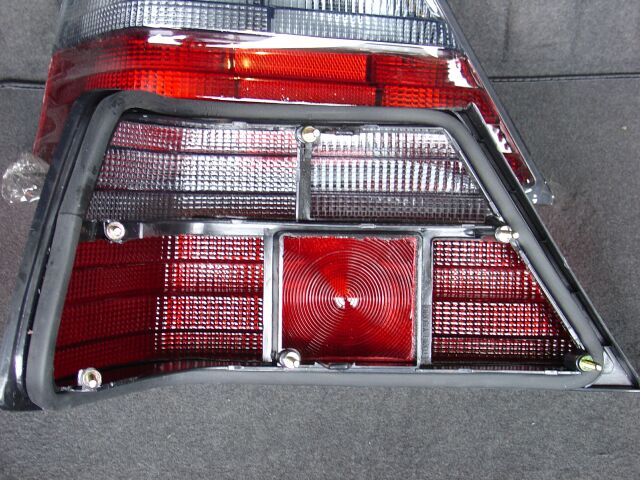 The
inside of the new tail lights.
The
inside of the new tail lights.
To stay legal, you will need to replace your top right blinker bulb with a
yellow one.
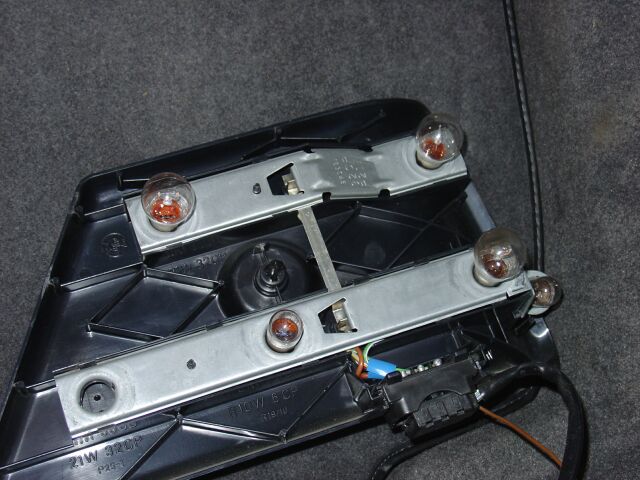
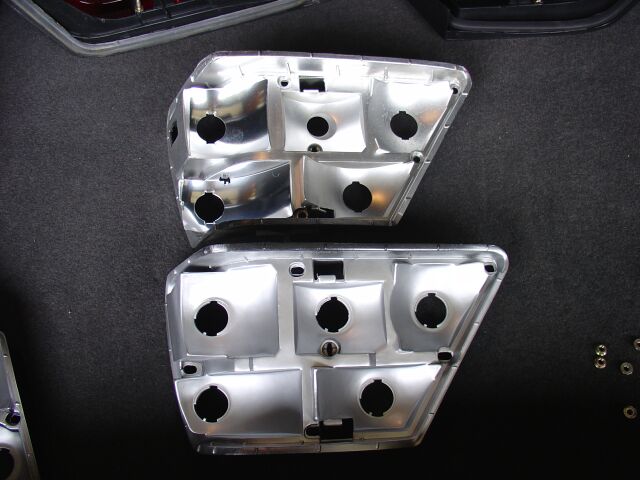 The
new style tail lights came with its own interior reflector/bulb holder.
The original piece is shown in the top of the picture and the aftermarket one
below. You will notice that the original reflector has two additional
mirror finished reflectors. Because of this, I chose to use the original
reflector with the new red/white lens.
The
new style tail lights came with its own interior reflector/bulb holder.
The original piece is shown in the top of the picture and the aftermarket one
below. You will notice that the original reflector has two additional
mirror finished reflectors. Because of this, I chose to use the original
reflector with the new red/white lens.
 After
you remove the bulb holder and some 8mm nuts, you can separate the reflector
from the lens.
After
you remove the bulb holder and some 8mm nuts, you can separate the reflector
from the lens.
 Another
picture showing the two lenses, you can tell the new style lens has a darker red
then the original lens.
Another
picture showing the two lenses, you can tell the new style lens has a darker red
then the original lens.
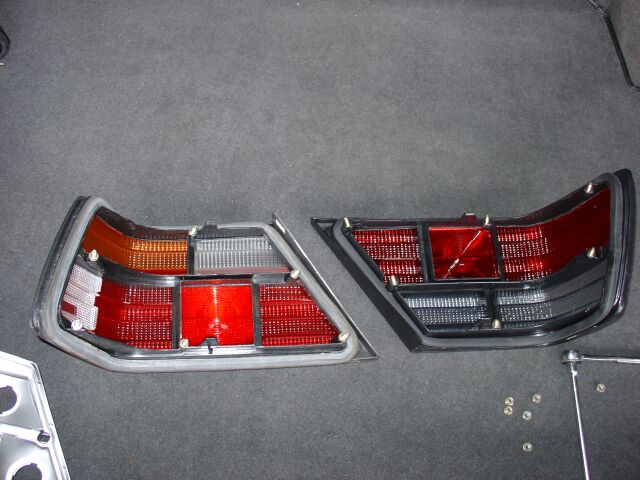
This
picture shows the two tail lights (the old on the left, new on the right).
This is a good cosmetic upgrade that is valid on any W124.
4/1/06 - LED Tail light upgrade
 Well,
the 94-95 style tail lights were a nice upgrade, but I have always wanted LED
tail lights. I saw them once on a W202 and really liked how nice they
looked and how bright they were. I finally managed to find some on EBay
for a reasonable price.
Well,
the 94-95 style tail lights were a nice upgrade, but I have always wanted LED
tail lights. I saw them once on a W202 and really liked how nice they
looked and how bright they were. I finally managed to find some on EBay
for a reasonable price.
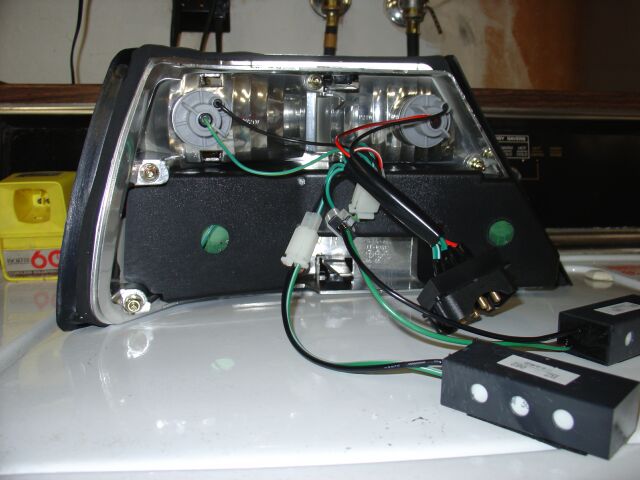
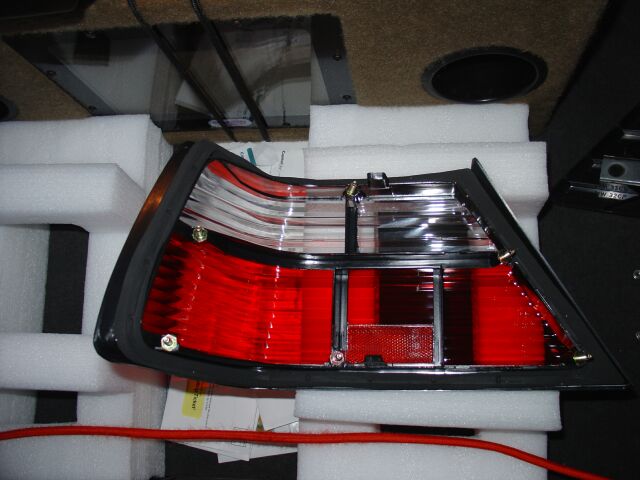
This is the rear of the LED lights. The backup and turn signal use regular
bulbs, the LED's are for running lights and brake lights. The LED portion
have some sort of regulator box's that need to be attached/hidden once
installed.
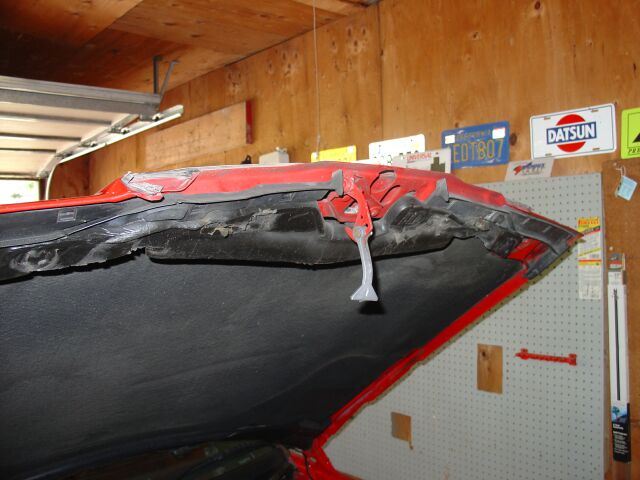
 So
we start by removing the rear bulb holder and disconnecting the wire harness.
The LED tail lights don't come with a cover like this, so at some point, I may
try and see if I can make this cover fit over the rear of the LED lights.
So
we start by removing the rear bulb holder and disconnecting the wire harness.
The LED tail lights don't come with a cover like this, so at some point, I may
try and see if I can make this cover fit over the rear of the LED lights.
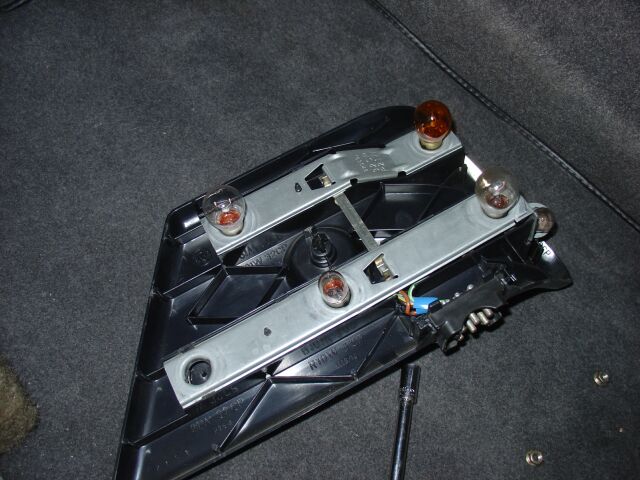
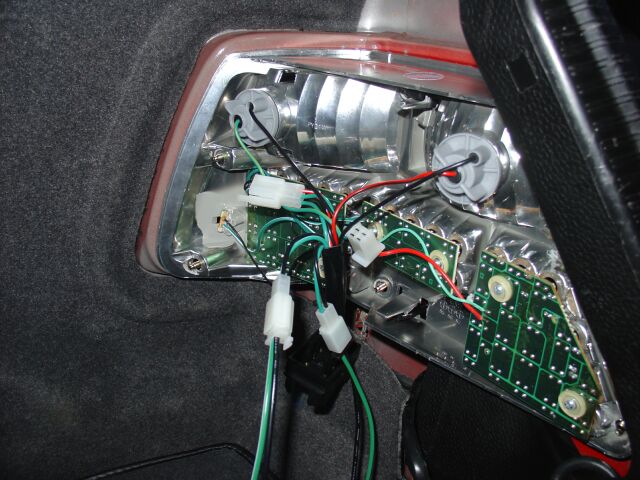
This internal frame structure is also not used in the install of the LED lights,
so we need to unbolt it and store it away with the rear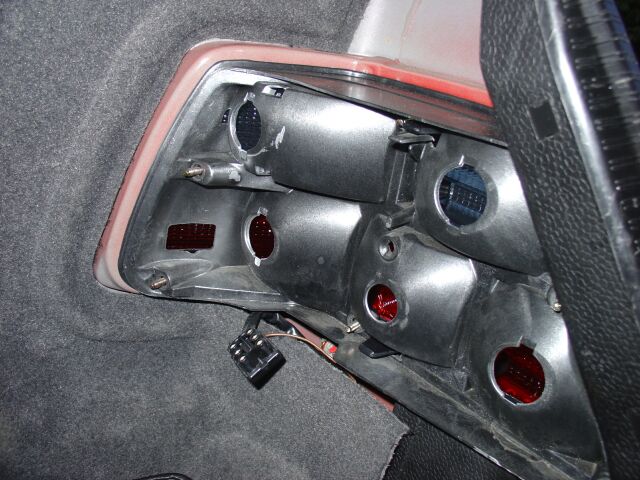 of the
old light assembly. NOTE:
Before you start this project, visit your local MB dealer and order a 6 pole
wire harness plug for the drivers side (passenger side already has this as seen
in this picture) the US W124 has a 8 pole wire harness plug on the drivers side
(extra pin for the rear fog light) and these LED tail lights have no provision
for the rear fog, so its plug is a 6 pole on both sides.
of the
old light assembly. NOTE:
Before you start this project, visit your local MB dealer and order a 6 pole
wire harness plug for the drivers side (passenger side already has this as seen
in this picture) the US W124 has a 8 pole wire harness plug on the drivers side
(extra pin for the rear fog light) and these LED tail lights have no provision
for the rear fog, so its plug is a 6 pole on both sides.
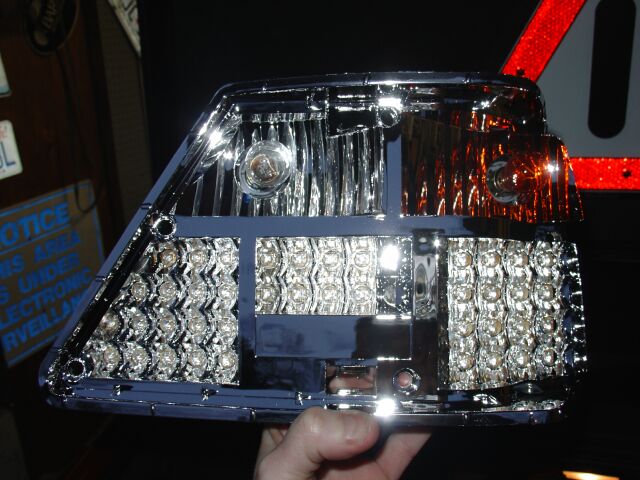 This
is the inside of the LED light with the lens removed.
This
is the inside of the LED light with the lens removed.
Here is the LED lens removed from the housing, so far the quality of
construction is very good.
 This
is the LED light right after mounting. The rear circuit board cover still
needs to be replaced and the regulators and wiring need to be cleaned up.
This
is the LED light right after mounting. The rear circuit board cover still
needs to be replaced and the regulators and wiring need to be cleaned up.
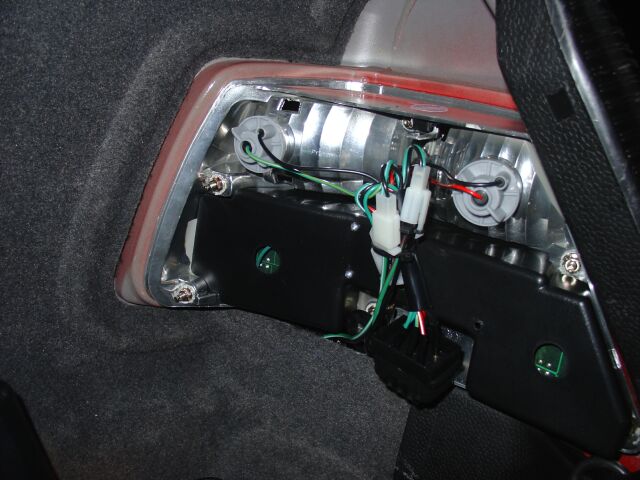
This is as clean as it is going to get without some sort of rear cover over the
lights.
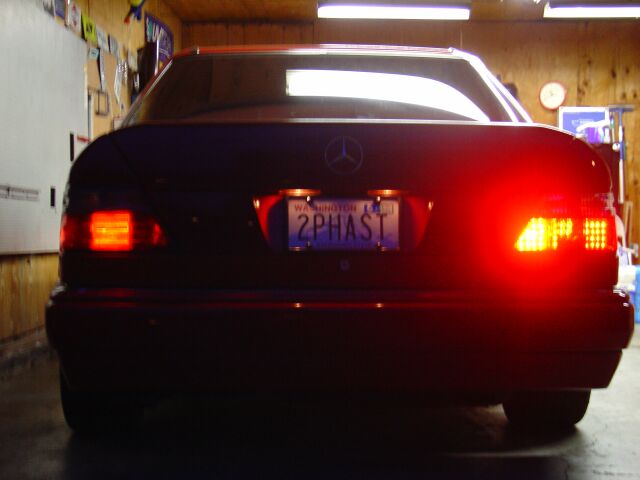 This
picture was taken at dusk and you can see the OE light on the left (running
lights only) and the LED light on the right, big difference in brightness.
The brake lights are just as bright.
This
picture was taken at dusk and you can see the OE light on the left (running
lights only) and the LED light on the right, big difference in brightness.
The brake lights are just as bright.
A daylight picture of the LED's off. This style of tail light really
updates the look of the W124.
 One
last close up picture of the LED tail light.
One
last close up picture of the LED tail light.
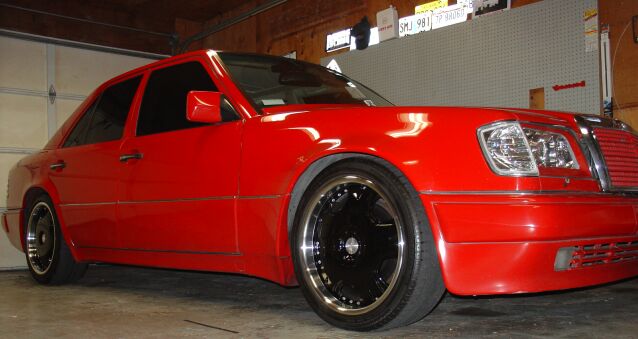
Wheels
 Keeping
in line with my update theme, the OEM wheels looked a bit dated,
so I set out on a trek to find a reasonable set of wheels for the 500E.
These particular wheels are a copy of the new E500 sport wheel, the advantage
with the copies is that these are 18x8.5" where as the stock E500 wheels are
only 17" The weight of these is right around the same as AMG monoblocks.
The face of the wheel is polished with the inner edges left silver. The
offset is 35mm and originally I planned on using H&R 10mm spacers for the front,
but the spacers would not clear the dust caps, so I am running these with no
spacers. There was plenty of caliper clearance and there are no issues
with rubbing on the shocks or inner fender wells.
Keeping
in line with my update theme, the OEM wheels looked a bit dated,
so I set out on a trek to find a reasonable set of wheels for the 500E.
These particular wheels are a copy of the new E500 sport wheel, the advantage
with the copies is that these are 18x8.5" where as the stock E500 wheels are
only 17" The weight of these is right around the same as AMG monoblocks.
The face of the wheel is polished with the inner edges left silver. The
offset is 35mm and originally I planned on using H&R 10mm spacers for the front,
but the spacers would not clear the dust caps, so I am running these with no
spacers. There was plenty of caliper clearance and there are no issues
with rubbing on the shocks or inner fender wells.
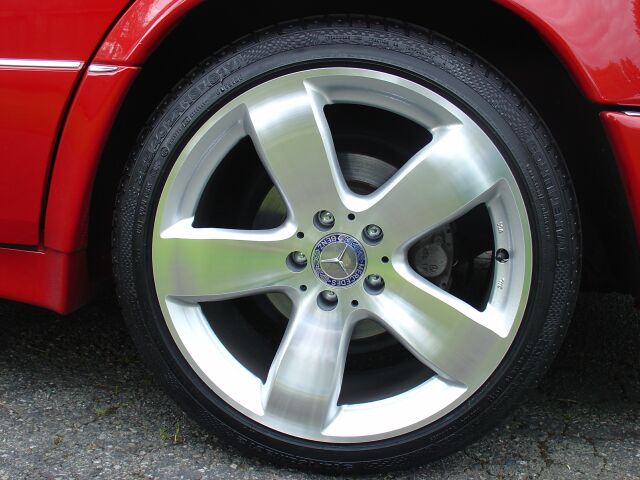
These
came with Conti Sport 2 tires in 235/40/18 with about 2500 miles on them.
Although these tires are not optimum for the 500E, the difference in height
between these and the factory tires is about 1/4". These wheels arrived
mounted, balanced with lugs and MB center caps.
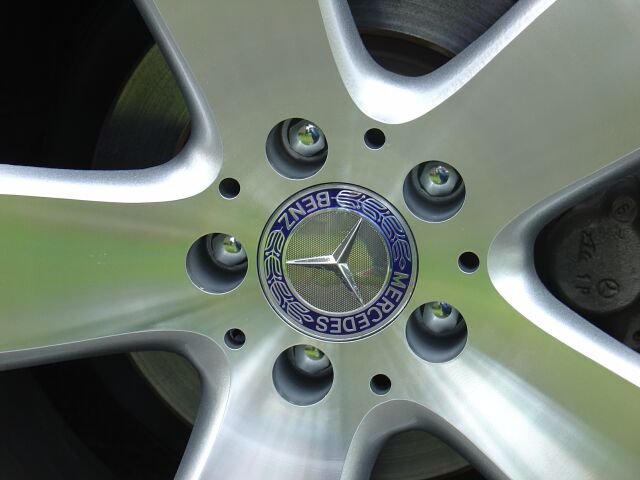 A
closer view of the polished face and Mercedes center cap. H&R Sport
springs to follow soon!
A
closer view of the polished face and Mercedes center cap. H&R Sport
springs to follow soon!
Well, the E500 sport wheels did not last long, they just did not provide
the look I was interested in. It took many months of searching to
locate a suitable wheel, these new wheels are made by BSA and are 18x8" with a
+35mm
offset. They fit the car fine and clear the
calipers nicely.
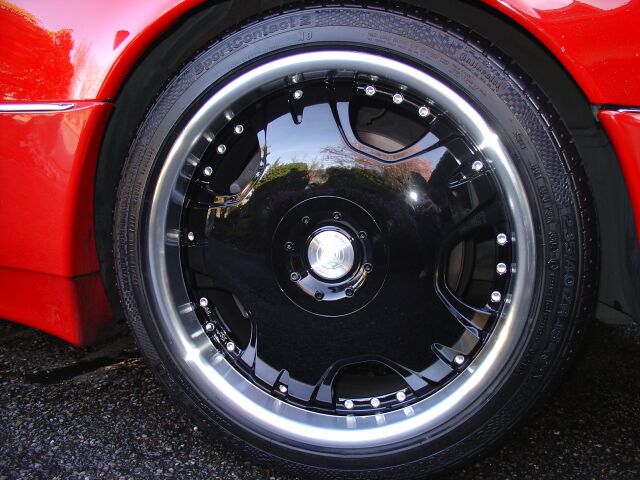 A
closer view of the LDR type wheel. More pictures to follow with the silver
center replaced with a MB star.
A
closer view of the LDR type wheel. More pictures to follow with the silver
center replaced with a MB star.
10/24/09 - AMG two piece wheels
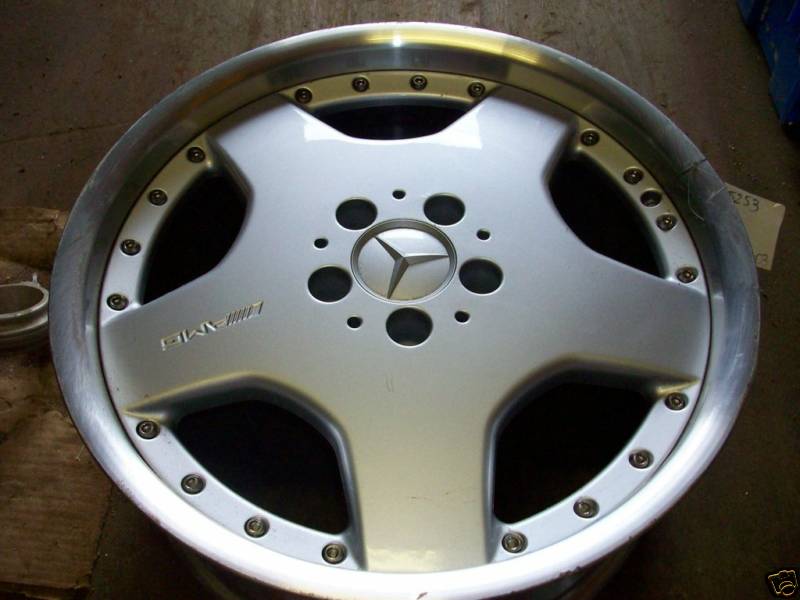
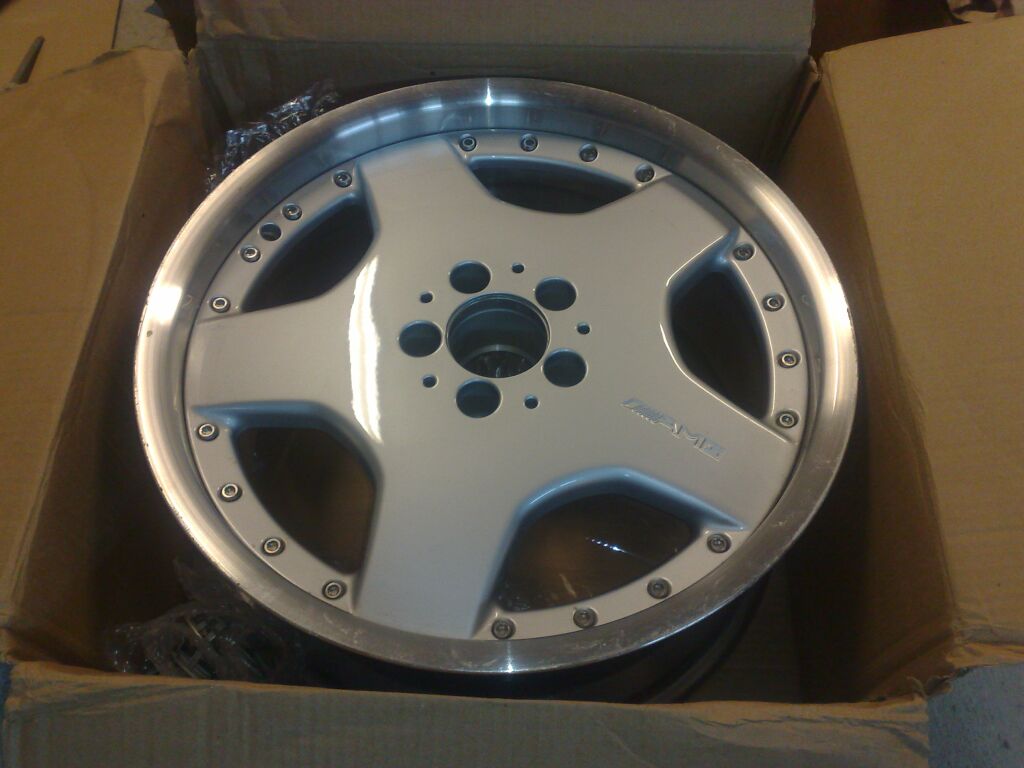
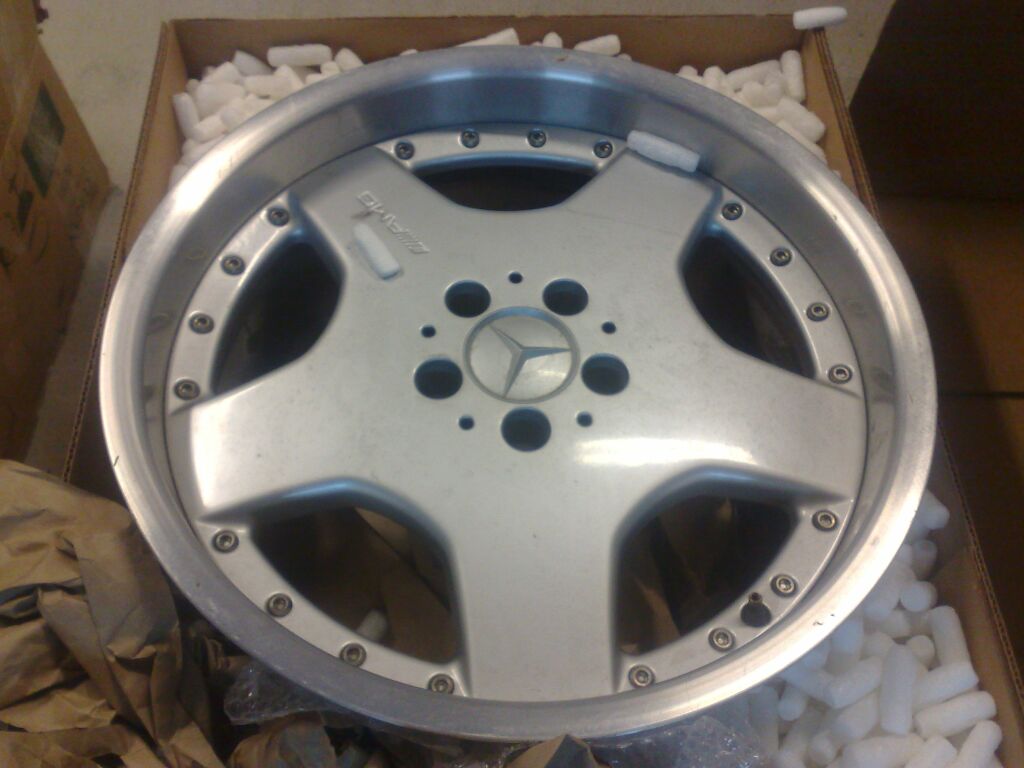
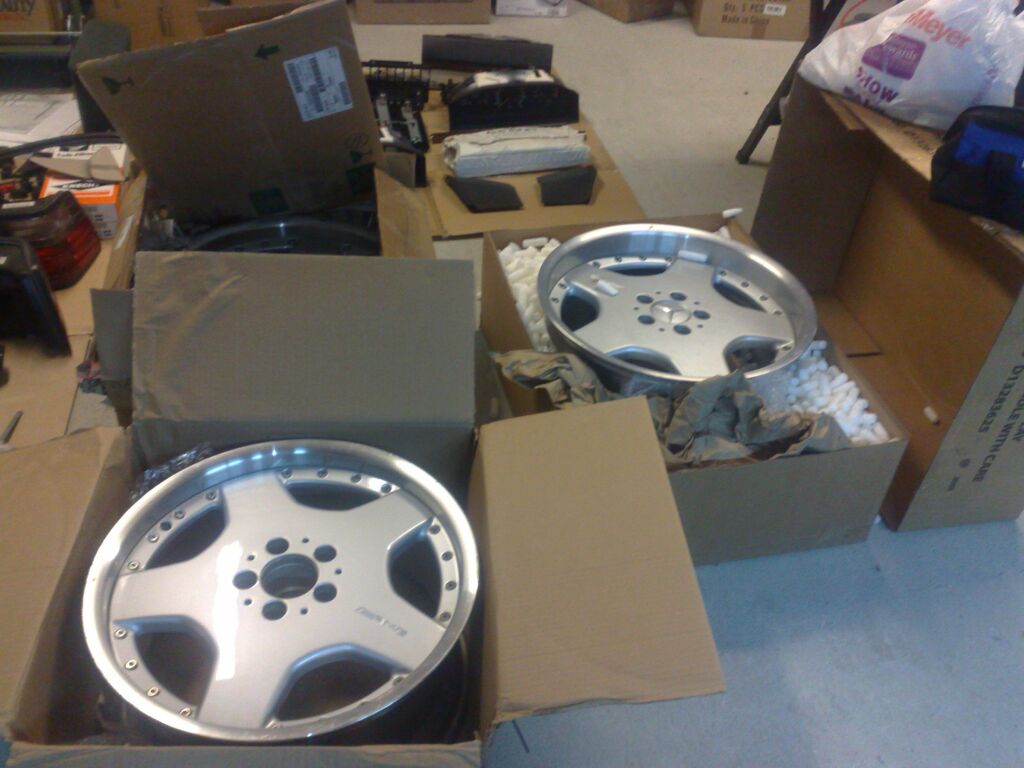
These AMG two piece wheels were originally available on the SL600 for model years 2001-2002. The size is 18x8.5" 25mm offset and 18x10" 25mm offset. Also very difficult to source, the rears are NLA and the fronts new are over $1100 each. These were acquired from three different sources for a nominal cost ;-) As you can tell, the lips need refinishing and I elected to keep with my existing color scheme by having these painted black. A local wheel refinisher whom does work for Ferrari and Mercedes dealers was used and I am very happy with the results.
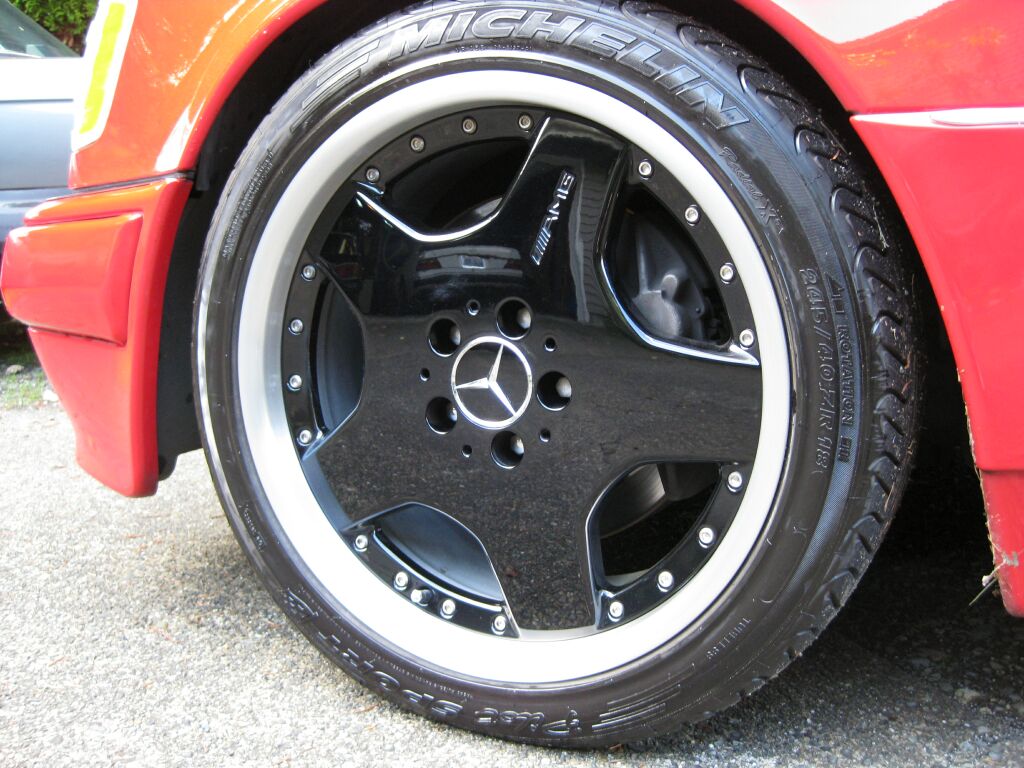
 This
is the finished result. Lips machined and clear coated, face painted
gloss black and this time around, I used the OE Mercedes center cap w/chrome
star, which was also painted gloss black. Tires are Pilot Sports in
245/40/18 and 275/35/18
This
is the finished result. Lips machined and clear coated, face painted
gloss black and this time around, I used the OE Mercedes center cap w/chrome
star, which was also painted gloss black. Tires are Pilot Sports in
245/40/18 and 275/35/18
 This
is the front wheel. Of course no clearance issues with the brakes and
all wheels sit flush with the fenders now.
This
is the front wheel. Of course no clearance issues with the brakes and
all wheels sit flush with the fenders now.
 New
profile, same overall color scheme. I don't like the look of a silver
wheel on a red car. Painting the centers red would of been too much
New
profile, same overall color scheme. I don't like the look of a silver
wheel on a red car. Painting the centers red would of been too much
T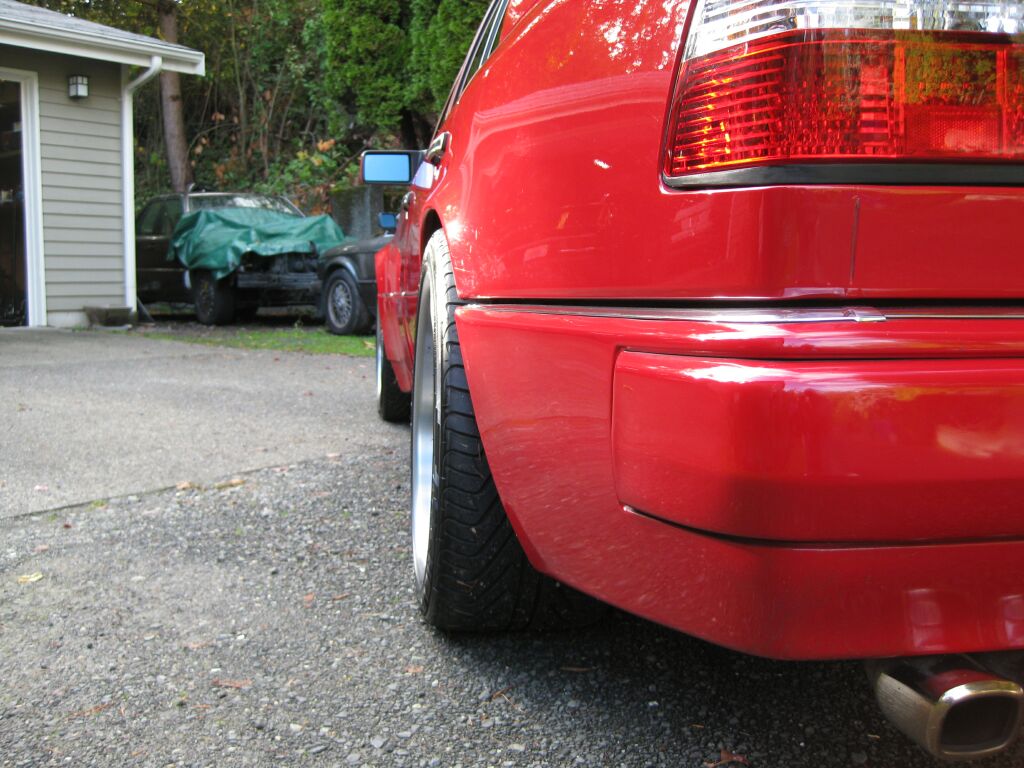 he
275/35/18 tires are meaty! They fit the body flaring nicely
he
275/35/18 tires are meaty! They fit the body flaring nicely
Body Colored Trim
 For
this round, I elected to paint the OE grill and wiper arms (like my 89 W124 back
in the day), so we start by removing the wiper arms
For
this round, I elected to paint the OE grill and wiper arms (like my 89 W124 back
in the day), so we start by removing the wiper arms
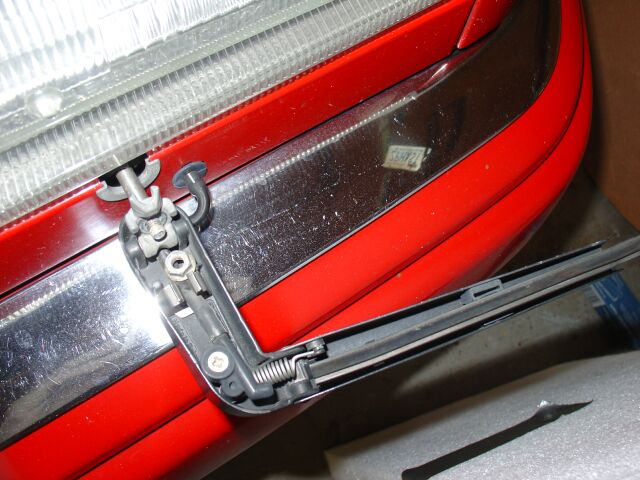
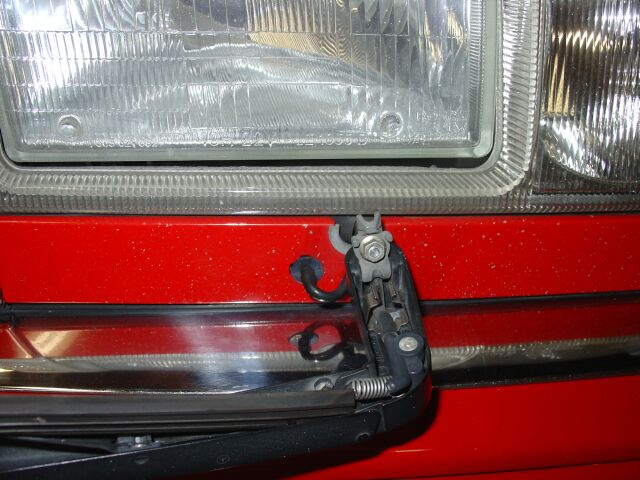 The
wiper arm folds down providing you access to the 8mm nut that you must remove.
I also removed the wiper fluid hose assembly from the inside of the wiper arm so
no over spray gets on it.
The
wiper arm folds down providing you access to the 8mm nut that you must remove.
I also removed the wiper fluid hose assembly from the inside of the wiper arm so
no over spray gets on it.
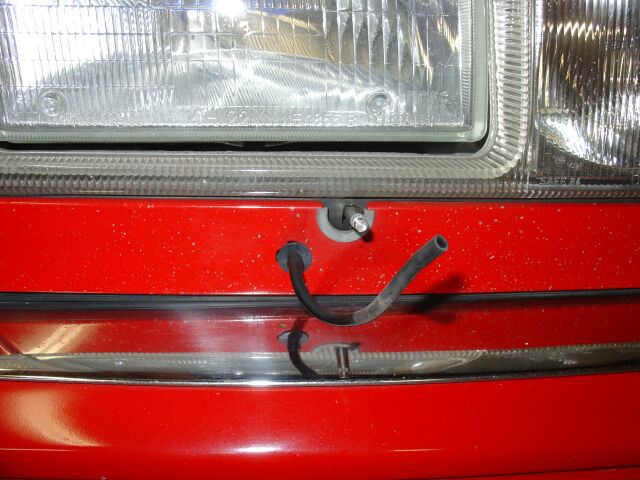 The
wiper fluid hose was left intake connected to the front of the car. I have
found that over the years, these rubber pieces can get brittle and easily tear,
so be careful removing them and don't pull too hard.
The
wiper fluid hose was left intake connected to the front of the car. I have
found that over the years, these rubber pieces can get brittle and easily tear,
so be careful removing them and don't pull too hard.
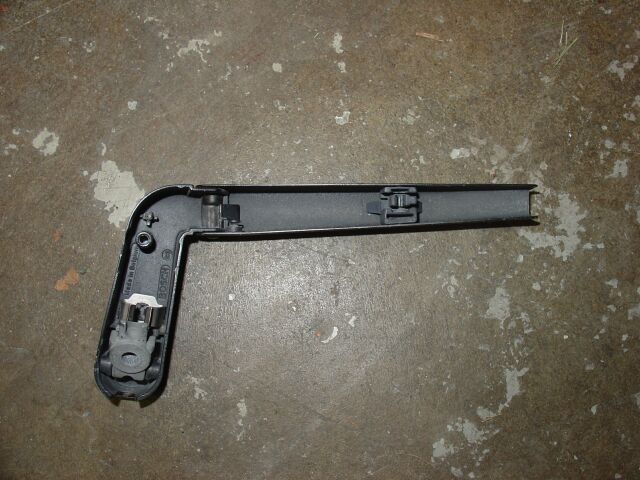
This is the wiper arm void of all its internals, you don't have to remove the
internal pieces, a good masking would take care of any over spray
problems, but I wanted to
clean everything before re-assembly.
 This
picture shows the wiper arm internals for your reference, there is one
particular spring that is used that can be difficult to get back in place when
you go to assemble the arm internals, keep that in mind before you pull it
apart.
This
picture shows the wiper arm internals for your reference, there is one
particular spring that is used that can be difficult to get back in place when
you go to assemble the arm internals, keep that in mind before you pull it
apart.
Next up was the grill. The best way to remove it, is to remove the
entire frame and then remove the clips holding the frame in place. To
remove the grill frame, you must remove about five 8mm nuts, so your
going to need a socket wrench with an extension to get to some of these.
 If
your interested in painting the entire grill frame, you must first have the
chrome/nickel removed. This is best done via a shop that specializes in
chroming. Don't try to paint over the chrome, you will just have problems
down the line with adhesion. Another option would be powder coating, which
from what I have been told, will work right over the chrome and is very durable.
If
your interested in painting the entire grill frame, you must first have the
chrome/nickel removed. This is best done via a shop that specializes in
chroming. Don't try to paint over the chrome, you will just have problems
down the line with adhesion. Another option would be powder coating, which
from what I have been told, will work right over the chrome and is very durable.
For prep, you should thoroughly de-grease/clean all your parts and sand using
400 grit wet/dry sand paper. The better your prep work, the better the end
results, keep that in mind. When your done and ready to paint, clean all
your parts again and prep with adhesion promoter and your ready to paint.
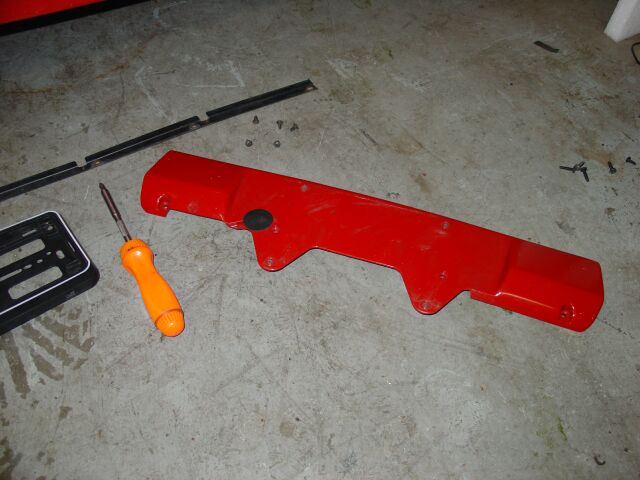
 I
also elected to paint the black trunk assist handle. This piece takes a
bit of effort to get off, since you have to remove quite a few clips, nuts and
some other pieces to get it off.
I
also elected to paint the black trunk assist handle. This piece takes a
bit of effort to get off, since you have to remove quite a few clips, nuts and
some other pieces to get it off.
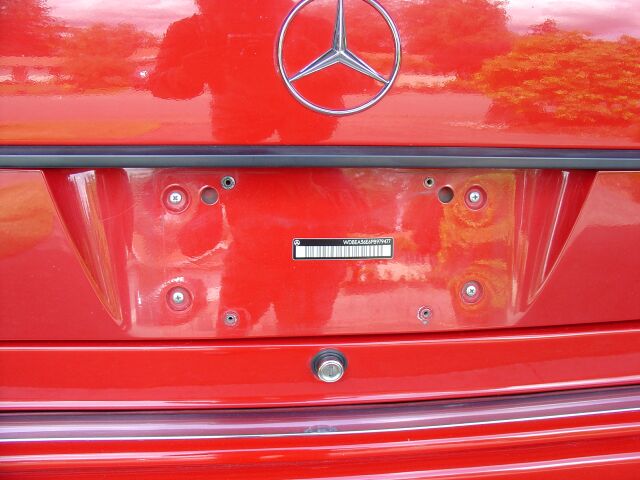
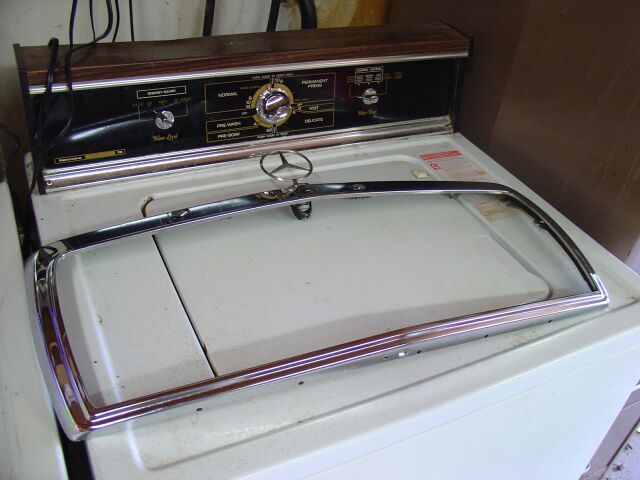
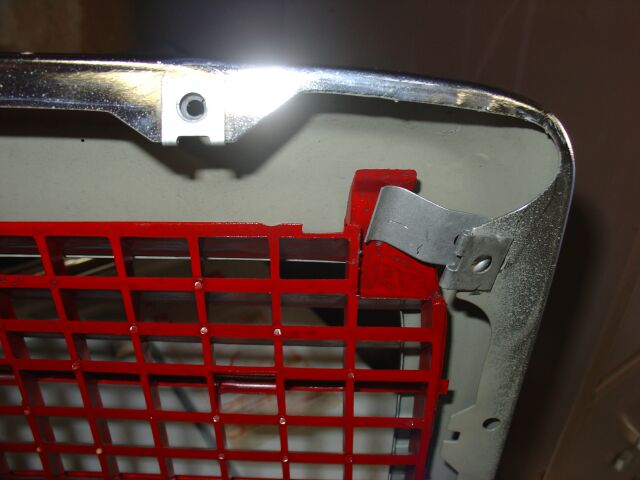
First, you need to remove the license plate filler panel, there are four
screws shown here that need to be removed
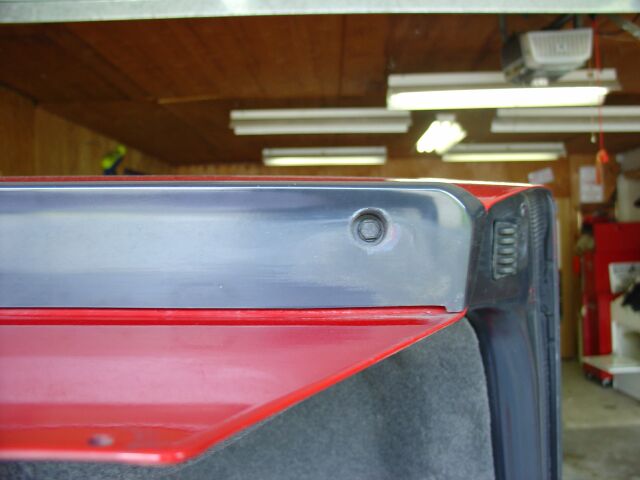
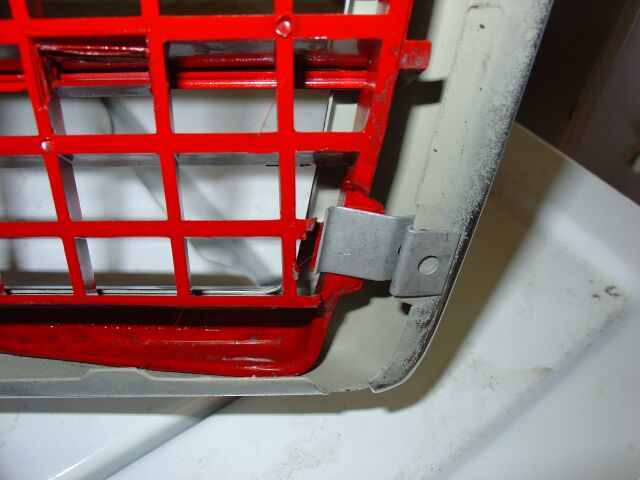
 Next,
you have these little slide clips on the underside of the trunk edge, use a
needle nose pliers to get them off and be careful not to break or loose them,
knowing Mercedes, these items are probably $3 each!
Next,
you have these little slide clips on the underside of the trunk edge, use a
needle nose pliers to get them off and be careful not to break or loose them,
knowing Mercedes, these items are probably $3 each!
Ok, so now the trunk license plate filler is off, you can move on to removing
the trunk assist handle.
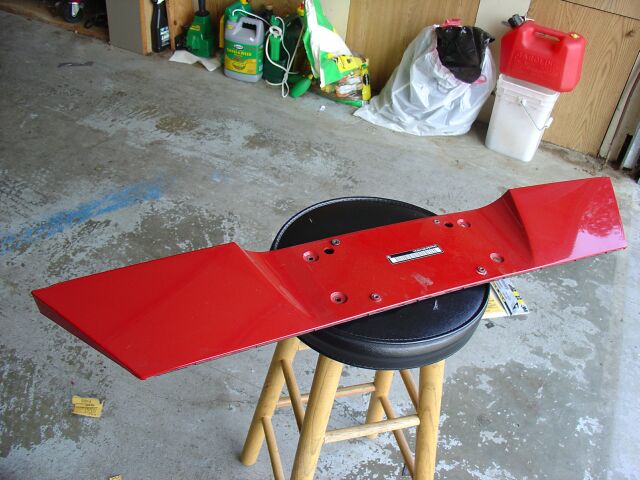
 This
is the trunk without the license plate filler panel. The filler panels
became standard on the W124 in 1991, so if you have an earlier model, you can
retro fit this piece.
This
is the trunk without the license plate filler panel. The filler panels
became standard on the W124 in 1991, so if you have an earlier model, you can
retro fit this piece.
To remove the trunk assist handle, there are some bolts at each end of the
handle that need to be removed.
 Next,
you need to remove your inner trunk carpet trim (if you have it) to access some
nuts, they are easy to get to, but you should be setup with a socket wrench and
extension to make the work go quickly.
Next,
you need to remove your inner trunk carpet trim (if you have it) to access some
nuts, they are easy to get to, but you should be setup with a socket wrench and
extension to make the work go quickly.
This is the trunk with the assist handle removed
 The
trunk assist handle off and ready for prep work.
The
trunk assist handle off and ready for prep work.
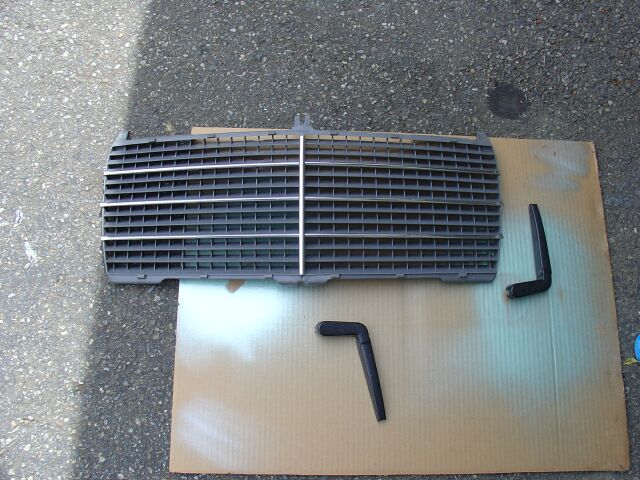
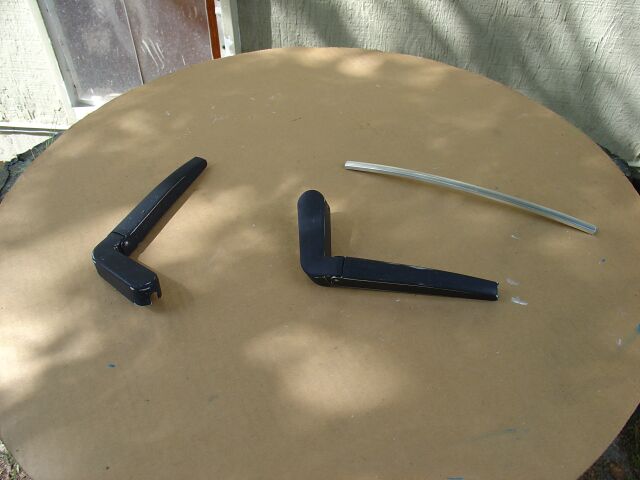 Here
are the wiper arms and the center chrome piece of the grill. I elected not
to remove all the chrome strips, as they can be difficult to get back on,
especially after you paint the grill, sliding them back on can gouge up the
paint (based on past experience)
Here
are the wiper arms and the center chrome piece of the grill. I elected not
to remove all the chrome strips, as they can be difficult to get back on,
especially after you paint the grill, sliding them back on can gouge up the
paint (based on past experience)
 Here
are the arms painted. Since these arms are kind of hinged, I opened them
up (not shown here) and lightly painted the hidden area first, let it dry and
then closed them and finished the painting. Like always, you want to apply
light, even coats and keep bugs and dirt away from your project area.
Here
are the arms painted. Since these arms are kind of hinged, I opened them
up (not shown here) and lightly painted the hidden area first, let it dry and
then closed them and finished the painting. Like always, you want to apply
light, even coats and keep bugs and dirt away from your project area.
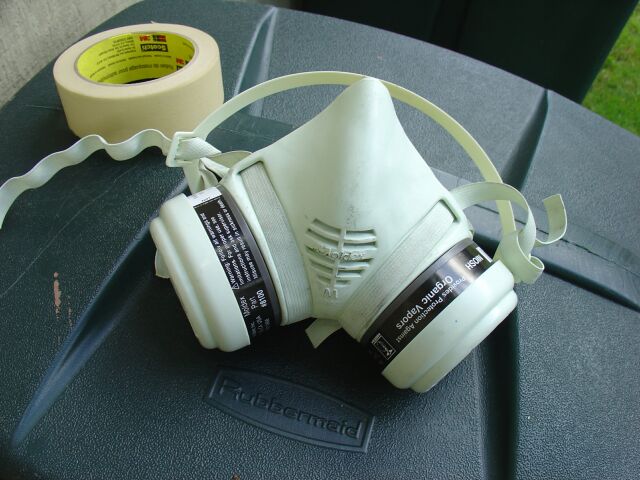 Anytime
you are using hazardous material (paint, thinner, sanding dust etc.) always wear
a quality face mask designed to filter out vapor particles. Protect
yourself and lungs!
Anytime
you are using hazardous material (paint, thinner, sanding dust etc.) always wear
a quality face mask designed to filter out vapor particles. Protect
yourself and lungs!
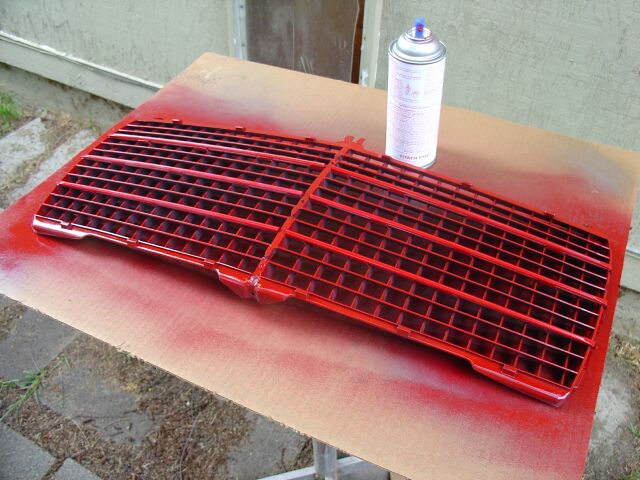 This
is the grill during the paint process. Like always, I use enamel paint
mixed and pressurized into a rattle can by
www.towerpaint.com
This
is the grill during the paint process. Like always, I use enamel paint
mixed and pressurized into a rattle can by
www.towerpaint.com
Once your items are thoroughly dry, its time for re-assembly. Please
don't rush the job and try to assembly the pieces while they are still wet, you
won't like the results. In the case of the grill, I needed to
install the center chrome strip and install it back into the frame using the
clips.
 This
is the bottom clip to hold the grill in place.
This
is the bottom clip to hold the grill in place.
 Here
is the trunk assist handle during the painting process. In my case, a
previous owner must of applied some sort of tire protectant to the item, even
with the exhausting prep work, I started to see fish eyes when I laid the first
coat of paint down. So, I had to remove the entire first coat of paint,
re-prep the handle and apply some self etching primer first. Normally for
plastic or previous painted surfaces, you can get away without using a base coat
of primer (I usually just use adhesion promoter). This took care of the
fish eye problem.
Here
is the trunk assist handle during the painting process. In my case, a
previous owner must of applied some sort of tire protectant to the item, even
with the exhausting prep work, I started to see fish eyes when I laid the first
coat of paint down. So, I had to remove the entire first coat of paint,
re-prep the handle and apply some self etching primer first. Normally for
plastic or previous painted surfaces, you can get away without using a base coat
of primer (I usually just use adhesion promoter). This took care of the
fish eye problem.
 Here
is the grill re-installed. The pre-mixed rattle can enamel was a very good
match for the 12 year old original Signal Red of the 500E. Once I source
another grill frame, I plan on painting that red also.
Here
is the grill re-installed. The pre-mixed rattle can enamel was a very good
match for the 12 year old original Signal Red of the 500E. Once I source
another grill frame, I plan on painting that red also.
 The
trunk with the assist handle re-installed. The red handle really updates
the aesthetics of the car.
The
trunk with the assist handle re-installed. The red handle really updates
the aesthetics of the car.
Painted Grill Frame with shaved emblems
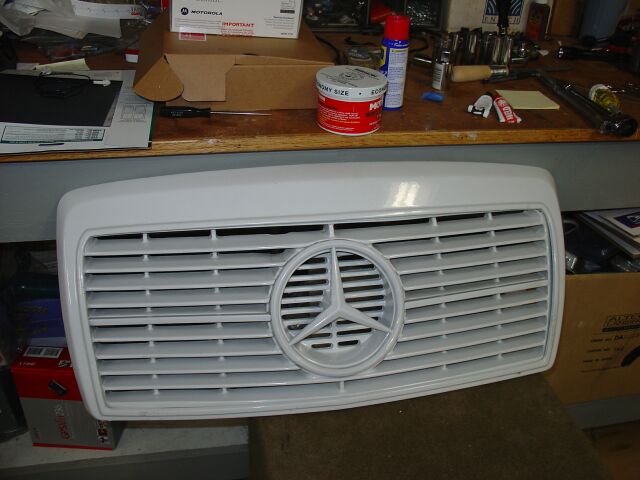 I
have always liked the look of the AMG Hammer W124's with the color matched grill
frames and shaved emblems. This item came from Ebay, its a OE grill frame
(aftermarket SEC style grill) that has been de-chromed and plates welded over
the emblem holes. This saved me quite a bit of work, as all I needed to do
was prep and paint the grill frame.
I
have always liked the look of the AMG Hammer W124's with the color matched grill
frames and shaved emblems. This item came from Ebay, its a OE grill frame
(aftermarket SEC style grill) that has been de-chromed and plates welded over
the emblem holes. This saved me quite a bit of work, as all I needed to do
was prep and paint the grill frame.
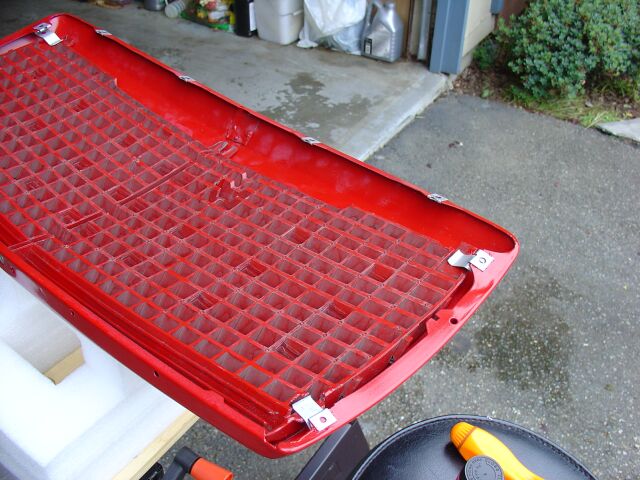
 This
is the back side of the grill frame and you can see how the holes have been
filled with small pieces of metal welded over them. I don't know if this
came from AMG or someone did it themselves, but it was done correctly.
This
is the back side of the grill frame and you can see how the holes have been
filled with small pieces of metal welded over them. I don't know if this
came from AMG or someone did it themselves, but it was done correctly.
 This
is where the holes used to be for the emblems.
This
is where the holes used to be for the emblems.
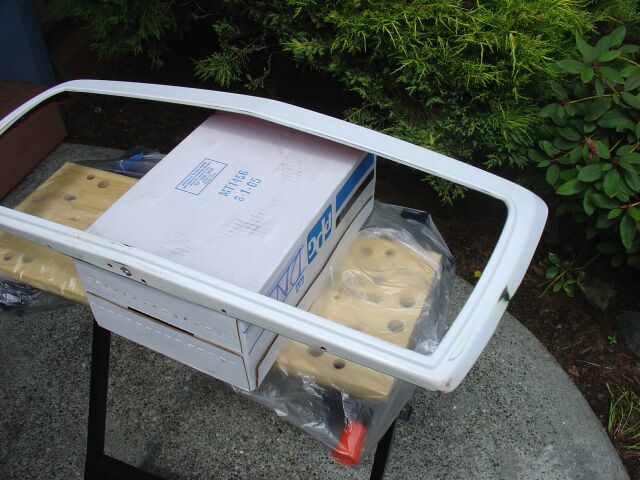 Since
the white paint was very well done, I used it as my primer base and just sanded
it down and filled in any imperfections.
Since
the white paint was very well done, I used it as my primer base and just sanded
it down and filled in any imperfections.
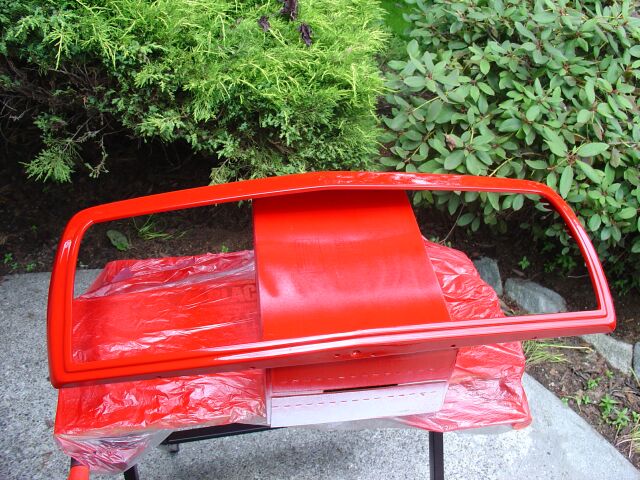 Here
is the grill frame after a few coats of Signal Red paint
Here
is the grill frame after a few coats of Signal Red paint
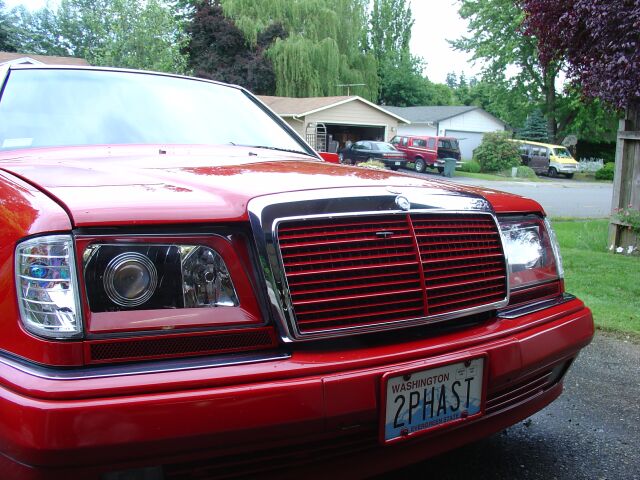 This
is what the 500e looked like with the OE chrome grill frame and OE grill
(painted body color)
This
is what the 500e looked like with the OE chrome grill frame and OE grill
(painted body color)
 This
is the newly painted grill frame as I installed the grill. I also painted
the inside of the frame to eliminate any residual white coloring.
This
is the newly painted grill frame as I installed the grill. I also painted
the inside of the frame to eliminate any residual white coloring.
Of course, without the MB wreath emblem, there is no pin to secure the top
grill tab to, but the grill is still held firmly in place by all the other
original mounting points.
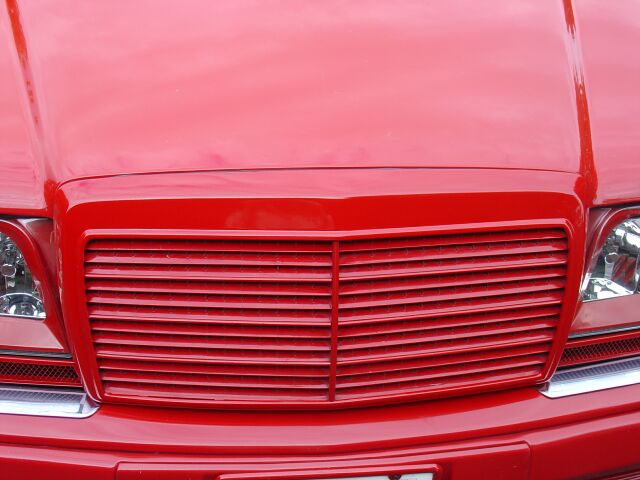
 This
is the finished product installed.
This
is the finished product installed.
 Straight
on picture of the new grill frame
Straight
on picture of the new grill frame
 After
living with this for a few days, I decided that with the grill frame red, there
was now a bit too much red on the front of the 500e, so it was back to Ebay to
locate another grill
After
living with this for a few days, I decided that with the grill frame red, there
was now a bit too much red on the front of the 500e, so it was back to Ebay to
locate another grill
After a bit of searching, I located a W124 Advantgarde grill, the one piece
kind, not a cut down S600 grill that easily breaks apart (like my 190e
experience). I was going to paint the chrome red, but decided to leave it
as is.
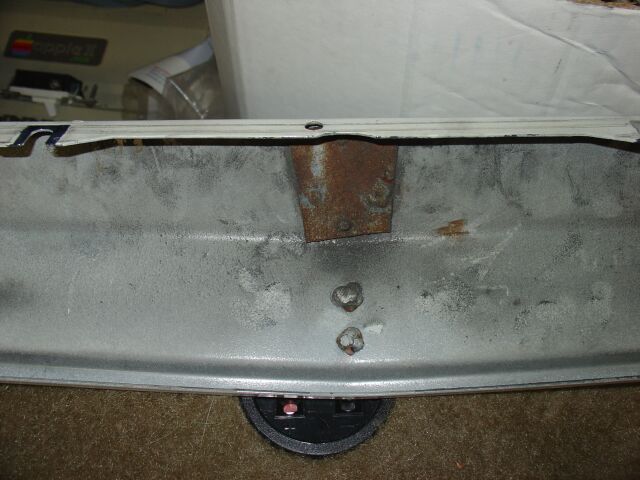
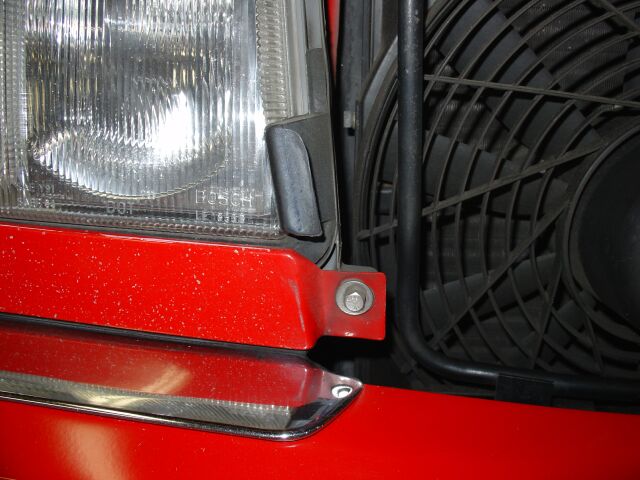
Euro Front License Plate Install
 The
task of installing a euro license plate on a W124 is simple compared to my W201
(which required you to switch the entire impact strip). For this car, all
we have to do is remove the license plate filler. After removing the
license plate, there are four screws that hold the filler panel in place, then
you can lift it upwards and off. You also need to unscrew the temp sensor
and feed it back through the filler by popping off the black hole cover (see
picture). Once the filler is off, remove the four screws that hold the
black metal bar in place (see picture)
The
task of installing a euro license plate on a W124 is simple compared to my W201
(which required you to switch the entire impact strip). For this car, all
we have to do is remove the license plate filler. After removing the
license plate, there are four screws that hold the filler panel in place, then
you can lift it upwards and off. You also need to unscrew the temp sensor
and feed it back through the filler by popping off the black hole cover (see
picture). Once the filler is off, remove the four screws that hold the
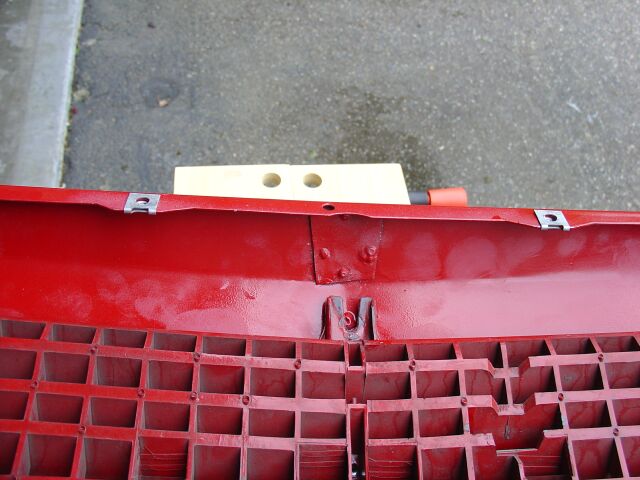
black metal bar in place (see picture)
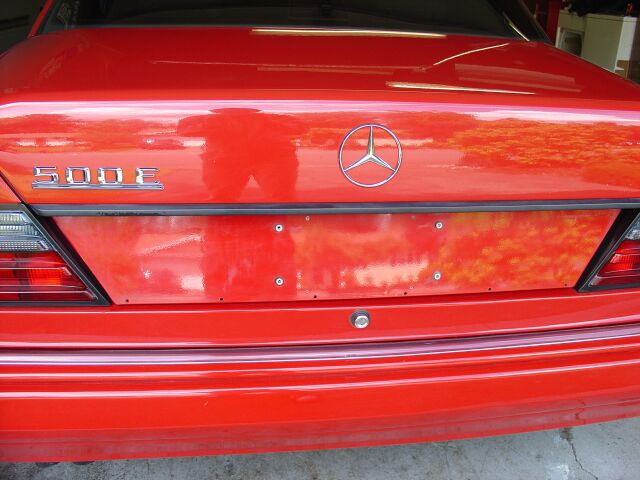
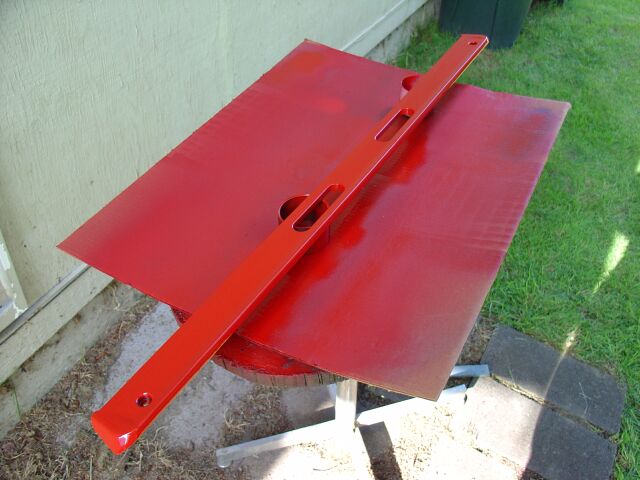
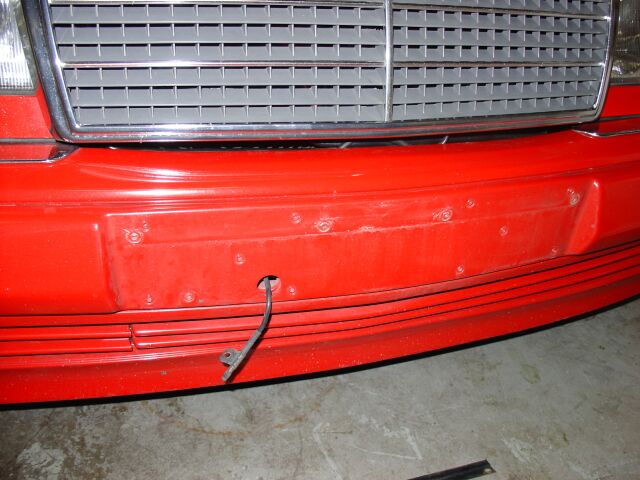 Once
the license plate filler is removed, this is what you see. The impact
strip recess has
the necessary holes for a euro plate holder already, so no drilling is needed. You can use
the screws that you removed from the black metal bar to secure your plate
holder. You will also have to determine where you want your temp sensor.
I used a zip tie and secured mine just inside the bumper below the license
plate.
Once
the license plate filler is removed, this is what you see. The impact
strip recess has
the necessary holes for a euro plate holder already, so no drilling is needed. You can use
the screws that you removed from the black metal bar to secure your plate
holder. You will also have to determine where you want your temp sensor.
I used a zip tie and secured mine just inside the bumper below the license
plate.
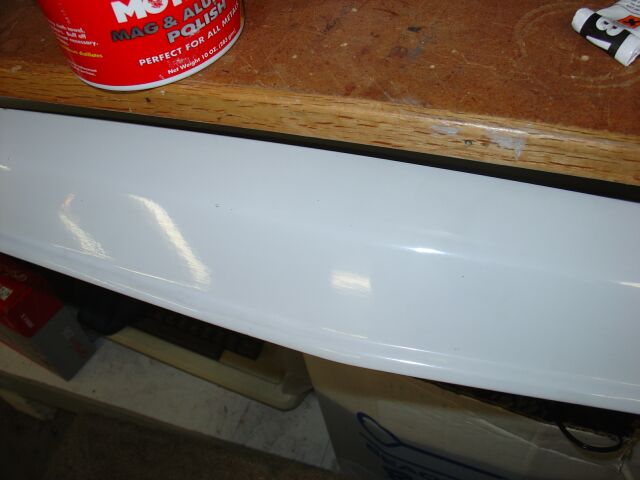
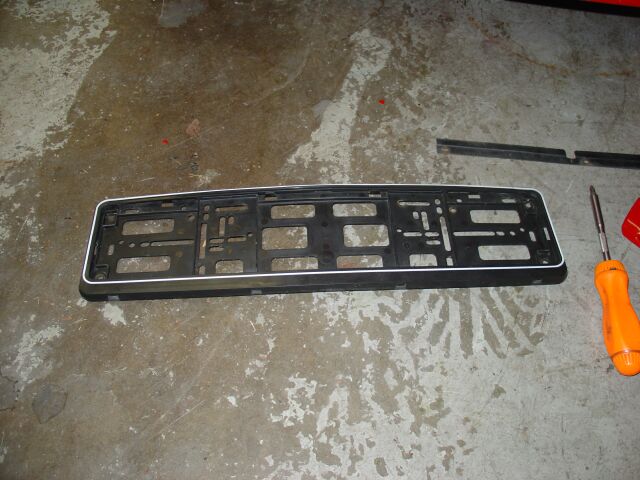 This
is what my euro plate holder looks like, it mounted right up to the existing
holes in the W124 impact strip, although I did have to enlarge several of the
holes just a little.
This
is what my euro plate holder looks like, it mounted right up to the existing
holes in the W124 impact strip, although I did have to enlarge several of the
holes just a little.
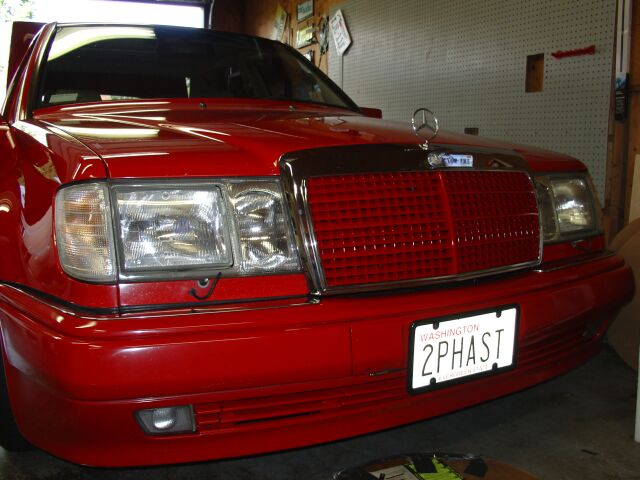
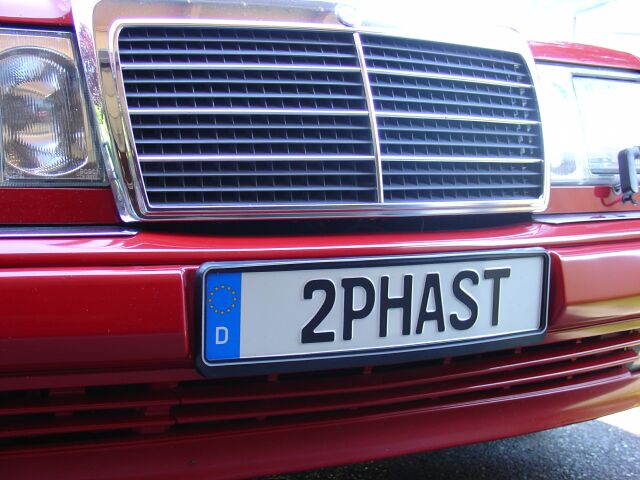 This
is the finished product. Keep in mind that in most states, using a license
plate issued by a foreign government is illegal, check you local laws before
removing your state issued front license plate.
This
is the finished product. Keep in mind that in most states, using a license
plate issued by a foreign government is illegal, check you local laws before
removing your state issued front license plate.
HID Projector Installation
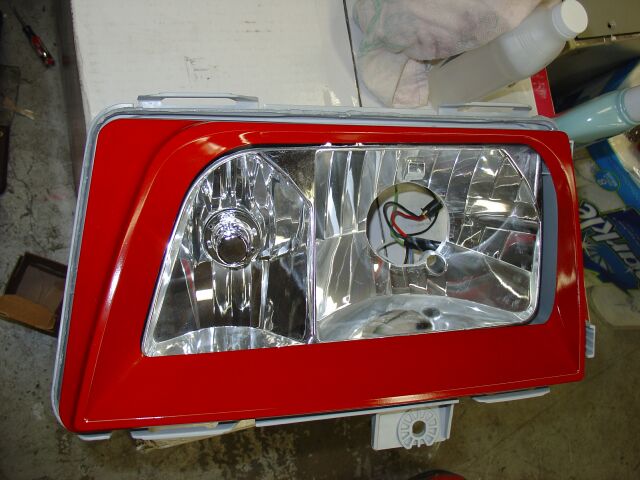
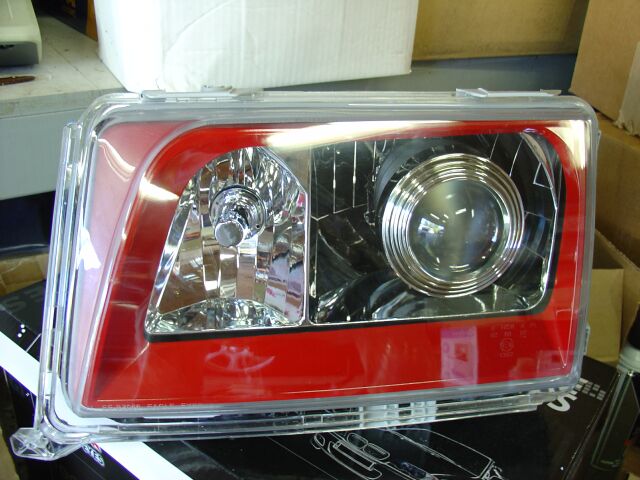
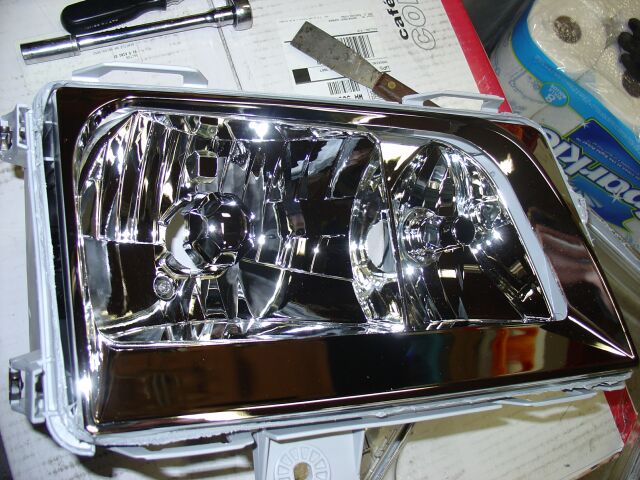 For
my HID projector retro, I needed either euro headlights with a modified glass
lens (removed fluting) or another headlight with a clear lens. There are
not many options and this is one of them, made in Taiwan and not the highest
quality, but the lenses are clear and will make a good base for the HID retro
project.
For
my HID projector retro, I needed either euro headlights with a modified glass
lens (removed fluting) or another headlight with a clear lens. There are
not many options and this is one of them, made in Taiwan and not the highest
quality, but the lenses are clear and will make a good base for the HID retro
project.
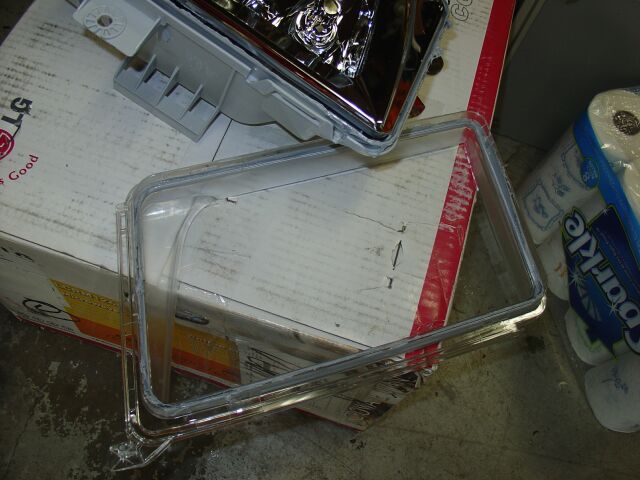 Of
course, the headlight lens is glued on, so to get the lenses off, you heat your
oven up to 400 degrees, turn it off and then place your headlight in for 10
minutes. This is sufficient to soften the glue so you can use a putty
knife or flat bladed screw driver to pry the lens off. Be careful though,
the glue is sticky and its easy to get this mess on your lens or the chrome
reflector.
Of
course, the headlight lens is glued on, so to get the lenses off, you heat your
oven up to 400 degrees, turn it off and then place your headlight in for 10
minutes. This is sufficient to soften the glue so you can use a putty
knife or flat bladed screw driver to pry the lens off. Be careful though,
the glue is sticky and its easy to get this mess on your lens or the chrome
reflector.
 The
rear of the headlight before disassembly.
The
rear of the headlight before disassembly.
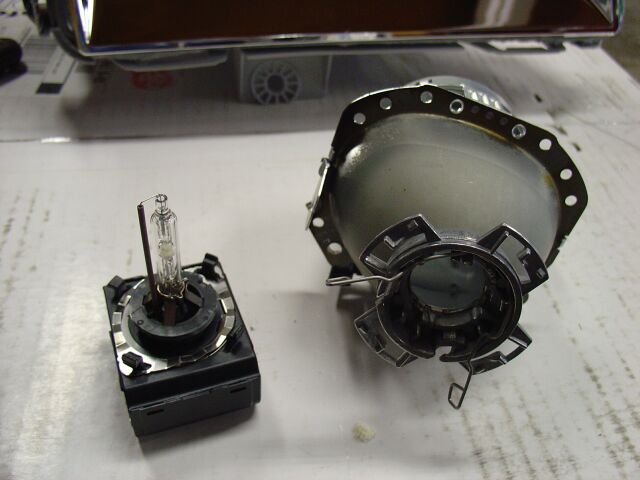
 I
managed to find a complete set of Mercedes Bi-Xenon projectors (projectors,
harness, ballast, igniter and burners) on Ebay for $175 which were in perfect
condition.
I
managed to find a complete set of Mercedes Bi-Xenon projectors (projectors,
harness, ballast, igniter and burners) on Ebay for $175 which were in perfect
condition.
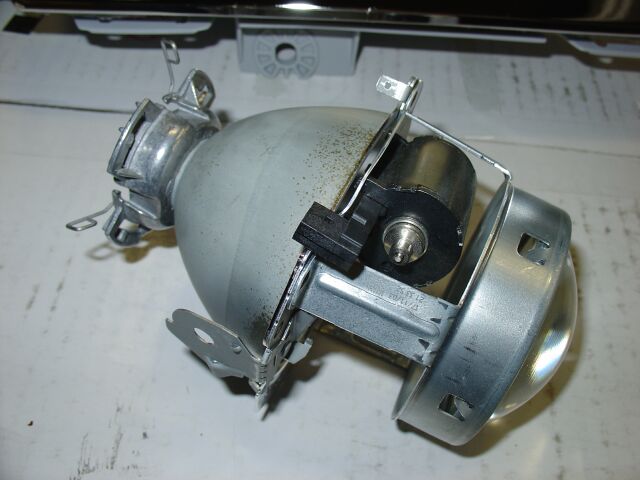
 The
projector with the burner/igniter removed.
The
projector with the burner/igniter removed.
 The
only item that did not come with these projectors was the bezel, so it was back
to Ebay where I found some compatible bezels for around $40.
The
only item that did not come with these projectors was the bezel, so it was back
to Ebay where I found some compatible bezels for around $40.
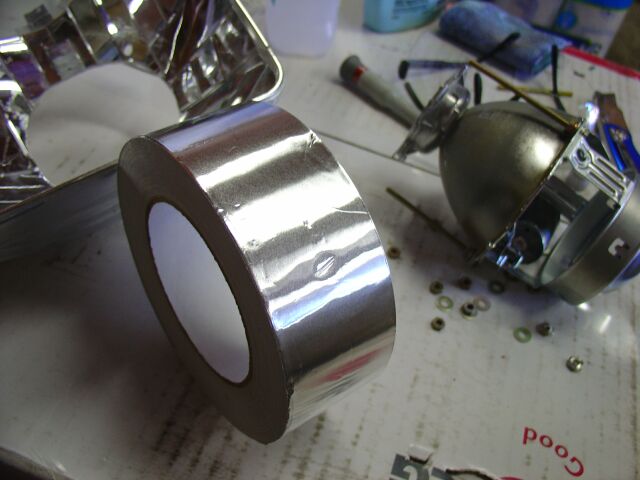 Since
the projector housings have openings in the sides, we have to cover these
otherwise light will leak out and hit the reflector inside the headlight and we
loose our ability to control the light dispersion. I used aluminum heater
duct tape to wrap my projectors, thus insuring that the only light coming out of
them is through the front lens.
Since
the projector housings have openings in the sides, we have to cover these
otherwise light will leak out and hit the reflector inside the headlight and we
loose our ability to control the light dispersion. I used aluminum heater
duct tape to wrap my projectors, thus insuring that the only light coming out of
them is through the front lens.
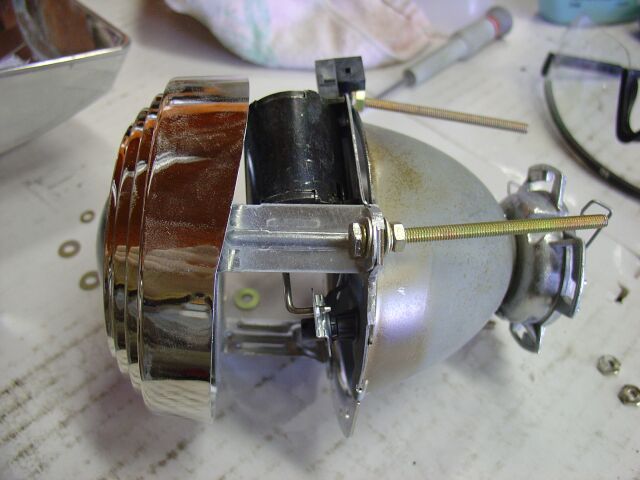
 This
is the projector wrapped with aluminum tape with the mounting screws in place,
these are long 3" screws with accompanying nuts, that allow me to firmly mount
the projector to the reflector base.
This
is the projector wrapped with aluminum tape with the mounting screws in place,
these are long 3" screws with accompanying nuts, that allow me to firmly mount
the projector to the reflector base.
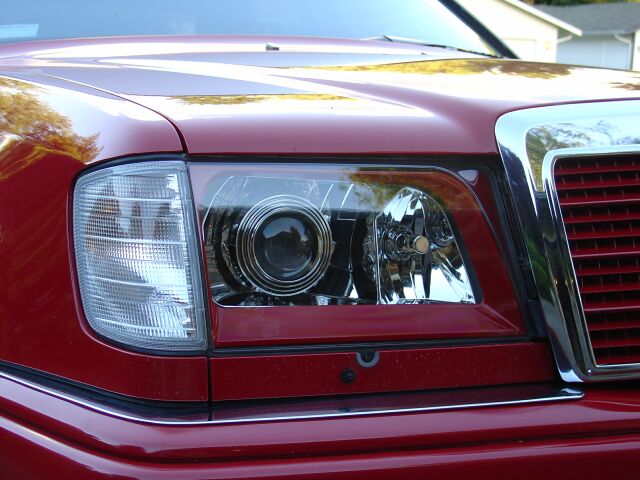
 To
achieve a unique look, I painted the chrome headlight housing trim body color
and left the internal reflectors chrome. I really like the unique look..
To
achieve a unique look, I painted the chrome headlight housing trim body color
and left the internal reflectors chrome. I really like the unique look..
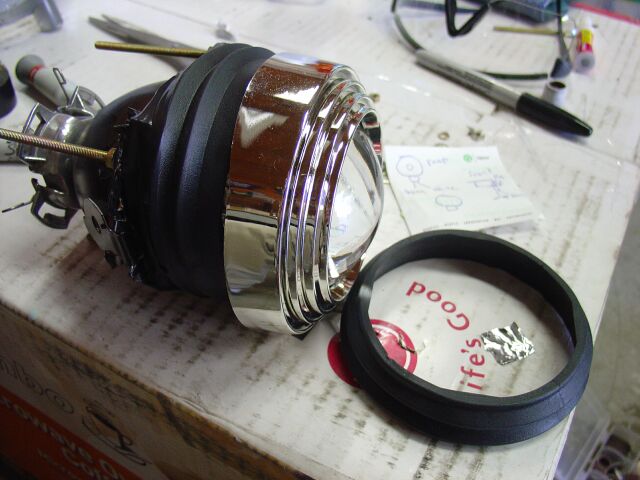 To
finish up the projectors, I had some 4" rubber material that I used in
conjunction with black electrical tape to finish up the projector before
mounting into the headlight..
To
finish up the projectors, I had some 4" rubber material that I used in
conjunction with black electrical tape to finish up the projector before
mounting into the headlight..
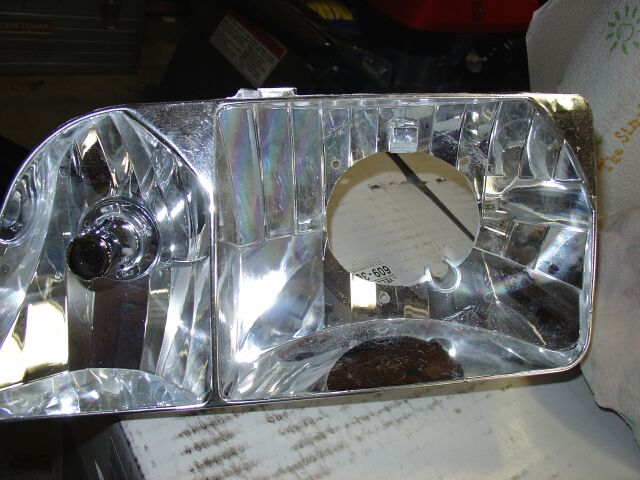 The
most labor intensive part of this project is cutting out the H4 mount and
enlarging it to accept the HID projector. A cordless Dremel with cutting
wheels and sanding wheels comes in handy for a project like this.
The
most labor intensive part of this project is cutting out the H4 mount and
enlarging it to accept the HID projector. A cordless Dremel with cutting
wheels and sanding wheels comes in handy for a project like this.
 Were
getting close, the projectors are finally mounted into the reflector housing and
the headlights are almost ready to be reassembled.
Were
getting close, the projectors are finally mounted into the reflector housing and
the headlights are almost ready to be reassembled.
 You
can see how much of the projector protrudes from the rear of the reflector.
I covered up the excess space with aluminum tape. I also applied some
lock-tight to all the nuts, just to make sure nothing comes apart. 'NOTE'
THE PROJECTOR SHIELD SHOULD BE ON THE BOTTOM, NOT THE TOP, PAY ATTENTION TO THE
SHIELD ORIENTATION BEFORE YOU MOUNT YOUR PROJECTORS!
You
can see how much of the projector protrudes from the rear of the reflector.
I covered up the excess space with aluminum tape. I also applied some
lock-tight to all the nuts, just to make sure nothing comes apart. 'NOTE'
THE PROJECTOR SHIELD SHOULD BE ON THE BOTTOM, NOT THE TOP, PAY ATTENTION TO THE
SHIELD ORIENTATION BEFORE YOU MOUNT YOUR PROJECTORS!
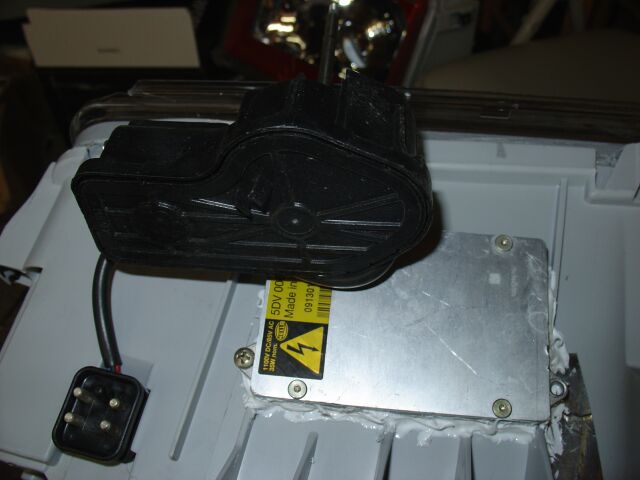
 The
original Mercedes HID setup has a low profile ballast that is designed to be
mounted to the underside of the headlight, so that is how I mounted them on my
headlights. Of course, plenty of silicone was used to make sure that there
was no way for any water to seep into the headlight assemblies
The
original Mercedes HID setup has a low profile ballast that is designed to be
mounted to the underside of the headlight, so that is how I mounted them on my
headlights. Of course, plenty of silicone was used to make sure that there
was no way for any water to seep into the headlight assemblies
 The
underside of the headlight with the ballast mounted. These are low profile
ballasts and give enough clearance for your headlight wiper motors.
The
underside of the headlight with the ballast mounted. These are low profile
ballasts and give enough clearance for your headlight wiper motors.
 This
is what newly assembled headlight with the igniter in place and everything wired
up.
This
is what newly assembled headlight with the igniter in place and everything wired
up.
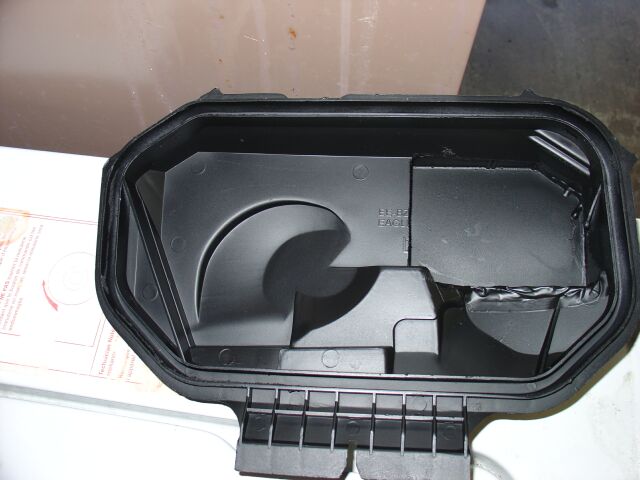
 Of
course, with the projector and igniter in the headlight, the rear headlight door
no longer closes, so it was up to the handy Dremel again to cut me an opening!
Of
course, with the projector and igniter in the headlight, the rear headlight door
no longer closes, so it was up to the handy Dremel again to cut me an opening!
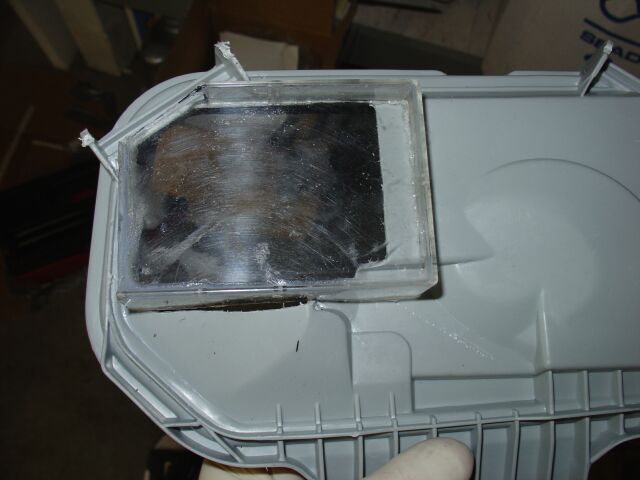 To
provide enough clearance for the igniter, I used a plastic tray from one of my
parts bid, a little trimming with the Dremel and it was a good fit.
To
provide enough clearance for the igniter, I used a plastic tray from one of my
parts bid, a little trimming with the Dremel and it was a good fit.
 I
learned many years ago not to waste time with garbage glue, so ever since the
early 80's, when I need a serious glue, I always turn to JB Weld, whether its
metal or plastic, this stuff is by far the best for the job. With the
plastic cover firmly in place and all little holes sealed, it was ready for
paint.
I
learned many years ago not to waste time with garbage glue, so ever since the
early 80's, when I need a serious glue, I always turn to JB Weld, whether its
metal or plastic, this stuff is by far the best for the job. With the
plastic cover firmly in place and all little holes sealed, it was ready for
paint.
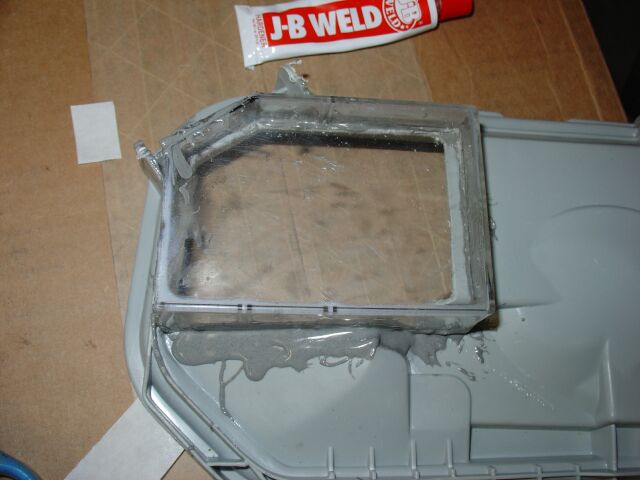
 I
initially painted these grey, but with the JB Weld it didn't look so hot, so to
hid the handy work a little, I painted the covers with a flat Kryon black.
I
initially painted these grey, but with the JB Weld it didn't look so hot, so to
hid the handy work a little, I painted the covers with a flat Kryon black.
 Here
is the rear of the cover. I needed about 1" of clearance for the igniter
and that's about what I have.
Here
is the rear of the cover. I needed about 1" of clearance for the igniter
and that's about what I have.
 The
finished headlight with the cover installed and waiting to be installed into the
500E
The
finished headlight with the cover installed and waiting to be installed into the
500E
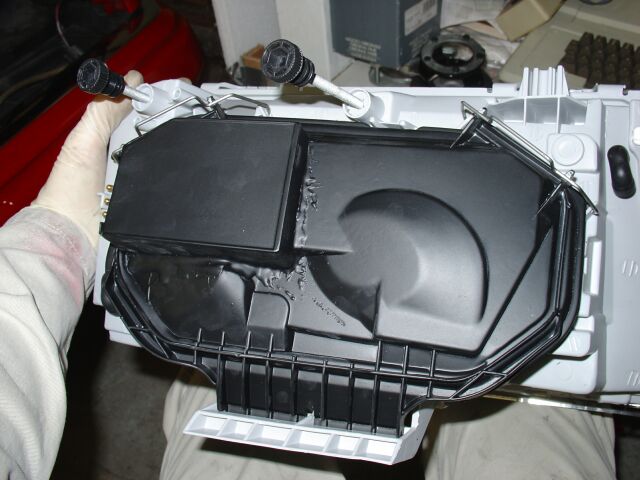
 We
start by removing the side marker and wiper (covered in the section about
painting trim)
We
start by removing the side marker and wiper (covered in the section about
painting trim)
 The
wiper trim panel needs to be removed, there are two nuts, one shown here and one
that is only visible when the side market light is removed.
The
wiper trim panel needs to be removed, there are two nuts, one shown here and one
that is only visible when the side market light is removed.
 The
last screw is on the side by the fog light. On the passenger side, this
one is a real pain to get out as it is right new to the aux fans. I used a
small open end wrench to get it out, be patient.
The
last screw is on the side by the fog light. On the passenger side, this
one is a real pain to get out as it is right new to the aux fans. I used a
small open end wrench to get it out, be patient.
 Once
the headlight is out, its time to do some cleanup
Once
the headlight is out, its time to do some cleanup
 You
can see that the factory headlight wiper motor fits fine and has not problems
clearing the HID ballast. This motor is on only for testing of the
clearance, I did not have the correct wiper arms or wiper trim panels, so at a
later date, the headlights will be removed and these installed. Wiper trim
panels and wiper arms from a 94-95 W124 will be needed.
You
can see that the factory headlight wiper motor fits fine and has not problems
clearing the HID ballast. This motor is on only for testing of the
clearance, I did not have the correct wiper arms or wiper trim panels, so at a
later date, the headlights will be removed and these installed. Wiper trim
panels and wiper arms from a 94-95 W124 will be needed.
 You
need euro socket plugs for these headlights, as the headlights don't ship with
any. The plugs and connectors can be purchased from the dealer or on Ebay.
I purchased mine from Ebay a few months before I started this project.
You
need euro socket plugs for these headlights, as the headlights don't ship with
any. The plugs and connectors can be purchased from the dealer or on Ebay.
I purchased mine from Ebay a few months before I started this project.
 Its
best to use a VOM to figure out which wire goes in which socket. Before I
reassembled the headlights, I drew out a diagram that detailed which pin was the
fog, low beam, high beam and city light.
Its
best to use a VOM to figure out which wire goes in which socket. Before I
reassembled the headlights, I drew out a diagram that detailed which pin was the
fog, low beam, high beam and city light.
 For
the city light, I tapped into the side marker light
For
the city light, I tapped into the side marker light
 Time
to test fit everything, get it bolted up and aligned. I also cleaned up
the rubber trim while I was at it.
Time
to test fit everything, get it bolted up and aligned. I also cleaned up
the rubber trim while I was at it.
 The
back of my modified cover, painted black so as to conceal my handy work.
The
back of my modified cover, painted black so as to conceal my handy work.
 The
finished product! It took three weekends of work and re-work to complete
this project, as it was my first HID projector retro-fit. The look is
great and the light is incredible, about 1000 times better than the HID retro I
did on my W201. This is definitely the only way to add HID's to a non HID
equipped vehicle.
The
finished product! It took three weekends of work and re-work to complete
this project, as it was my first HID projector retro-fit. The look is
great and the light is incredible, about 1000 times better than the HID retro I
did on my W201. This is definitely the only way to add HID's to a non HID
equipped vehicle.
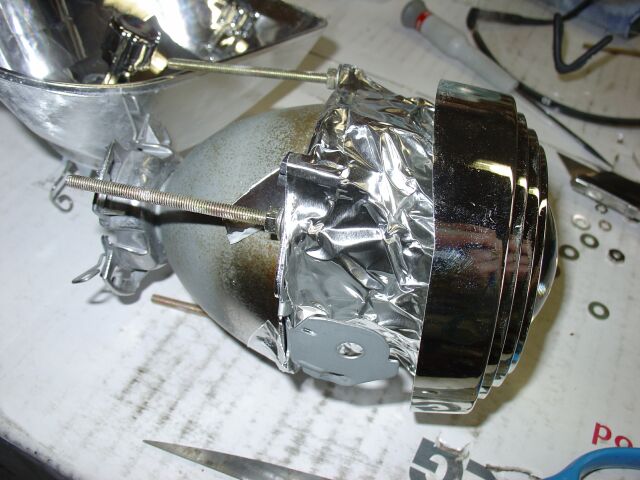
 A
close up of the finished product. The only downside to the project is
getting the air intake covers in place. The adjustment shafts are so long
that they interfere with the covers, this is a problem localized to the
400E/500E only though and you can work around it by inserting one end of the
cover, bending the cover inward and then inserting the other end. Hard to
explain, but easy enough to do.
A
close up of the finished product. The only downside to the project is
getting the air intake covers in place. The adjustment shafts are so long
that they interfere with the covers, this is a problem localized to the
400E/500E only though and you can work around it by inserting one end of the
cover, bending the cover inward and then inserting the other end. Hard to
explain, but easy enough to do.
 Another
picture with crystal clear side markets vs. the white Bosch markers as seen the
previous pictures.
Another
picture with crystal clear side markets vs. the white Bosch markers as seen the
previous pictures.
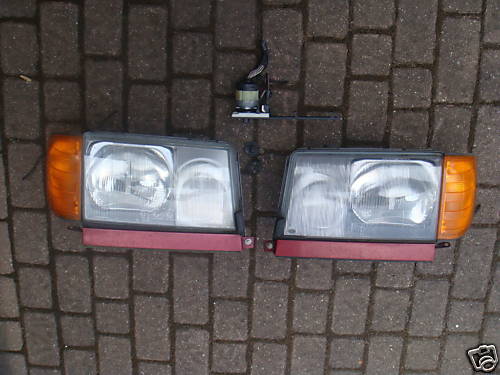 Although
the HID projector headlight project was a success, I never really liked the
look of the aftermarket headlights. Eventually, I found a good deal on
a set of pre-face lift Hella headlights which I had shipped over from
Germany, complete as pictured here. The package included the dark
orange euro markers, headlight vacuum switch, headlight switch, headlight
switch trim, lower panels, all screws, euro headlight plugs, bulbs etc.
A very good buy for $250 shipped!
Although
the HID projector headlight project was a success, I never really liked the
look of the aftermarket headlights. Eventually, I found a good deal on
a set of pre-face lift Hella headlights which I had shipped over from
Germany, complete as pictured here. The package included the dark
orange euro markers, headlight vacuum switch, headlight switch, headlight
switch trim, lower panels, all screws, euro headlight plugs, bulbs etc.
A very good buy for $250 shipped!
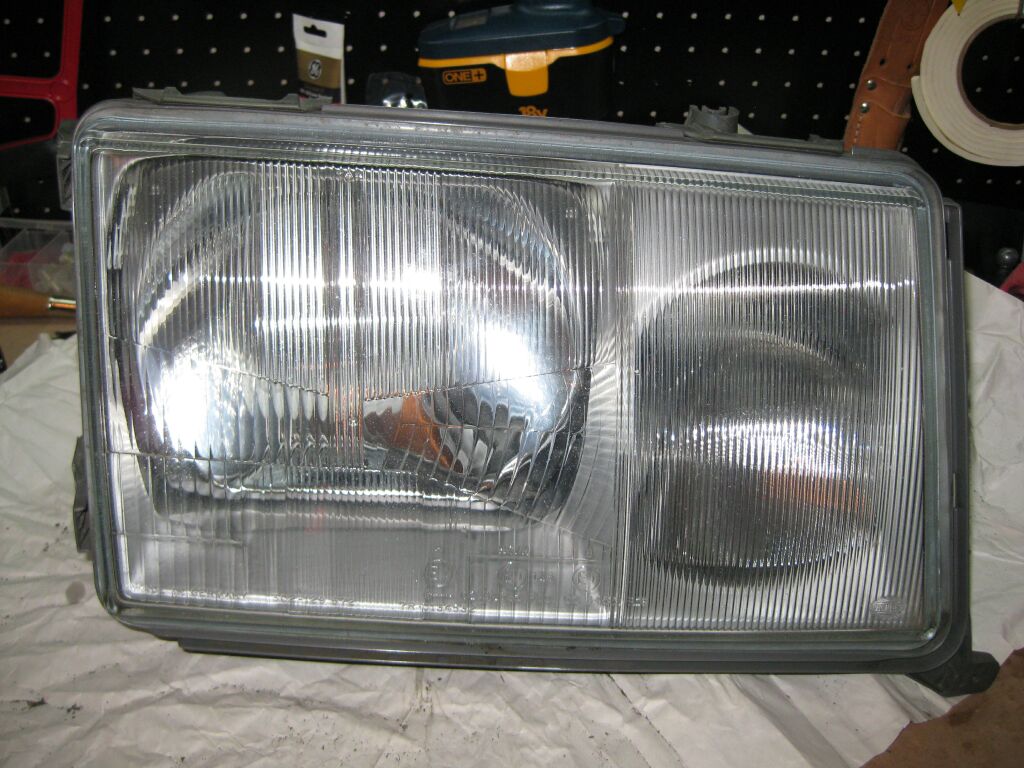 The
European headlights use a glass lense and the fluting is also different to
spread more light onto the road. European headlights also use a more
efficient bulb (H4). This particular set, although dirty, is in
excellent condition.
The
European headlights use a glass lense and the fluting is also different to
spread more light onto the road. European headlights also use a more
efficient bulb (H4). This particular set, although dirty, is in
excellent condition.
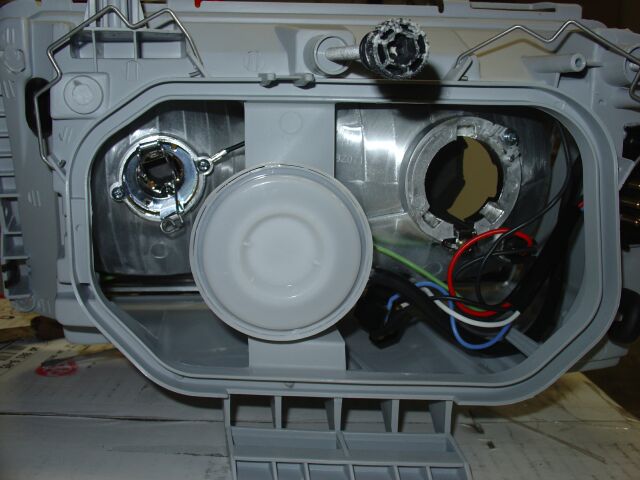
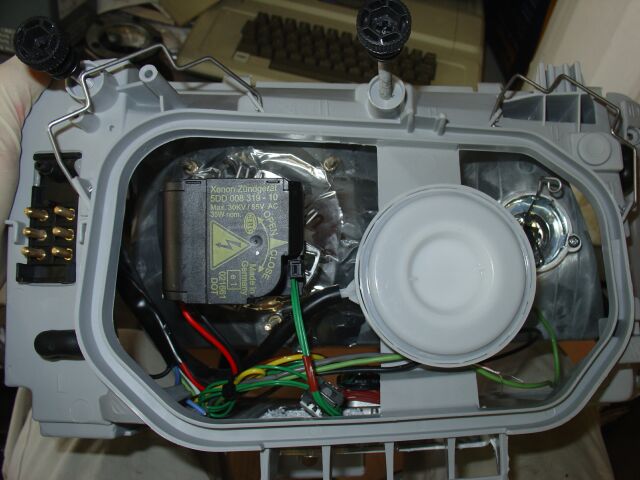
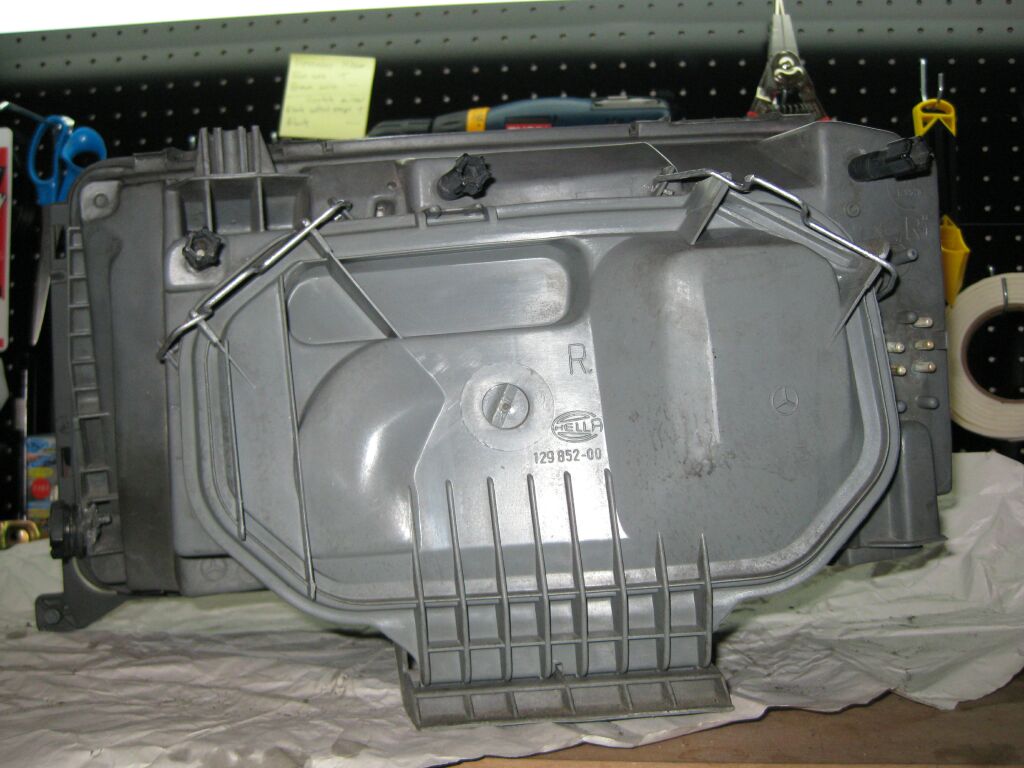 The
backside of the headlight, nothing special here, all the parts are in very
good working condition and all the adjusters work as they should.
The
backside of the headlight, nothing special here, all the parts are in very
good working condition and all the adjusters work as they should.
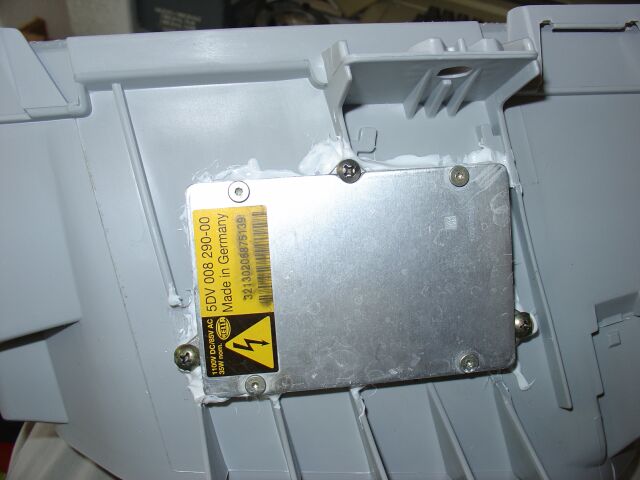
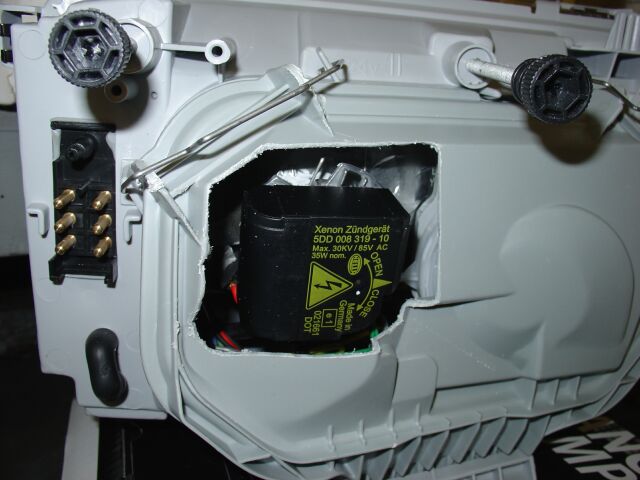
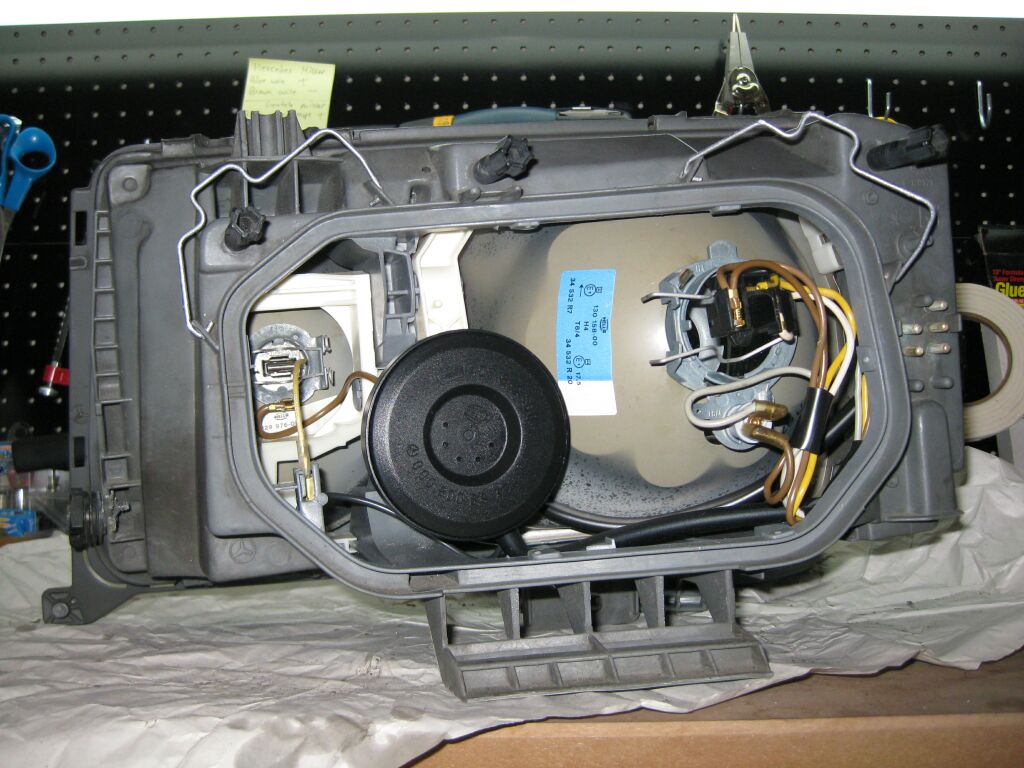 The
European headlights also have vacuum adjusters inside of them, which allows
you to adjust the headlight level from the inside of the automobile.
US spec Mercedes do not have this option. The vacuum adjuster module
is shown here, it is the round black module.
The
European headlights also have vacuum adjusters inside of them, which allows
you to adjust the headlight level from the inside of the automobile.
US spec Mercedes do not have this option. The vacuum adjuster module
is shown here, it is the round black module.
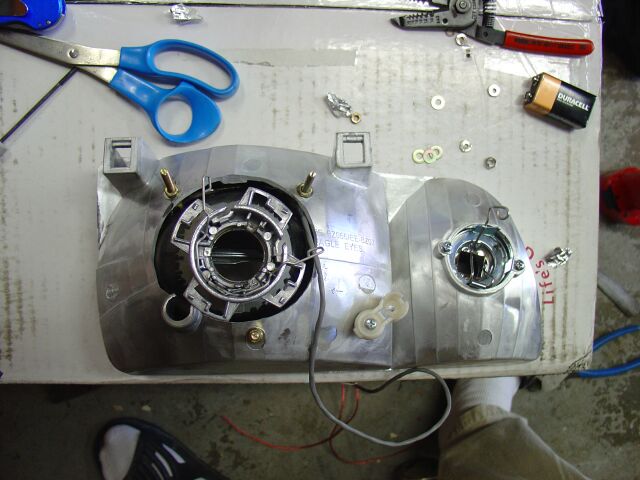
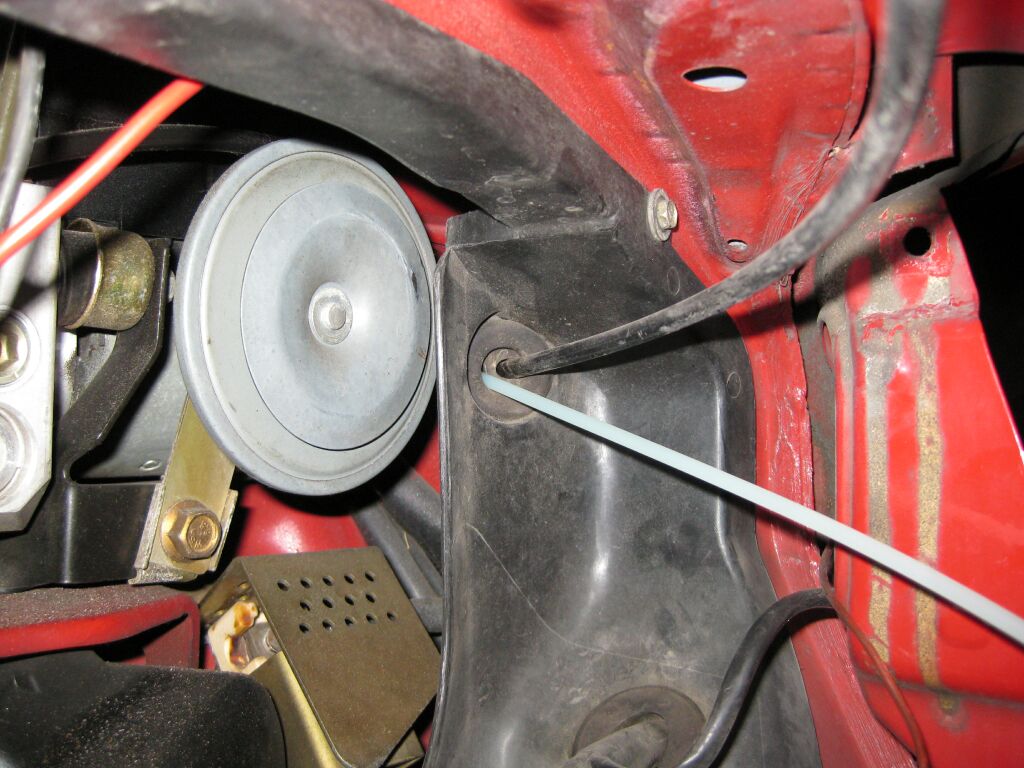 Since
I have covered headlight installs previously, I am not going to duplicate my
efforts, so the rest of my pictures will cover the installation of the
European vacuum adjusters and associated parts. My package included
most every thing I needed, but I did need to purchase some vacuum line, a
couple of T's and some rubber vacuum line and a rubber T. This picture
shows how I routed the hard vacuum line on the drivers side through a
existing grommit.
Since
I have covered headlight installs previously, I am not going to duplicate my
efforts, so the rest of my pictures will cover the installation of the
European vacuum adjusters and associated parts. My package included
most every thing I needed, but I did need to purchase some vacuum line, a
couple of T's and some rubber vacuum line and a rubber T. This picture
shows how I routed the hard vacuum line on the drivers side through a
existing grommit.
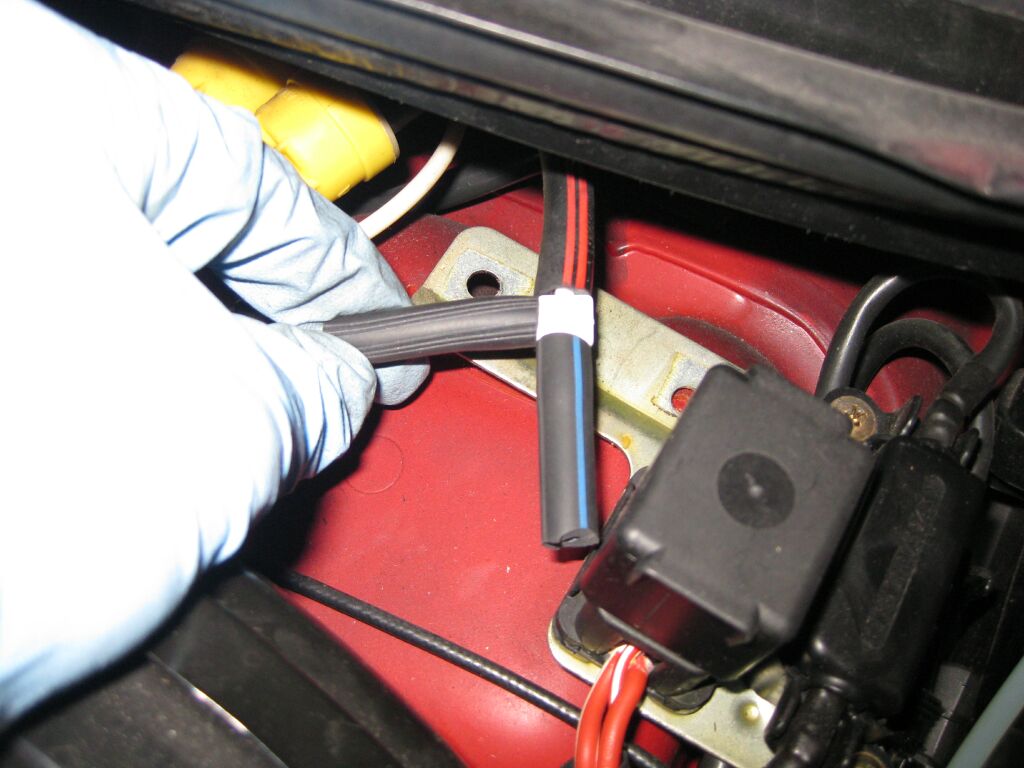
 This
picture is also of the drivers side showing the routing of the hard vacuum
line up along the factory wire harness and through existing grommits.
This
picture is also of the drivers side showing the routing of the hard vacuum
line up along the factory wire harness and through existing grommits.
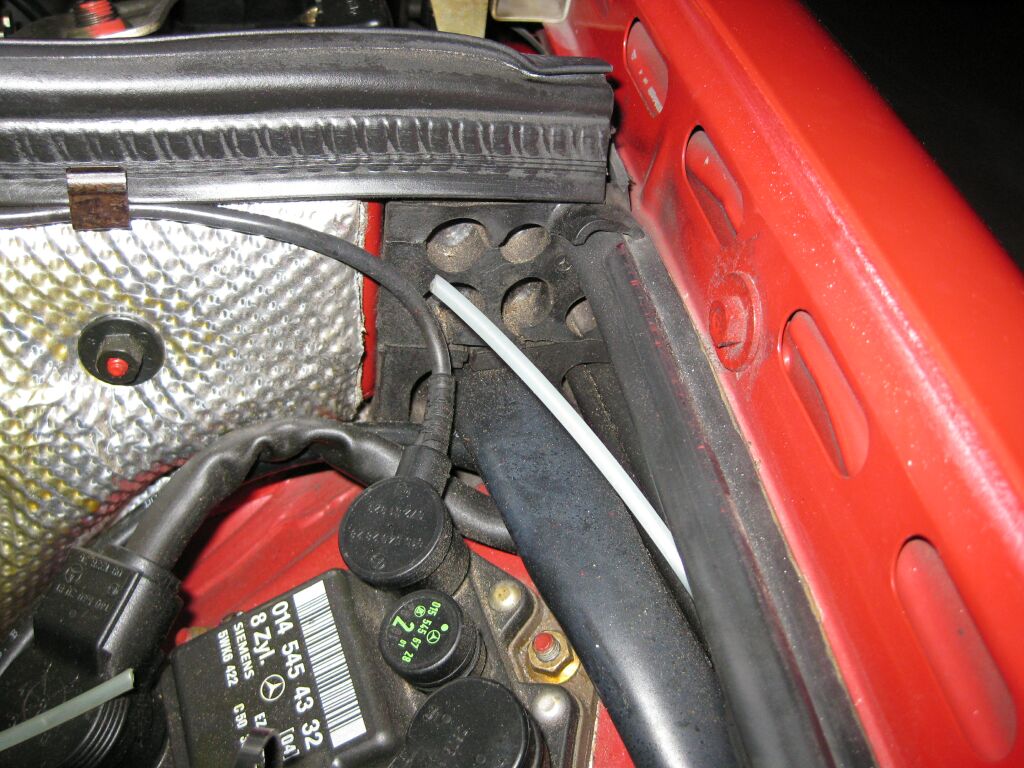 Another
picture showing the drivers side and the routing of the vacuum line through
existing grommits
Another
picture showing the drivers side and the routing of the vacuum line through
existing grommits
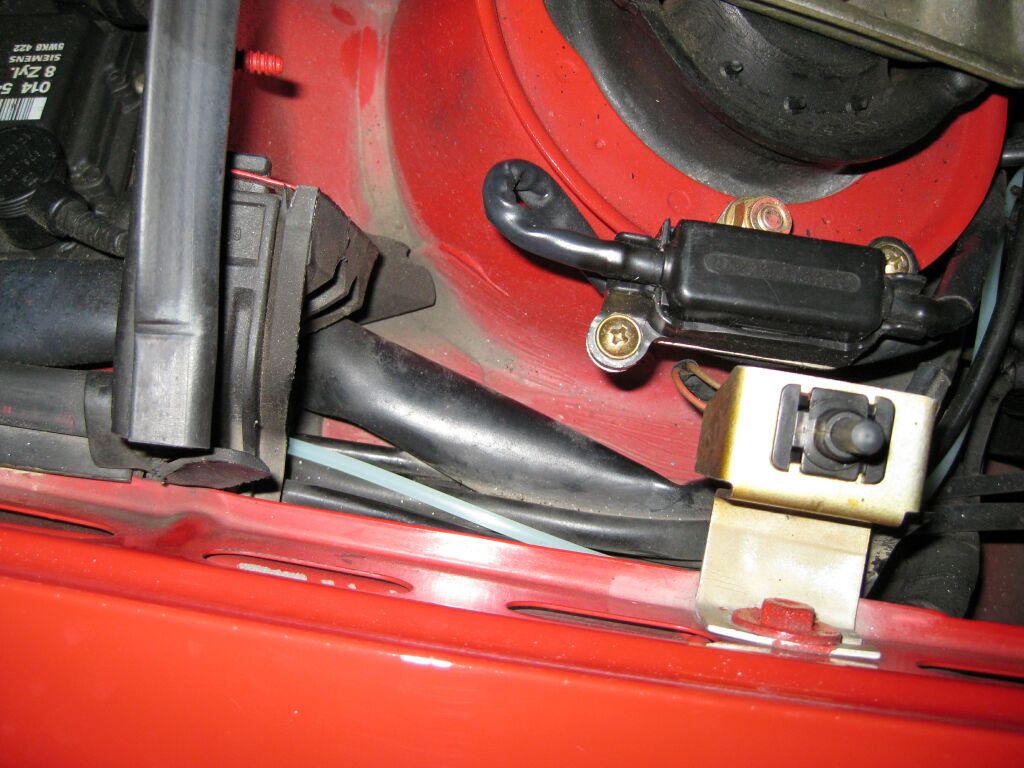
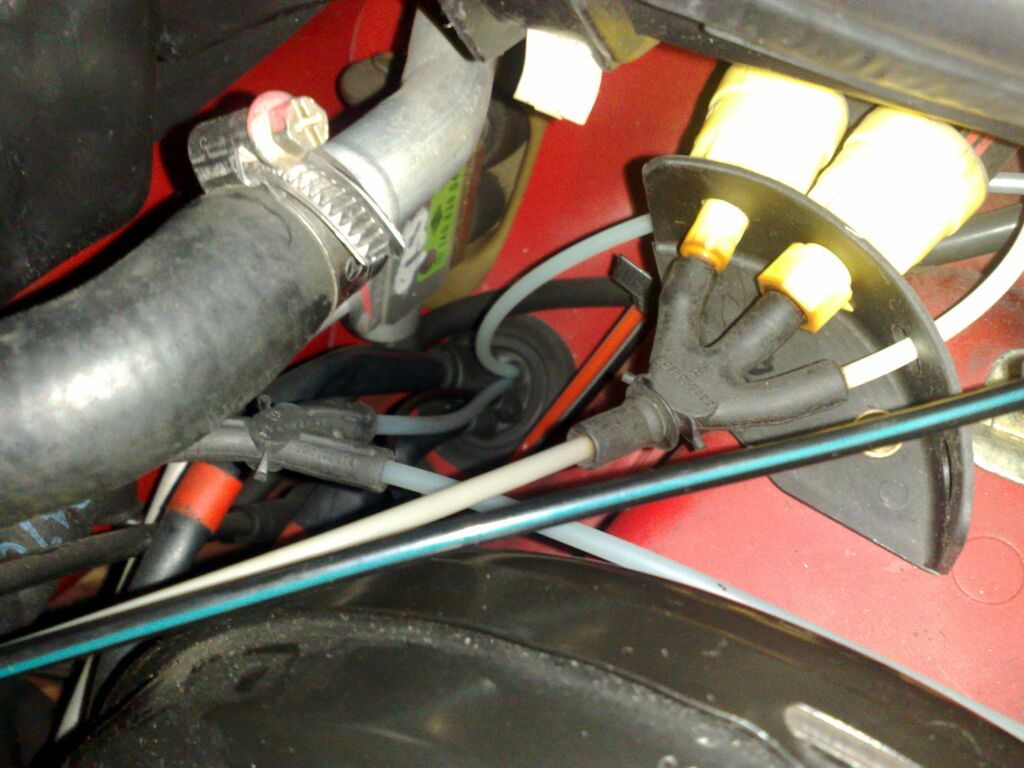
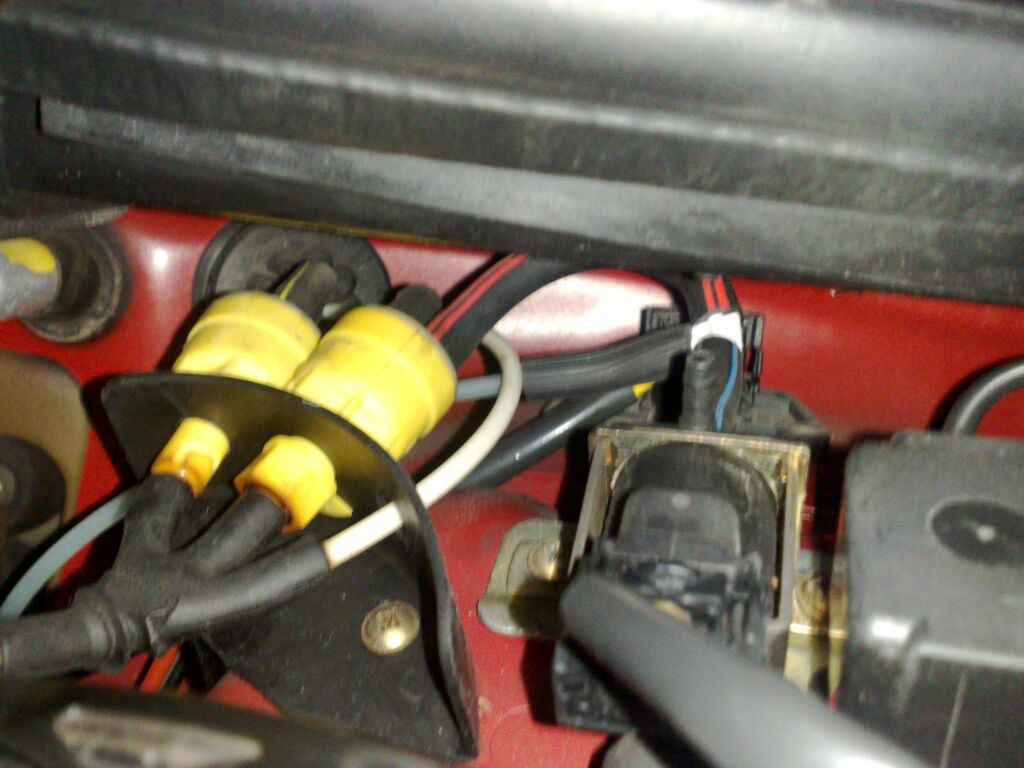
 This
is the location where I will pull vacuum. The two yellow items in the
picture are flow-back valves. Once pressurized with vacuum, it keeps
the lines pressurized when the vehicle is turned off. I will be
tapping into one of these AFTER the valve, that way my headlights will
maintain vacuum when the vehicle is turned off.
This
is the location where I will pull vacuum. The two yellow items in the
picture are flow-back valves. Once pressurized with vacuum, it keeps
the lines pressurized when the vehicle is turned off. I will be
tapping into one of these AFTER the valve, that way my headlights will
maintain vacuum when the vehicle is turned off.
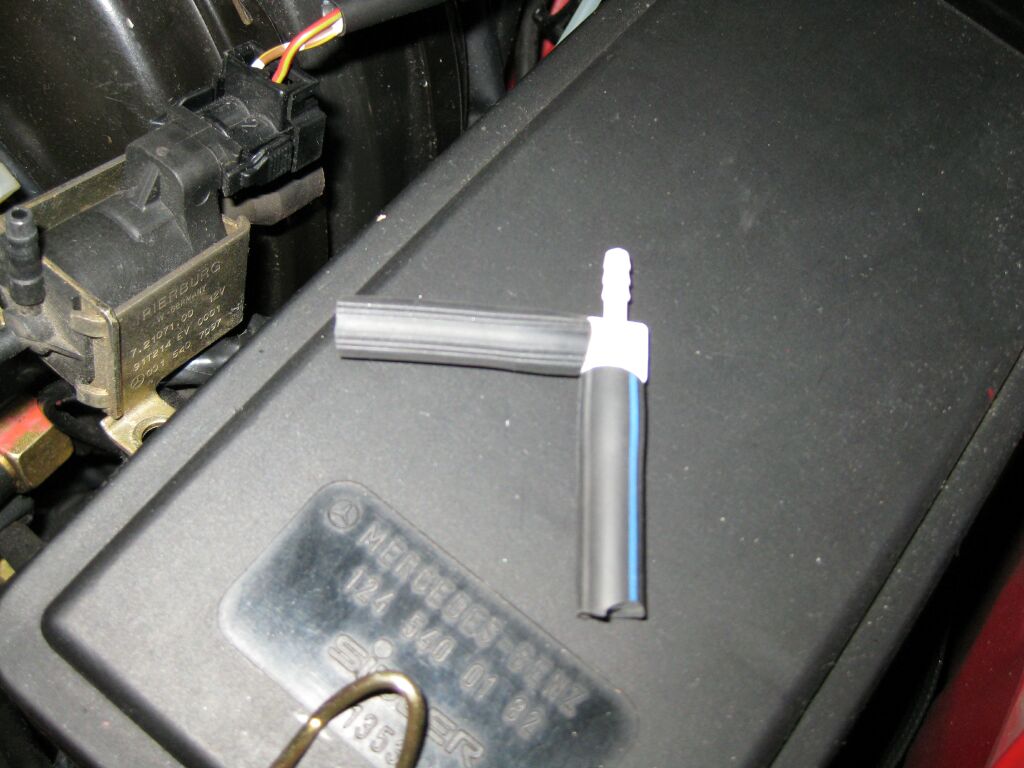 To
tap into a existing vacuum line, I made a T, using a plastic T and a couple
of pieces of rubber vacuum line.
To
tap into a existing vacuum line, I made a T, using a plastic T and a couple
of pieces of rubber vacuum line.
 This
is the T connected to the 2nd yellow flow-back valve.
This
is the T connected to the 2nd yellow flow-back valve.
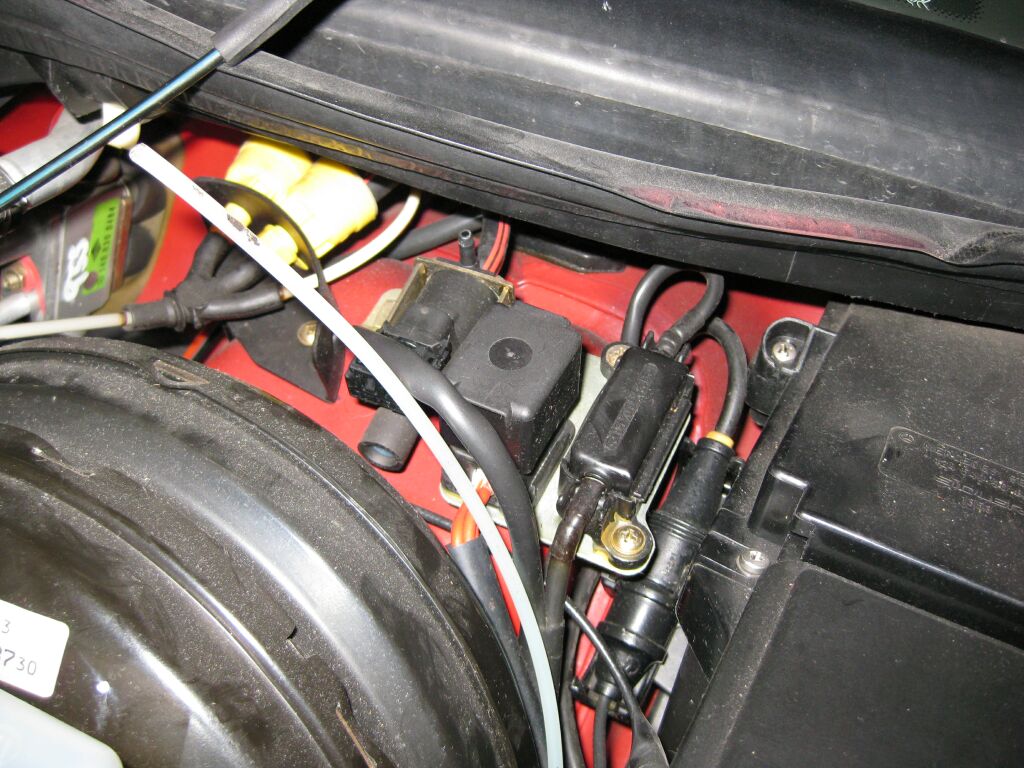
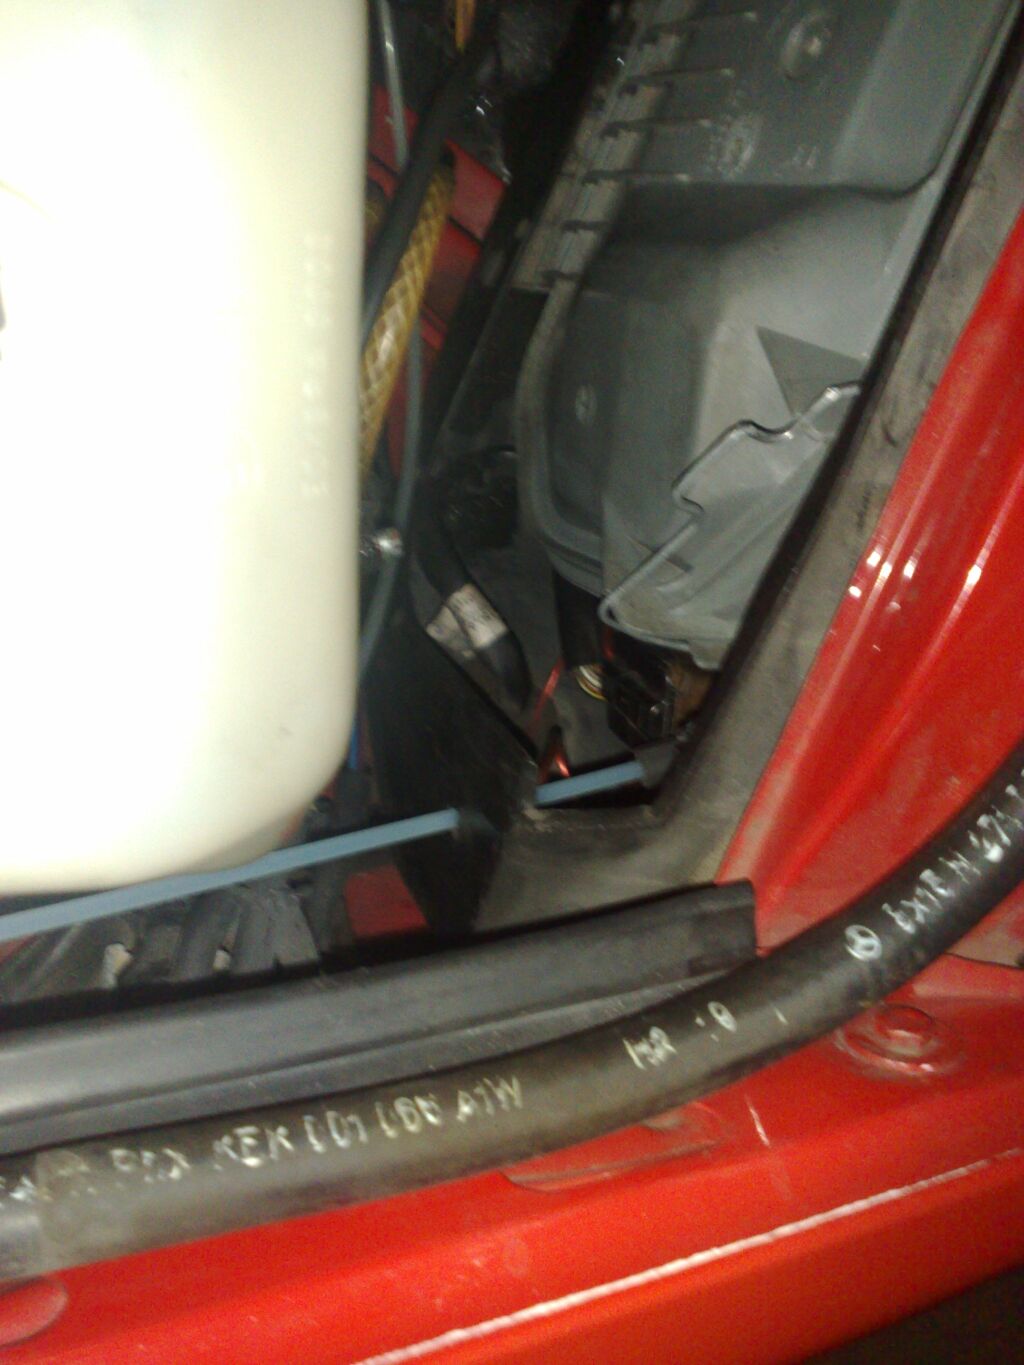 Before
I got too far with the vacuum taps, I had to run a hard vacuum line from the
passenger side headlight. Since the 500e headlights sit in sealed
buckets (part of the air intake system) I had to drill one hole to route the
vacuum line into the bucket. To get the drill into that space, I
removed the washer tank.
Before
I got too far with the vacuum taps, I had to run a hard vacuum line from the
passenger side headlight. Since the 500e headlights sit in sealed
buckets (part of the air intake system) I had to drill one hole to route the
vacuum line into the bucket. To get the drill into that space, I
removed the washer tank.
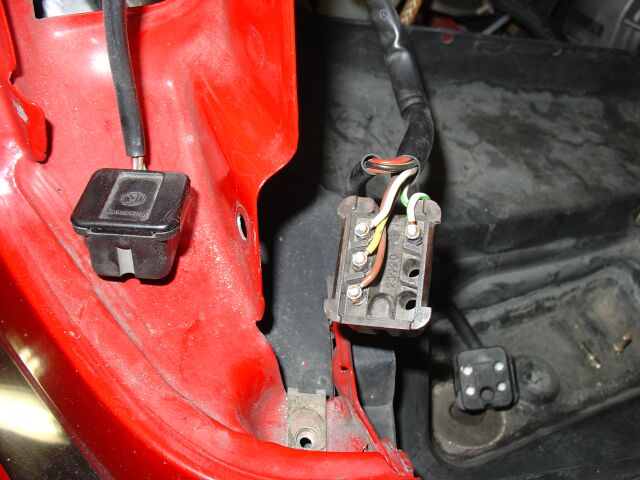
 For
the interior vacuum control switch, I needed to route two hard lines into
the cabin. As you can see here, I used the same grommet where I routed
coax for my FGS module.
For
the interior vacuum control switch, I needed to route two hard lines into
the cabin. As you can see here, I used the same grommet where I routed
coax for my FGS module.
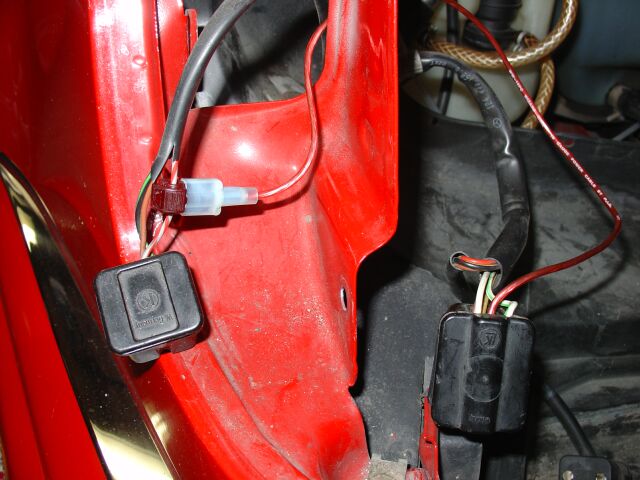
 Here
you see my T in place and connected to my main vacuum line (for the interior
switch) and also connected to whatever this particular module happens to be.
Here
you see my T in place and connected to my main vacuum line (for the interior
switch) and also connected to whatever this particular module happens to be.
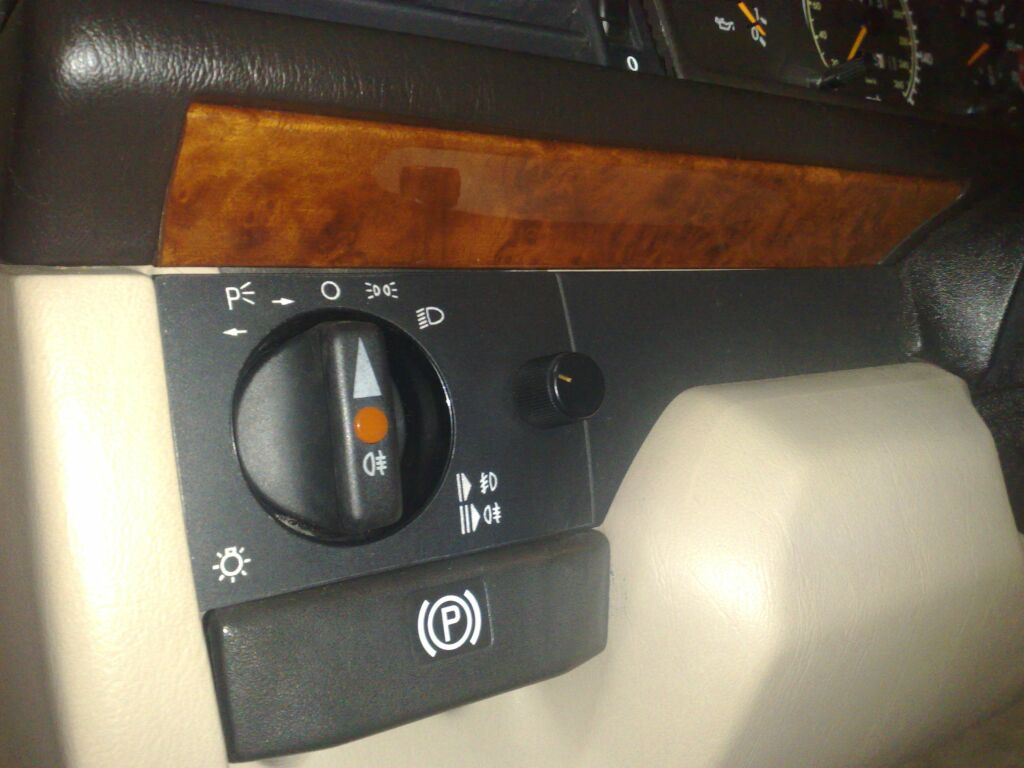 This
is the US headlight trim panel. I used the vacant space next to the
headlight switch for my Basslink control knob, which I now need to relocate.
This
is the US headlight trim panel. I used the vacant space next to the
headlight switch for my Basslink control knob, which I now need to relocate.
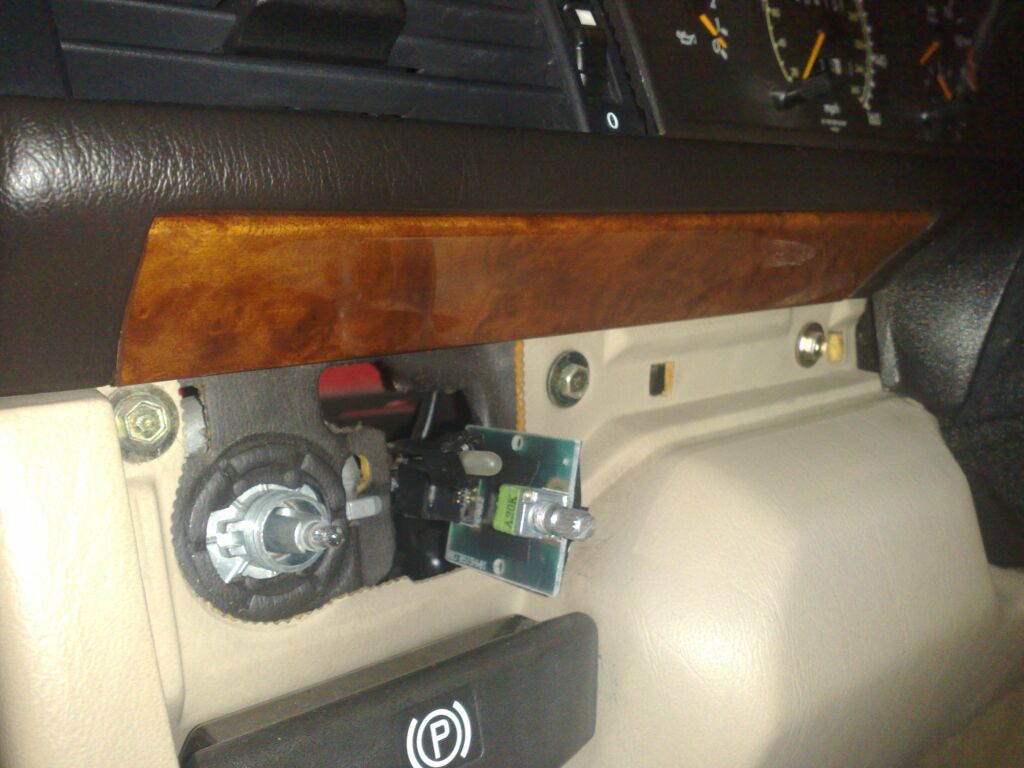 The
headlight knob pulls off and then there is a nut that needs to be removed.
Needle nose pliers work well. You can then remove the trim panel.
My Basslink circuit board occupies the vacuum switch space, so the Basslink
control will be relocated to under the dash.
The
headlight knob pulls off and then there is a nut that needs to be removed.
Needle nose pliers work well. You can then remove the trim panel.
My Basslink circuit board occupies the vacuum switch space, so the Basslink
control will be relocated to under the dash.
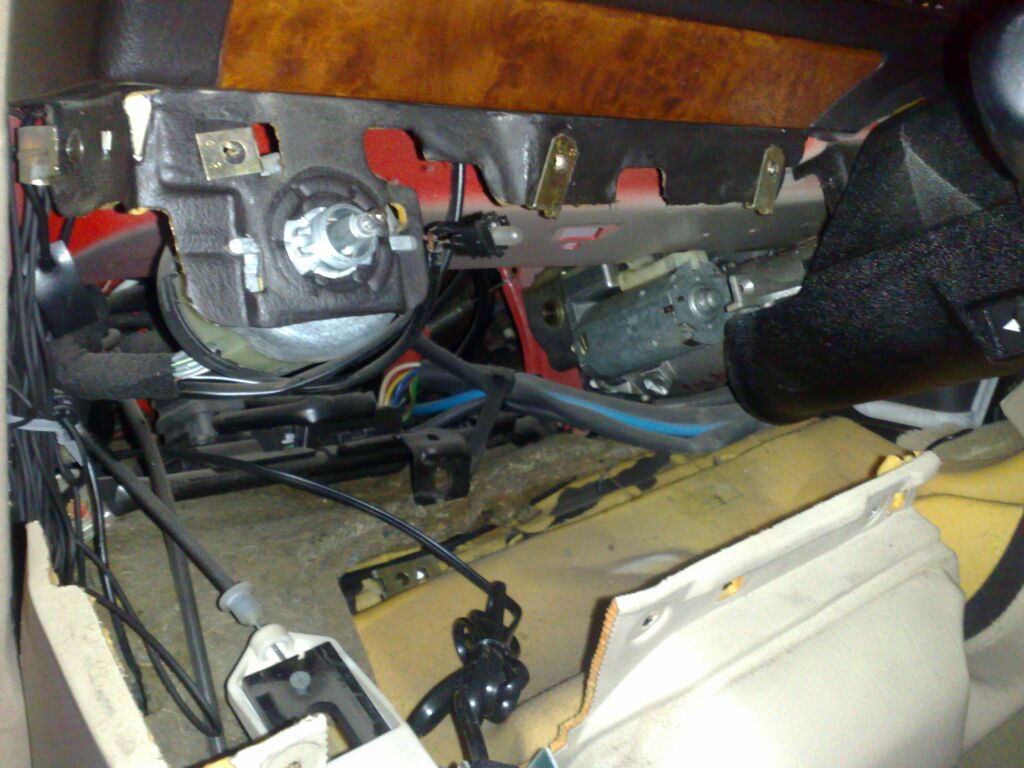 Since
the vacuum line for the switch was routed through the firewall, I dropped
the knee bolster so I could more easily pull the line up to the switch
location. I used a 2 foot grabber tool, (normally used to pick up
screws when you drop them in the engine bay) to reach up to the vacuum line
and pull it forward.
Since
the vacuum line for the switch was routed through the firewall, I dropped
the knee bolster so I could more easily pull the line up to the switch
location. I used a 2 foot grabber tool, (normally used to pick up
screws when you drop them in the engine bay) to reach up to the vacuum line
and pull it forward.
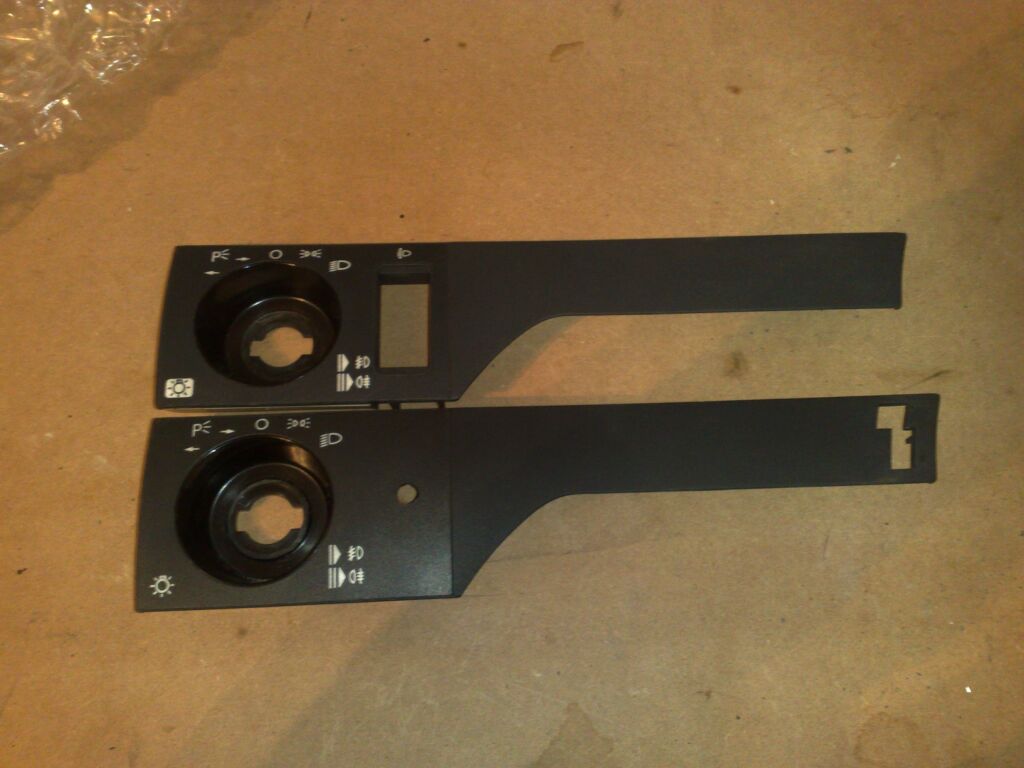
The European headlight switch panel didn't have the notch at the far end like the original trim panel did. The notch is used to attach a beauty ring that goes over the steering column.
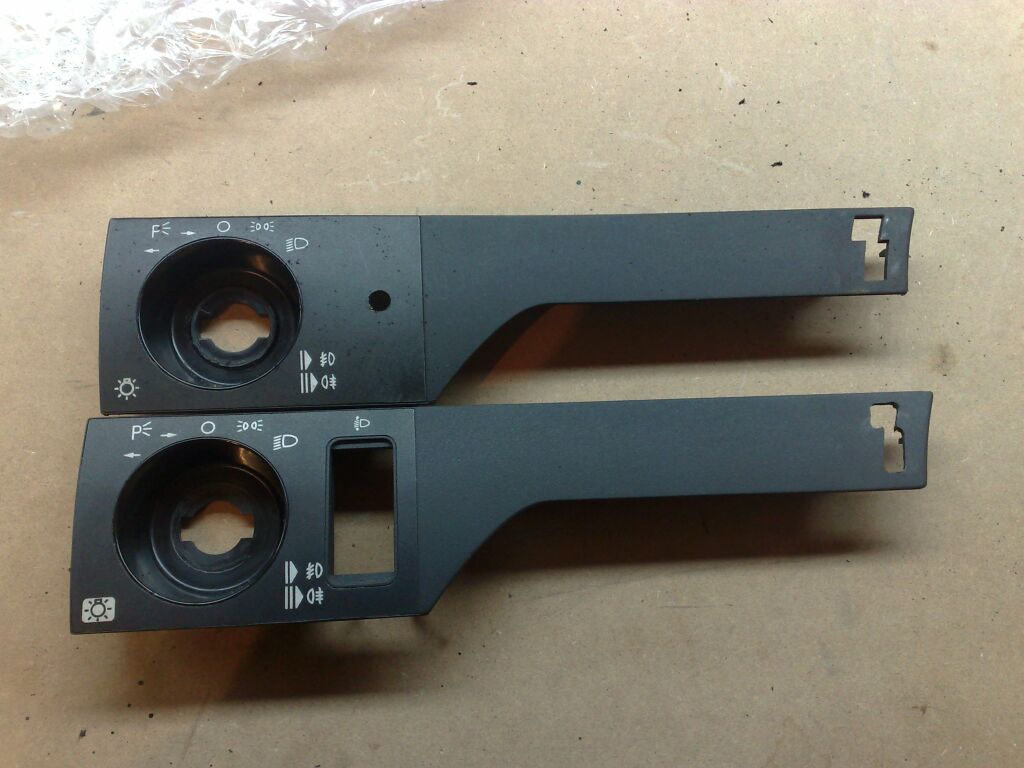 A
few minutes with my Dremel and a grinding bit was all that was needed to
modify the European trim panel. On the back of the panel is the
outline for the hole, so I used it as a guide.
A
few minutes with my Dremel and a grinding bit was all that was needed to
modify the European trim panel. On the back of the panel is the
outline for the hole, so I used it as a guide.
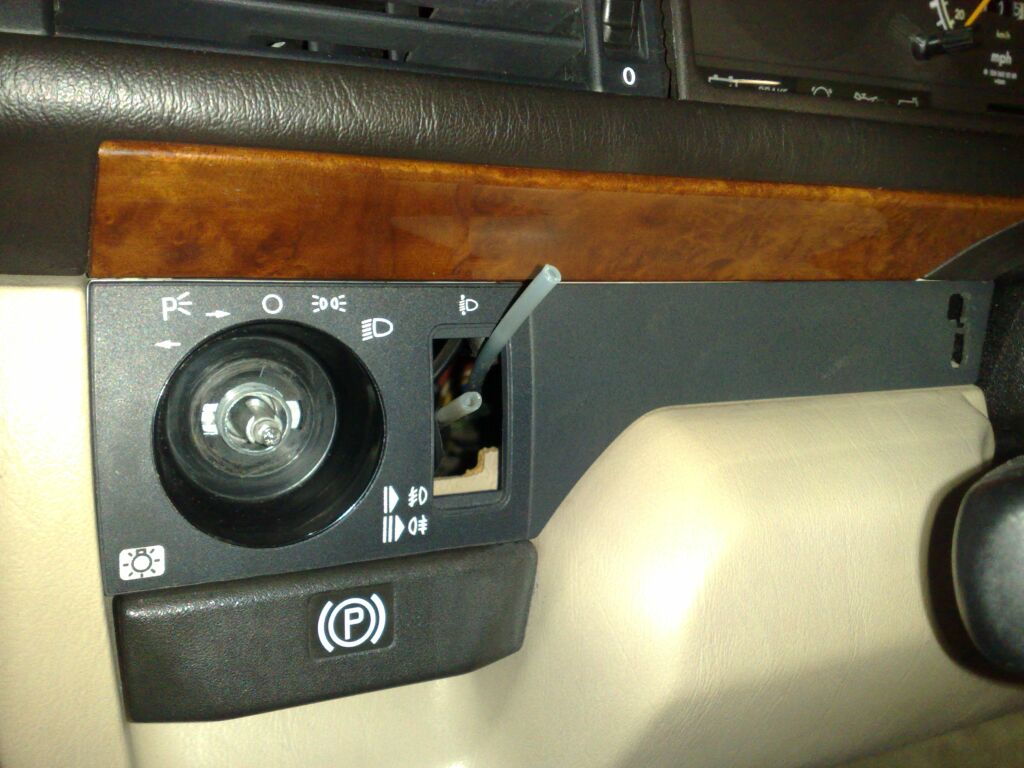 Here
is the line and panel re-installed
Here
is the line and panel re-installed
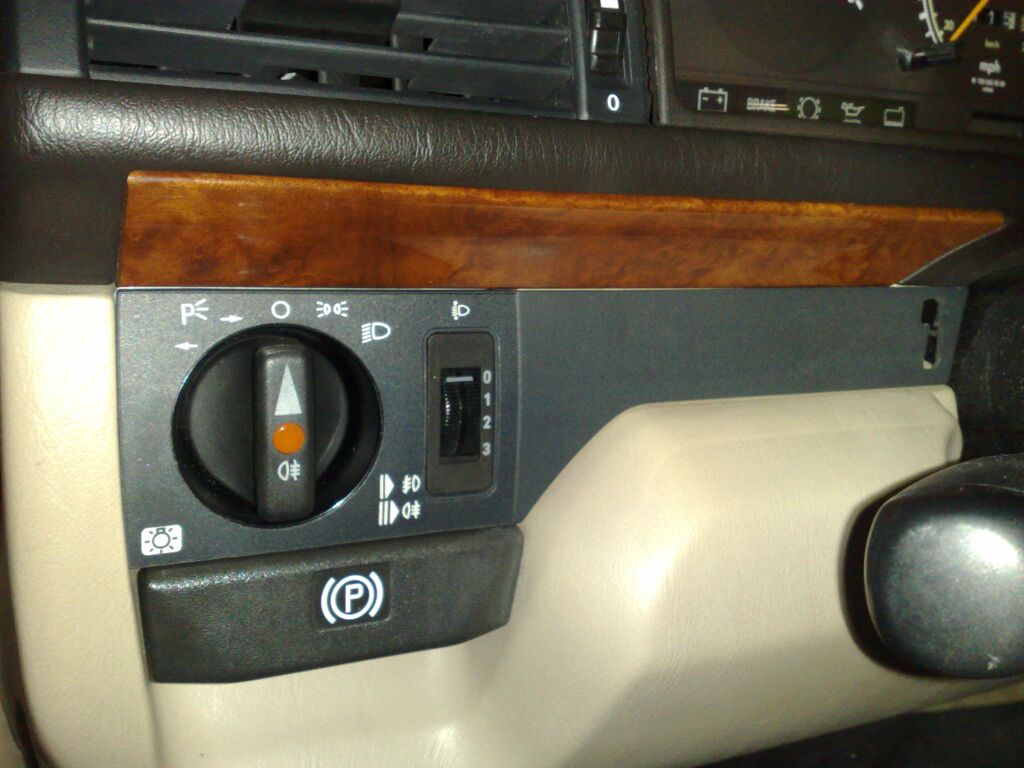 The
finished product. The manual adjustment switch allows a good deal of
adjustment capability for the headlights. Normally this is needed if
you have several people in the back seat or the trunk is full. On the
500e, the self leveling suspension adjusts for these situations, keeping the
car level, so its not such a important upgrade on the 500e.
The
finished product. The manual adjustment switch allows a good deal of
adjustment capability for the headlights. Normally this is needed if
you have several people in the back seat or the trunk is full. On the
500e, the self leveling suspension adjusts for these situations, keeping the
car level, so its not such a important upgrade on the 500e.
Finished headlight installation. I also have switched out my clear Bosch markers for Bosch clear/amber markers (94/95 W124). The Hellas came with the euro dark orange markers, although I have not decided if I want to use them or not.
 Front
view of the Hella headlights.
Front
view of the Hella headlights.
 Closer
view of the Hella headlight. OE for the W124 was mainly Bosch, but
Hella also provided OE headlights, most of the US headlights I have seen
have been Bosch, Hella seems to be used primarily for euro headlights for
some reason.
Closer
view of the Hella headlight. OE for the W124 was mainly Bosch, but
Hella also provided OE headlights, most of the US headlights I have seen
have been Bosch, Hella seems to be used primarily for euro headlights for
some reason.
Euro
Hella Headlights (500e Specific) with euro headlight wipers and new vented
panels - May 2012
I was able to purchased these 500e Hella Euro headlights from
Parts.com for $238 each. Normally these types of products are blocked
from ordering in the US, but for some reason now they are available.
Since I had a set of euro headlight wiper motors/arms (from a 94 E420) I
decided to use them and build a new set of vented headlight panels. In
lieu of posting pictures, here are several videos.
Color
Matched License Plate Rings 5-27-06
6/7/10 - Painted Airbox Cover
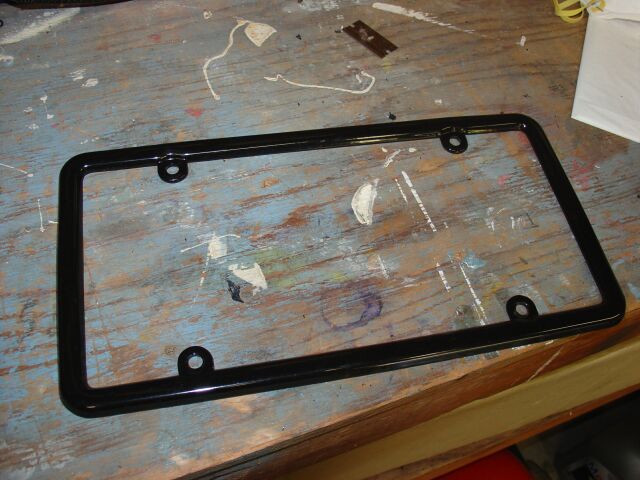 These
are standard black metal license plate rings found at most auto parts stores.
Since I am trying to get rid of all the black trim on my 500E. I decided
to paint these body color.
These
are standard black metal license plate rings found at most auto parts stores.
Since I am trying to get rid of all the black trim on my 500E. I decided
to paint these body color.
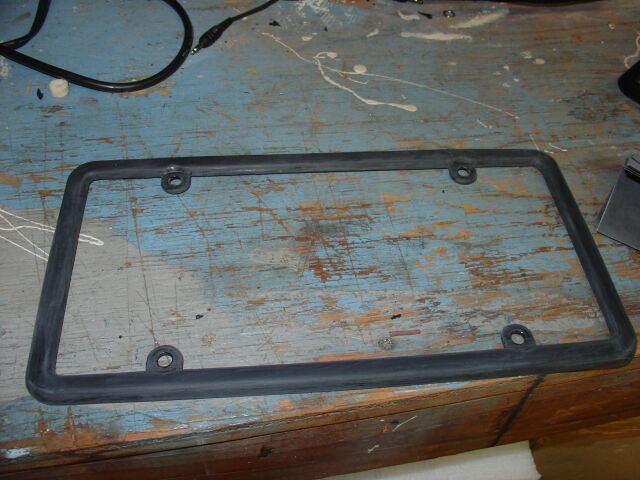 The
first step in this process was to wipe them down with wax/grease remover, then
sand with a 400 grit wet/dry sandpaper and then one more wipe down with
wax/grease remover.
The
first step in this process was to wipe them down with wax/grease remover, then
sand with a 400 grit wet/dry sandpaper and then one more wipe down with
wax/grease remover.
 Next
was to shoot the rings with body matched paint (spray cans courtesy of Tower
Paint)
Next
was to shoot the rings with body matched paint (spray cans courtesy of Tower
Paint)
This is how the black license plate ring looks on the red car
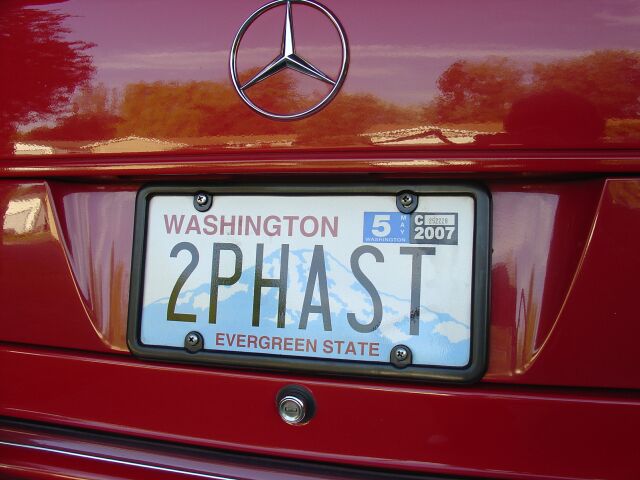
 And
here we have the newly painted license plate ring installed. Although, the
screws have not yet been painted.
And
here we have the newly painted license plate ring installed. Although, the
screws have not yet been painted.
Exterior
Pictures as of 6/27/06
 These
pictures are the very latest that show all the modifications/updates I have done
to date.
These
pictures are the very latest that show all the modifications/updates I have done
to date.
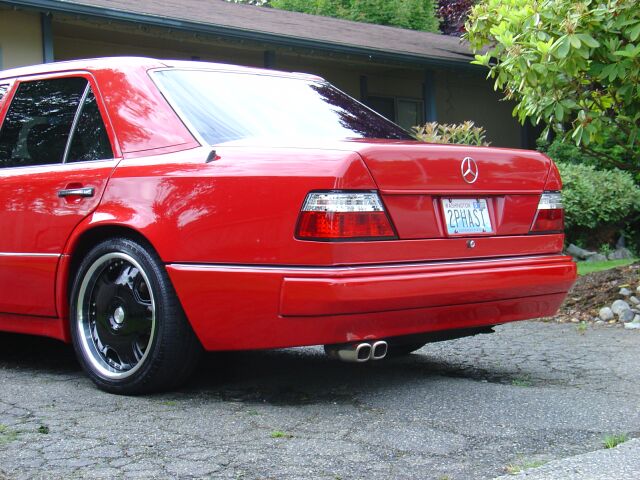 This
rear quarter picture details the LED tail lights, painted trunk handle/license
ring and my new exhaust
This
rear quarter picture details the LED tail lights, painted trunk handle/license
ring and my new exhaust
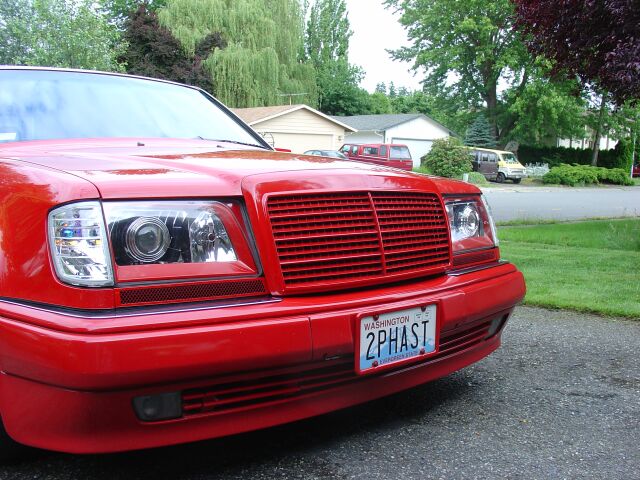
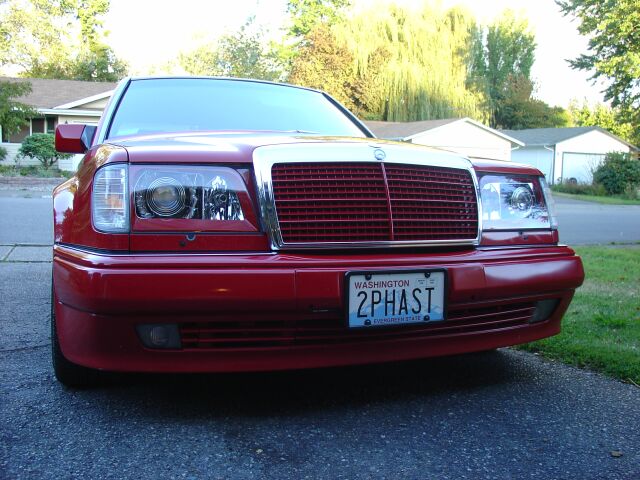
 This
front quarter picture gives you an idea of what the 94-95 head lights look like
on a pre 94 vehicle
This
front quarter picture gives you an idea of what the 94-95 head lights look like
on a pre 94 vehicle
 Of
course the big appearance impact here is the monochrome grill and frame.
Gives the 500e more of a AMG hammer look.
Of
course the big appearance impact here is the monochrome grill and frame.
Gives the 500e more of a AMG hammer look.
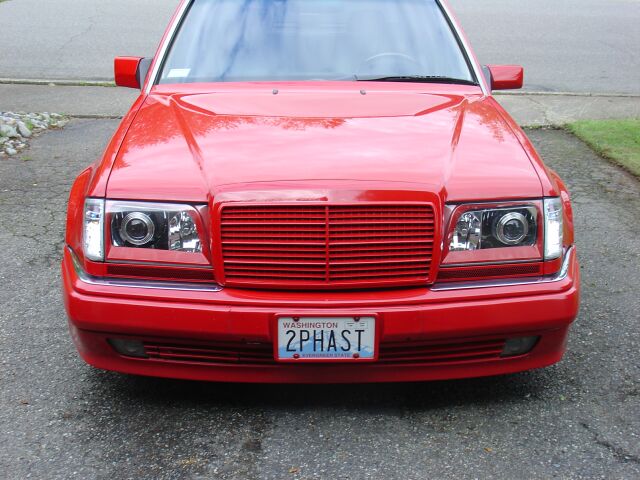
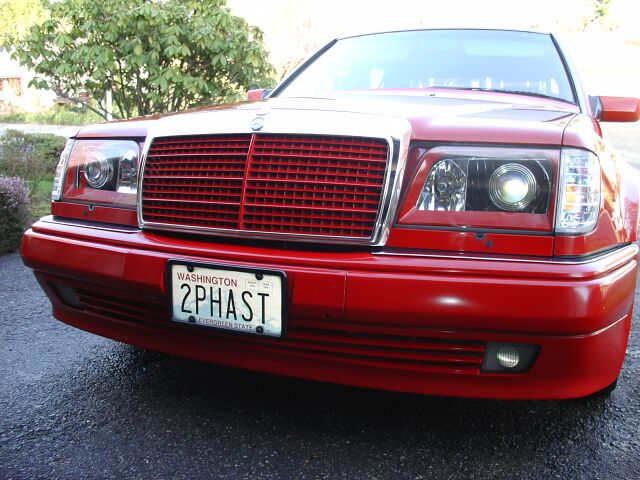
 Another
front on picture showing headlight detail, the vented headlight trim panels and
headlights. Notice the grill frame emblems have been shaved.
Another
front on picture showing headlight detail, the vented headlight trim panels and
headlights. Notice the grill frame emblems have been shaved.
With
the addition of the red grill frame, plus the red grill, there was no contrast
up front, so after being patient, I located a suitable Advantgarde grill
(on Ebay, $65.00) that was NOT a cut down version. It was installed in its
original form, black with chrome strips. At some point, I may paint the
chrome strips red.
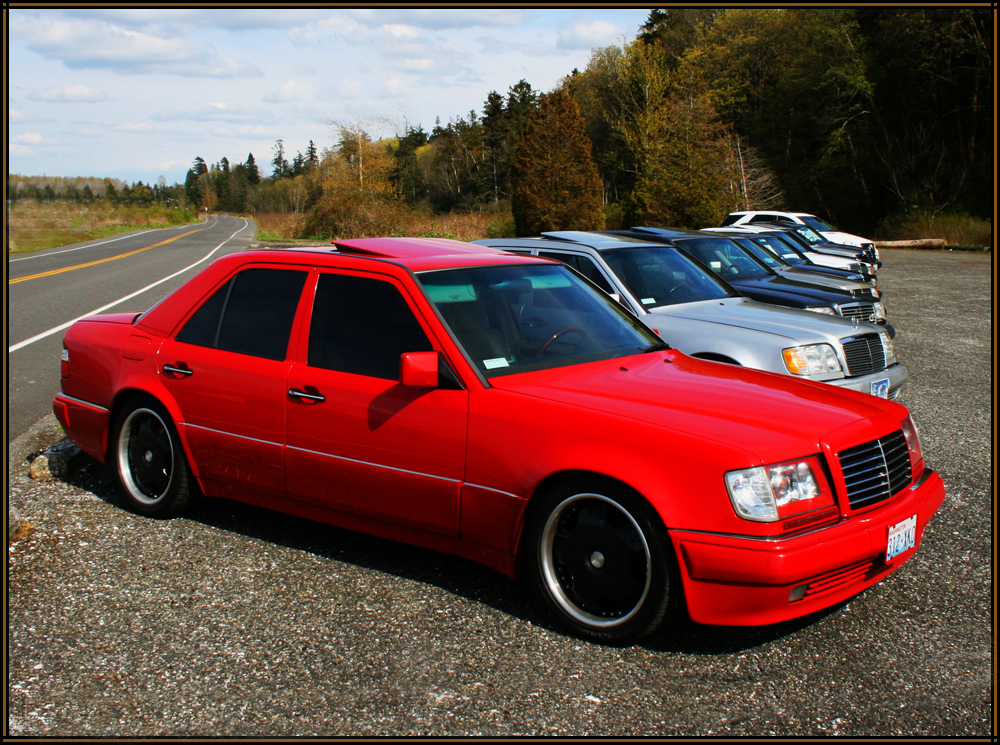
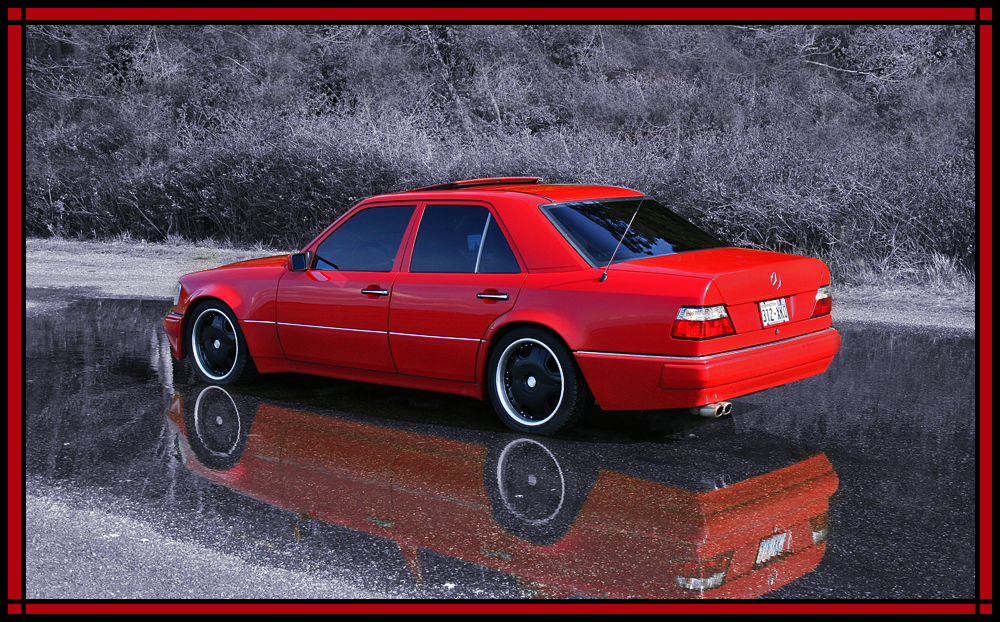 These
pictures were taken at a local Washington W124 meet by the infamous ZorroAMG,
who just so happens to be a excellent photographer.
These
pictures were taken at a local Washington W124 meet by the infamous ZorroAMG,
who just so happens to be a excellent photographer.
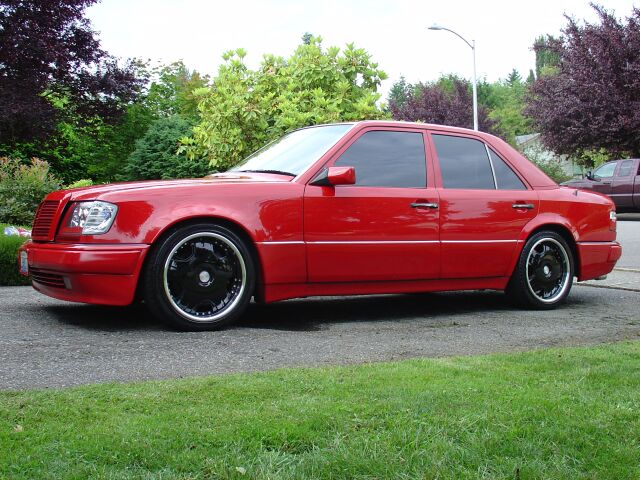
 Another
profile view
Another
profile view
 I
really like this front picture of the 500e
I
really like this front picture of the 500e
 I
actually wanted to do this project several years ago, but knew that a 1992
airbox was needed. So thanks to Steve Geyer (SG Motorsports.com) were
ready to go!
I
actually wanted to do this project several years ago, but knew that a 1992
airbox was needed. So thanks to Steve Geyer (SG Motorsports.com) were
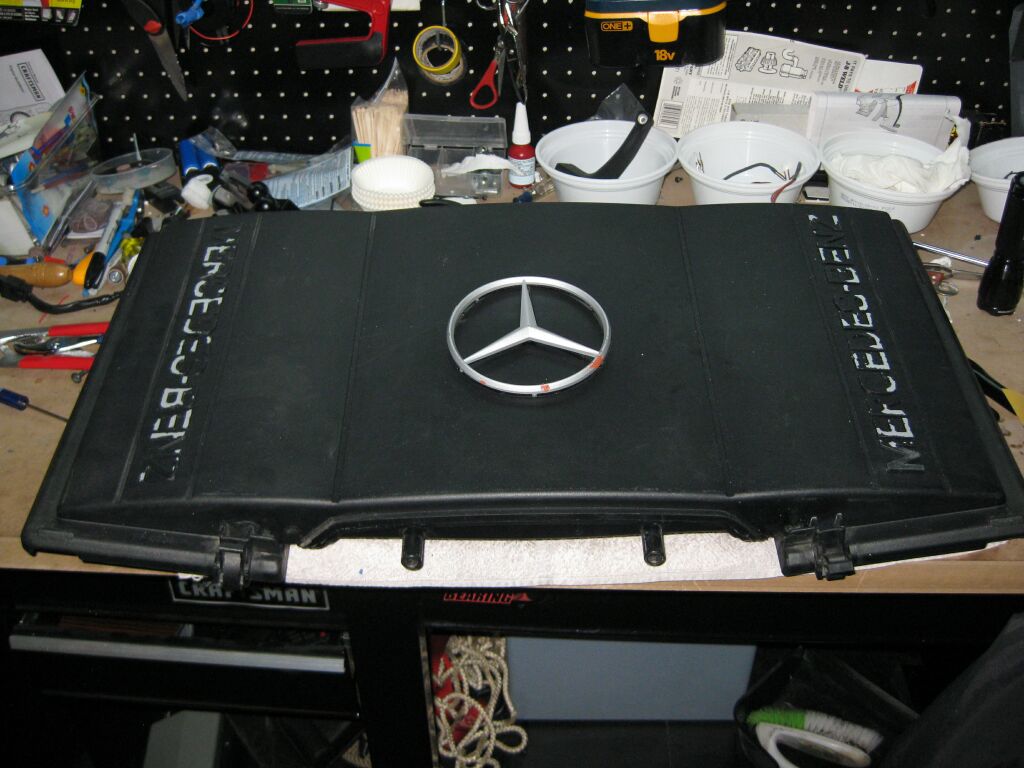
ready to go!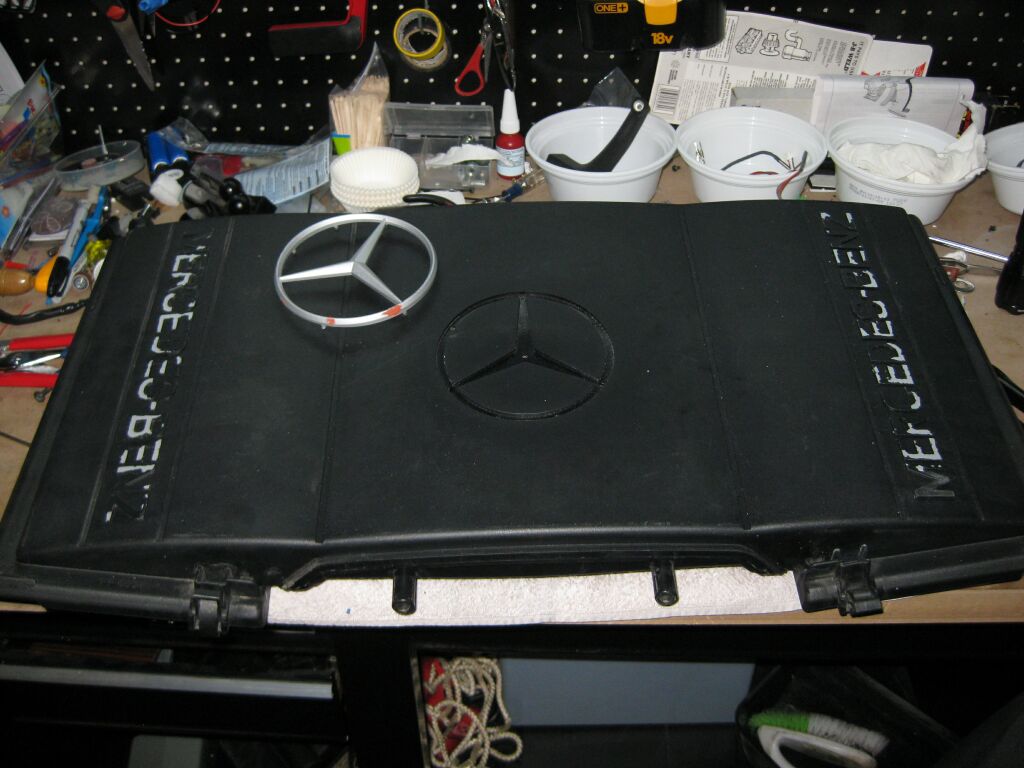 The
1992 airbox was needed since the MB star is removable, trying to paint one
(that is molded into the cover) would of been too much work. So first
the star was removed, then everything was washed down with wax and grease
remover. Once cleaned, everything was sanded with 400 grit sandpaper
The
1992 airbox was needed since the MB star is removable, trying to paint one
(that is molded into the cover) would of been too much work. So first
the star was removed, then everything was washed down with wax and grease
remover. Once cleaned, everything was sanded with 400 grit sandpaper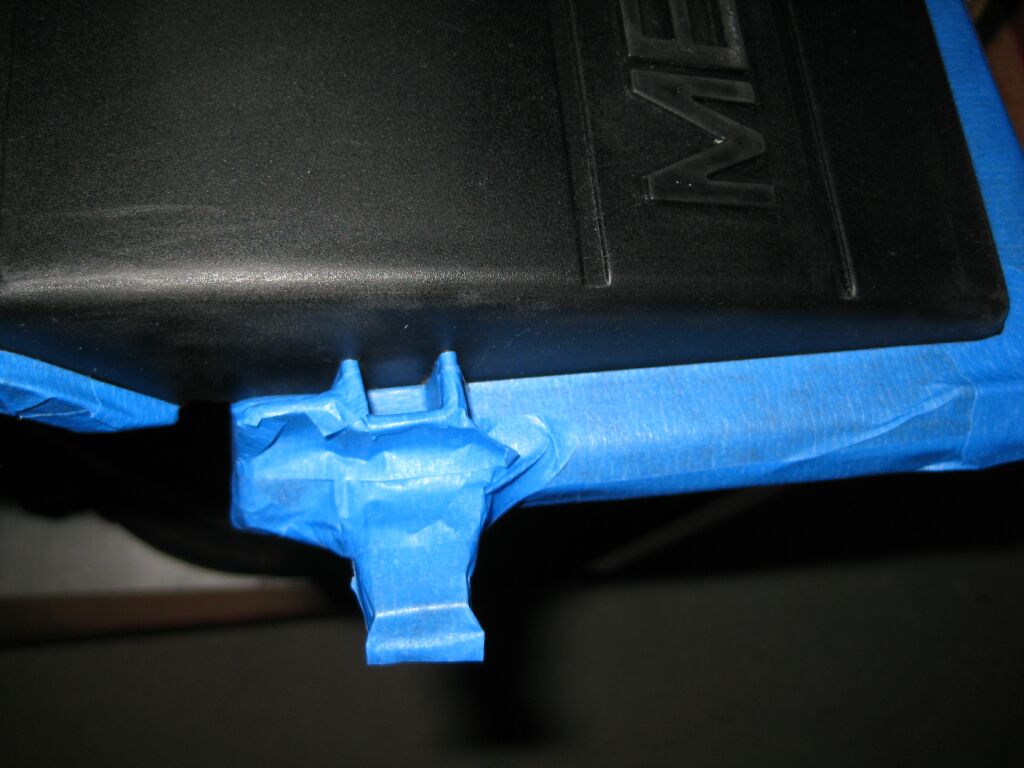 Since
the lower parts of the airbox clamp onto the lip of the cover, I decided not
to paint this lip. So the tedious process of masking clean lines
around the top began.
Since
the lower parts of the airbox clamp onto the lip of the cover, I decided not
to paint this lip. So the tedious process of masking clean lines
around the top began.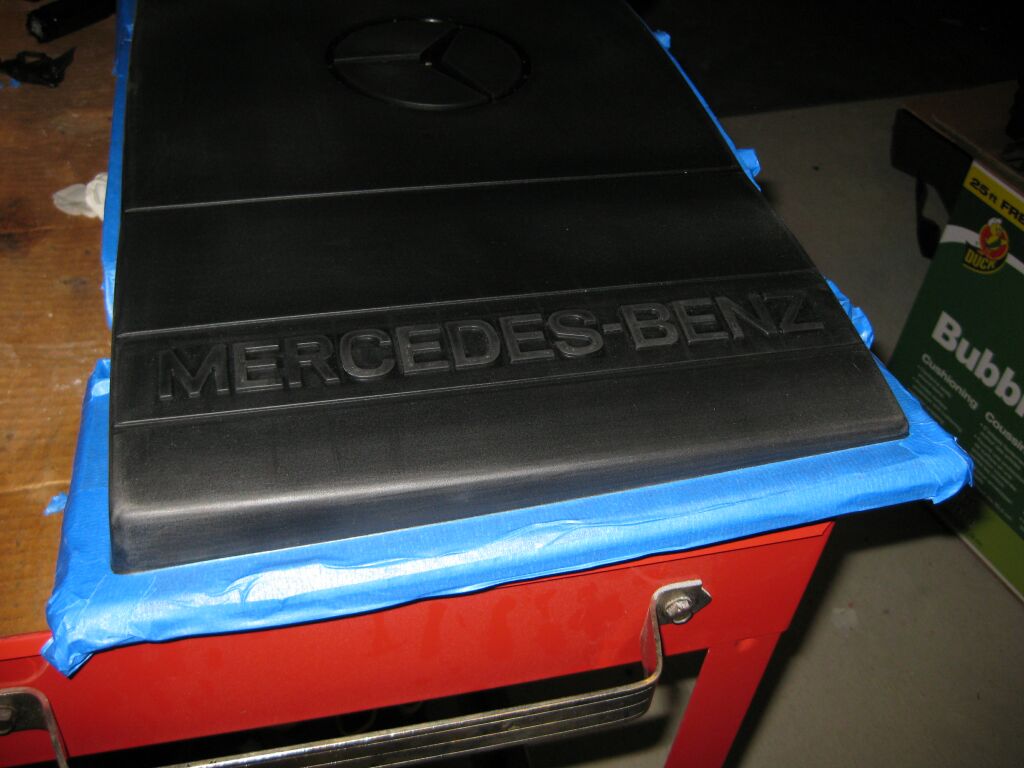 Getting
clean mask lines is important and this job took about 1.5 hours.
Normal 3m blue painters tape was used, best stuff I have found (prevents
bleeding of the paint).
Getting
clean mask lines is important and this job took about 1.5 hours.
Normal 3m blue painters tape was used, best stuff I have found (prevents
bleeding of the paint).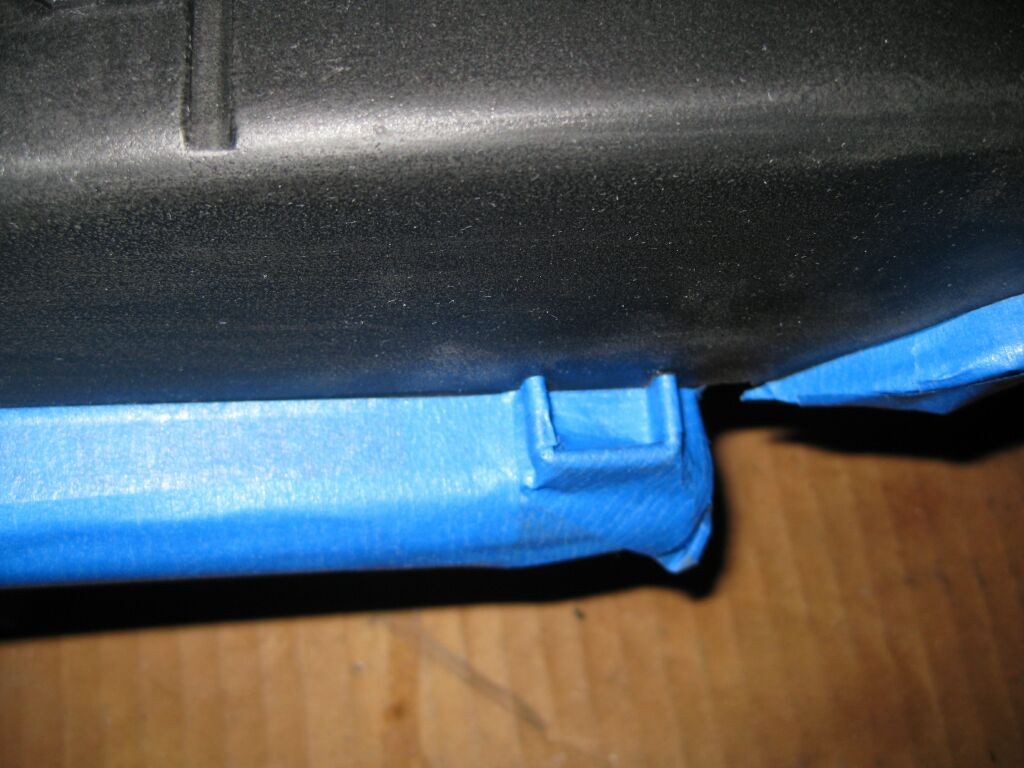 These
small boxed areas are where the lower box clamps latch onto, so had to mask
off this entire area. I was afraid that if painted, the process of
latching (the lower section) would scrape and/or chip up the paint.
These
small boxed areas are where the lower box clamps latch onto, so had to mask
off this entire area. I was afraid that if painted, the process of
latching (the lower section) would scrape and/or chip up the paint.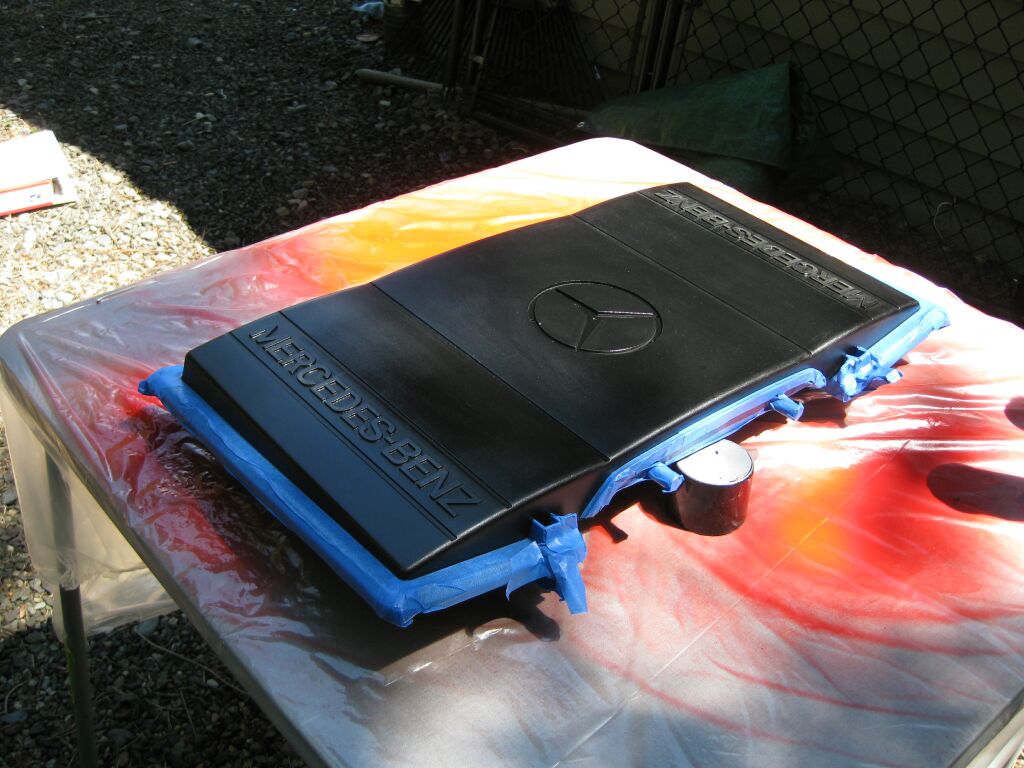 After
another liberal bath in wax and grease remover, the next step was several
coats of adhesion promoter. The adhesion promoter aids paint in
adhering to the surface and also as a "flex additive" which keeps the paint
pliable so it does not crack during installation (not really applicable in
this instance, mainly its useful on bumpers)
After
another liberal bath in wax and grease remover, the next step was several
coats of adhesion promoter. The adhesion promoter aids paint in
adhering to the surface and also as a "flex additive" which keeps the paint
pliable so it does not crack during installation (not really applicable in
this instance, mainly its useful on bumpers)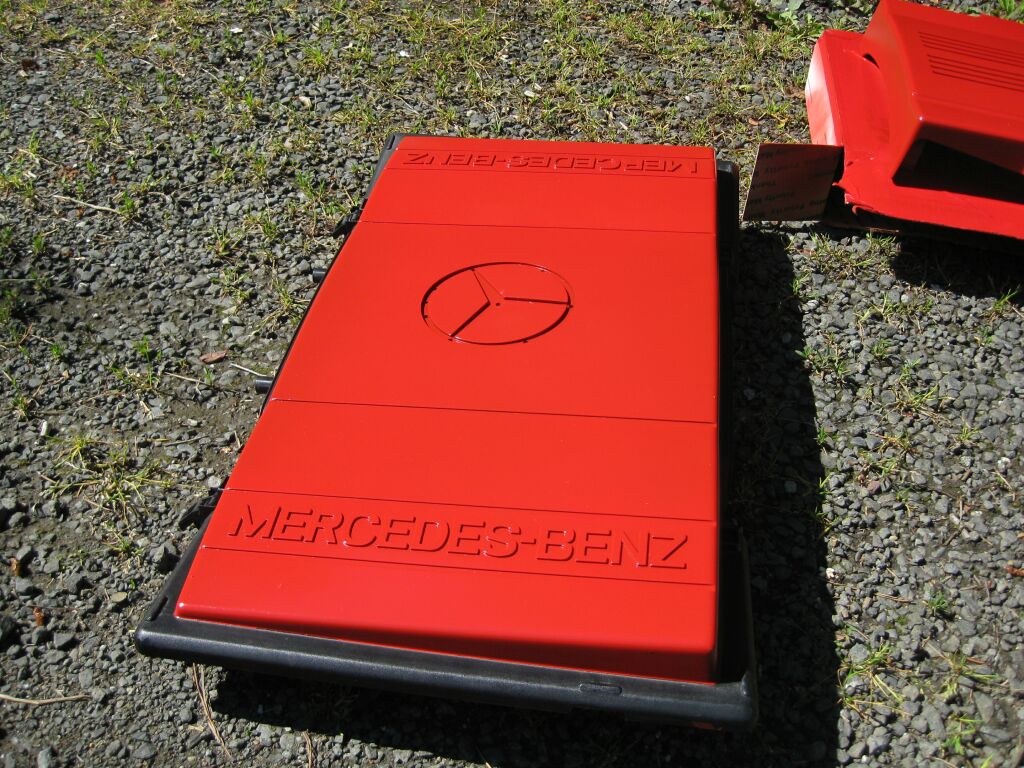 All
the prep work paid off, there were no "surprises" (like fish eyes due to
oil/silicone) and I was able to lay down about five coats. This time
around, Krylon Fusion paint was used. Its designed specifically for
plastic and the color was a very close match to the signal red of the 500e.
All
the prep work paid off, there were no "surprises" (like fish eyes due to
oil/silicone) and I was able to lay down about five coats. This time
around, Krylon Fusion paint was used. Its designed specifically for
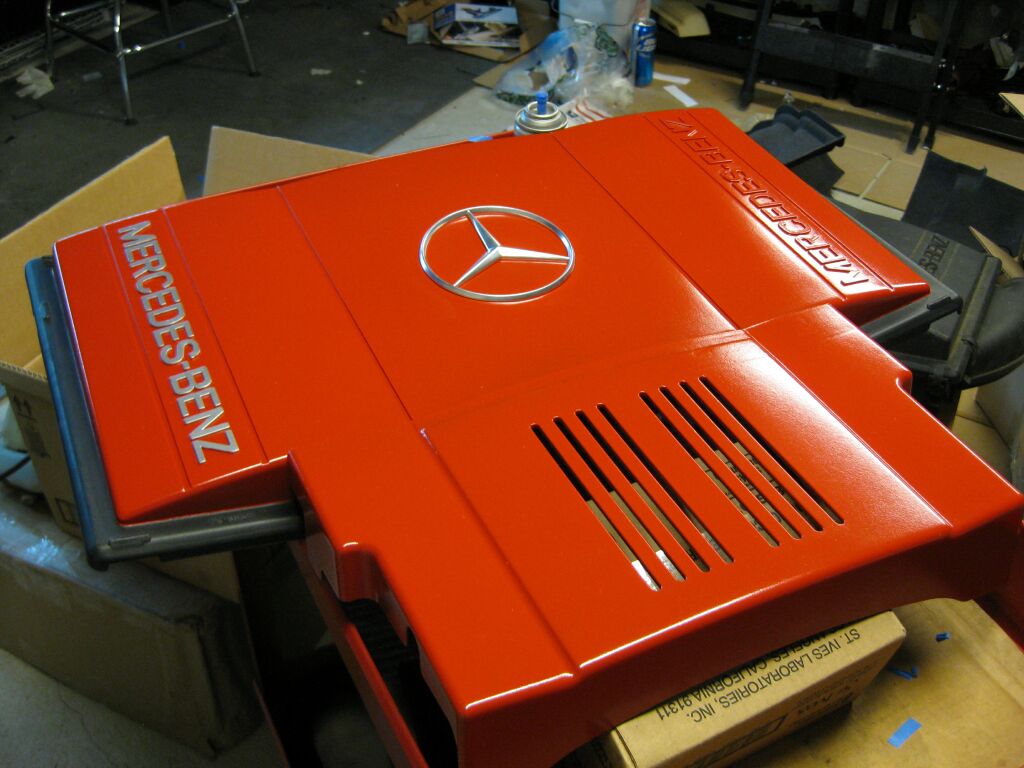
plastic and the color was a very close match to the signal red of the 500e.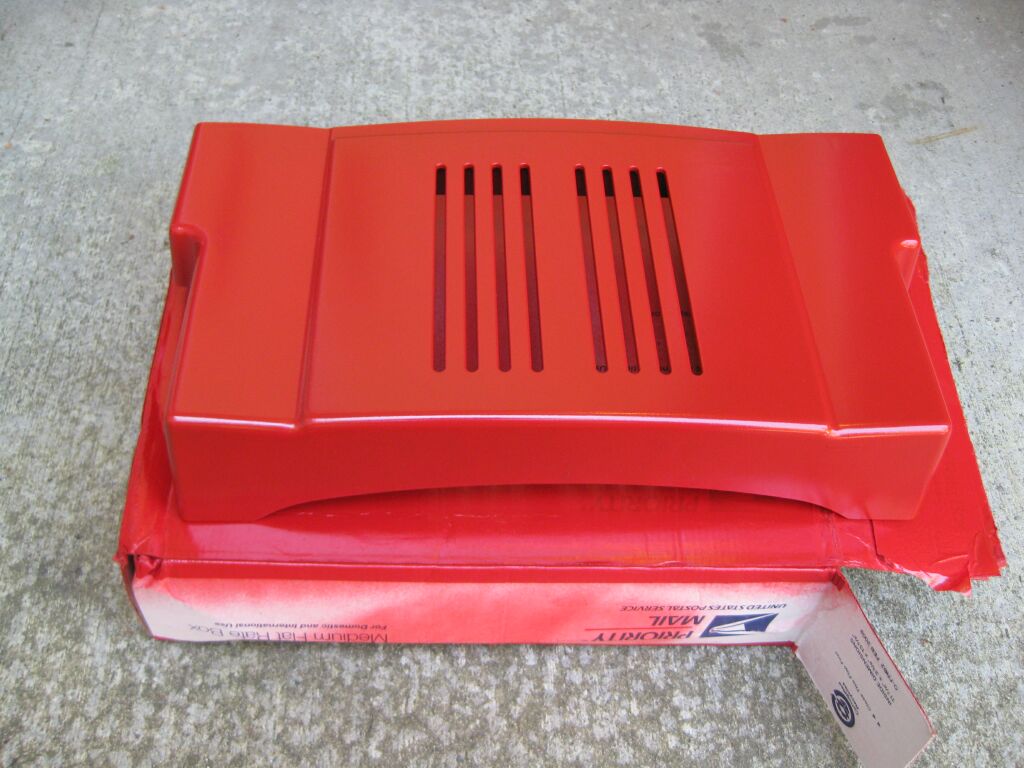 No
issues with the front cover either, the finish came out smooth and shiny
No
issues with the front cover either, the finish came out smooth and shiny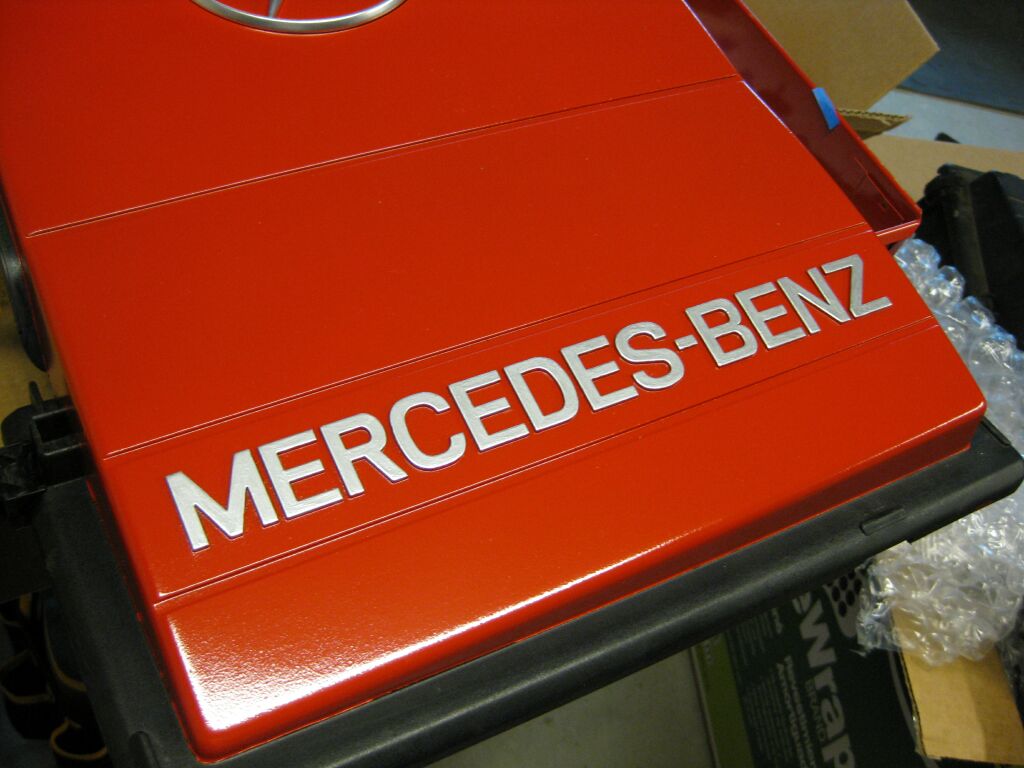 The
paint chosen for the Star and lettering was Dupli-Color chrome paint.
Its about as close to chrome as you can get in a can. The emblem was
prepped and painted in the normal manor but the MB letters were a different
story. These were hand painted, which took about three hours in total
to do. Fortunately the letters are raised, which makes it much easier
than if they had been flat or recessed.
The
paint chosen for the Star and lettering was Dupli-Color chrome paint.
Its about as close to chrome as you can get in a can. The emblem was
prepped and painted in the normal manor but the MB letters were a different
story. These were hand painted, which took about three hours in total
to do. Fortunately the letters are raised, which makes it much easier
than if they had been flat or recessed.
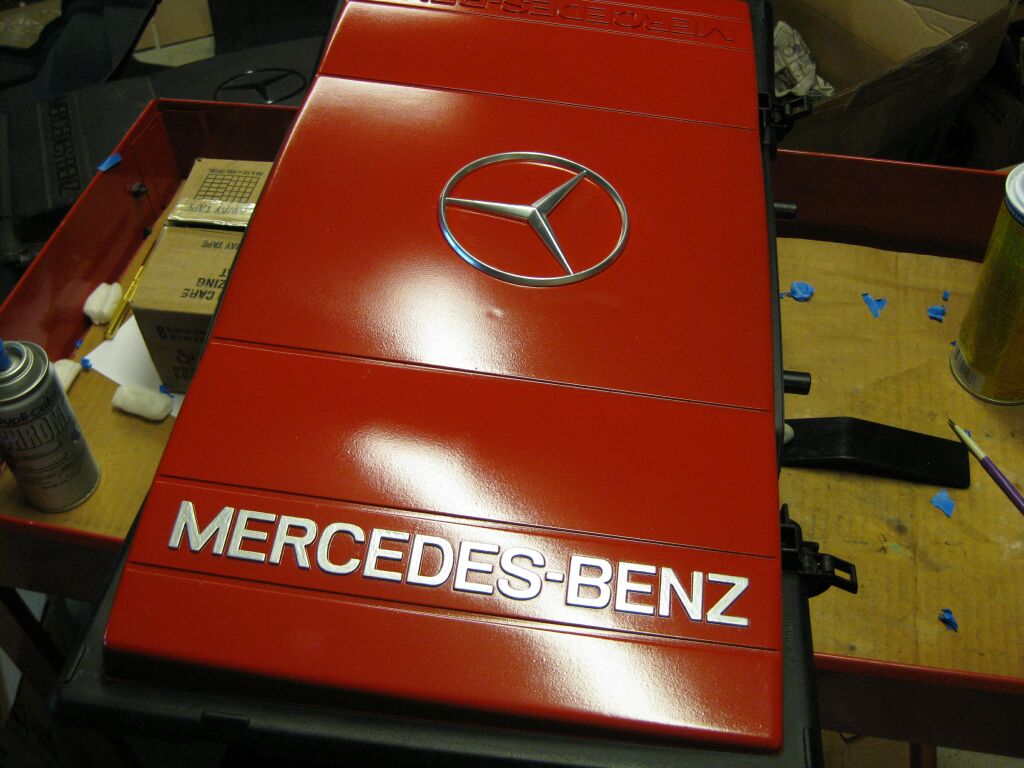 Another
picture showing the painted letters and installed chrome star.
Another
picture showing the painted letters and installed chrome star.
 Another
picture, although not quite done at this point. The mask lines turned
out very good and the black lip adds a nice contrast to the red cover.
Another
picture, although not quite done at this point. The mask lines turned
out very good and the black lip adds a nice contrast to the red cover.
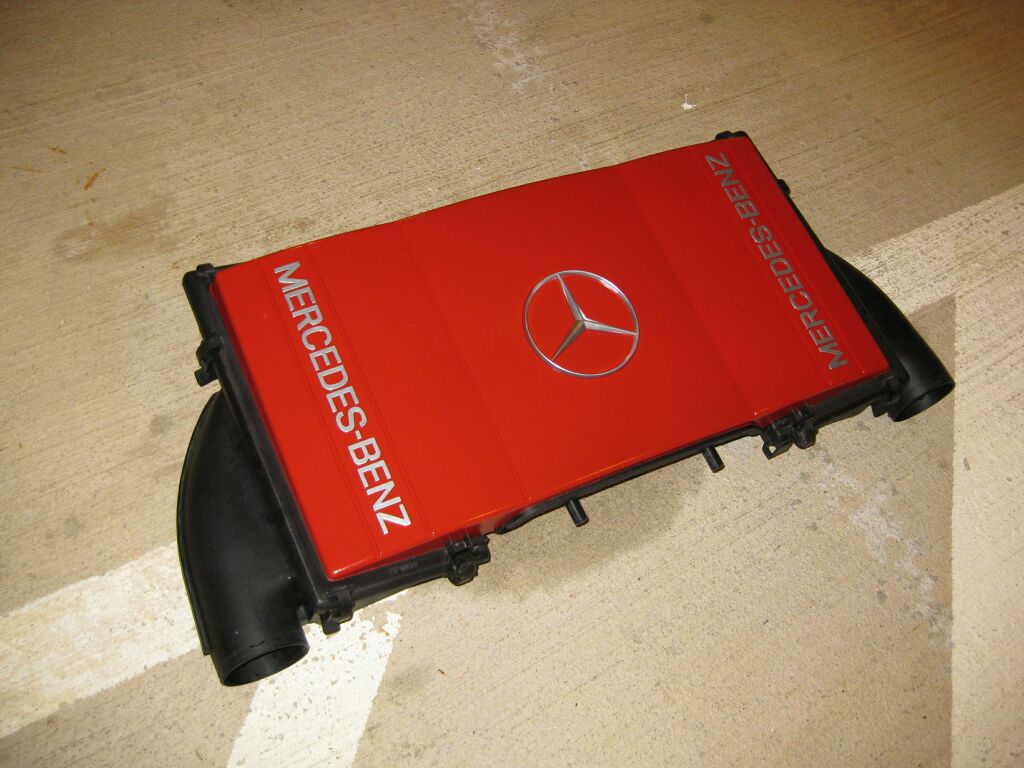
 This
is the airbox cover with the front louvered cover installed
This
is the airbox cover with the front louvered cover installed
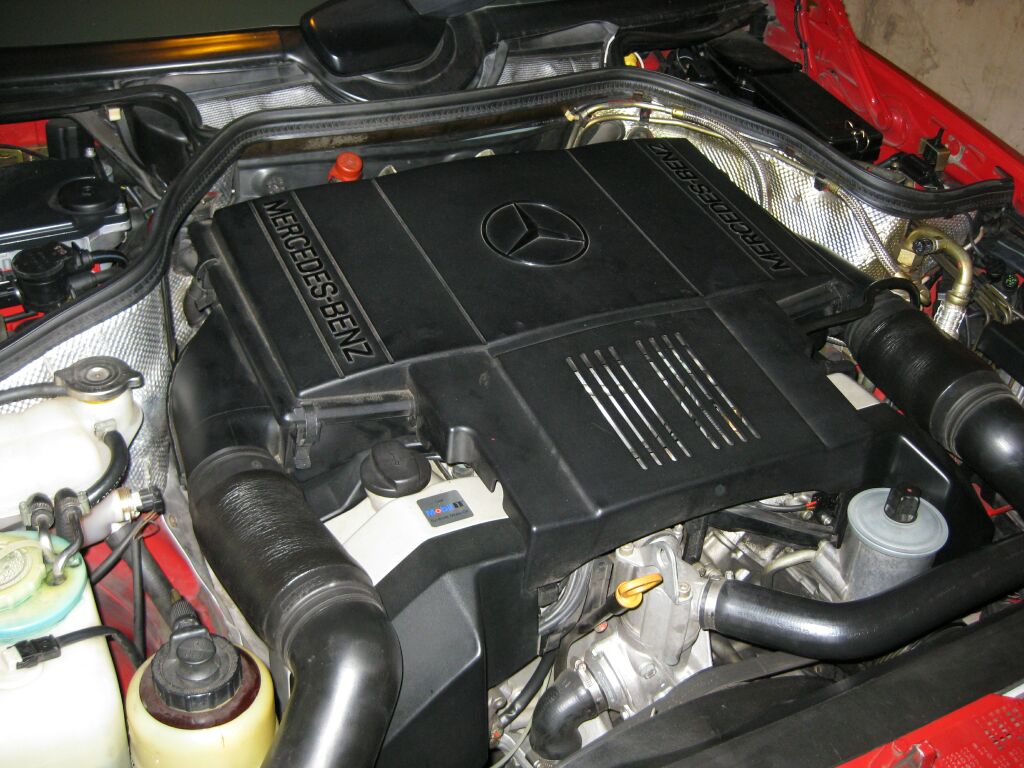 Ok
so down to the installation. This is my OE airbox assembly, nothing
special.
Ok
so down to the installation. This is my OE airbox assembly, nothing
special.
 At
this point, the K&N air filters have been removed from my original airbox
and installed in this newly painted airbox, so its ready to install.
At
this point, the K&N air filters have been removed from my original airbox
and installed in this newly painted airbox, so its ready to install.
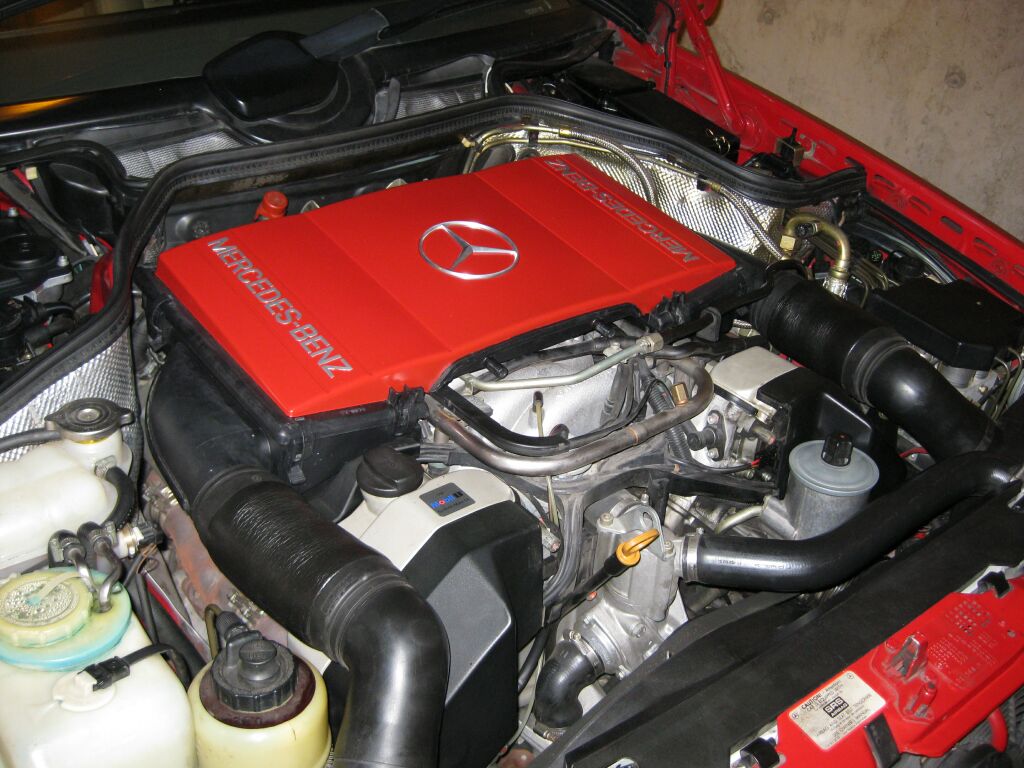 So
here is the airbox installed and the air inlet pipes re-installed.
So
here is the airbox installed and the air inlet pipes re-installed.
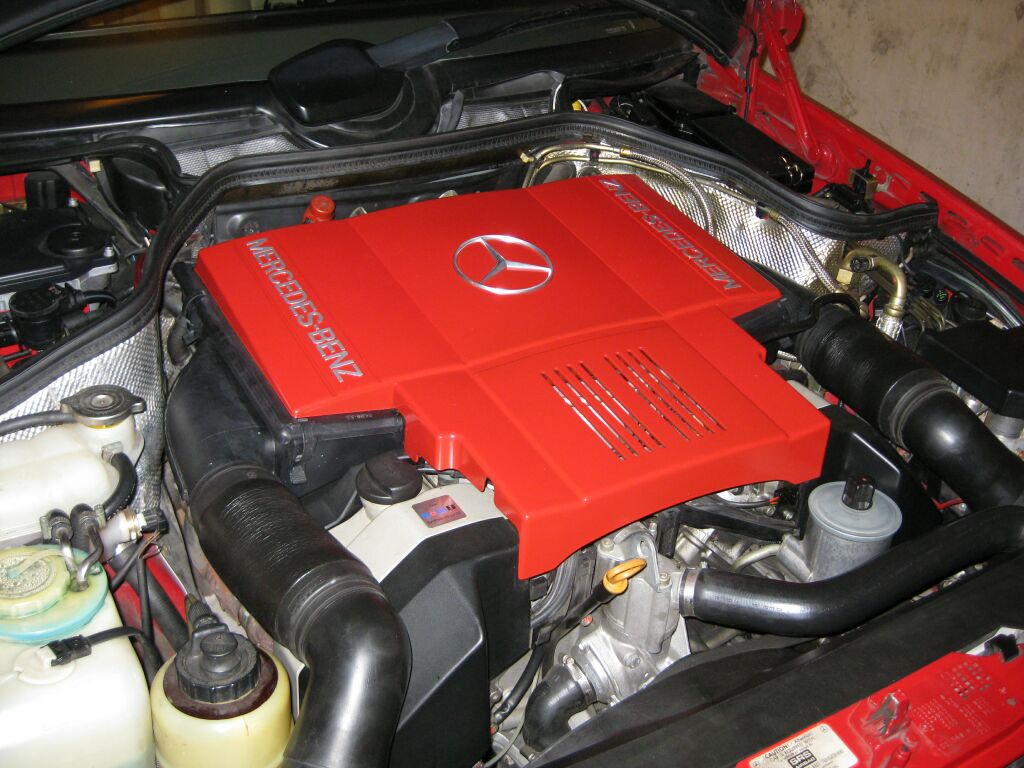
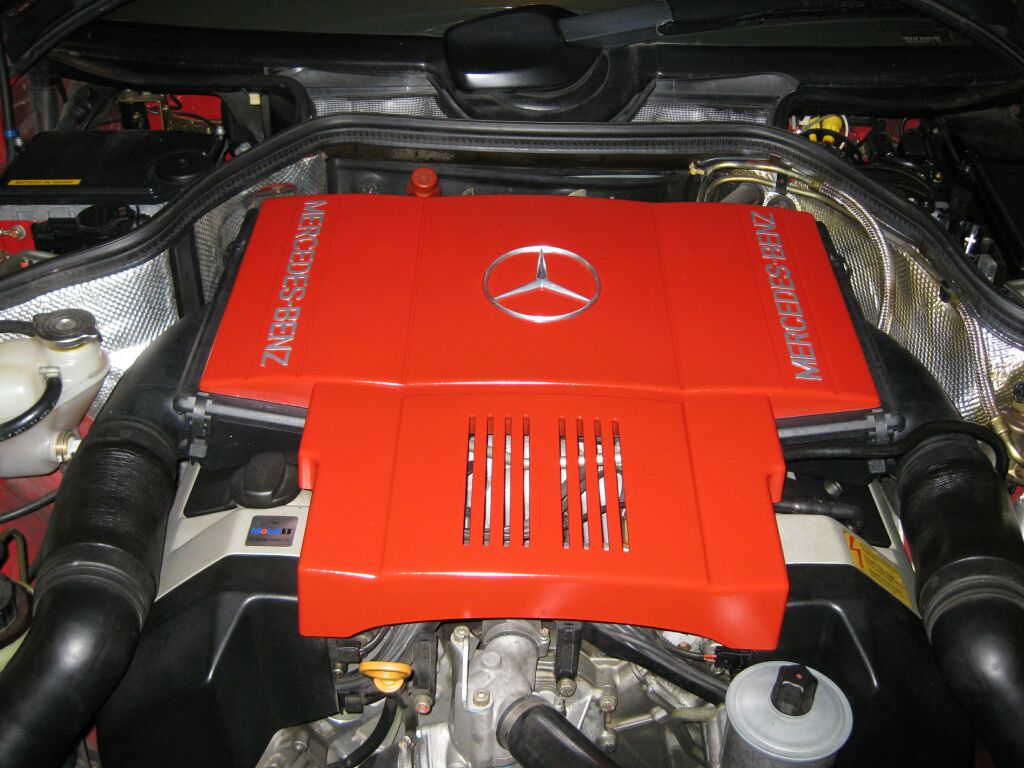
And
the completed airbox installed! I really like this update, although
not sure if I like the front louvered cover being red. I may install
the black cover to add some more contrast to the engine bay.

Information/pictures on
this site are the property of Rik Johnson
and 2phast Motorsports. They are not
to be used without express written
permission.