This is a section I put together that will have all the miscellaneous
updates, repairs and anything else that does not warrant its own independent
page.
6/10/09 - Cabin air filter upgrade
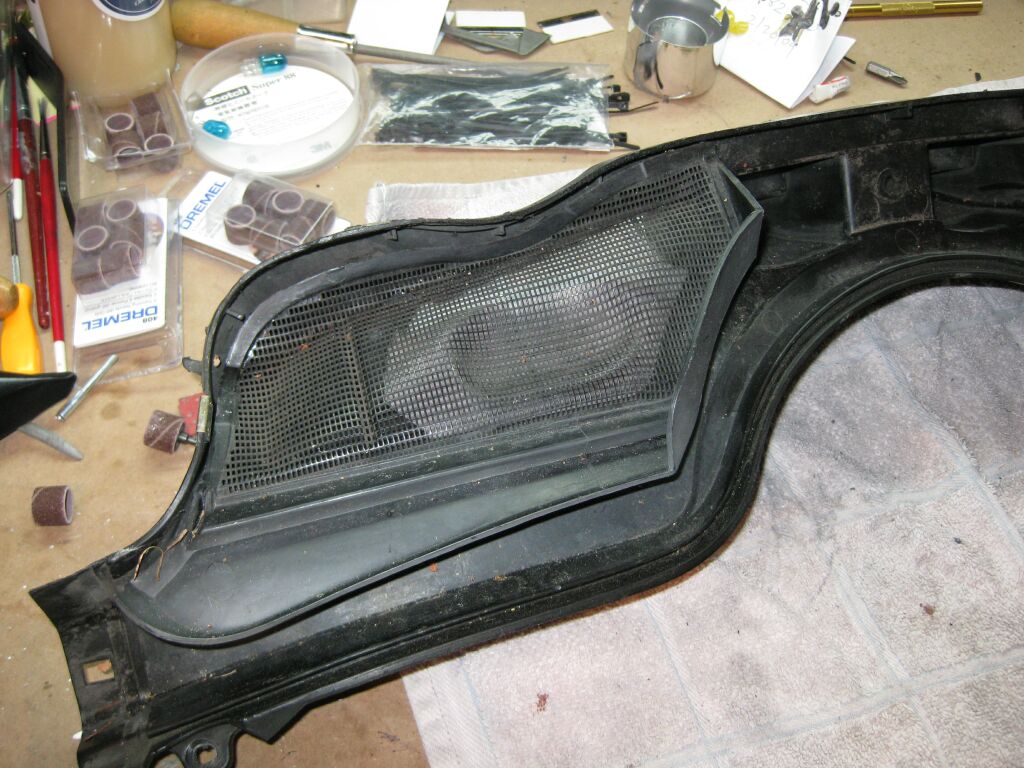 The
pre-94 model 500E didn't have a cabin filter for odor and dust elimination.
This is the drivers side of the cowling that draws in air for the
heating/cooling of the car. There is a company in France that sells
filters that replace these grills, but they are quite expensive and not
available in the US.
The
pre-94 model 500E didn't have a cabin filter for odor and dust elimination.
This is the drivers side of the cowling that draws in air for the
heating/cooling of the car. There is a company in France that sells
filters that replace these grills, but they are quite expensive and not
available in the US.
To
start this project, we need to remove these grills, easier said then done,
since MB did a spot weld (plastic weld) of these to the cowling. This
process is easier to do if you remove the cowling and drill out the plastic
welds.
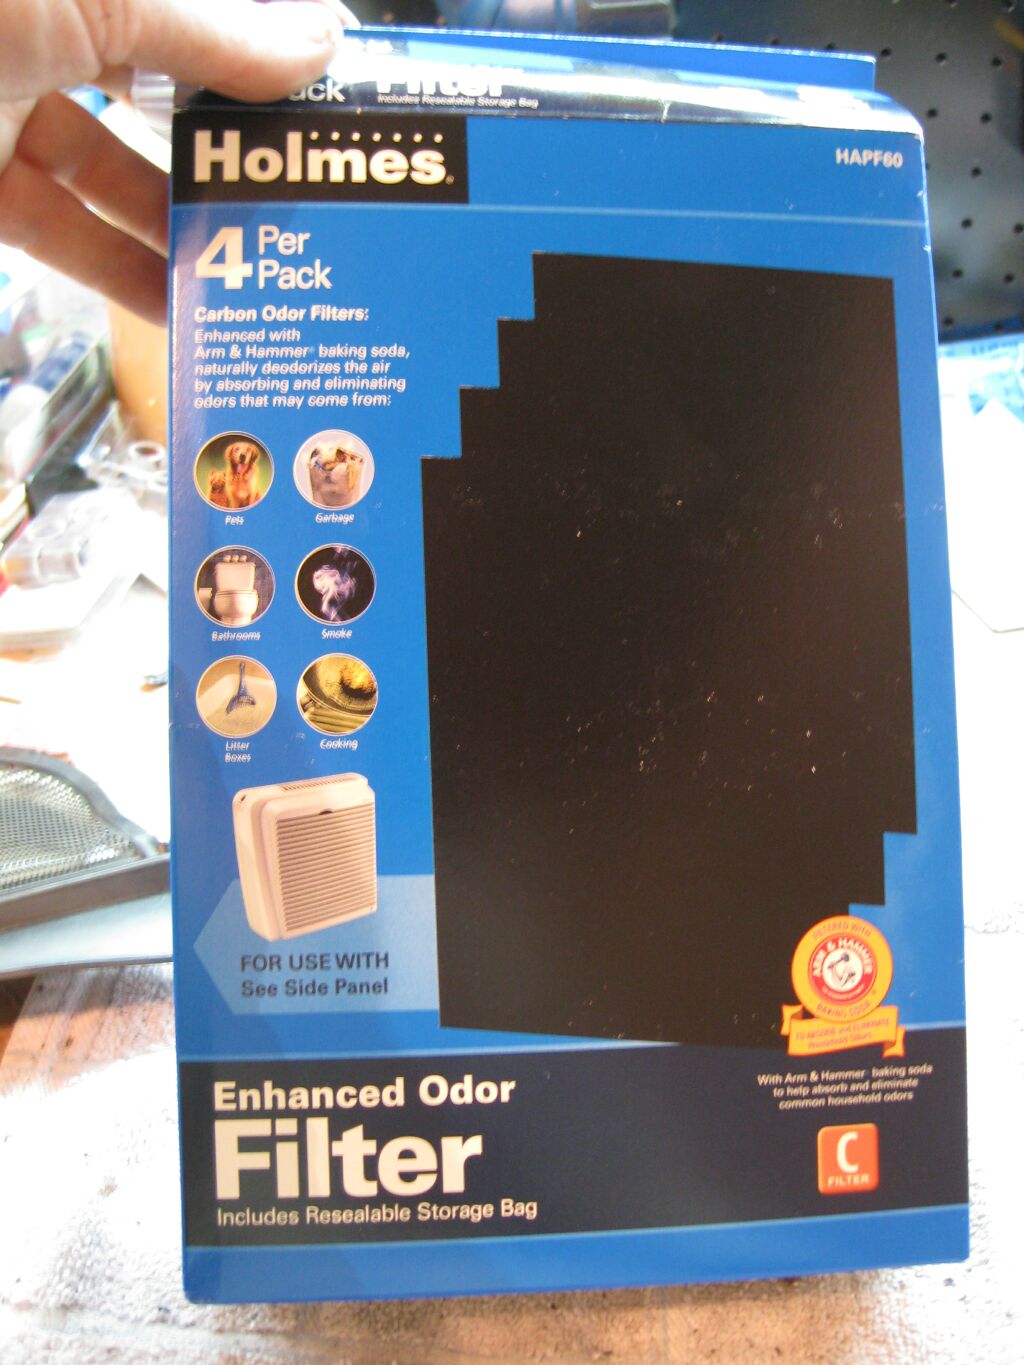 So
what we are going to do is build our own pollen/odor filters. To
start, you need to purchase some charcoal filters large enough to cut down
to fit our grills. These happen to be the ones I chose, as there are
enough filters in the box to do four grills (need to change every three
months)
So
what we are going to do is build our own pollen/odor filters. To
start, you need to purchase some charcoal filters large enough to cut down
to fit our grills. These happen to be the ones I chose, as there are
enough filters in the box to do four grills (need to change every three
months)
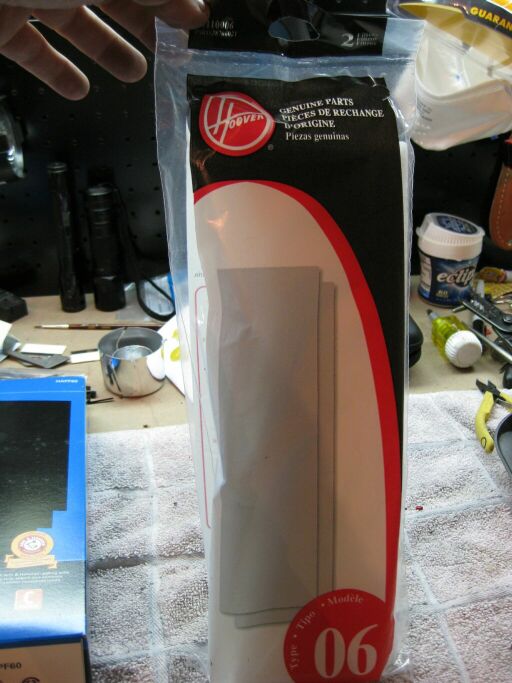
The
2nd part of the filter is the pollen/dust filter. These go before the
charcoal filters. So we will be making a filter "sandwich" to insert
into our grills. Make sure whatever you purchase is wide enough for
your grills. These particular filters are for a Hoover vacuum cleaner,
the charcoal filters are for a home air filtering device. Total for
all material was about $15.00
 You
will need to cut both filters down so that they can be inserted into your
grill. Since the Hoover filters were long and skinny, I did these
first, then used my newly cut down filter as a template for the larger black
charcoal filter.
You
will need to cut both filters down so that they can be inserted into your
grill. Since the Hoover filters were long and skinny, I did these
first, then used my newly cut down filter as a template for the larger black
charcoal filter.
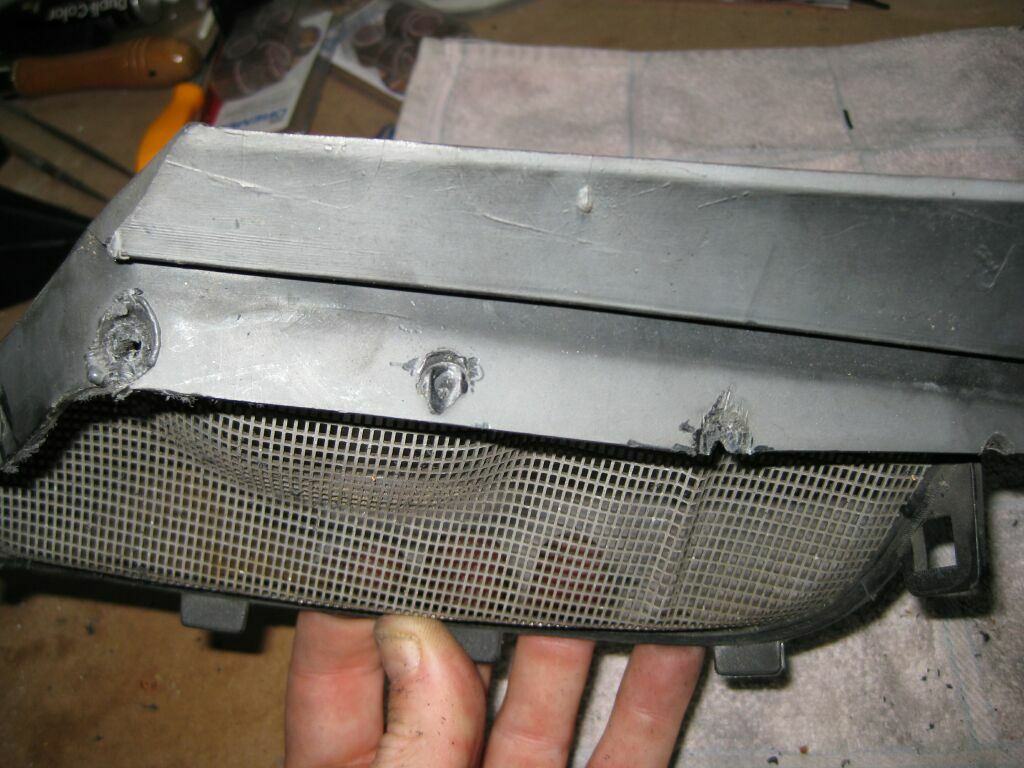
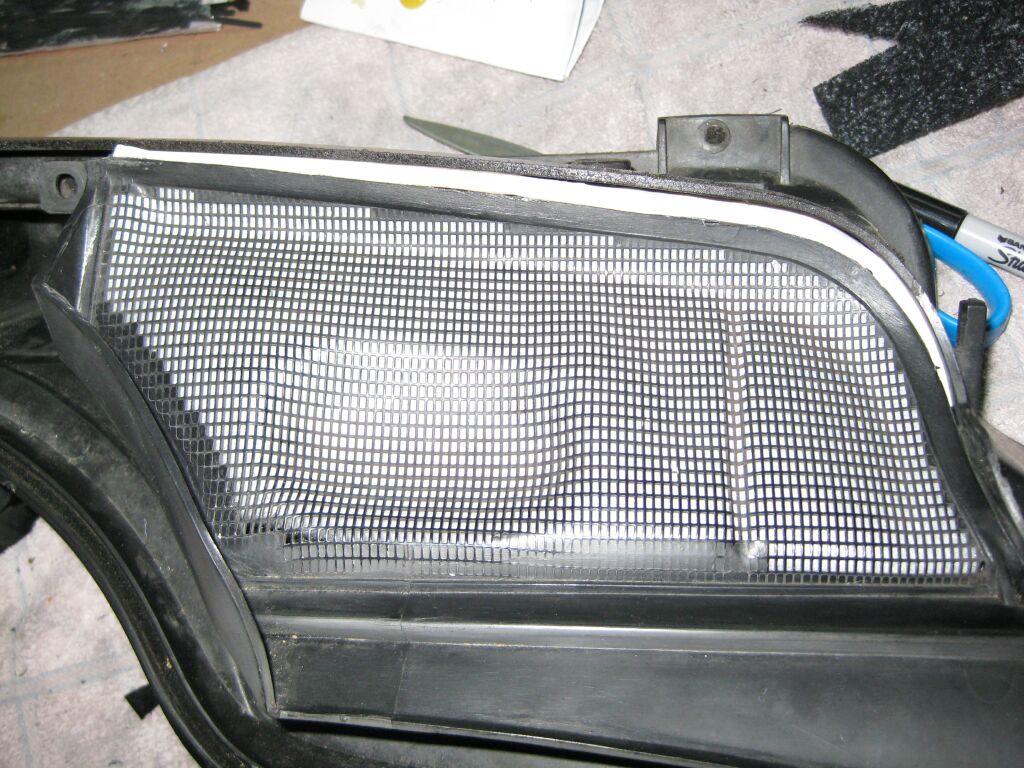
 You
can see how the filters fit into the back side of the grill. You want
to make sure they cover the entire surface to ensure complete filtration.
You
can see how the filters fit into the back side of the grill. You want
to make sure they cover the entire surface to ensure complete filtration.
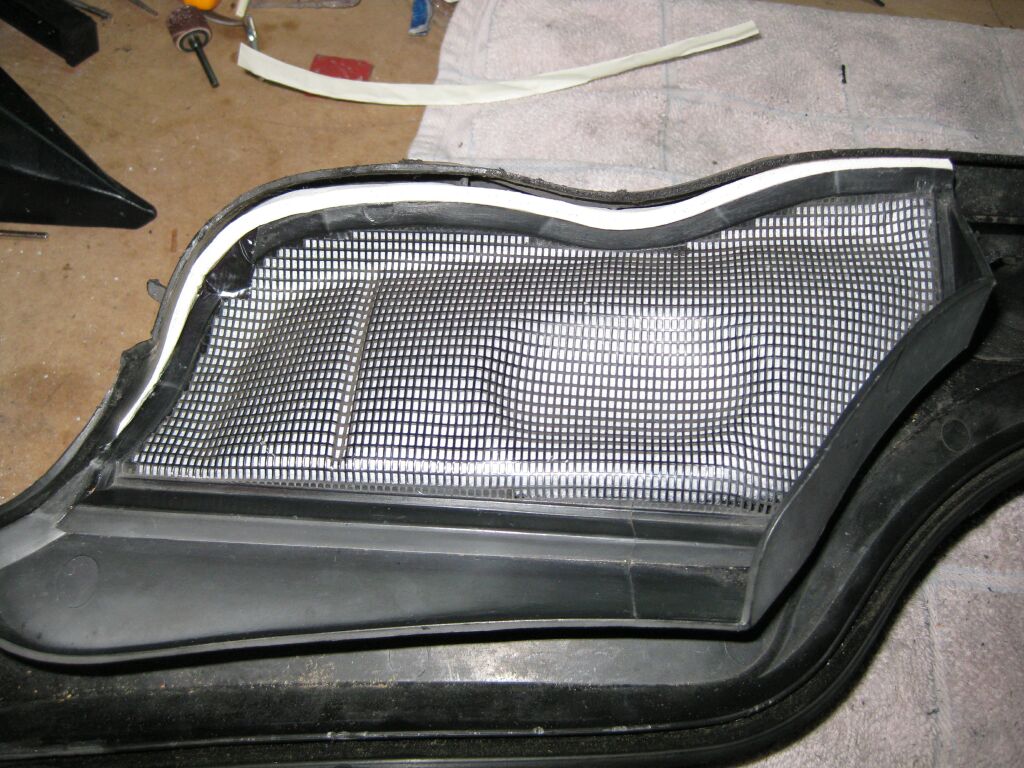
 Lastly,
the charcoal filter is cut down and fitted over the top of the pollen
filter. To make sure these stay "sandwiched" together and in place, I
used some strips of duct tape. This not only will keep the filters in
place, but also seal off any gaps left over.
Lastly,
the charcoal filter is cut down and fitted over the top of the pollen
filter. To make sure these stay "sandwiched" together and in place, I
used some strips of duct tape. This not only will keep the filters in
place, but also seal off any gaps left over.
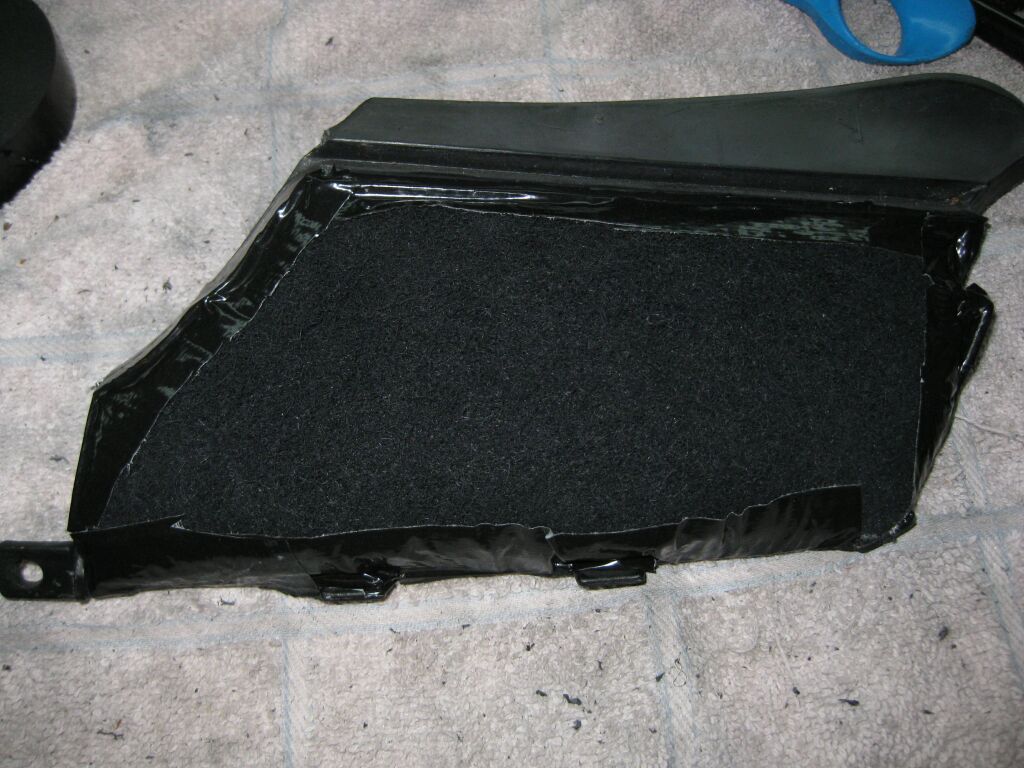
 Upon
re-installation, I noticed that the grills don't make a complete seal
against the cowling. To fix this issue and ensure a tight seal, I used
some foam tape (to seal out leaks from doors/windows) around the outer edge.
Since we have drilled out the plastic welds, I used two short self tapping
screws to secure the grills in place and are easy to get to when it comes
time to replace the filters.
Upon
re-installation, I noticed that the grills don't make a complete seal
against the cowling. To fix this issue and ensure a tight seal, I used
some foam tape (to seal out leaks from doors/windows) around the outer edge.
Since we have drilled out the plastic welds, I used two short self tapping
screws to secure the grills in place and are easy to get to when it comes
time to replace the filters.
 This
is the other side finished and installed. Now the cowling can be
re-installed.
This
is the other side finished and installed. Now the cowling can be
re-installed.
6/8/09 - Rear Brake Rotor & Pad Replacement
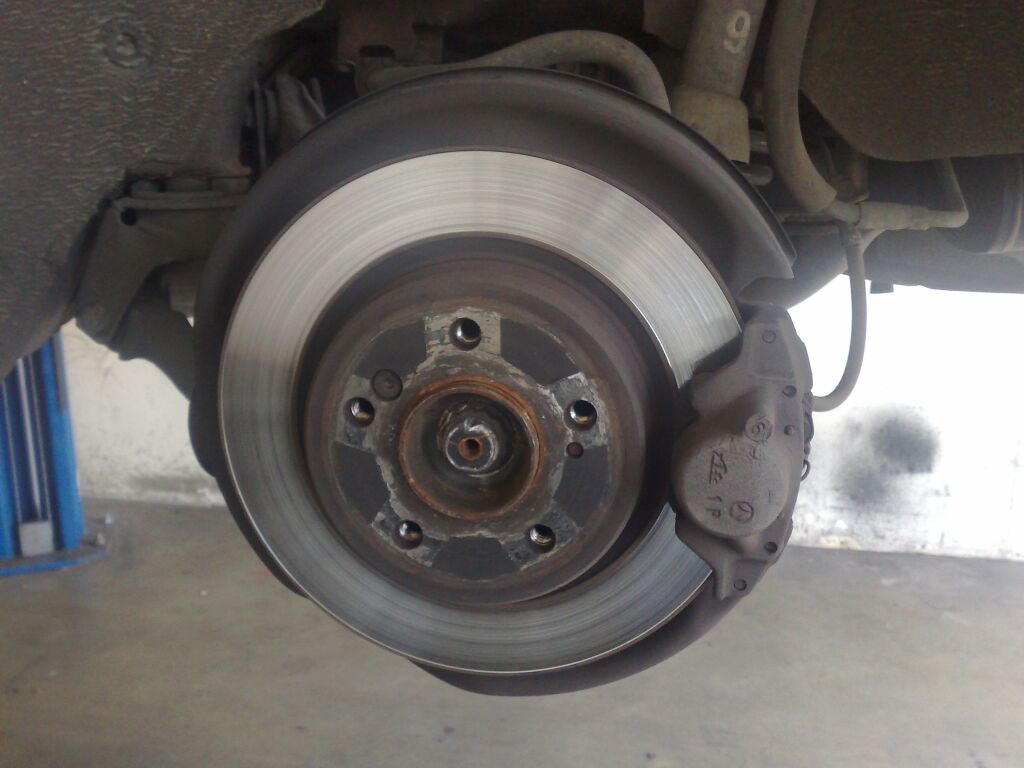 I
already completed the front brake replacement several months ago, but had
some issues with the pictures, so now that I finally finished the rear, I
have some pictures to post. I used Balor OE rotors and EBC Greenstuff
pads. My original rotors were warped and my OE front pads worn down.
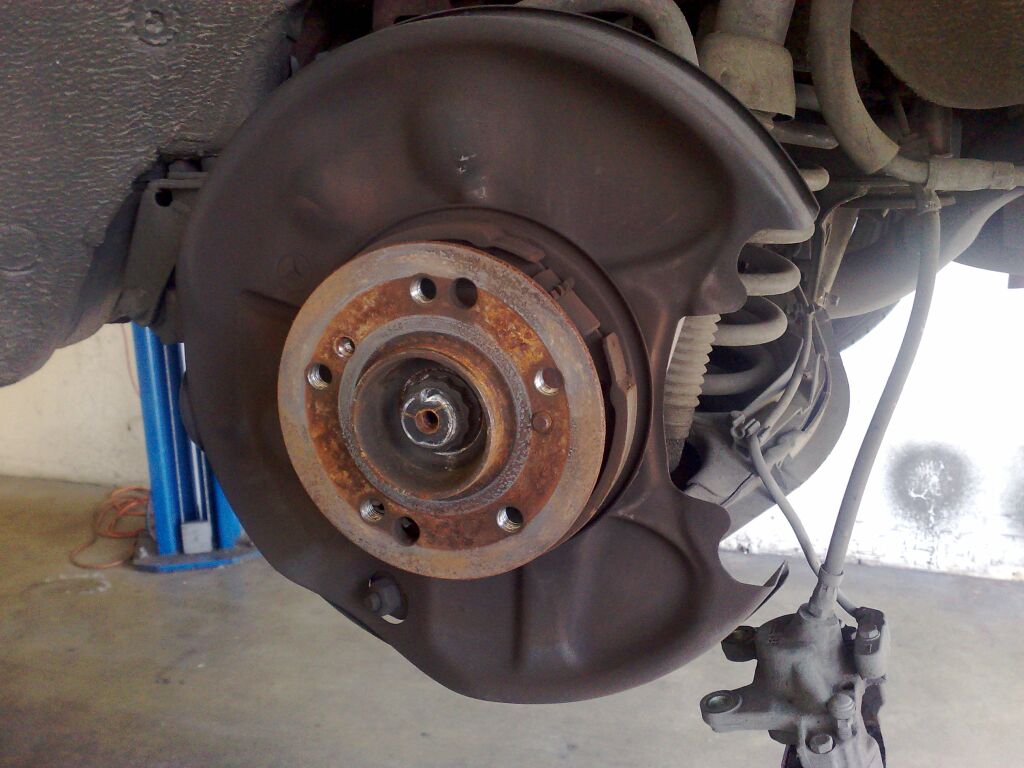
So this is the stock rear.
I
already completed the front brake replacement several months ago, but had
some issues with the pictures, so now that I finally finished the rear, I
have some pictures to post. I used Balor OE rotors and EBC Greenstuff
pads. My original rotors were warped and my OE front pads worn down.
So this is the stock rear.
 First
up, removal of the caliper, two bolts on the rear hold it in place. A
impact wrench comes in handy for this job
First
up, removal of the caliper, two bolts on the rear hold it in place. A
impact wrench comes in handy for this job
 Once
the bolts are out, the caliper can be pulled off. The rotor is held on
with a single hex screw. Once you remove it, you can pull the rotor.
A mallet/hammer may be necessary to get the rotor off. Hitting it from
the rear and tapping it on the rotor hat will loosen it up.
Once
the bolts are out, the caliper can be pulled off. The rotor is held on
with a single hex screw. Once you remove it, you can pull the rotor.
A mallet/hammer may be necessary to get the rotor off. Hitting it from
the rear and tapping it on the rotor hat will loosen it up.
 Now
that we have the rotor off, its time to clean up the caliper and rotor dust
shield. The pads can be removed/installed without disconnecting the
brake line, but you may need a flat blade screw driver to compress the
caliper pistons
Now
that we have the rotor off, its time to clean up the caliper and rotor dust
shield. The pads can be removed/installed without disconnecting the
brake line, but you may need a flat blade screw driver to compress the
caliper pistons
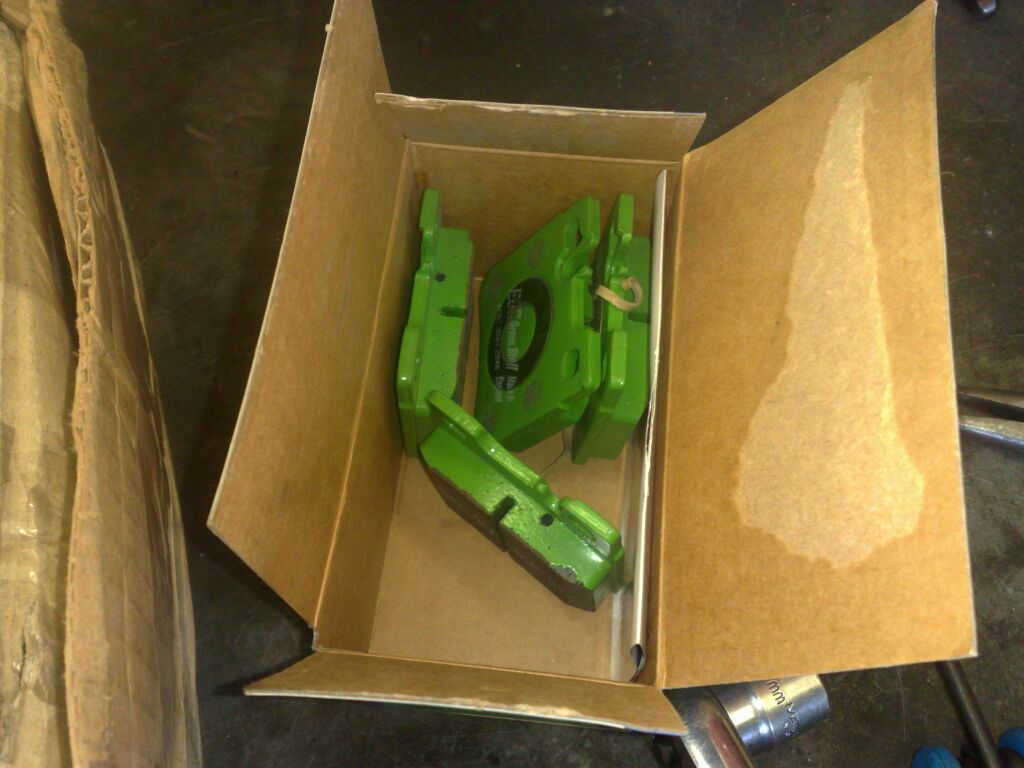 This
time around I chose to use EBC Greenstuff brake pads. I have used
Porterfield R4S and MetalMaster pads in the past, all are good but I scored
a great deal on these via EBay (also on all of the rotors). These are
street pads, so they work cold, don't squeal and produce much less dust then
the OE pads.
This
time around I chose to use EBC Greenstuff brake pads. I have used
Porterfield R4S and MetalMaster pads in the past, all are good but I scored
a great deal on these via EBay (also on all of the rotors). These are
street pads, so they work cold, don't squeal and produce much less dust then
the OE pads.
 This
is the EBC part number I used for the rear. I don't have the part
numbers for the front handy, but since my 500e has the SL600 front brakes,
those are the pads I used in the front.
This
is the EBC part number I used for the rear. I don't have the part
numbers for the front handy, but since my 500e has the SL600 front brakes,
those are the pads I used in the front.
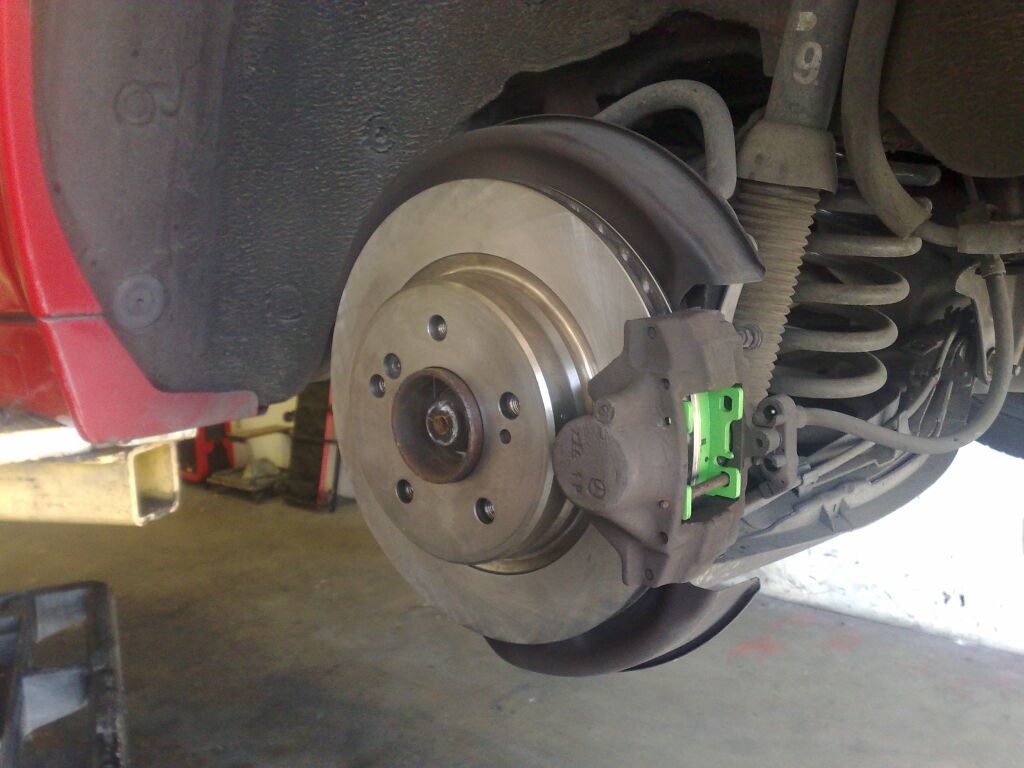 Everything
done and put back together. For the last couple of months I was
driving around with my new fronts and warped rears, which was noticeable
when braking, the braking now is much improved and a very noticeable
improvement in stopping ability. Something I didn't expect to notice
with the rears since they are not the primary stopping power in this car.
Everything
done and put back together. For the last couple of months I was
driving around with my new fronts and warped rears, which was noticeable
when braking, the braking now is much improved and a very noticeable
improvement in stopping ability. Something I didn't expect to notice
with the rears since they are not the primary stopping power in this car.
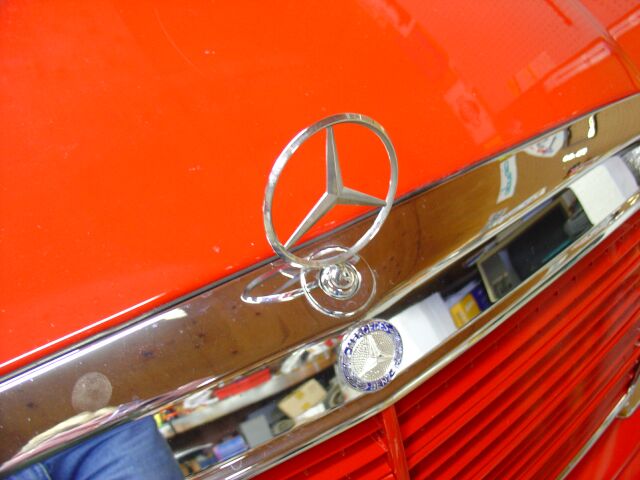
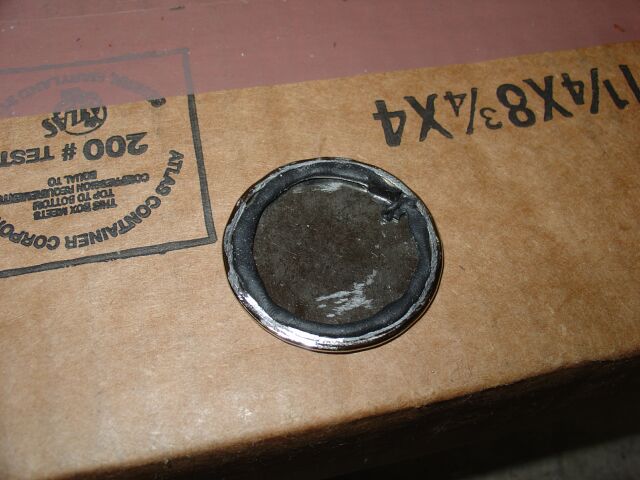
7/5/05 - Removal of Hood Star and replace with chrome hole cap
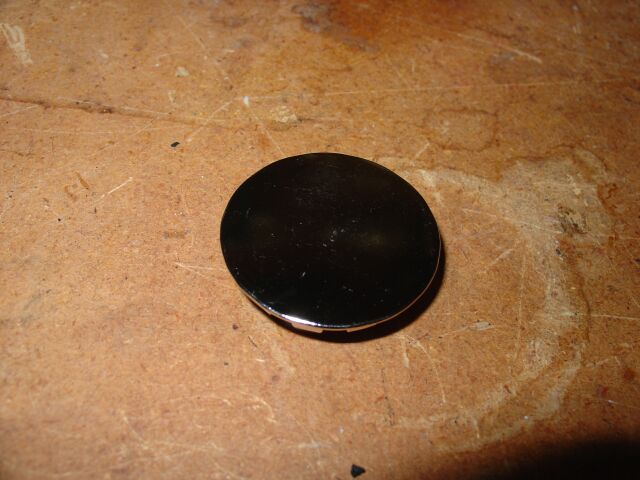 Eventually,
I plan on powder coating a grill frame (body color) and welding in the holes for
the emblem/star. When I was in Lowes, I came across these chrome caps and
remembered seeing something like this available from Performance Products for
something like $20. This only cost a buck, so I figured it would be fun to
try and see if I could make it work.
Eventually,
I plan on powder coating a grill frame (body color) and welding in the holes for
the emblem/star. When I was in Lowes, I came across these chrome caps and
remembered seeing something like this available from Performance Products for
something like $20. This only cost a buck, so I figured it would be fun to
try and see if I could make it work.
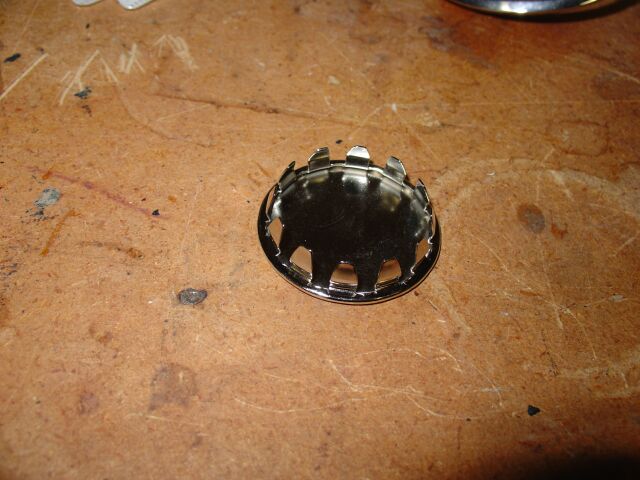 This
is the back side of the chrome cap, I knew modifications were going to be
necessary to make this fit, as the Mercedes hood star has kind of an oblong
hole.
This
is the back side of the chrome cap, I knew modifications were going to be
necessary to make this fit, as the Mercedes hood star has kind of an oblong
hole.
 So
we start by removing the hood star.
So
we start by removing the hood star.
 To
remove the star, a pliers is needed, grasp the black ring, pull down and twist
the ring till its ends are aligned with the notched opening, the hood star will
come right out.
To
remove the star, a pliers is needed, grasp the black ring, pull down and twist
the ring till its ends are aligned with the notched opening, the hood star will
come right out.
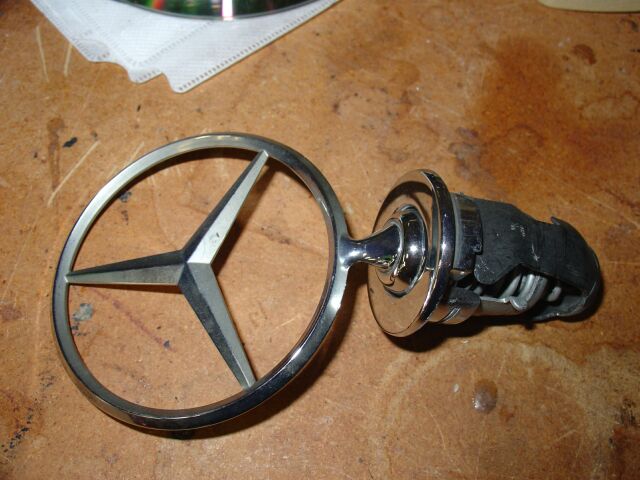 This
is the star removed from the grill.
This
is the star removed from the grill.
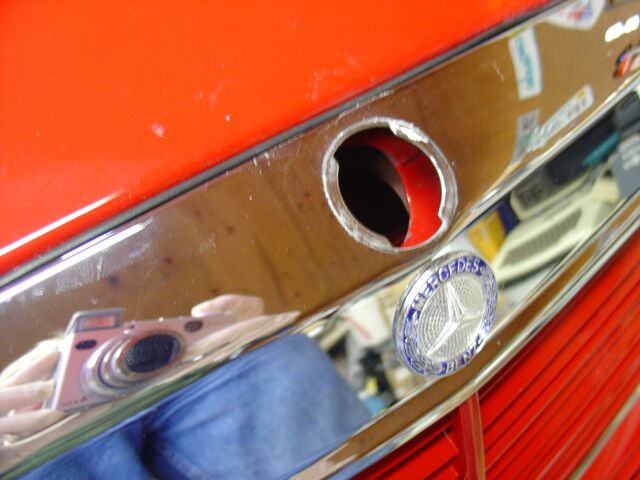 This
is the hole that needs to be filled. You can see what I mean when I say
the hole is oblong.
This
is the hole that needs to be filled. You can see what I mean when I say
the hole is oblong.
 After
some test fitting, it became obvious that if this was going to work, I needed to
remove all the clips on the back of the chrome cap. This would allow the
cap to sit flush, where as, with the clips in place, it would not sit flush.
So, a few minutes with the old Dremel and we had a smooth base to work from.
The next issue to tackle was how to adhere the chrome cap to the grill. I
did not want a permanent solution so I broke out some of my trusty black goo.
Black goo is what I call this stuff, its actually windshield tack and also used
on some cars to attach inner door plastic seals to the sheet metal. Very
sticky and reliable stuff. Once its stuck on, its very difficult to get off, so
it would work for this particular project quite well. (Note:
Although you should wear gloves when working with this stuff, that's not really
possible since its so sticky, so please, if you use this stuff, wash your hands
after handling it, its a skin and eye irritant).
After
some test fitting, it became obvious that if this was going to work, I needed to
remove all the clips on the back of the chrome cap. This would allow the
cap to sit flush, where as, with the clips in place, it would not sit flush.
So, a few minutes with the old Dremel and we had a smooth base to work from.
The next issue to tackle was how to adhere the chrome cap to the grill. I
did not want a permanent solution so I broke out some of my trusty black goo.
Black goo is what I call this stuff, its actually windshield tack and also used
on some cars to attach inner door plastic seals to the sheet metal. Very
sticky and reliable stuff. Once its stuck on, its very difficult to get off, so
it would work for this particular project quite well. (Note:
Although you should wear gloves when working with this stuff, that's not really
possible since its so sticky, so please, if you use this stuff, wash your hands
after handling it, its a skin and eye irritant).
 Here
is the final product. A nice inexpensive way to cap off the hood star
without breaking your wallet in the process. I prefer a shaved, clean look
to the grill, some prefer to not have the hood emblem because of theft concerns.
Whatever your motivating, have fun.
Here
is the final product. A nice inexpensive way to cap off the hood star
without breaking your wallet in the process. I prefer a shaved, clean look
to the grill, some prefer to not have the hood emblem because of theft concerns.
Whatever your motivating, have fun.
Removal of 500E Trunk emblem
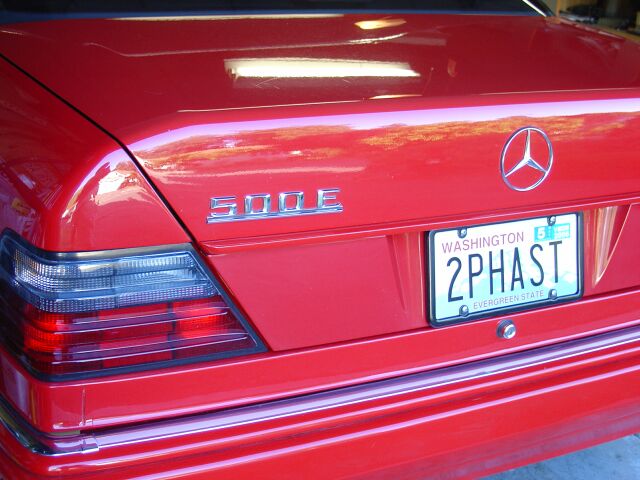 Finally
decided to remove the 500E trunk emblem to clean up the appearance of the rear.
It was a tough decision.
Finally
decided to remove the 500E trunk emblem to clean up the appearance of the rear.
It was a tough decision.
 I
used dental floss to cut the emblem away from the trunk lid without scratching
the paint. Once removed, the hard work started. I used a combination
of Goo Gone and Goof Off, both are adhesive removers with the latter being
strong enough to remove paint, so be careful using using these products. I
applied some Goof Off to the adhesive and let it sit for a bit, then used Goo
Gone soaked into a cotton cloth to rub the mess off. Rubbing straight Goof
Off on paint is not recommended, you can damage your paint and clear coat.
I
used dental floss to cut the emblem away from the trunk lid without scratching
the paint. Once removed, the hard work started. I used a combination
of Goo Gone and Goof Off, both are adhesive removers with the latter being
strong enough to remove paint, so be careful using using these products. I
applied some Goof Off to the adhesive and let it sit for a bit, then used Goo
Gone soaked into a cotton cloth to rub the mess off. Rubbing straight Goof
Off on paint is not recommended, you can damage your paint and clear coat.
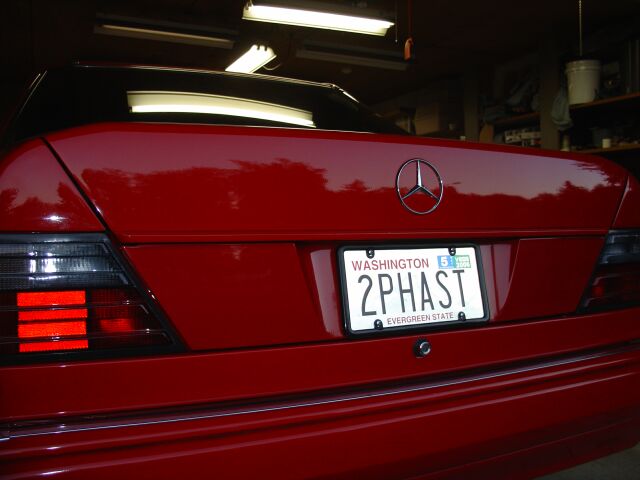 Once
finished, I applied several coats of Zaino wax to complete the removal and clean
up/polish away any scratch's that might remain. Took about an hour, so be
patient.
Once
finished, I applied several coats of Zaino wax to complete the removal and clean
up/polish away any scratch's that might remain. Took about an hour, so be
patient.
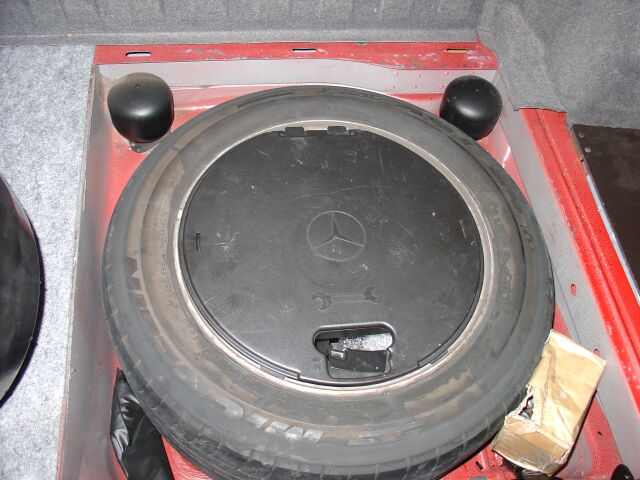
W140 Tool Bin
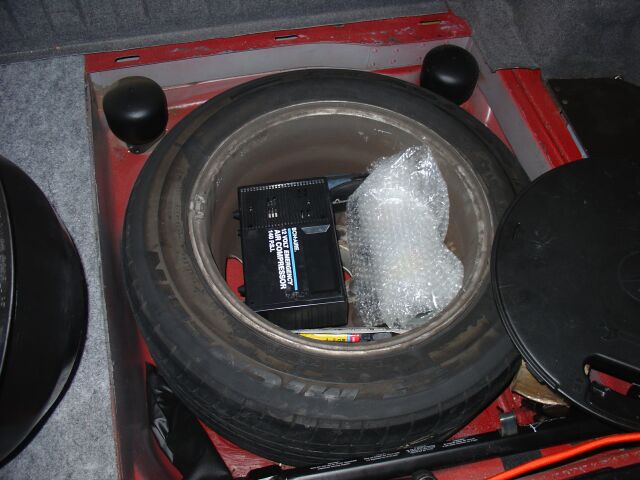 The
W124 comes with a plastic bucket for storage of our tool sack and other misc
items. The W140 comes with a nice storage tray that sits inside the spare
wheel and has a nice assortment of MB tools. This case has a locking lid
and you can take it out and carry with you. Here is my dirty spare wheel
with the bucket removed and my other necessities stored away.
The
W124 comes with a plastic bucket for storage of our tool sack and other misc
items. The W140 comes with a nice storage tray that sits inside the spare
wheel and has a nice assortment of MB tools. This case has a locking lid
and you can take it out and carry with you. Here is my dirty spare wheel
with the bucket removed and my other necessities stored away.
Here is the W140 tool kit seated into the top of the spare wheel. Our
plastic trunk cover (big plastic piece with a hole in the center of it) does not
allow easy access to the tool kit, like it did to our plastic bucket. Of
course you could modify the cover.
 I
picked this tool kit up from Ebay for around $20, aside from it having some
misc. scratch's on the cover, it was complete with all tools in unused condition.
One note, you need a 16" spare wheel for this kit to fit, those of your running
around with 14" or 15" spare tires are out of luck!
I
picked this tool kit up from Ebay for around $20, aside from it having some
misc. scratch's on the cover, it was complete with all tools in unused condition.
One note, you need a 16" spare wheel for this kit to fit, those of your running
around with 14" or 15" spare tires are out of luck!
Oil Change
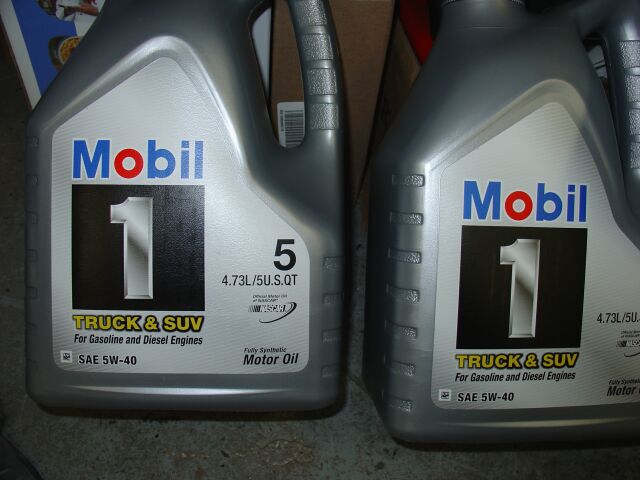 The
previous owners of my 500E always ran dino oil in the car, so to extend the life
of the motor, I switched over to a synthetic oil. This time around, I did
a bit more research (my W201 was converted to use the same brand/weight as my
Corvette) and decided on Mobil 1 5w40 Truck & SUV.
The
previous owners of my 500E always ran dino oil in the car, so to extend the life
of the motor, I switched over to a synthetic oil. This time around, I did
a bit more research (my W201 was converted to use the same brand/weight as my
Corvette) and decided on Mobil 1 5w40 Truck & SUV.

I purchased a stock of Mann oil filters (Ebay) that should hold me over for a year or so of oil changes.
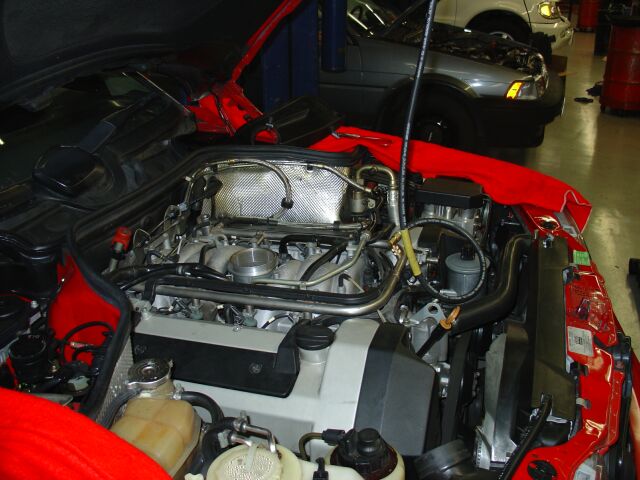
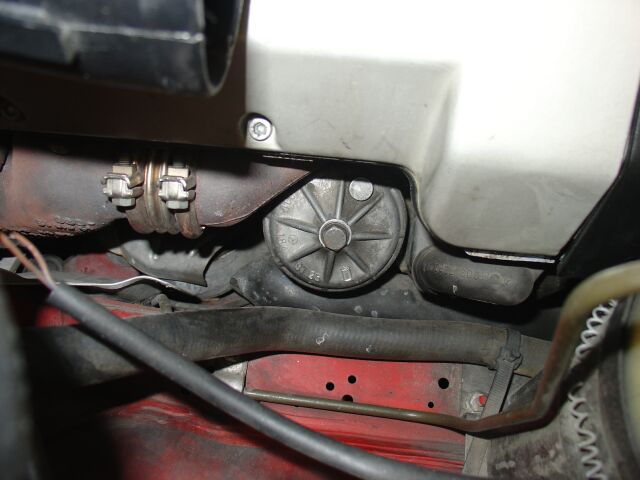 The
oil filter on the M119 motor is housed in this compartment on the passenger side
of the engine block, it requires a socket wrench to remove the cover.
The
oil filter on the M119 motor is housed in this compartment on the passenger side
of the engine block, it requires a socket wrench to remove the cover.

Once you have the oil filter cover off, there are several rubber O-rings and a
washer you need to replace (included with the new oil filter).
 I
use a hand pump to drain the oil from my car. This is not a efficient
method by any means, takes me an hour or so to pump the 8 quarts of oil from the
motor.
I
use a hand pump to drain the oil from my car. This is not a efficient
method by any means, takes me an hour or so to pump the 8 quarts of oil from the
motor.
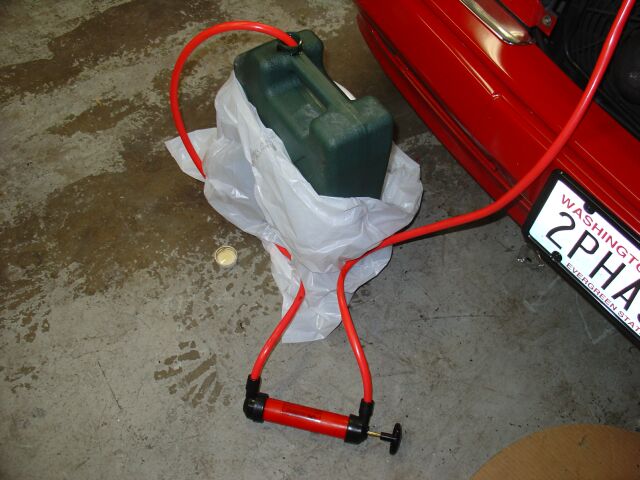
Of course, you need to drain your oil oil into something that you can haul down
to the local auto parts outlet and dump into their recycle bin. This is
what I use and it holds almost 16 quarts of oil, almost enough for two full oil
chances.
2-2-06 - General Maintenance
Normally, when I purchase a pre-owned vehicle, if I can not determine when general maintenance items have been performed, I will just go through and do them all myself and log the date and mileage. For this exercise, the project was to flush/refill the radiator, power steering, brake fluid, trans fluid, trans filter, rear diff fluid. Replace the caps/rotors, fuel filter and flush the fuel injection system.
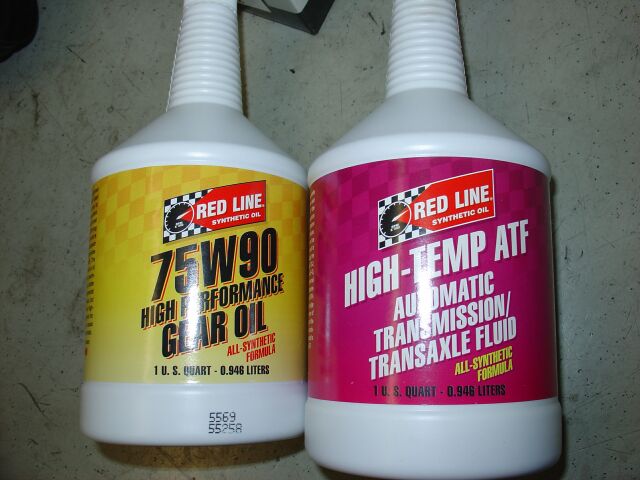 For
the transmission and rear differential, I chose Redline High Temp ATF and
Redline syn 75w90 gear oil for the differential. The ATF fluid exceeds the
MB requirement and same for the rear differential fluid.
For
the transmission and rear differential, I chose Redline High Temp ATF and
Redline syn 75w90 gear oil for the differential. The ATF fluid exceeds the
MB requirement and same for the rear differential fluid.
![]()
To start with the trans fluid/filter change, we need to drain the old fluid from
the pan and also drain it from the torque converter. A trans fluid flush
is always best if you have the equipment to do it.
![]() Here
is the transmission with the pan and removed. OE filters can be purchased
from Ebay for around $20 +/-
Here
is the transmission with the pan and removed. OE filters can be purchased
from Ebay for around $20 +/-
![]()
Here is the new filter which includes everything needed for the exchange.
![]() Here
is the new transmission filter being installed. The M119 transmission
consumes allot of fluid, check your owners manual for the proper fill
amount for your particular vehicle.
Here
is the new transmission filter being installed. The M119 transmission
consumes allot of fluid, check your owners manual for the proper fill
amount for your particular vehicle.
Rear Differential Fluid
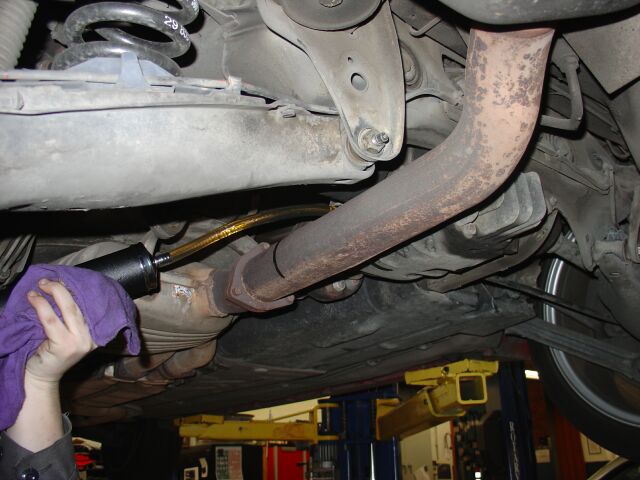 The
rear diff can be drained normally, but the fill hole is on the side of the
housing, the item shown in the picture is designed specifically to fill hard to
reach areas, you just insert the hose into your fluid bottle, draw back the
handle, then insert the hose into the hole and depress the handle. Kind of
like a syringe. Again, consult your owners manual for the proper fill
levels for your differential.
The
rear diff can be drained normally, but the fill hole is on the side of the
housing, the item shown in the picture is designed specifically to fill hard to
reach areas, you just insert the hose into your fluid bottle, draw back the
handle, then insert the hose into the hole and depress the handle. Kind of
like a syringe. Again, consult your owners manual for the proper fill
levels for your differential.
Caps and Rotors
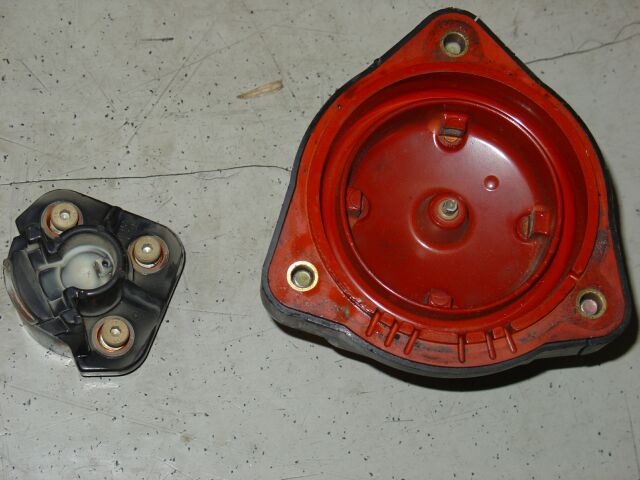 I
purchase a set of new Bosch rotors and caps (Ebay) for around $180. The
old units (shown in this picture) were very worn. I don't have any how to
pictures on the install, but its not to difficult to figure out.
I
purchase a set of new Bosch rotors and caps (Ebay) for around $180. The
old units (shown in this picture) were very worn. I don't have any how to
pictures on the install, but its not to difficult to figure out.
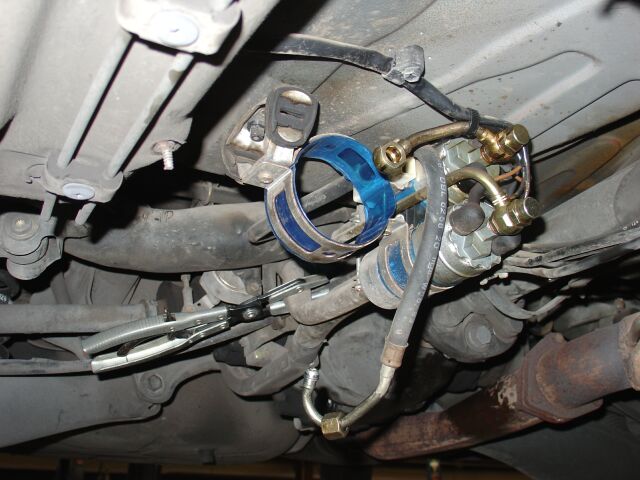
SLS fluid Change
 To
change the self leveling suspension fluid, you need two bottles. Again,
Ebay provided me the source for my project. The best way to do this is to
disconnect the SLS return line and extend it into a oil pan or container, open
up the SLS reservoir, start the car and as the old fluid comes out into drain
pan, keep adding new fluid till only clean fluid is coming out of the return
line. I also cleaned the SLS filter, which btw was not even dirty.
To
change the self leveling suspension fluid, you need two bottles. Again,
Ebay provided me the source for my project. The best way to do this is to
disconnect the SLS return line and extend it into a oil pan or container, open
up the SLS reservoir, start the car and as the old fluid comes out into drain
pan, keep adding new fluid till only clean fluid is coming out of the return
line. I also cleaned the SLS filter, which btw was not even dirty.
Fuel Filter Change
 The
fuel filter is another area that can cause you grief and its not an expensive
item to replace.
The
fuel filter is another area that can cause you grief and its not an expensive
item to replace.
This is a picture of the underside of the 500E, with the fuel pump cover and
filter removed. Not a complicated R&R, but you really need a lift and some
idea of what you are doing.
Power steering fluid replacement
 OE
fluid was used in the power fluid flush.
OE
fluid was used in the power fluid flush.
Brake Fluid flush
 OE
MB Dot 4 brake fluid was used here, since I am not going to race this vehicle, a
higher temp fluid is not necessary. At the shop, a pressurized machine was
used to flush the fluid out into this bottle, sure is easier than having someone
help by pumping the brake pedal.
OE
MB Dot 4 brake fluid was used here, since I am not going to race this vehicle, a
higher temp fluid is not necessary. At the shop, a pressurized machine was
used to flush the fluid out into this bottle, sure is easier than having someone
help by pumping the brake pedal.
Injector Flush
 The
MB dealer uses a pressurized system to inject fuel injector/system cleaner into
the engine, they start by disabling the fuel pumps by removing the fuel pump
relay, then they hook this system up to your engine injector system, pressurize
it and run your car off of the cleaner. Takes about 20 minutes or so.
Not cheap though, the kit alone is over $50. You follow this up by adding
a can of cleaner to your gas tank.
The
MB dealer uses a pressurized system to inject fuel injector/system cleaner into
the engine, they start by disabling the fuel pumps by removing the fuel pump
relay, then they hook this system up to your engine injector system, pressurize
it and run your car off of the cleaner. Takes about 20 minutes or so.
Not cheap though, the kit alone is over $50. You follow this up by adding
a can of cleaner to your gas tank.
Special thanks to Steve Geyer at
SG
Motorsports.com for his assistance with these maintenance projects.
Flex Disc Replacement 7-2-06
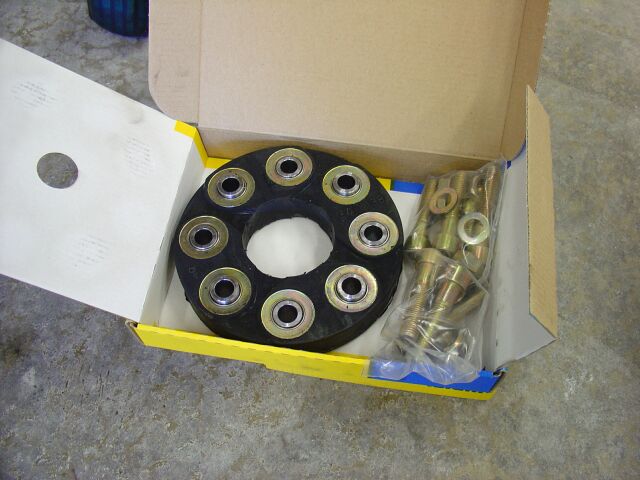 The
original flex discs on the 500e were showing their age, so they were replaced
with new OE items.
The
original flex discs on the 500e were showing their age, so they were replaced
with new OE items.
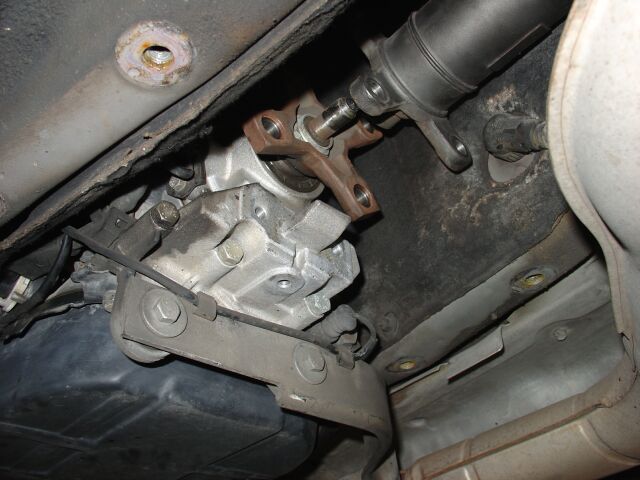
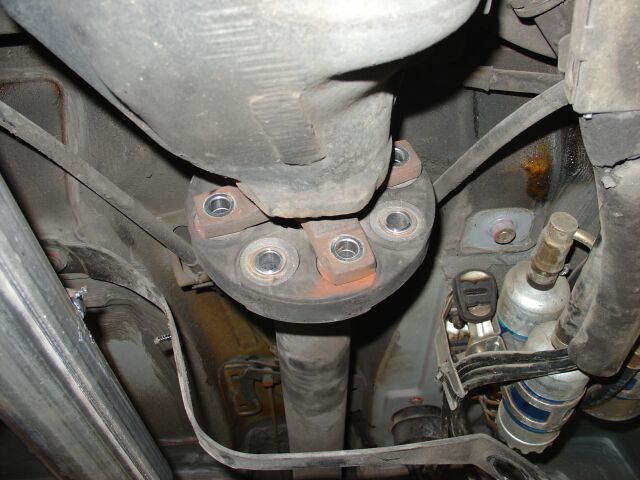 The
500e uses heavy duty flex discs that have 8 bolts vs. the 6 bolt version for the
4 and 6 cylinder W124's. This is the rear disc in process of being
replaced. Notice the drive line support shaft, only the 500e has this
reinforcement piece, in the event of a disc failure, it keeps the drive line
from dropping and dragging on the ground.
The
500e uses heavy duty flex discs that have 8 bolts vs. the 6 bolt version for the
4 and 6 cylinder W124's. This is the rear disc in process of being
replaced. Notice the drive line support shaft, only the 500e has this
reinforcement piece, in the event of a disc failure, it keeps the drive line
from dropping and dragging on the ground.
 Here
is the rear flex disc removed. When replacing the flex discs, you should
always do them both. Also, both discs should be installed with the
writing side facing each other.
Here
is the rear flex disc removed. When replacing the flex discs, you should
always do them both. Also, both discs should be installed with the
writing side facing each other.
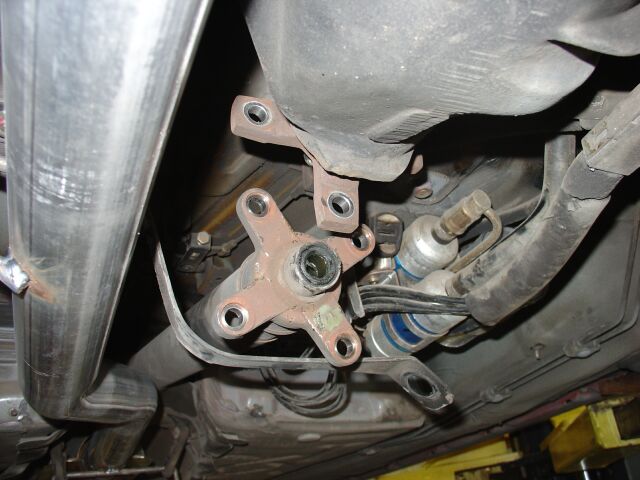
Here is the front flex disc being replaced. In the event you neglect
your flex disc's and they shred, you run the risk of it causing your airbags to
deploy, a scary thought if your on the freeway.
Title Max Company Resources
Company Profile at
Linkedin
Title Max
Telecommuting Jobs
<Back
Information/pictures on this site are the property of Rik Johnson and are not
to be used without written permission.