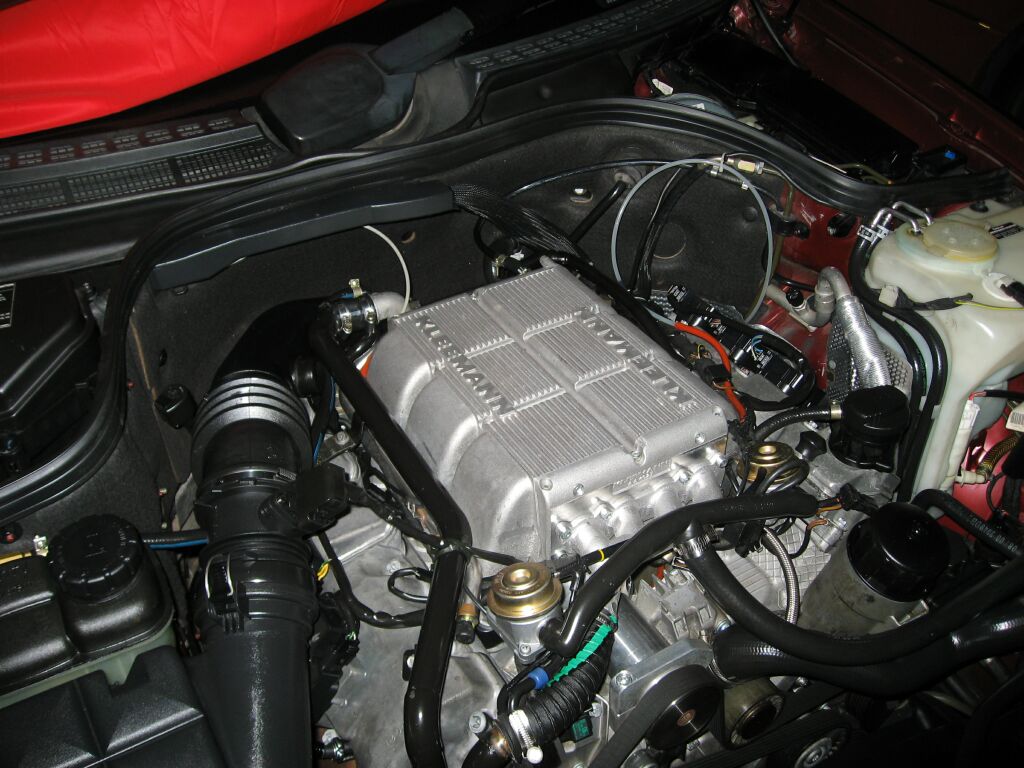
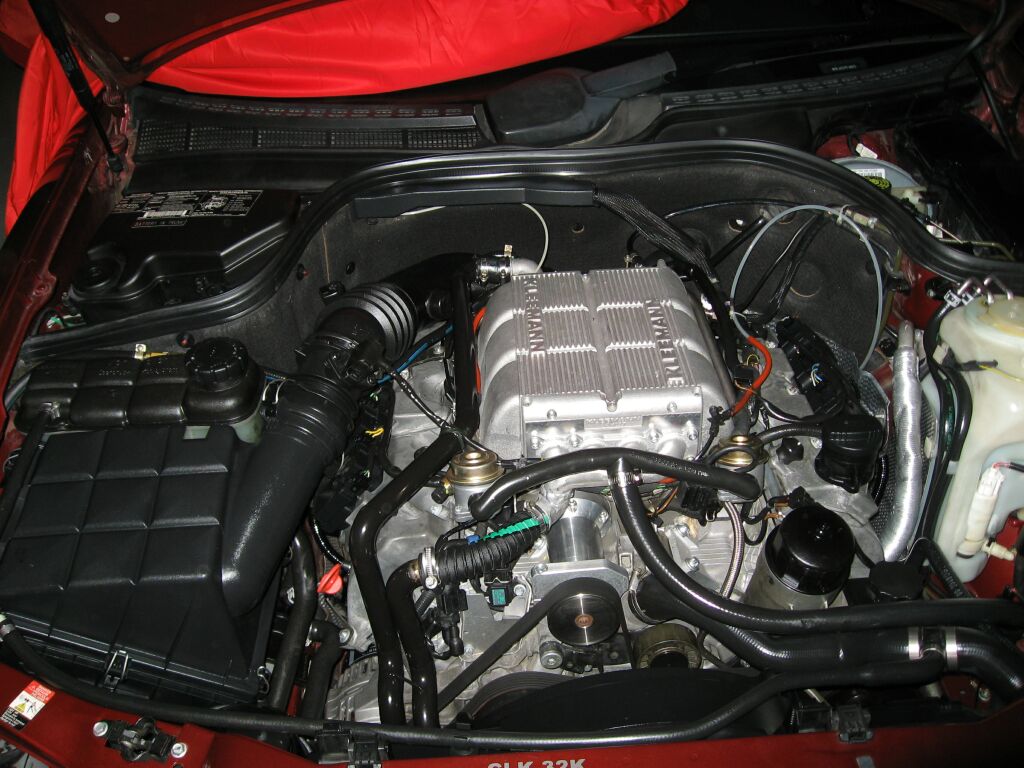
 The
CLK32K is Kleemanns designation for the CLK320 when supercharged. The
Kleemann supercharger is the full kit, which includes intercooler and ECU flash.
This particular setup also uses a custom made 70mm pulley, which increases the
boost from .5 bar to .6 bar. Also included with this particular conversion
is a electric water pump with metal impellers (stock has plastic impellers).
The result is a increase from the stock hp of 215 to roughly 345 hp.
Coupled with the 3.27:1 rear differential (from a C230) this car is extremely
fast.
The
CLK32K is Kleemanns designation for the CLK320 when supercharged. The
Kleemann supercharger is the full kit, which includes intercooler and ECU flash.
This particular setup also uses a custom made 70mm pulley, which increases the
boost from .5 bar to .6 bar. Also included with this particular conversion
is a electric water pump with metal impellers (stock has plastic impellers).
The result is a increase from the stock hp of 215 to roughly 345 hp.
Coupled with the 3.27:1 rear differential (from a C230) this car is extremely
fast.
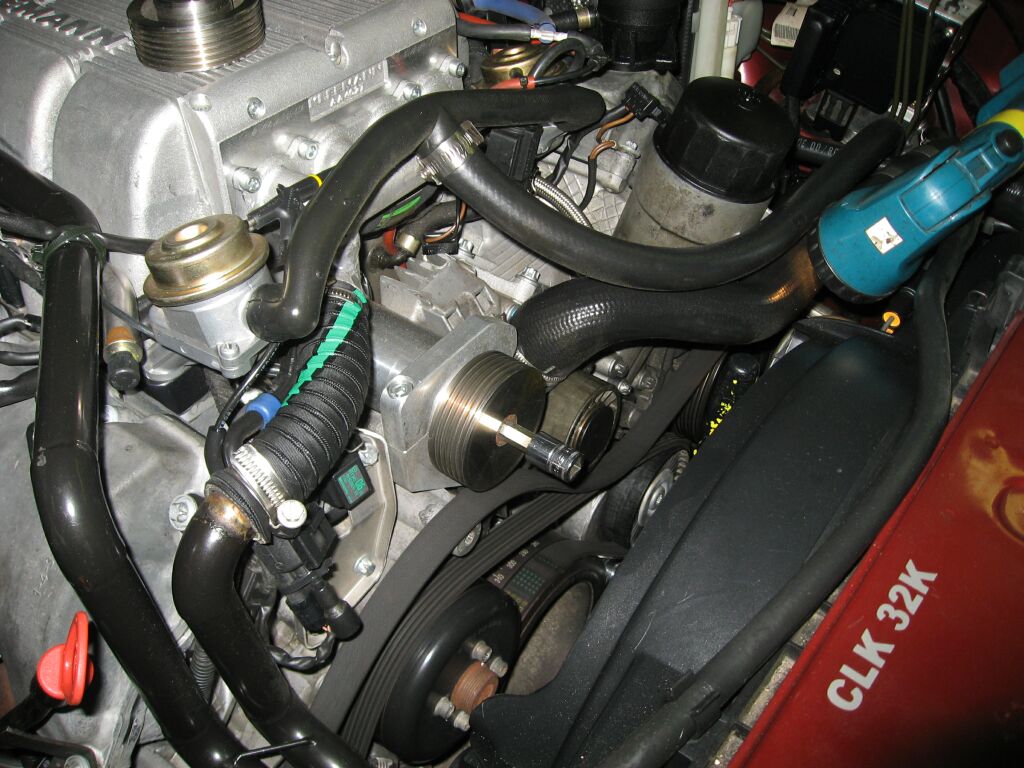
Here we see the drive belt removed as we prepare to remove the 76mm stock SC
pulley and install the smaller, 70mm custom made pulley
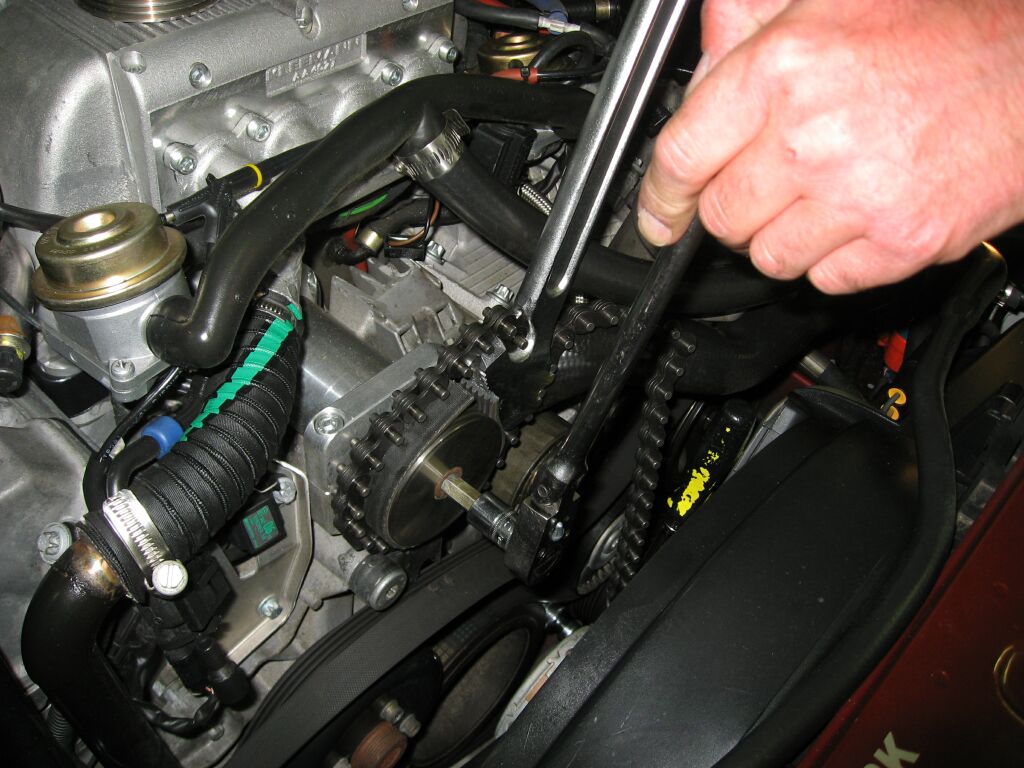 This
is a specialty tool used to remove pulley's. Thanks to Alex at CarbCon in
Kirkland for doing the installation for me
This
is a specialty tool used to remove pulley's. Thanks to Alex at CarbCon in
Kirkland for doing the installation for me
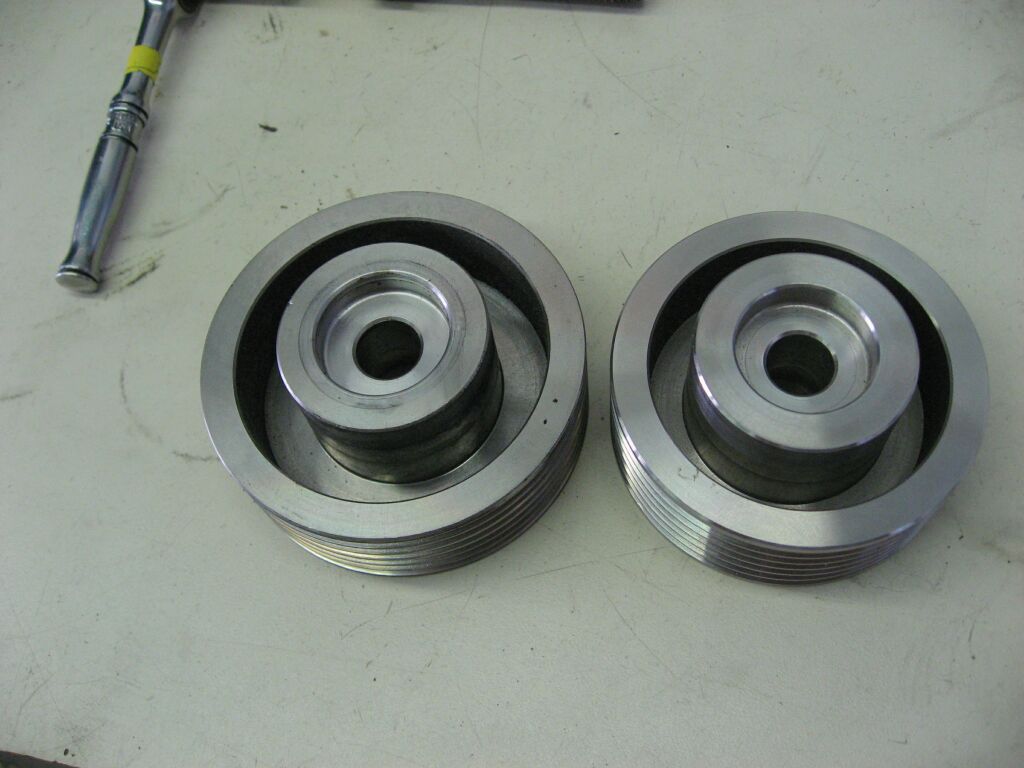 You
can see the stock 76mm pulley vs. the 70mm custom made pulley
You
can see the stock 76mm pulley vs. the 70mm custom made pulley
 Another
picture of the 70mm pulley before installation
Another
picture of the 70mm pulley before installation
 Another
view of the Kleemann supercharger. The stock engine cover no longer fits,
so the engine does look a bit bare, but with a few modifications, I should be
able to at least get part of the engine cover to fit.
Another
view of the Kleemann supercharger. The stock engine cover no longer fits,
so the engine does look a bit bare, but with a few modifications, I should be
able to at least get part of the engine cover to fit.
 The
stock engine covers don't fit over the Kleemann supercharger, so my original was
cut down to fit. This didn't look very good, so I decided to purchase a
new OE cover and modify it to fit. I had a slight mishap with my digital
camera, so I don't have any progression pictures, just the finished product.
It took me four days of cutting/sanding to get the cover to fit over the SC and
all the associated piping.
The
stock engine covers don't fit over the Kleemann supercharger, so my original was
cut down to fit. This didn't look very good, so I decided to purchase a
new OE cover and modify it to fit. I had a slight mishap with my digital
camera, so I don't have any progression pictures, just the finished product.
It took me four days of cutting/sanding to get the cover to fit over the SC and
all the associated piping.
 The
majority of work was concentrated on cutting away the center section of the
cover, of course, the underside needed trimming and as a result of this, not all
of the original mounting clips are still intact. Painting involved sanding
with 400 grit, application of a adhesion promoter and then finally body matched
paint. The star was removable and painted separately using a chrome paint.
The letters were hand painted using the same chrome paint. The hand
lettering took an entire day, but the end results were worth the effort.
The
majority of work was concentrated on cutting away the center section of the
cover, of course, the underside needed trimming and as a result of this, not all
of the original mounting clips are still intact. Painting involved sanding
with 400 grit, application of a adhesion promoter and then finally body matched
paint. The star was removable and painted separately using a chrome paint.
The letters were hand painted using the same chrome paint. The hand
lettering took an entire day, but the end results were worth the effort.
 Like
I mentioned in my previous caption, not all the mounting clips were left intact,
you can see that I had to add a grommet and use a wire tie to hold the left
passenger side front corner down. This is somewhat inconvenient, as now I
need to keep wire tires and a pair of cutters in my car. (in the event I need to
remove the cover)
Like
I mentioned in my previous caption, not all the mounting clips were left intact,
you can see that I had to add a grommet and use a wire tie to hold the left
passenger side front corner down. This is somewhat inconvenient, as now I
need to keep wire tires and a pair of cutters in my car. (in the event I need to
remove the cover)
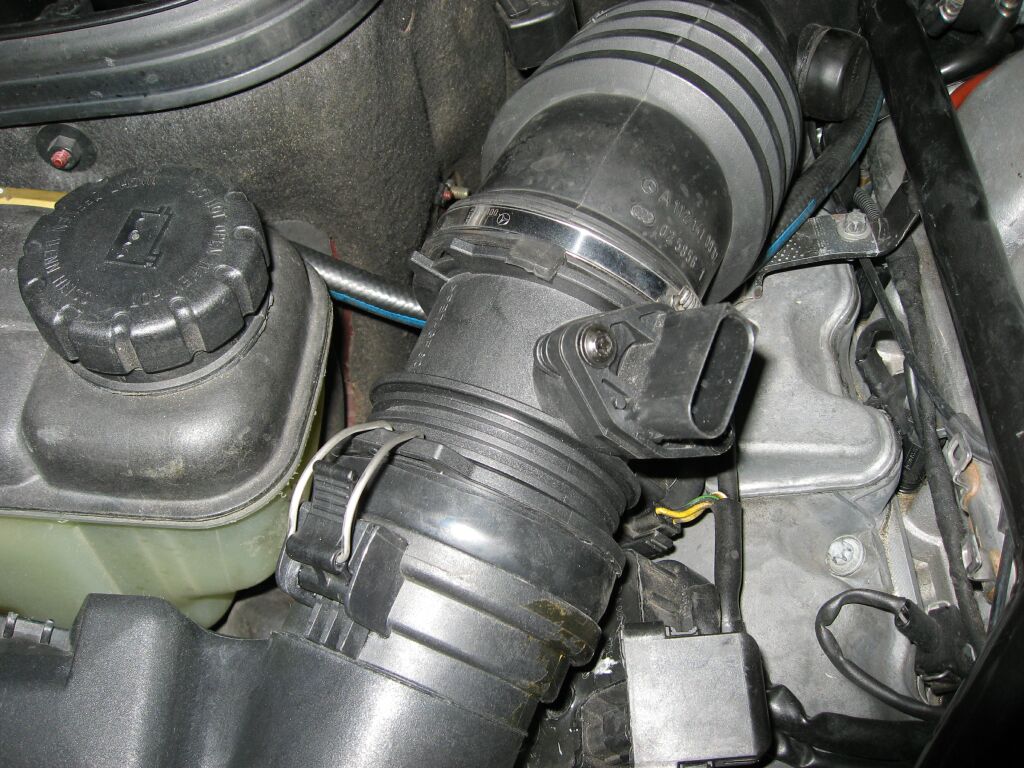
 You
can also see that now the MAF sits correctly, as the other part of this upgrade
was replacing the C36 airbox cover with a OE cover (mentioned in the next
section)
You
can also see that now the MAF sits correctly, as the other part of this upgrade
was replacing the C36 airbox cover with a OE cover (mentioned in the next
section)
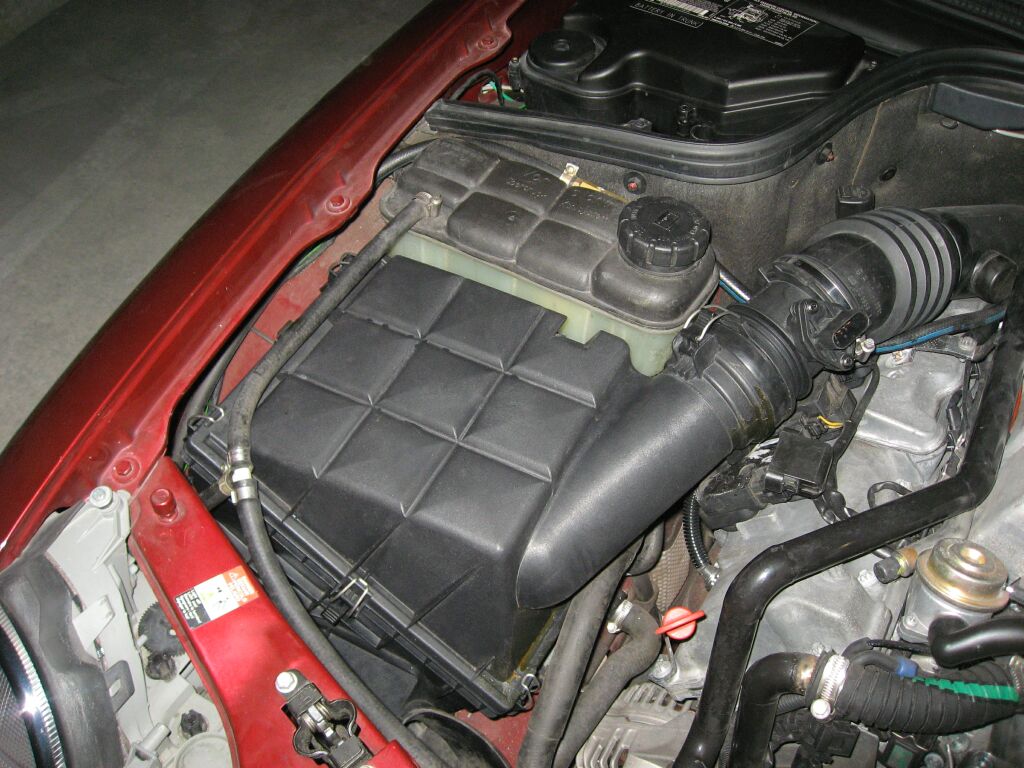
C36 Airbox Installation
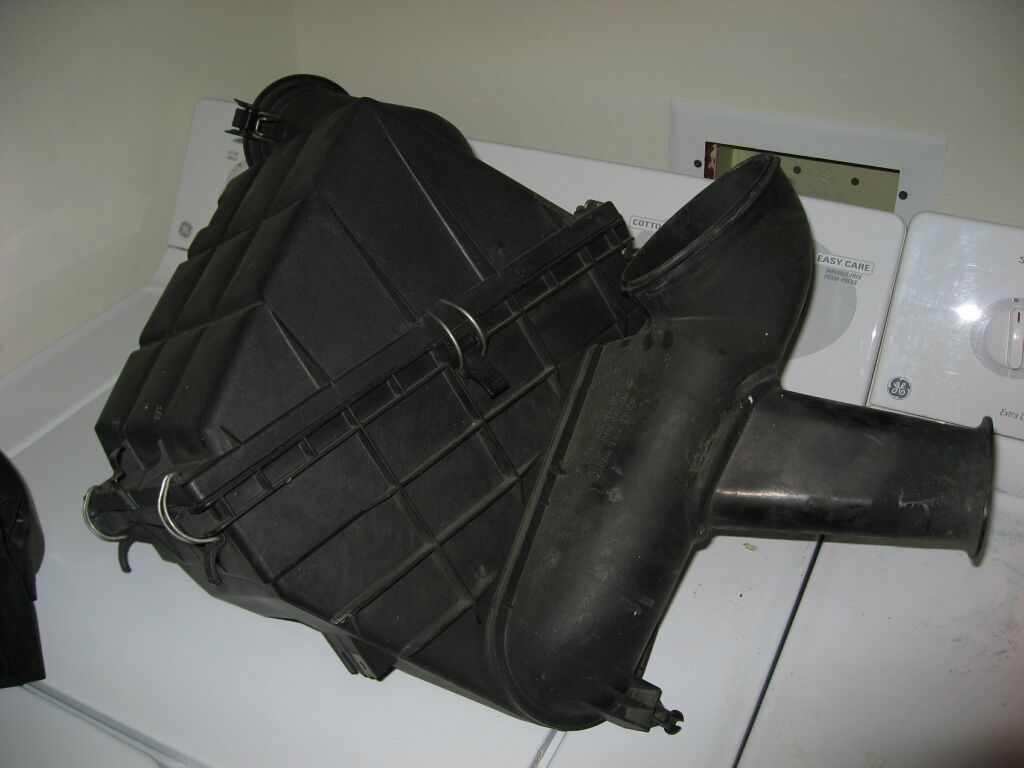 The
stock airbox for the CLK320 is designed to flow enough air for a 3.2l motor
putting out 215 hp. Since this car now puts out 345 hp, the stock
airbox did not flow enough air. Aftermarket air intakes can provide the
needed air flow, but they also have a tendency to draw hot air from the
engine bay. After numerous tests, the aftermarket air intake was scrapped
in lieu of a MB solution. The C36 airbox is a modified C280 box, which
includes a scoop (shown in this picture on the bottom of the main intake).
This scoop draws cold air from the lower bumper area in conjunction to the air
intake next to the radiator. This was the modification AMG came up with to
feed a 3.6l motor (versus the 2.8l of the C280).
The
stock airbox for the CLK320 is designed to flow enough air for a 3.2l motor
putting out 215 hp. Since this car now puts out 345 hp, the stock
airbox did not flow enough air. Aftermarket air intakes can provide the
needed air flow, but they also have a tendency to draw hot air from the
engine bay. After numerous tests, the aftermarket air intake was scrapped
in lieu of a MB solution. The C36 airbox is a modified C280 box, which
includes a scoop (shown in this picture on the bottom of the main intake).
This scoop draws cold air from the lower bumper area in conjunction to the air
intake next to the radiator. This was the modification AMG came up with to
feed a 3.6l motor (versus the 2.8l of the C280).
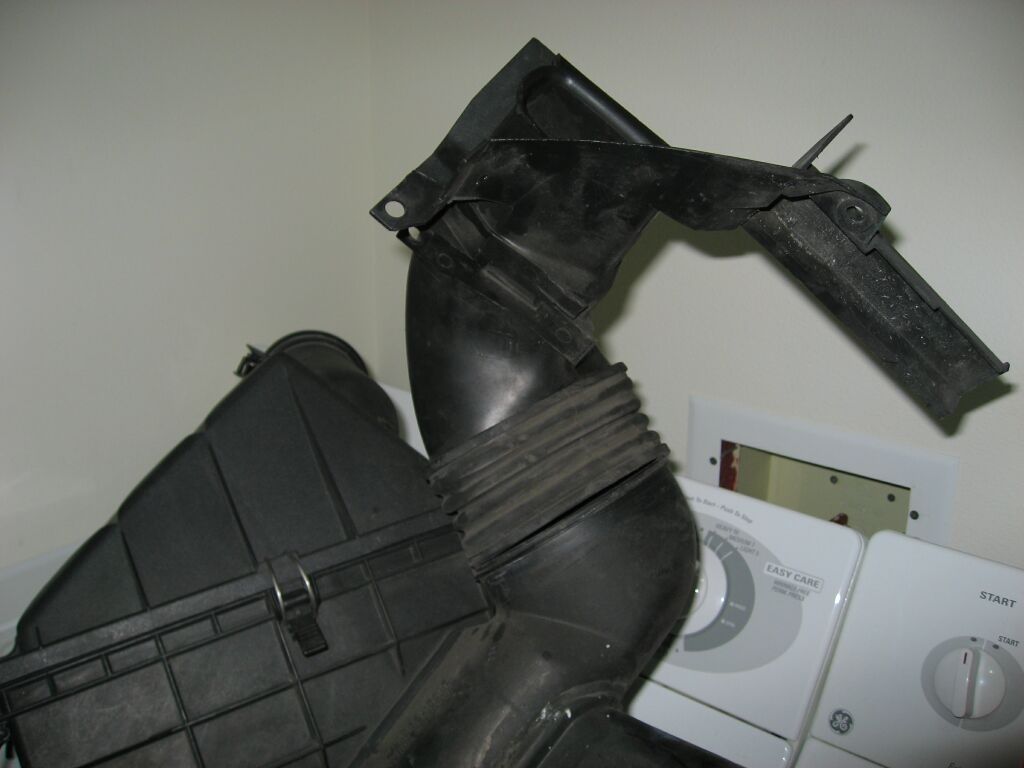 This
is the airbox with the top scoop installed and the radiator piece still
installed. The radiator filler piece is obviously from a W202 and does not
fit the W208, so I will be using the stock CLK320 radiator filler piece.
The C36 is based off the W202 platform, same with the CLK320.
This
is the airbox with the top scoop installed and the radiator piece still
installed. The radiator filler piece is obviously from a W202 and does not
fit the W208, so I will be using the stock CLK320 radiator filler piece.
The C36 is based off the W202 platform, same with the CLK320.
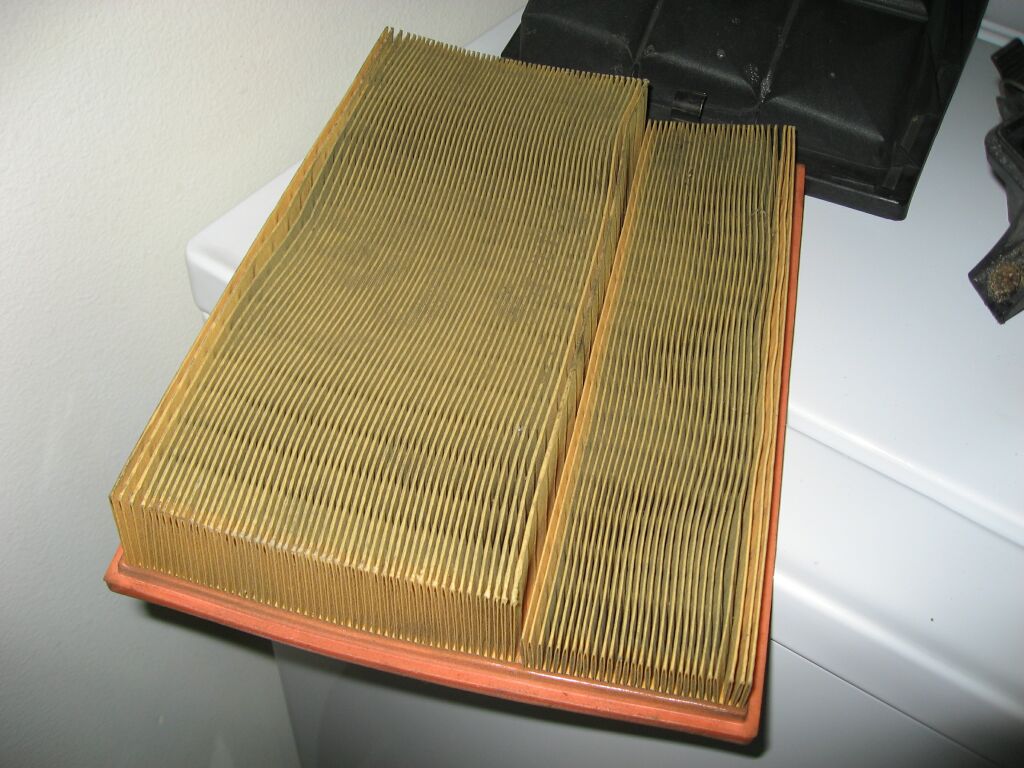 This
is the C36 stock filter, not too different from the C280 filter, except that it
is notched so it does not restrict air flow from the lower scoop.
This
is the C36 stock filter, not too different from the C280 filter, except that it
is notched so it does not restrict air flow from the lower scoop.
 To
further increase air flow, I chose to use a K&N filter. These filters by
themselves don't provide much of a HP increase, but every bit helps!
To
further increase air flow, I chose to use a K&N filter. These filters by
themselves don't provide much of a HP increase, but every bit helps!
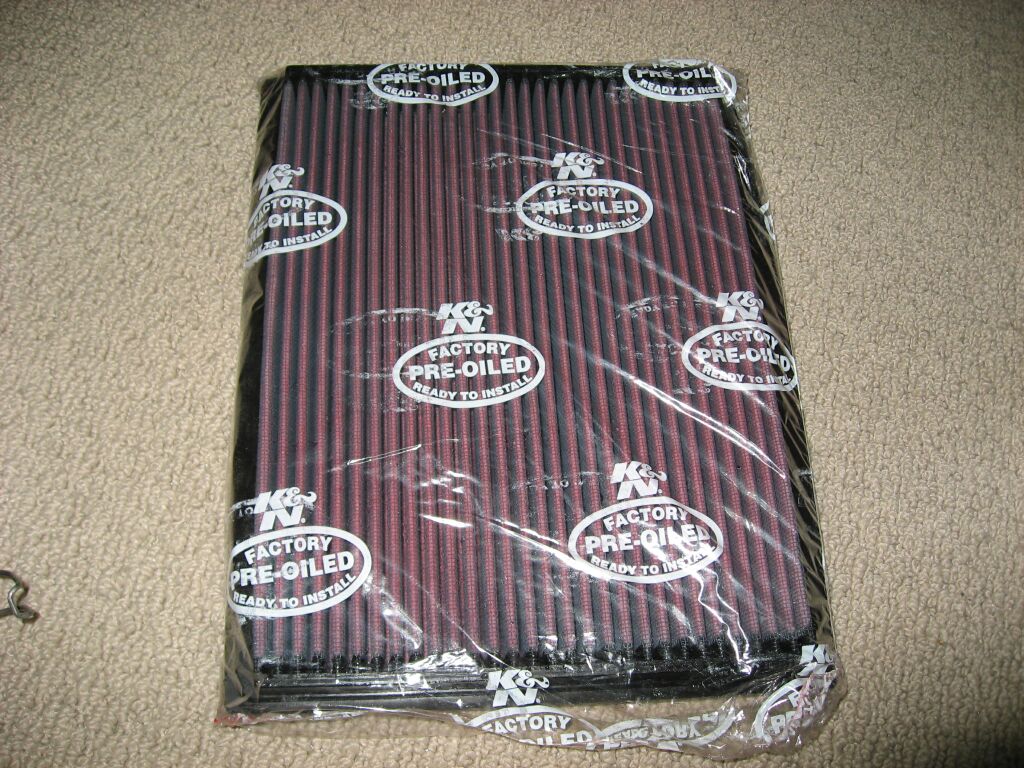 The
K&N comes pre-oiled and ready to install. I have used this filters for
many years without any negative effects.
The
K&N comes pre-oiled and ready to install. I have used this filters for
many years without any negative effects.
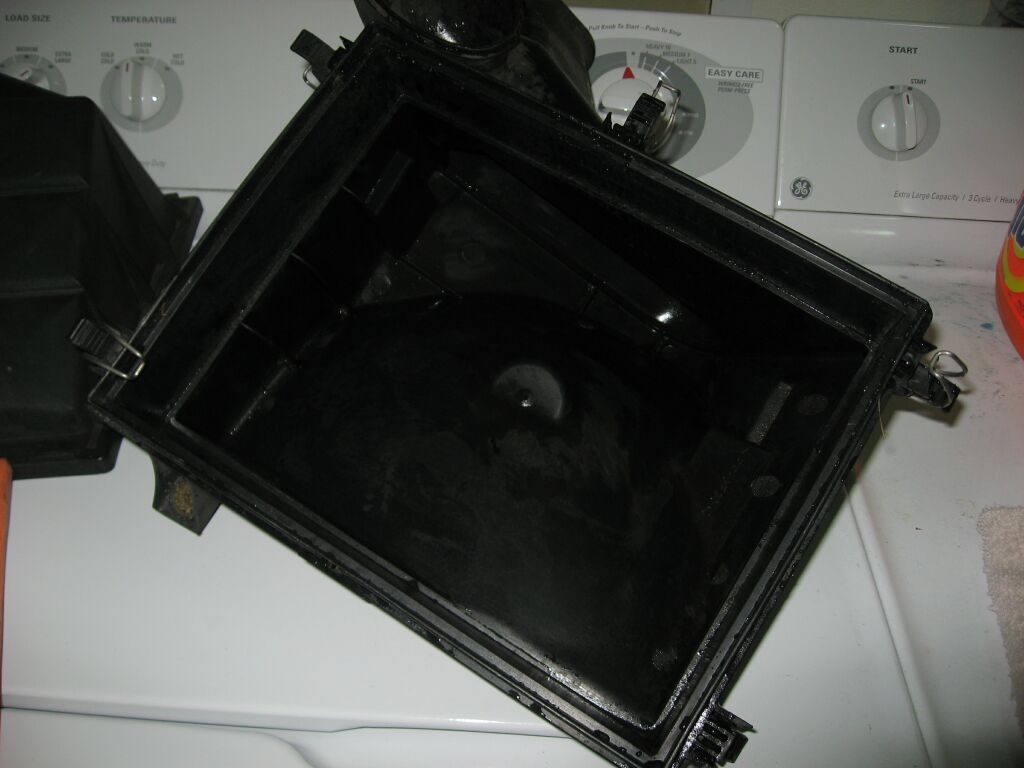 Before
I installed the K&N, a good cleaning to the interior of the airbox was
necessary.
Before
I installed the K&N, a good cleaning to the interior of the airbox was
necessary.
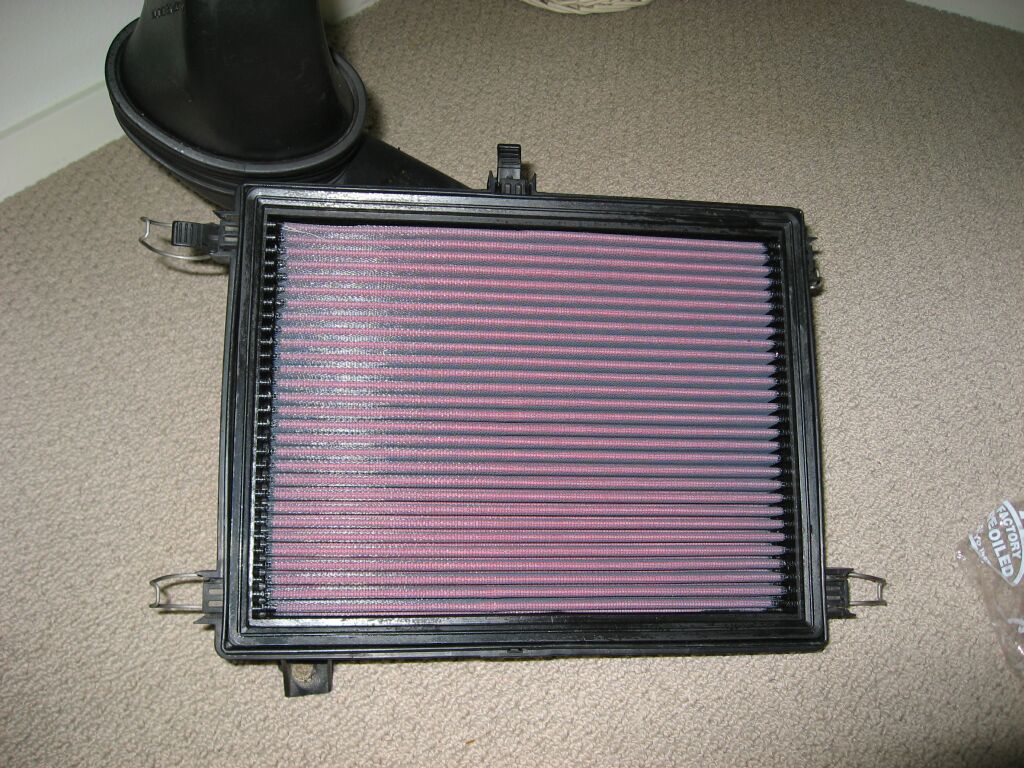 Here
is the filter installed and ready for the top to be put back on.
Here
is the filter installed and ready for the top to be put back on.
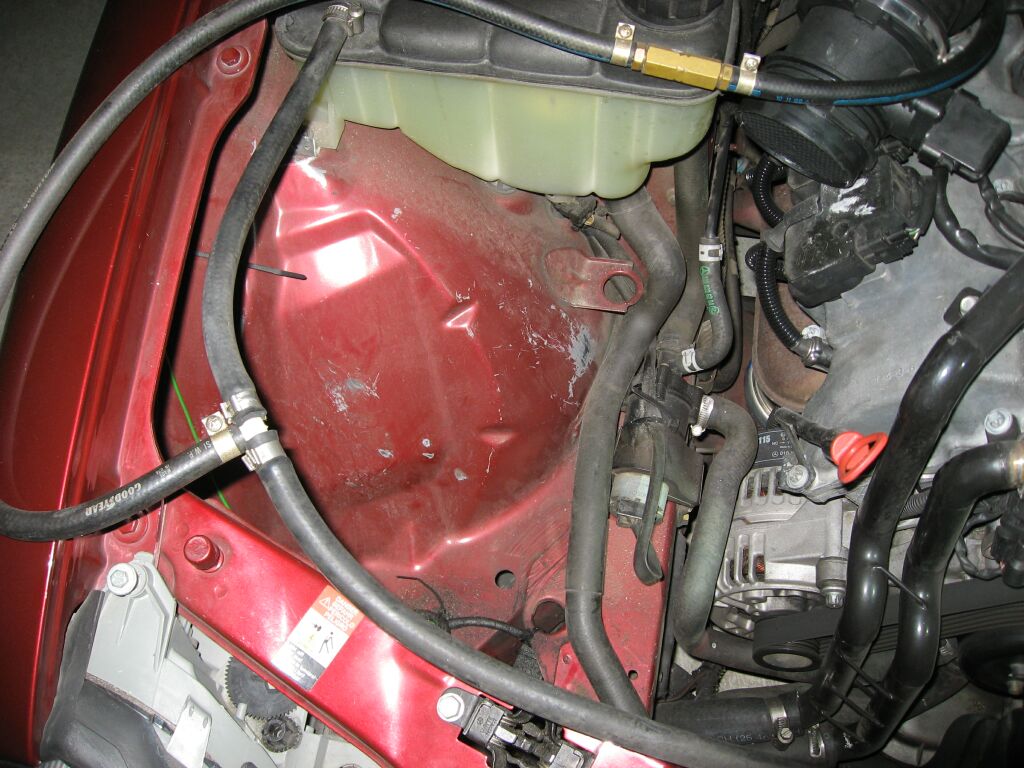 This
is the engine bay minus the stock airbox. There are additional water lines
that need to be carefully routed around the new box. I also took replaced
the rubber mounts for the airbox while I was at it.
This
is the engine bay minus the stock airbox. There are additional water lines
that need to be carefully routed around the new box. I also took replaced
the rubber mounts for the airbox while I was at it.
 Because
the C36 used a older MAF design, I had to modify the inside of the airbox tubing
to accept the newer CLK MAF. The clip points are also skewed, which
results in the MAF being being rotated about 30 degrees upwards. I used a
small piece of rubber intake tubing to make a ring to seal the MAF to the airbox.
Because
the C36 used a older MAF design, I had to modify the inside of the airbox tubing
to accept the newer CLK MAF. The clip points are also skewed, which
results in the MAF being being rotated about 30 degrees upwards. I used a
small piece of rubber intake tubing to make a ring to seal the MAF to the airbox.
 Test
fitting of the airbox and MAF. I needed to re-route some of the coolant
hoses, but overall the C36 airbox fits very well.
Test
fitting of the airbox and MAF. I needed to re-route some of the coolant
hoses, but overall the C36 airbox fits very well.
 The
MAF wiring needed to be taken apart and separated a bit from the main harness
and re-routed over some water lines. This gave me enough slack to put the
plug end back together and plug it into the MAF. This problem was
directly due to the MAF being skewed upwards by 30 degrees.
The
MAF wiring needed to be taken apart and separated a bit from the main harness
and re-routed over some water lines. This gave me enough slack to put the
plug end back together and plug it into the MAF. This problem was
directly due to the MAF being skewed upwards by 30 degrees.
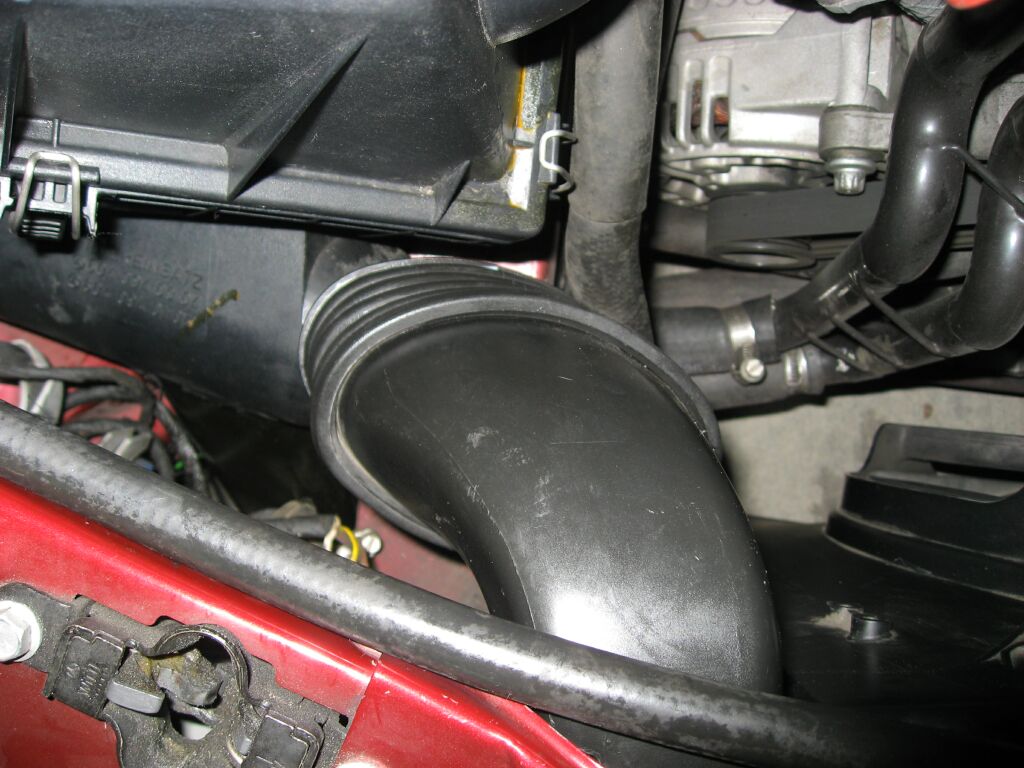 This
is the air inlet tube installed onto the box. It draws cold air from the
radiator area behind the grill.
This
is the air inlet tube installed onto the box. It draws cold air from the
radiator area behind the grill.
 This
is the air inlet tube viewed from the front of the CLK. The stock CLK air
scoop is not currently installed.
This
is the air inlet tube viewed from the front of the CLK. The stock CLK air
scoop is not currently installed.
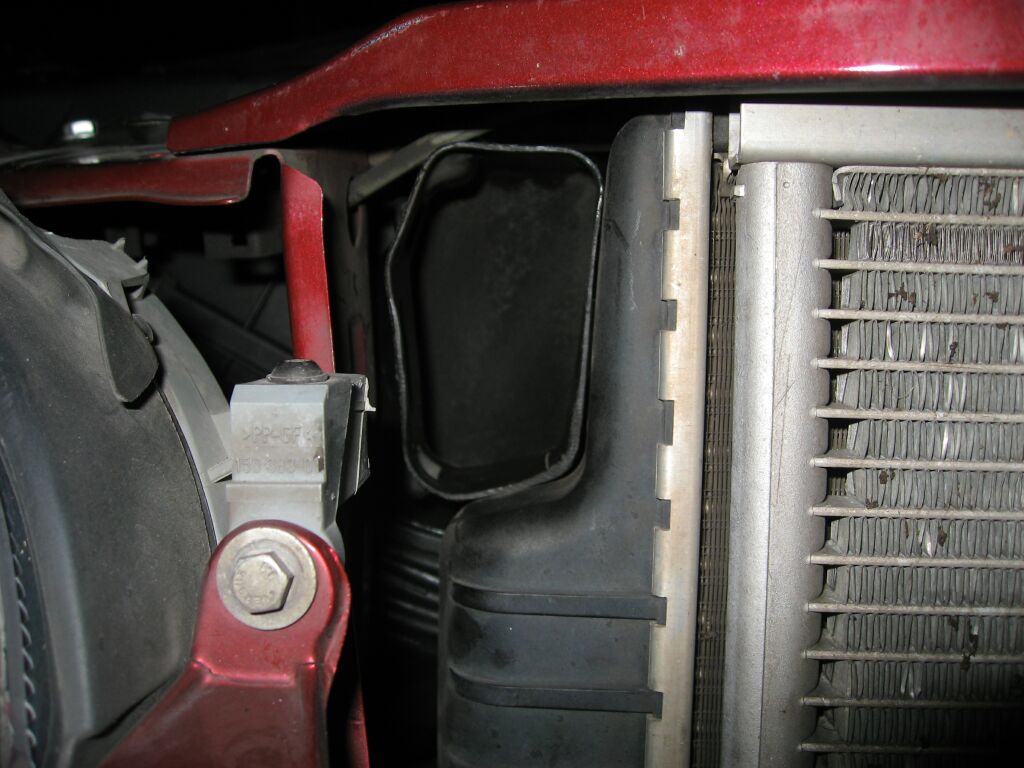
Here you can see the additional air inlet which is routed down into the
bumper area, its a tight fit on the CLK, mainly because of the electric water
pump and additional intercooler tubing that is in the car, but it works.
 Here
is the finished product, all cleaned up. You will notice that I secured
the MAF wires using zip ties to reduce strain on the actual MAF connector.
There is some slack in the wiring, and revving of the motor does not move the
motor enough to put a strain on the wire.
Here
is the finished product, all cleaned up. You will notice that I secured
the MAF wires using zip ties to reduce strain on the actual MAF connector.
There is some slack in the wiring, and revving of the motor does not move the
motor enough to put a strain on the wire.
 Since
the C36 airbox didn't fit the MAF very well, I purchased a stock CLK320 airbox
and mated the top of the new box to the bottom of the C36 airbox. This
allowed me to fix the MAF fitment issues but still benefit from the higher
flowing bottom section of the C36 airbox.
Since
the C36 airbox didn't fit the MAF very well, I purchased a stock CLK320 airbox
and mated the top of the new box to the bottom of the C36 airbox. This
allowed me to fix the MAF fitment issues but still benefit from the higher
flowing bottom section of the C36 airbox.
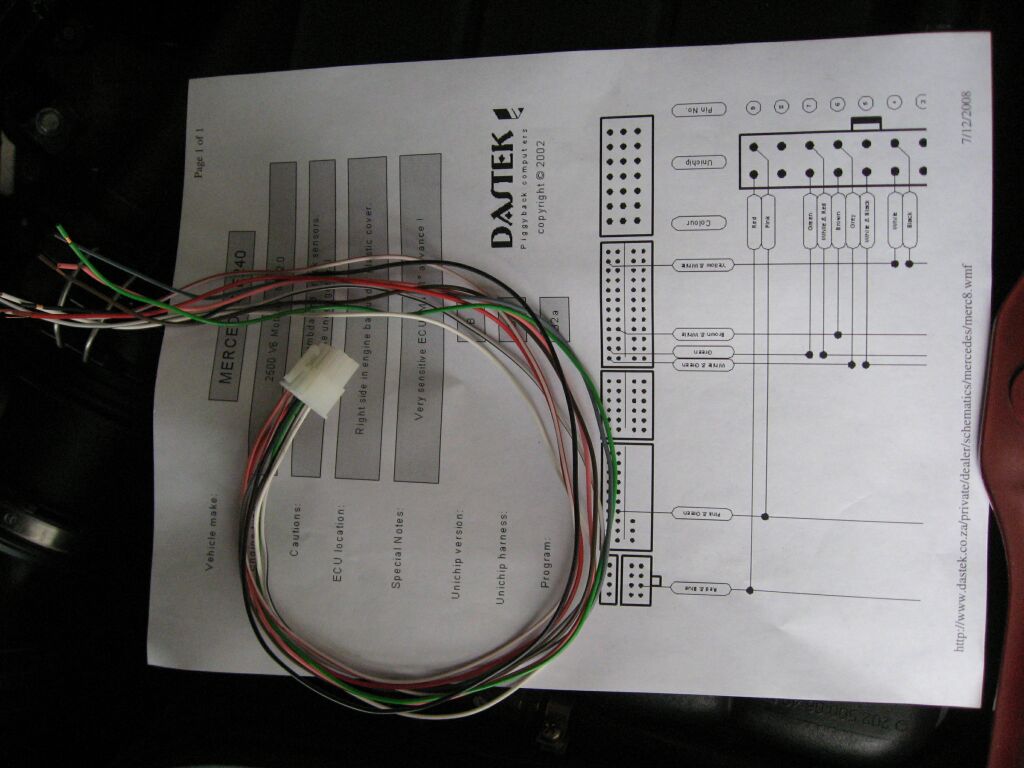
Unichip Piggy Back ECU installation
 With
the addition of the smaller SC pulley, we have increased boost, so we must be
able to control timing and fuel. The stock ECU is not programmable,
although it can and has been re-flashed, to take into consideration of extra
performance add-ons, you need to be able to dyno tune your car. Not much
is available for Mercedes, but Unichip offers a universal piggy back ecu that
needs to be hard wired between the stock ecu and the car. So its back to
see Alex at www.carbconn.com in Kirkland,
who is the local expert for tuning forced induction vehicles.
With
the addition of the smaller SC pulley, we have increased boost, so we must be
able to control timing and fuel. The stock ECU is not programmable,
although it can and has been re-flashed, to take into consideration of extra
performance add-ons, you need to be able to dyno tune your car. Not much
is available for Mercedes, but Unichip offers a universal piggy back ecu that
needs to be hard wired between the stock ecu and the car. So its back to
see Alex at www.carbconn.com in Kirkland,
who is the local expert for tuning forced induction vehicles.
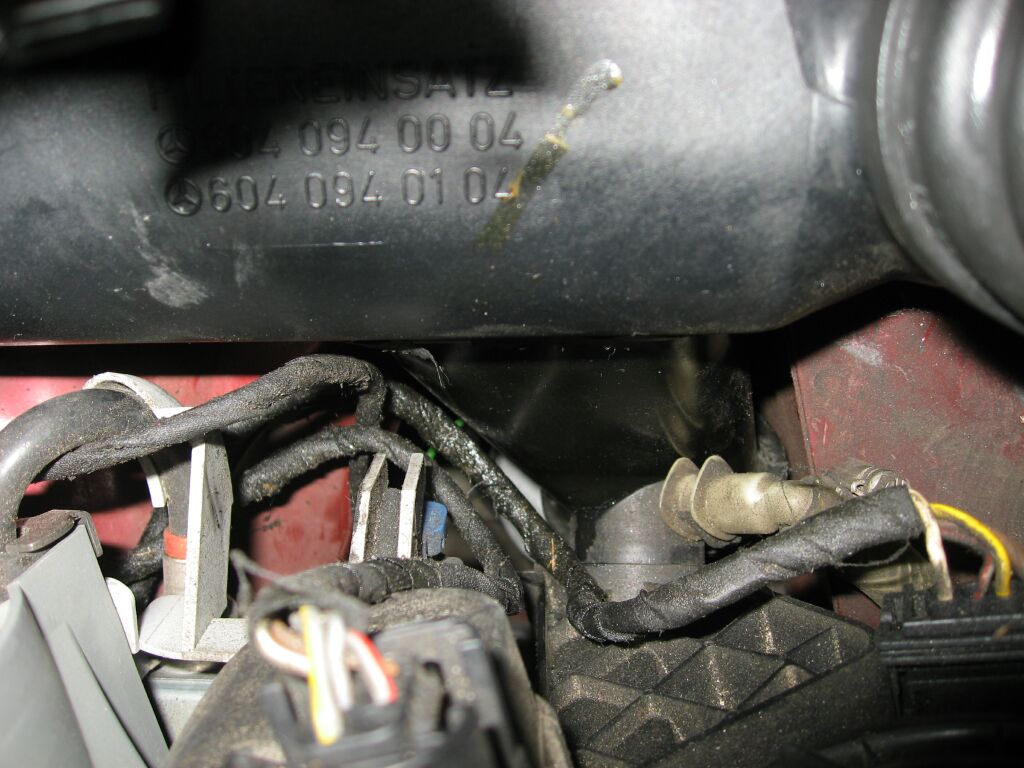
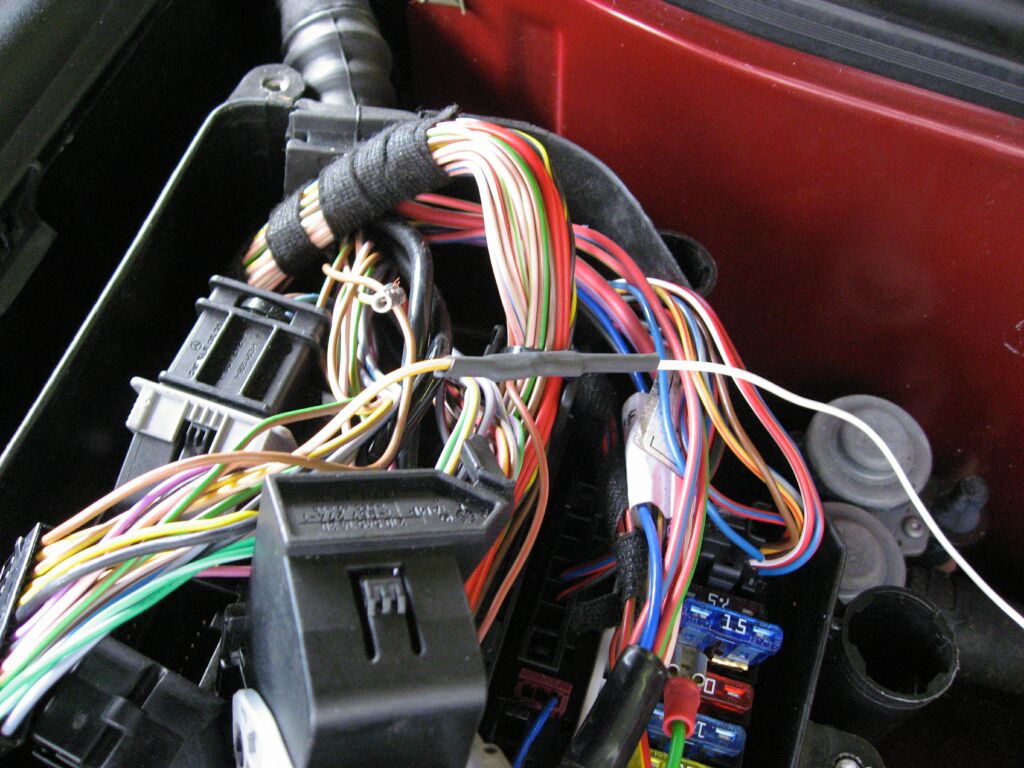
 Alex
logged into his dealer account at Unichip and searched their database for
suitable wiring diagrams, he found a schematic for a 2001 E240, which uses the
same M112 motor as my car, just a smaller displacement. We closely
examined my ecu and wire harness and found it to be a exact match to the E240.
Alex
logged into his dealer account at Unichip and searched their database for
suitable wiring diagrams, he found a schematic for a 2001 E240, which uses the
same M112 motor as my car, just a smaller displacement. We closely
examined my ecu and wire harness and found it to be a exact match to the E240.
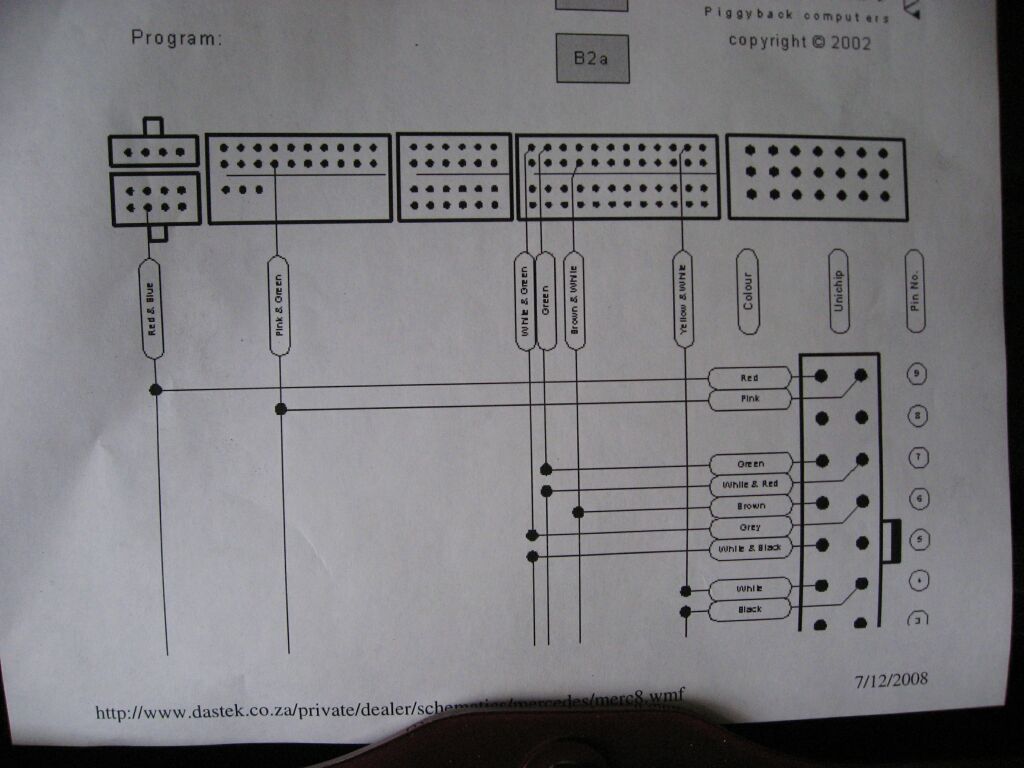 A
better view of the E240 wiring diagram. The installation requires
identifying certain ecu wires and then splicing the Unichip into these wires.
A
better view of the E240 wiring diagram. The installation requires
identifying certain ecu wires and then splicing the Unichip into these wires.
 For
longevity, all connections should be solder/crimped with heat shrink applied to
secure the splices.
For
longevity, all connections should be solder/crimped with heat shrink applied to
secure the splices.
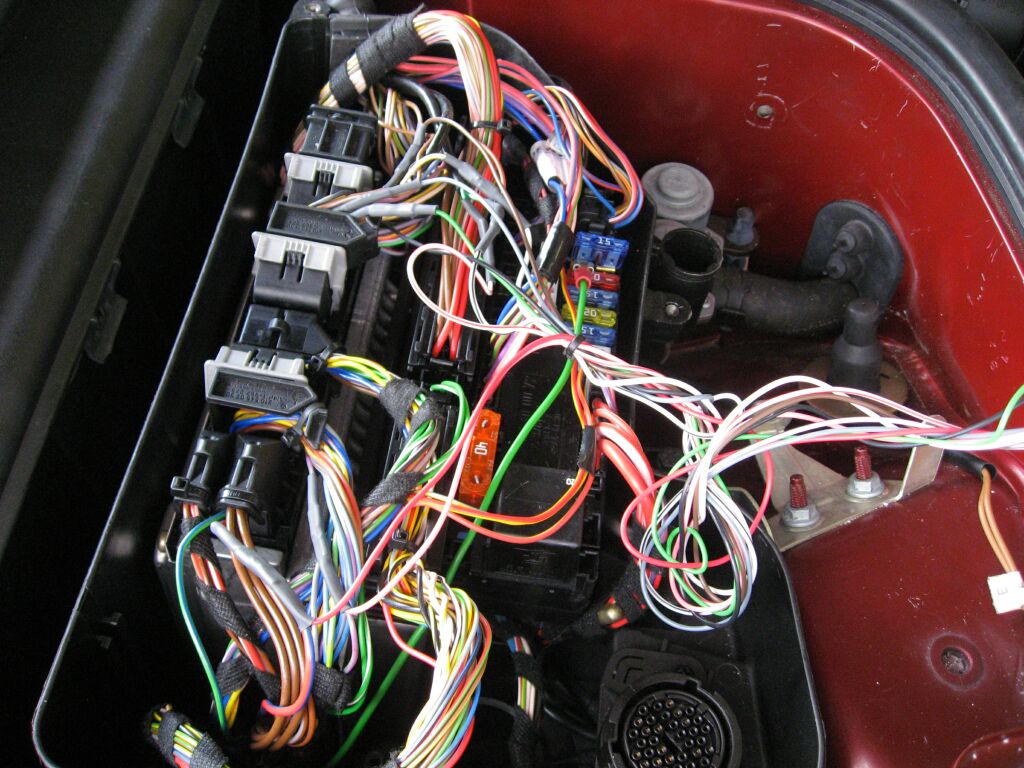 Another
picture detailing the splicing work
Another
picture detailing the splicing work
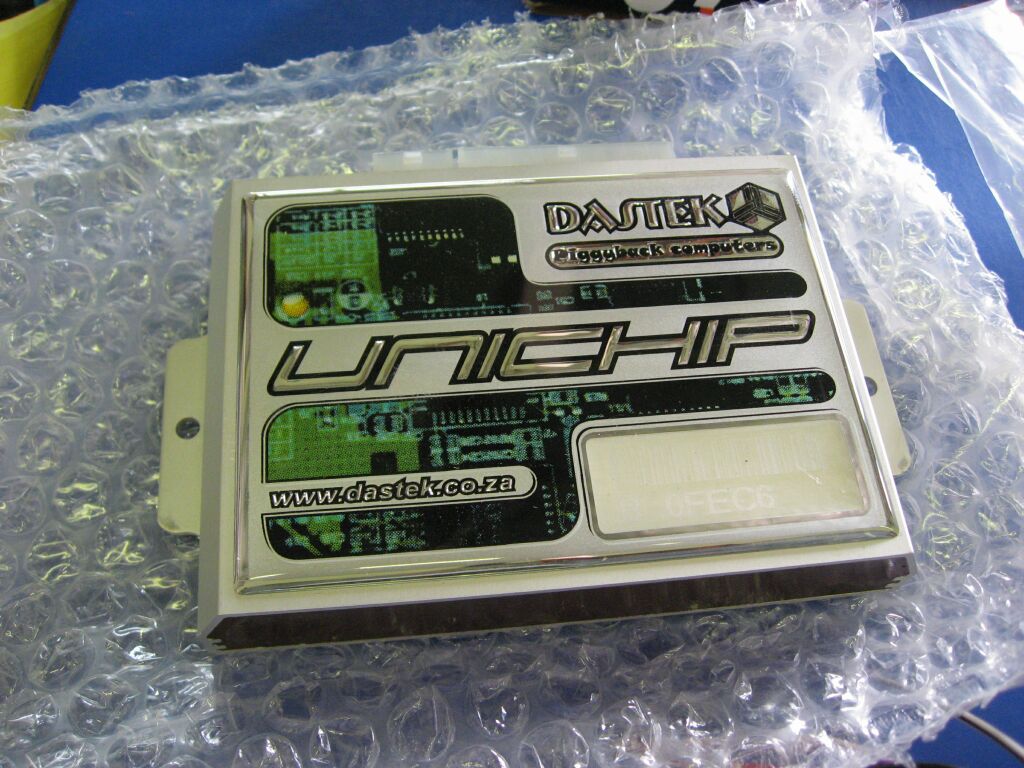
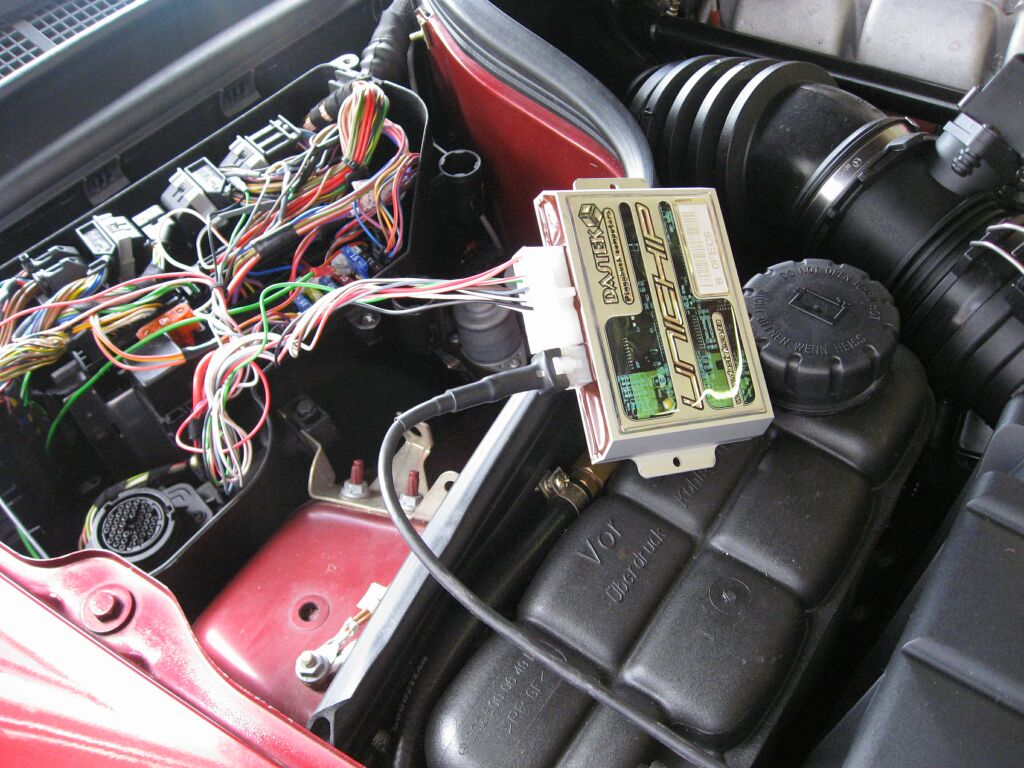 With
the Unichip installed, it was time to verify that it would accept commands from
the programming terminal, so we proceeded to test it by adjusting fuel/timing.
With
the Unichip installed, it was time to verify that it would accept commands from
the programming terminal, so we proceeded to test it by adjusting fuel/timing.
 The
Unichip is plugged into this module, which in turn in plugged into a laptop
computer. We can then adjust fuel trims and timing throughout the rev
band. This is done at standstill, driving and on the dyno doing WOT runs.
We were aiming for a nice 12.5 AF and no pinging at redline.
The
Unichip is plugged into this module, which in turn in plugged into a laptop
computer. We can then adjust fuel trims and timing throughout the rev
band. This is done at standstill, driving and on the dyno doing WOT runs.
We were aiming for a nice 12.5 AF and no pinging at redline.
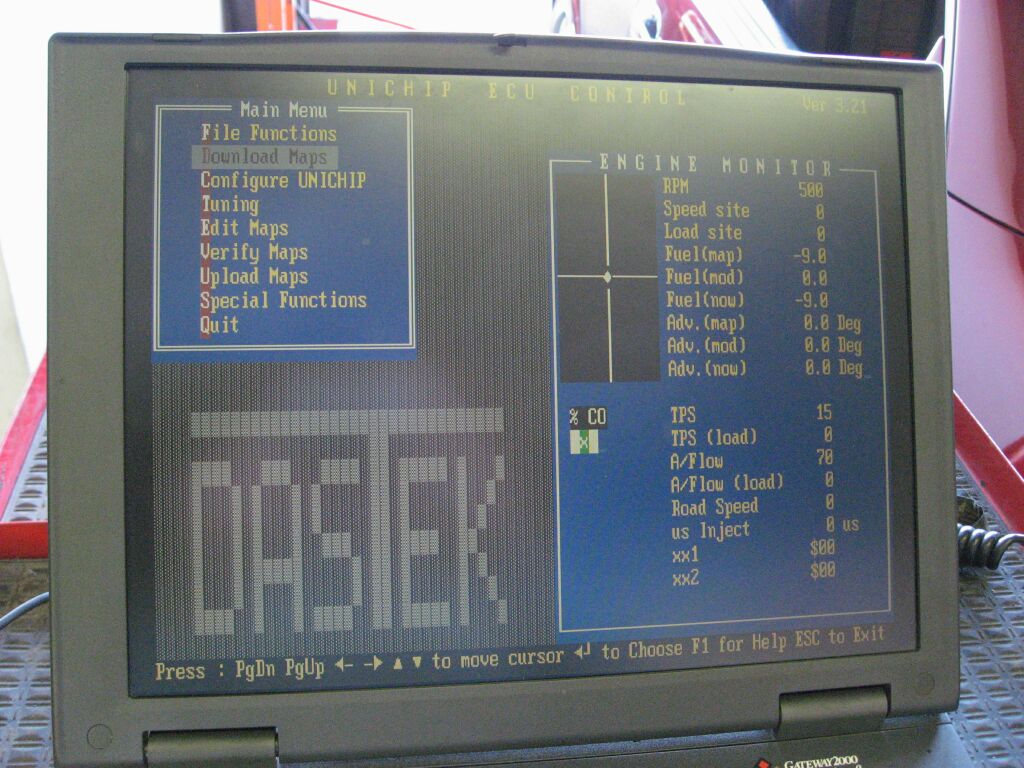 This
is the picture of the Unichip console. Upon our first round of tuning, we
discovered we were hitting 100% duty cycle on the stock injectors, right around
4800 rpm.
This
is the picture of the Unichip console. Upon our first round of tuning, we
discovered we were hitting 100% duty cycle on the stock injectors, right around
4800 rpm.
Dyno Tuning, injector installation and misc.
 Once
you jump into the world of custom tuning and performance enhancement, all sorts
of things pop up. Kleemann uses a rising rate fuel pressure regulator to
assist fuel requirements on their SC kit. With the Unichip, we didn't need
this anymore, so we had to disconnect it.
Once
you jump into the world of custom tuning and performance enhancement, all sorts
of things pop up. Kleemann uses a rising rate fuel pressure regulator to
assist fuel requirements on their SC kit. With the Unichip, we didn't need
this anymore, so we had to disconnect it.
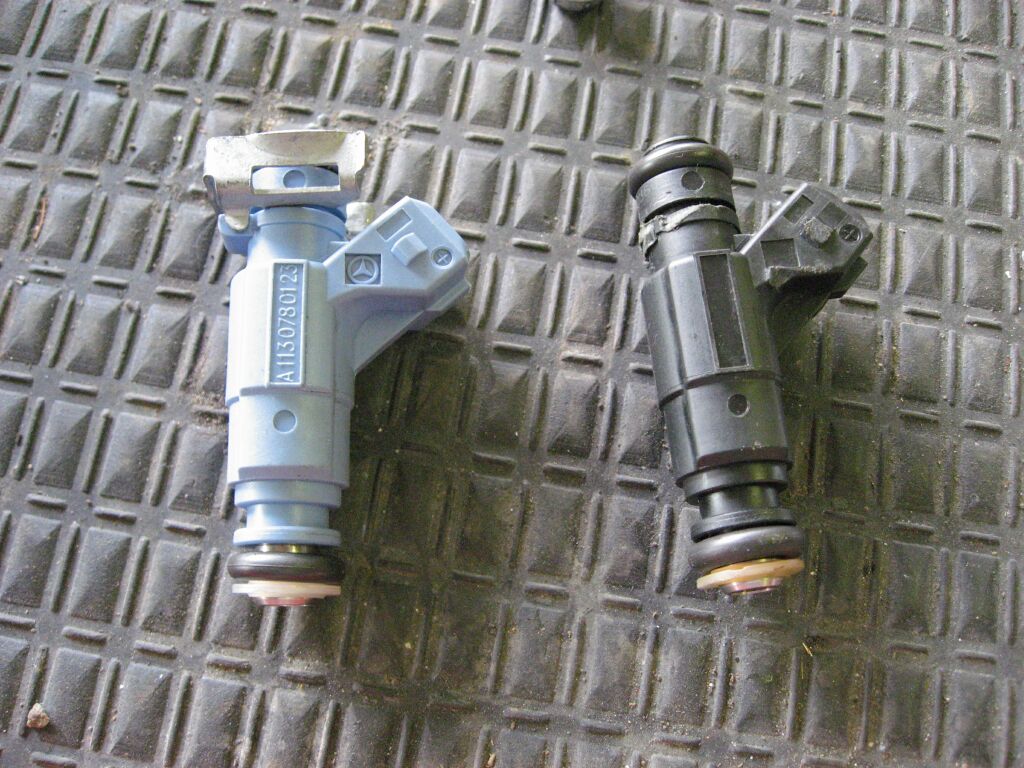 Since
we were hitting 100% duty cycle on the stock injectors, it was time for a
upgrade. The C32 AMG model uses 40lb injectors (stock clk injectors are
19lb). So I acquired a set of the new injectors, which are light blue in
color.
Since
we were hitting 100% duty cycle on the stock injectors, it was time for a
upgrade. The C32 AMG model uses 40lb injectors (stock clk injectors are
19lb). So I acquired a set of the new injectors, which are light blue in
color.
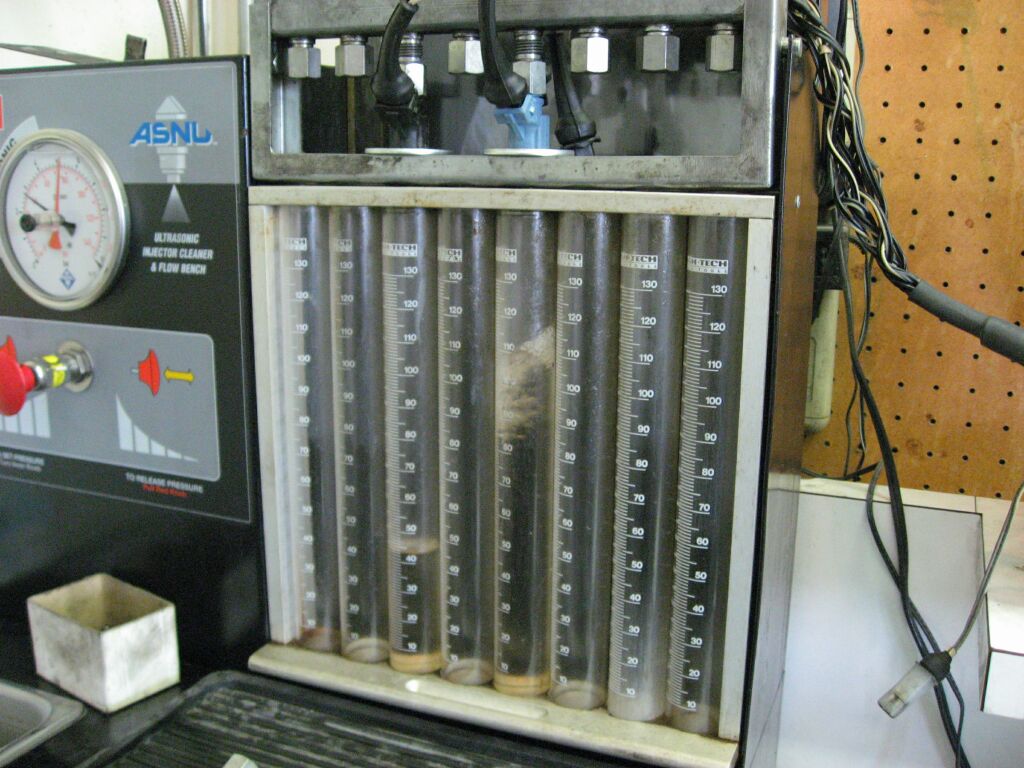 To
determine the flow of these new injectors vs. the stock injectors, Alex ran them
through his injector flow bench. As you can see, the C32 injectors flow
double the amount of fuel as the stock injectors. We tested all six
injectors to confirm flow rates and spray pattern before we installed the
injectors.
To
determine the flow of these new injectors vs. the stock injectors, Alex ran them
through his injector flow bench. As you can see, the C32 injectors flow
double the amount of fuel as the stock injectors. We tested all six
injectors to confirm flow rates and spray pattern before we installed the
injectors.
 Although
our tuning is not yet finished, we are seeing around 270 rwhp and 240lbs of
torque. This is a 20 rwhp increase and 30lbs of torque increase over the stock
76mm SC pulley.
Although
our tuning is not yet finished, we are seeing around 270 rwhp and 240lbs of
torque. This is a 20 rwhp increase and 30lbs of torque increase over the stock
76mm SC pulley.
To see the clk32k on the dyno, click the play button

<Back
Information/pictures on this site are the property of Rik Johnson and are not
to be used without written permission.