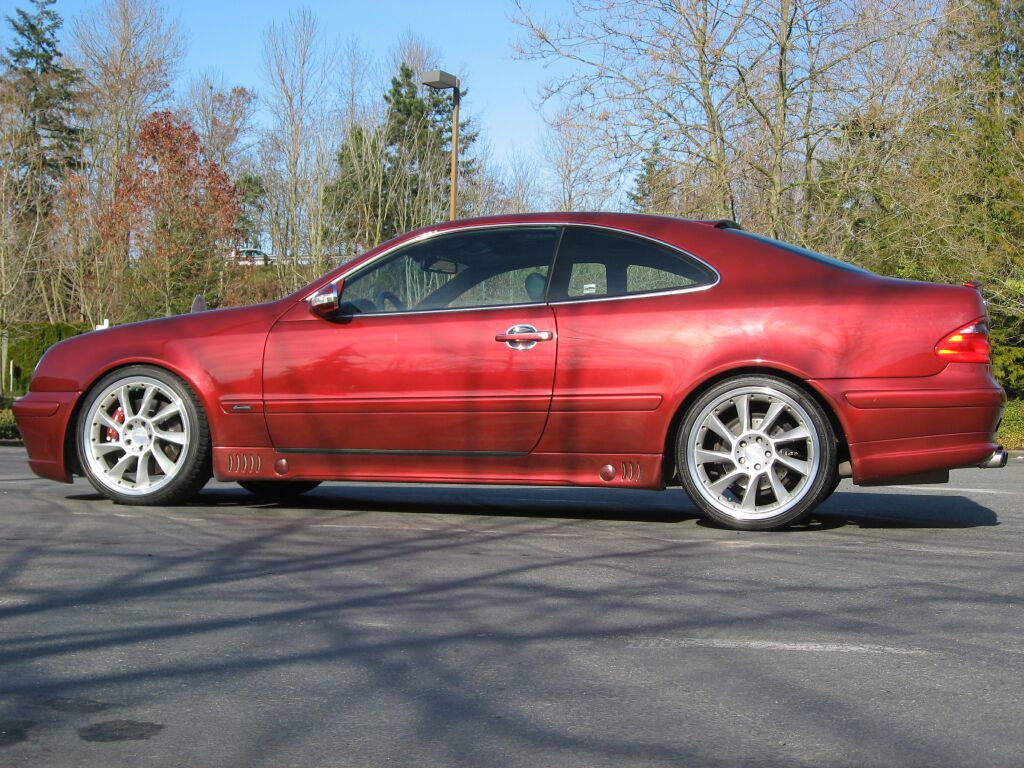
 This is the newest addition to the 2phast family. Its a 2000 CLK320 (badged as a CLK32K). This profile shot shows a little of the exterior modifications. The CLK has a full Lorinser body kit and Lorinser LM6 19x8.5 and 19x9.5" wheels. This CLK has almost all the available options for this year, minus the orthopedic seats.
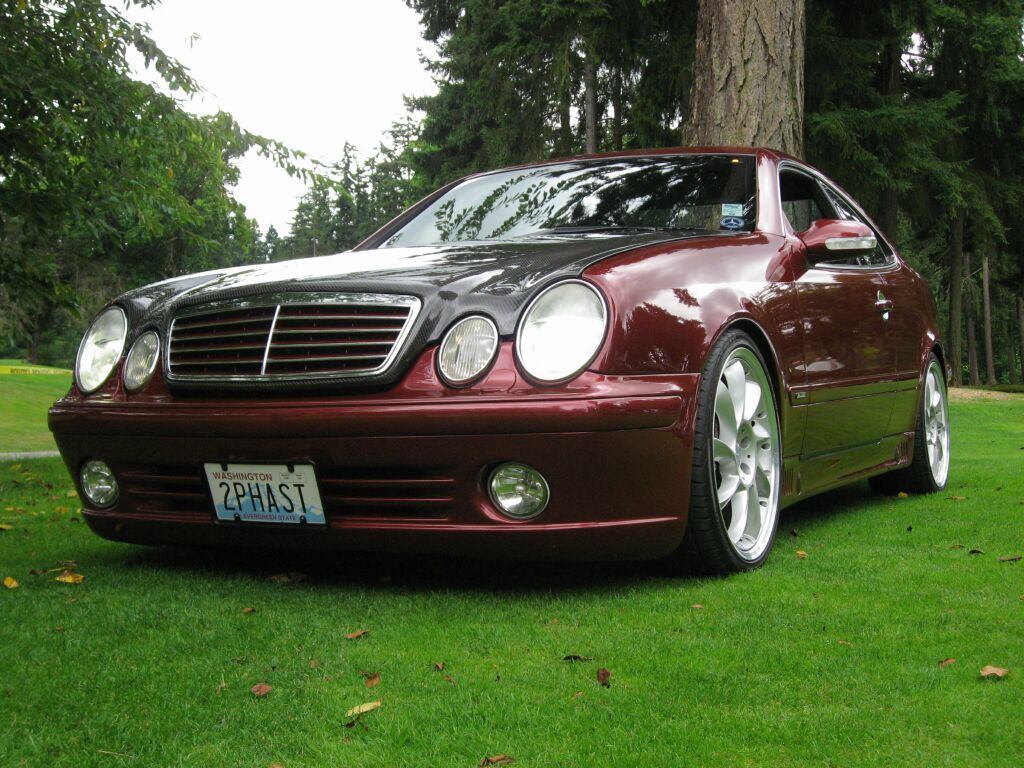
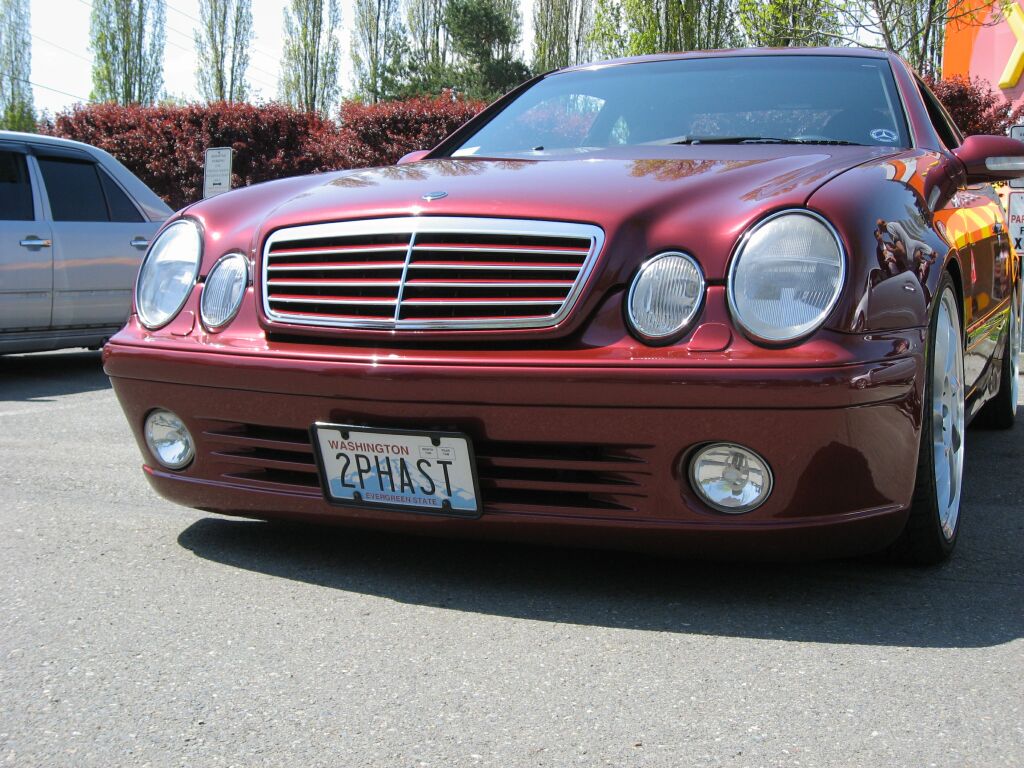 This front view gives you a nice view of the Lorinser front bumper and a
tastefully modified grill. The hood star has been replaced with a Lorinser flat badge emblem. I elected to mount the license plate low on the front bumper (we require front plates in Washington) as I did not want a plate mounted to the bumper impact strip. My license plate on my 911 was mounted like this and it was tolerable. The front bumper has about 4" of clearance in the front.
This front view gives you a nice view of the Lorinser front bumper and a
tastefully modified grill. The hood star has been replaced with a Lorinser flat badge emblem. I elected to mount the license plate low on the front bumper (we require front plates in Washington) as I did not want a plate mounted to the bumper impact strip. My license plate on my 911 was mounted like this and it was tolerable. The front bumper has about 4" of clearance in the front.
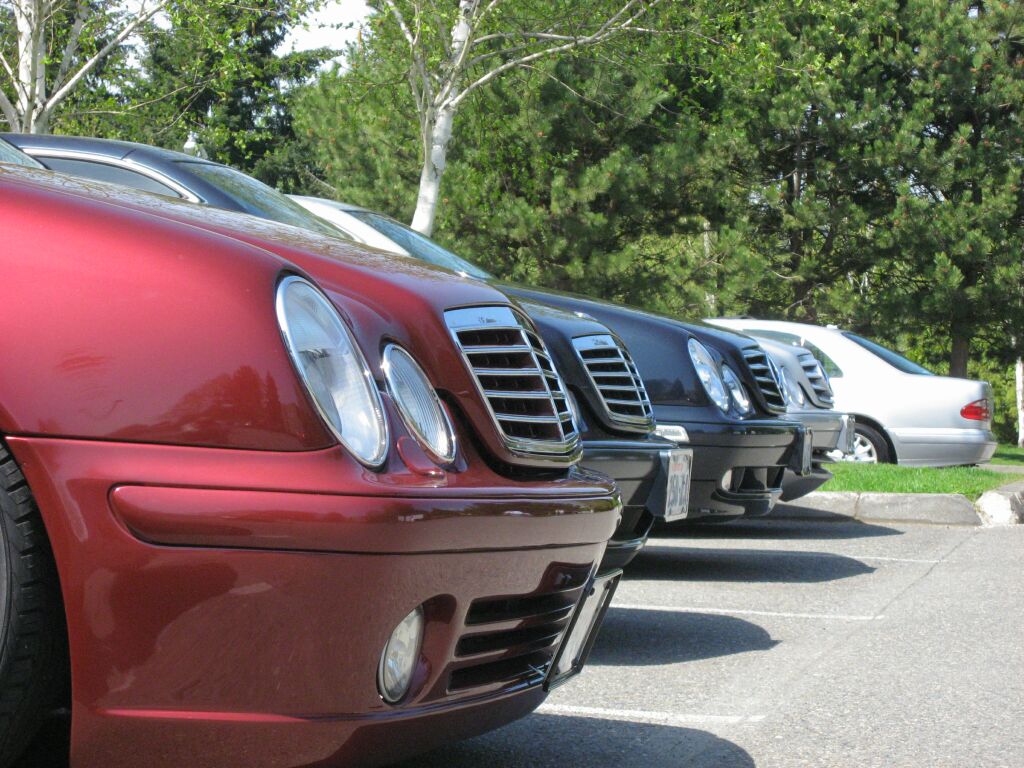 A side view of the front bumper. Here you can see the euro impact strips which do not have a cut out for the marker lights.
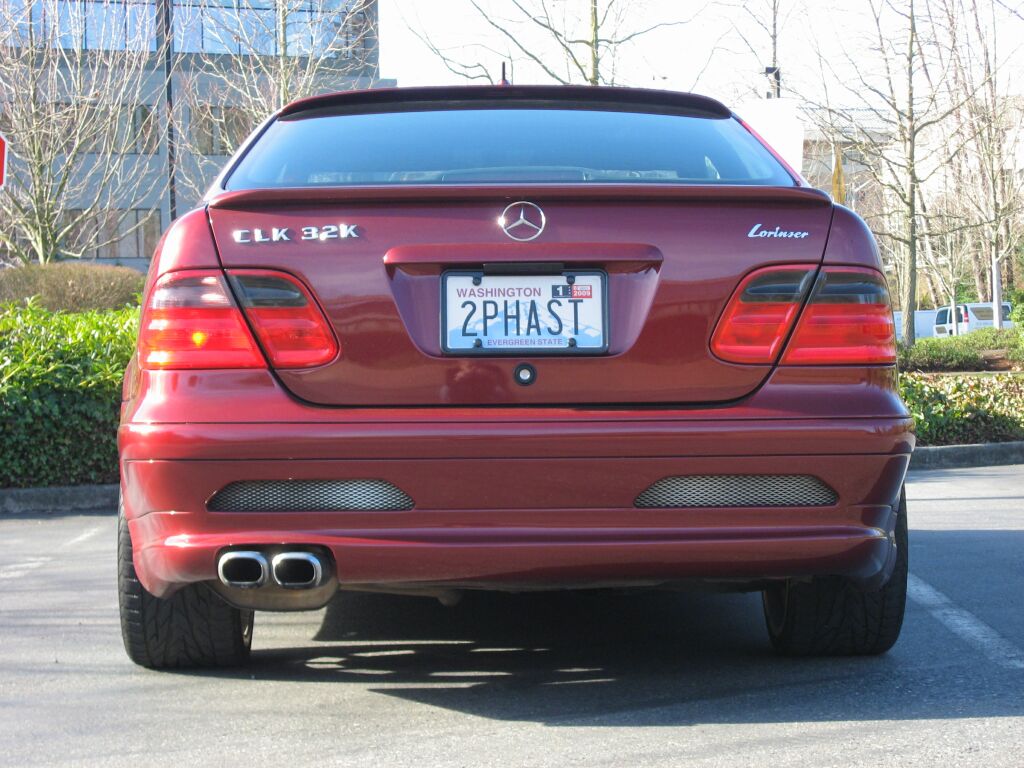 In this picture you can see the Lorinser roof wing, Lorinser trunk wing, Lorinser exhaust (no resonator), Lorinser bumper and CLK32k and Lorinser emblems. The car was badged as a CLK32k as that is how Kleemann badges the CLK320 once it has been supercharged (more on that later). You will also notice the smoked tail lights.
 A closer view of the trunk showing more details of the trunk wing.
 A closer look at the Lorinser roof wing and GPS antenna. The stub has recently been replaced, most of these I see are broken for some reason.
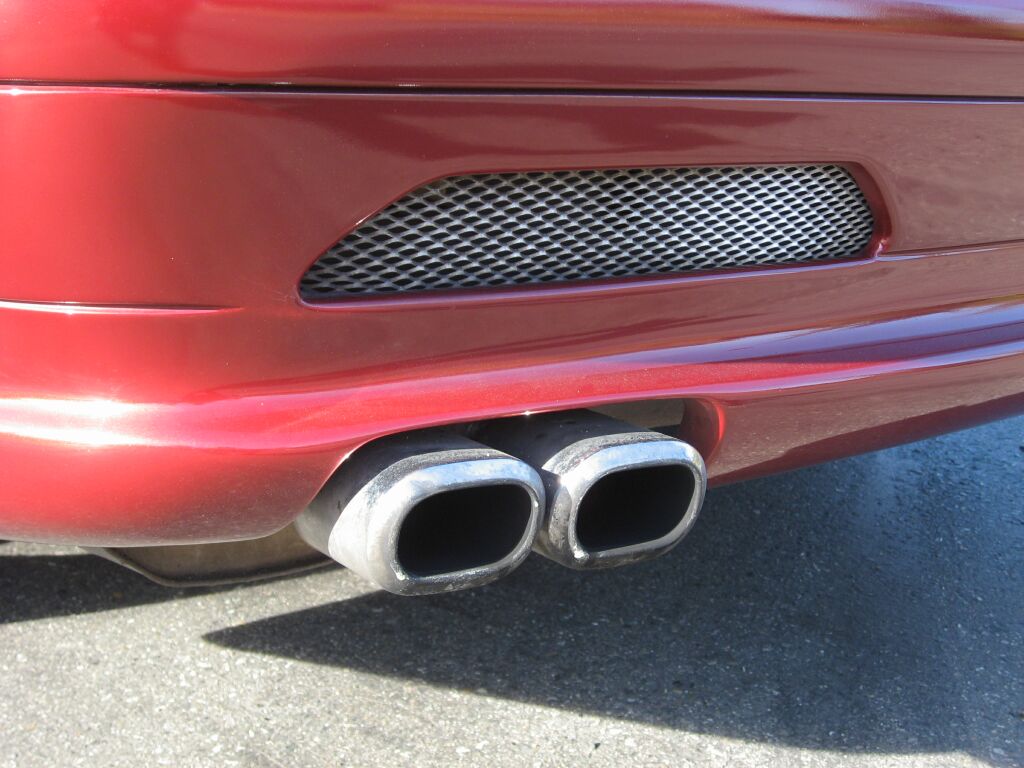 The dual tip Lorinser exhaust is a resonator back exhaust system, but in my case, the resonator has been replaced with striaight pipe, which gives this healthy V6 more bite! The mesh covering the opening of the Lorinser bumper tends to get discolored by the exhaust, so it requires extra attention when the car is detailed.
 Exterior bling was kept to a minimum. The
Schatz chrome door handle cups are a acquired taste, not everyone cares for them. I think they add a nice elegant touch to the CLK
Exterior bling was kept to a minimum. The
Schatz chrome door handle cups are a acquired taste, not everyone cares for them. I think they add a nice elegant touch to the CLK
 The fender impact molding normally holds some sort of badging, in this case, the Lorinser theme was carried over and authentic Lorinser Sportservice emblems were utilized. Lorinser has several styles available, but this style appears to be what the Lorinser factory uses when they build out a Mercedes.
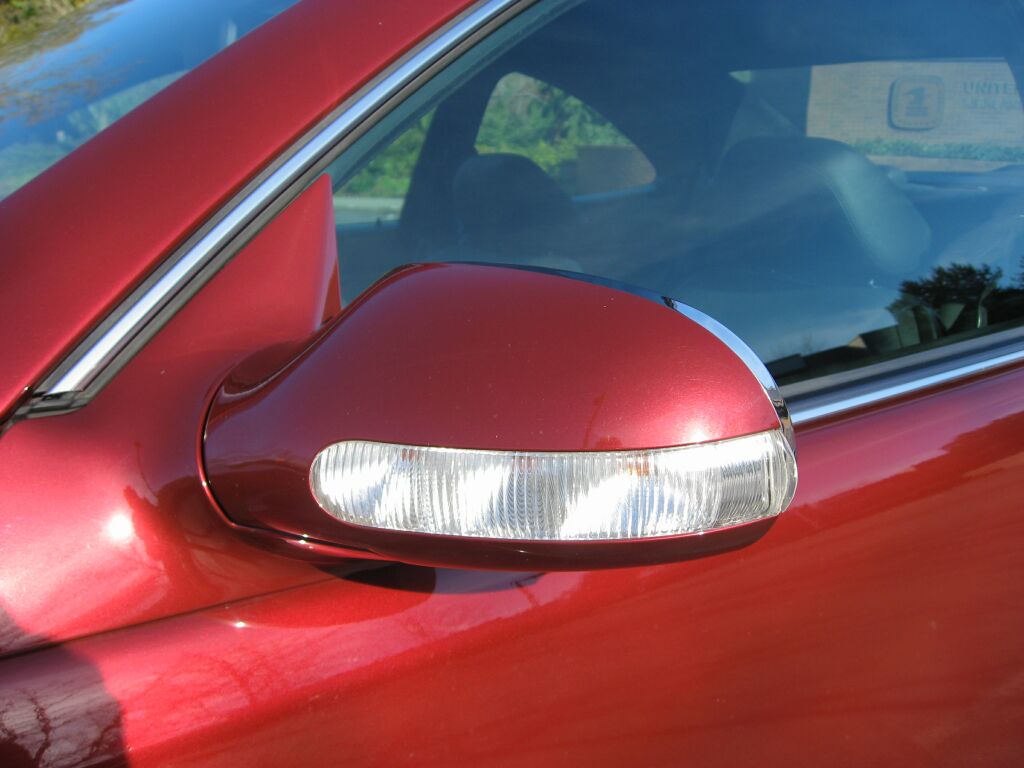 The model year 2000 saw the blinkers move from being fender mounted to being mounted in the door mirrors. The addition of
Schatz chrome trim adds to the bling effect.
The model year 2000 saw the blinkers move from being fender mounted to being mounted in the door mirrors. The addition of
Schatz chrome trim adds to the bling effect.
 The Lorinser emblem on the trunk lid
 A closer picture of the front Lorinser 19x8.5" LM6 wheel. These wheels are a true three piece wheel and are made by Ronal for Lorinser. You will also notice the large brakes, which are from a C32. The rotors have been cross drilled and the calipers painted body color. To complete the look, Lorinser labeling has been added to the calipers for a more OE look. Needless to say, the stopping capability of this car is incredible!
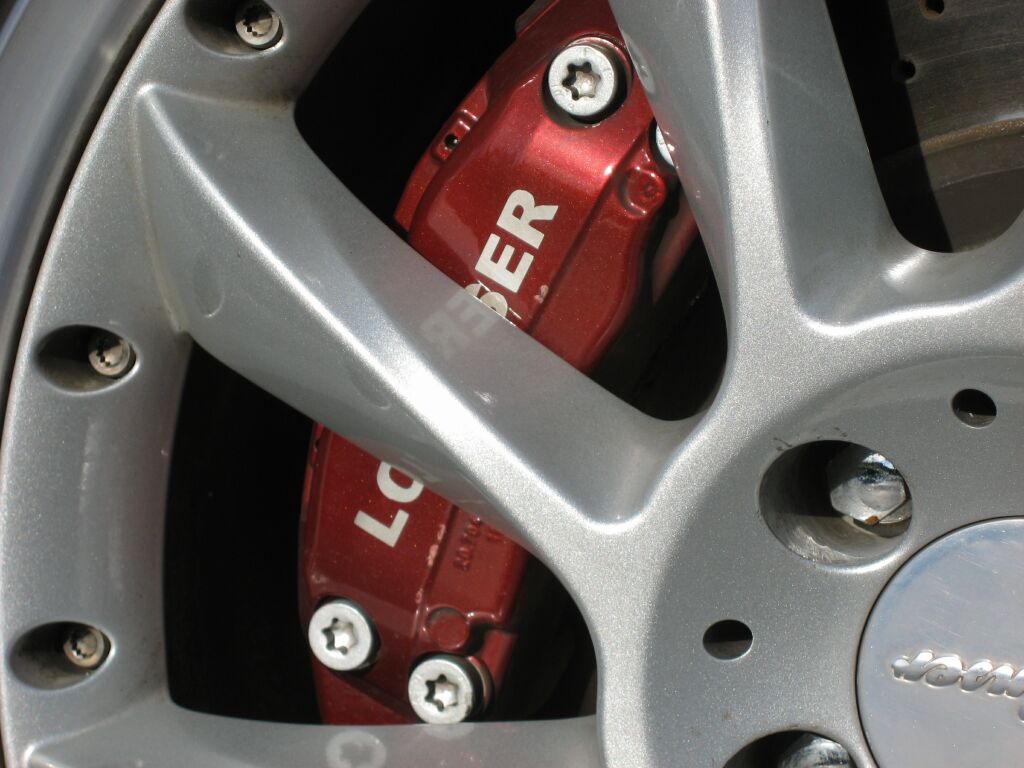 A closer view of the C32 color matched calipers.
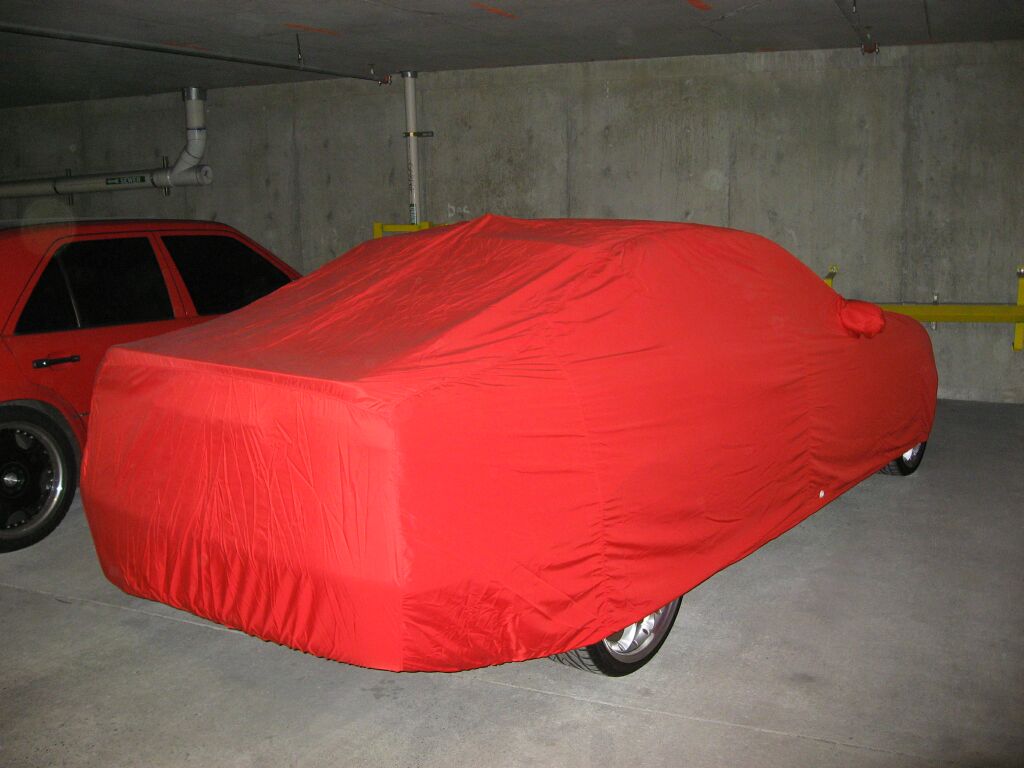 As with all my
vehicles, I store them covered when not in use. For the CLK, I picked up a
good deal on Ebay. This cover is made by California Car Cover and is made
from their Superweave fabric, their top of the line cover. It is custom
designed for the CLK and finished in bright red.
As with all my
vehicles, I store them covered when not in use. For the CLK, I picked up a
good deal on Ebay. This cover is made by California Car Cover and is made
from their Superweave fabric, their top of the line cover. It is custom
designed for the CLK and finished in bright red.
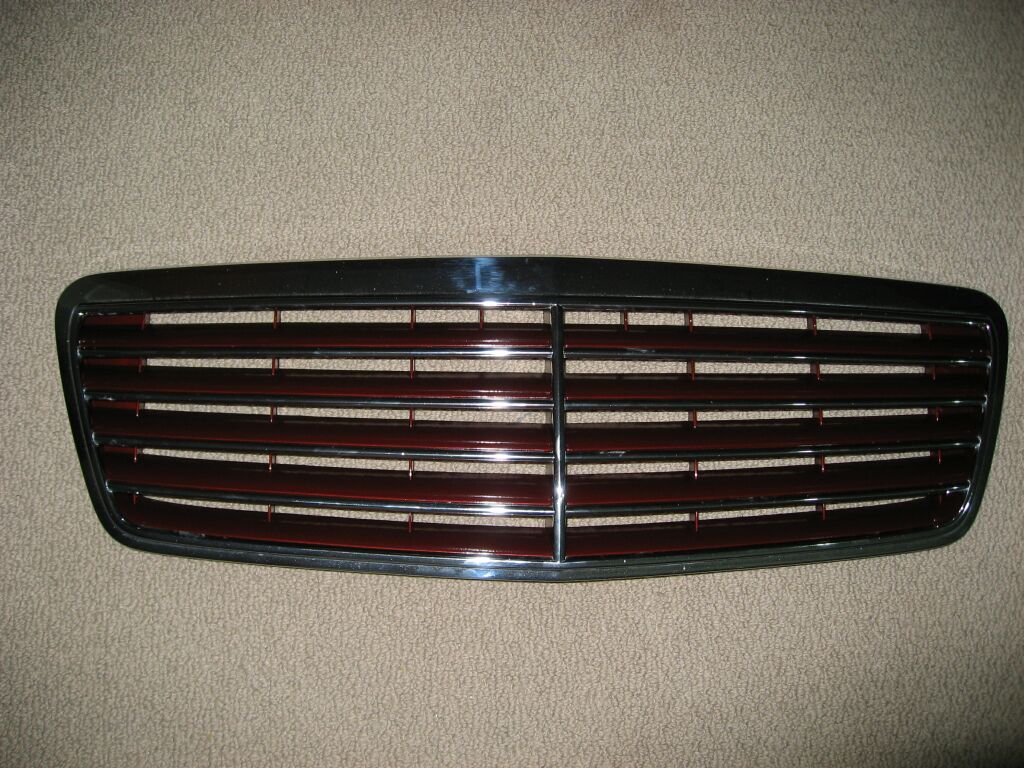
Updated Factory Grill
 I
wanted something unique for the grill and the aftermarket options were limited.
I don't like the grills with the big stars in them, so I elected to do something
different and take the OE grill apart and paint the black sections body color.
I
wanted something unique for the grill and the aftermarket options were limited.
I don't like the grills with the big stars in them, so I elected to do something
different and take the OE grill apart and paint the black sections body color.
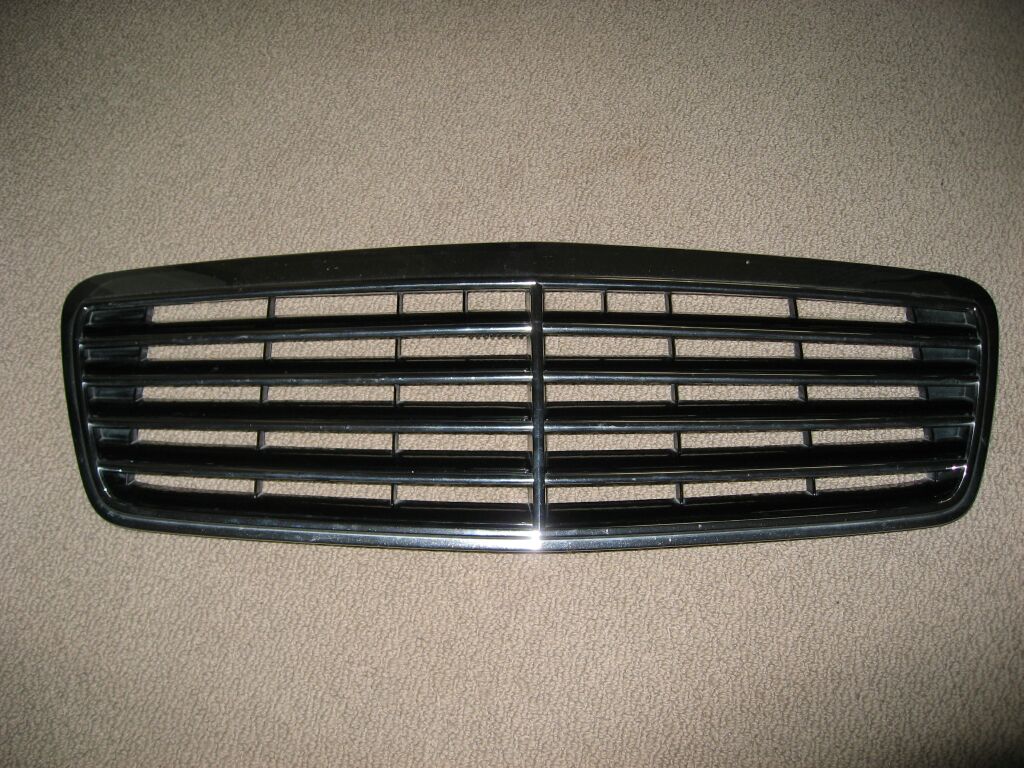
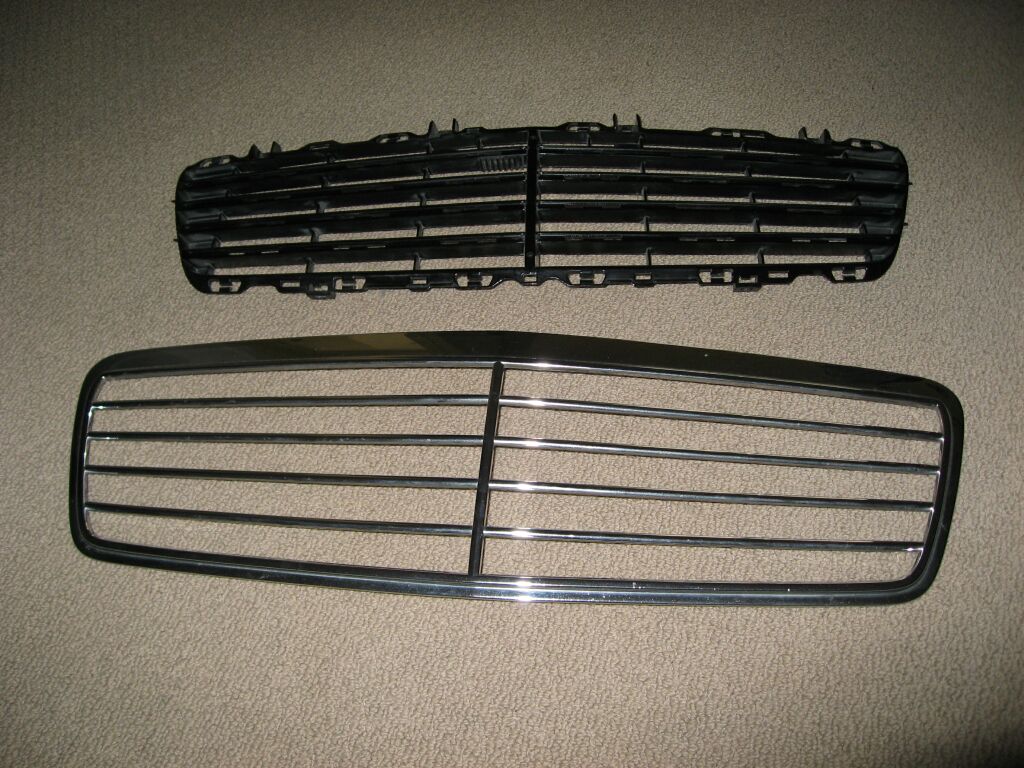 The
first step was to take the chrome grill off from the frame, easy enough to do,
but it was time consuming as you need to release clips from the frame and the
slats while applying pressure. You also need to be careful, as the newer grills
are not metal, they are chrome plated plastic.
The
first step was to take the chrome grill off from the frame, easy enough to do,
but it was time consuming as you need to release clips from the frame and the
slats while applying pressure. You also need to be careful, as the newer grills
are not metal, they are chrome plated plastic.
 After
a through cleaning and wet sanding with 400 grit sand paper, I applied several
coats of Adhesion Promoter, after that dried, it was time to paint. Like
always, I ordered factory matching paint from
www.towerpaint.com. I started by
painting the back side and all the remote crevices first, I then proceeded to
paint the front surface, starting with light coats and allowing the paint to dry
between coats. The last coat was laid on heavy to ensure a smooth glossy
finish.
After
a through cleaning and wet sanding with 400 grit sand paper, I applied several
coats of Adhesion Promoter, after that dried, it was time to paint. Like
always, I ordered factory matching paint from
www.towerpaint.com. I started by
painting the back side and all the remote crevices first, I then proceeded to
paint the front surface, starting with light coats and allowing the paint to dry
between coats. The last coat was laid on heavy to ensure a smooth glossy
finish.
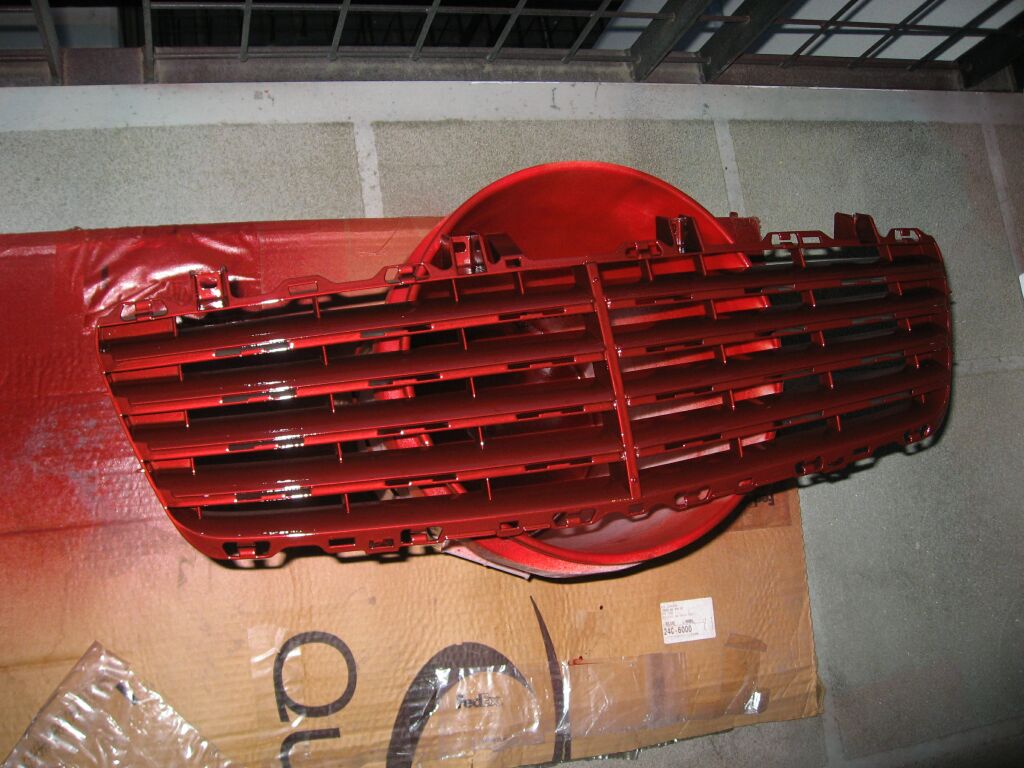
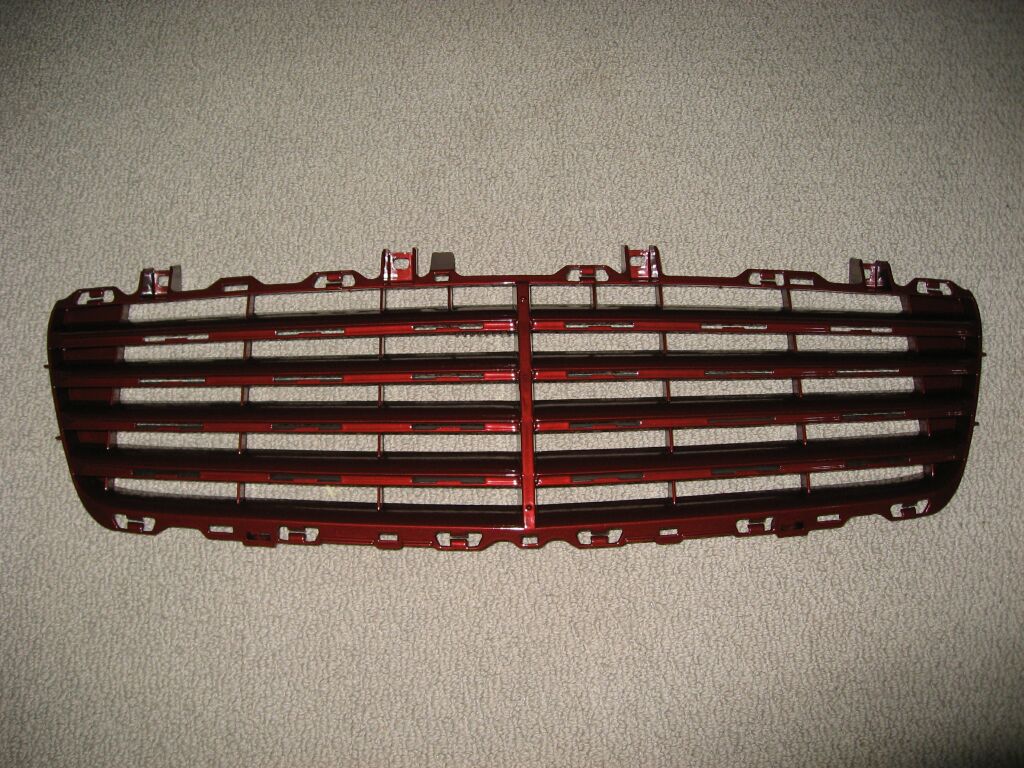 Here
is the freshly painted grill before re-assembly. I normally let painted
items dry overnight before I handle them.
Here
is the freshly painted grill before re-assembly. I normally let painted
items dry overnight before I handle them.
 The
chrome grill porting just snaps back into place. You do need to apply a
bit of pressure to make sure the clips snap back into place. I also
cleaned and polished the chrome surface while I had it apart.
The
chrome grill porting just snaps back into place. You do need to apply a
bit of pressure to make sure the clips snap back into place. I also
cleaned and polished the chrome surface while I had it apart.
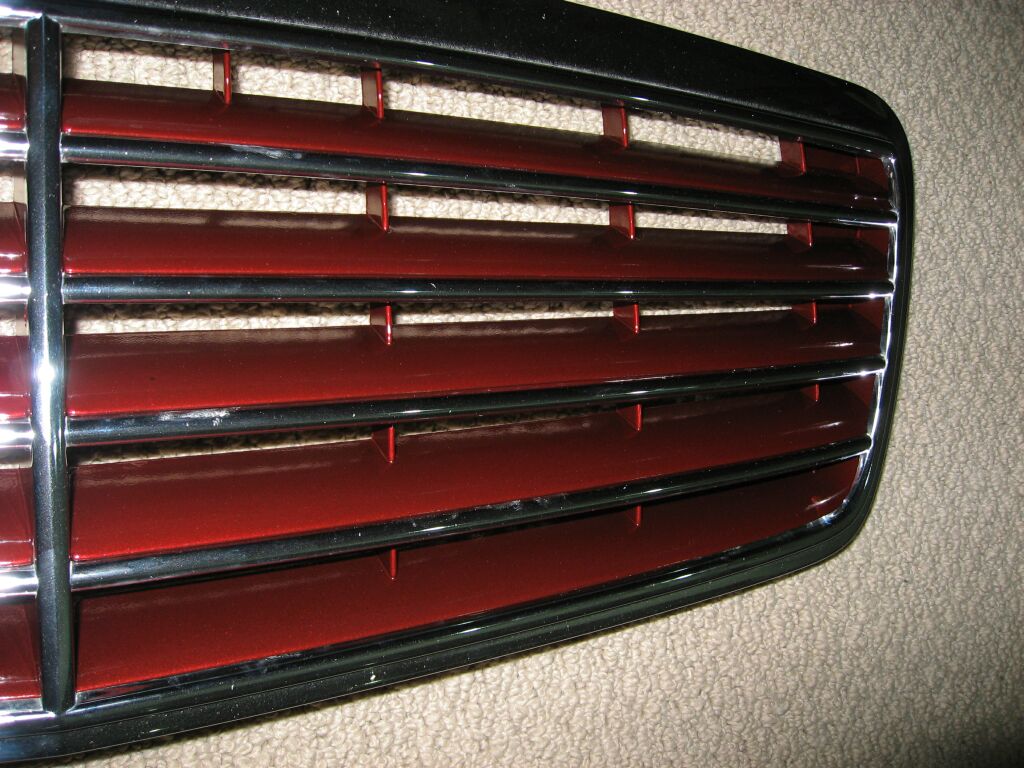 A
closer view of the grill once assembly was complete. These pictures don't
capture the color too well, plus the flash tends to wash everything out a bit.
A
closer view of the grill once assembly was complete. These pictures don't
capture the color too well, plus the flash tends to wash everything out a bit.
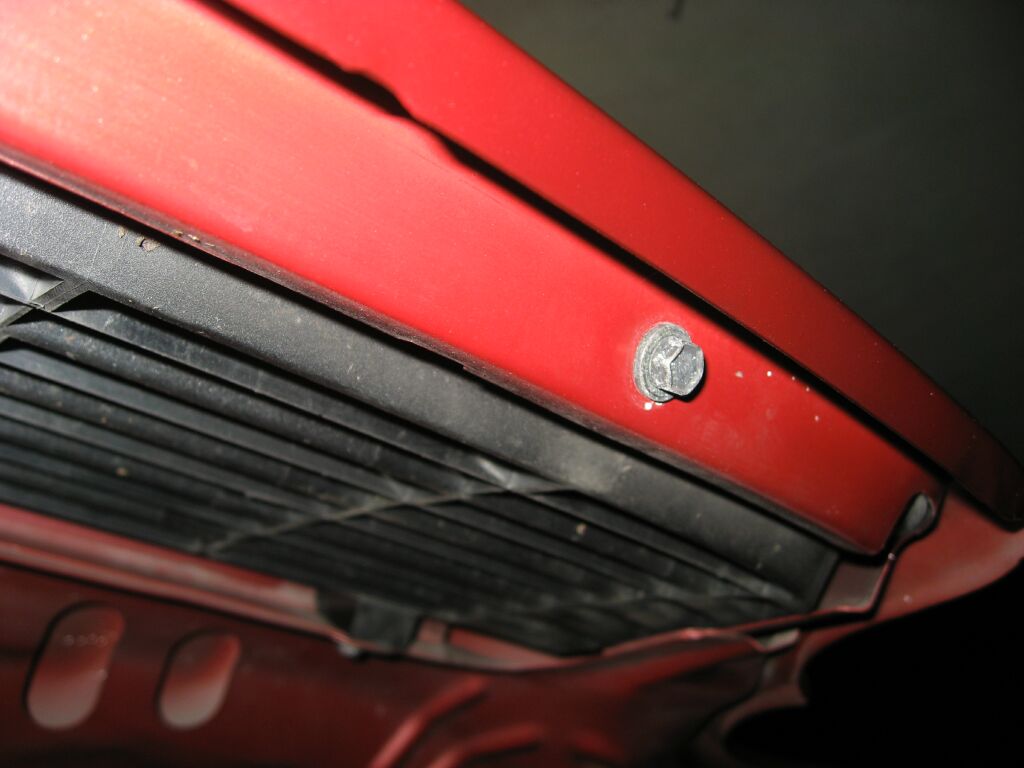 So
to install/uninstall the grill, there are six 8mm bolts that need to be removed.
Four along the top and two across the bottom, then the grill will just lift out
of the hood frame.
So
to install/uninstall the grill, there are six 8mm bolts that need to be removed.
Four along the top and two across the bottom, then the grill will just lift out
of the hood frame.
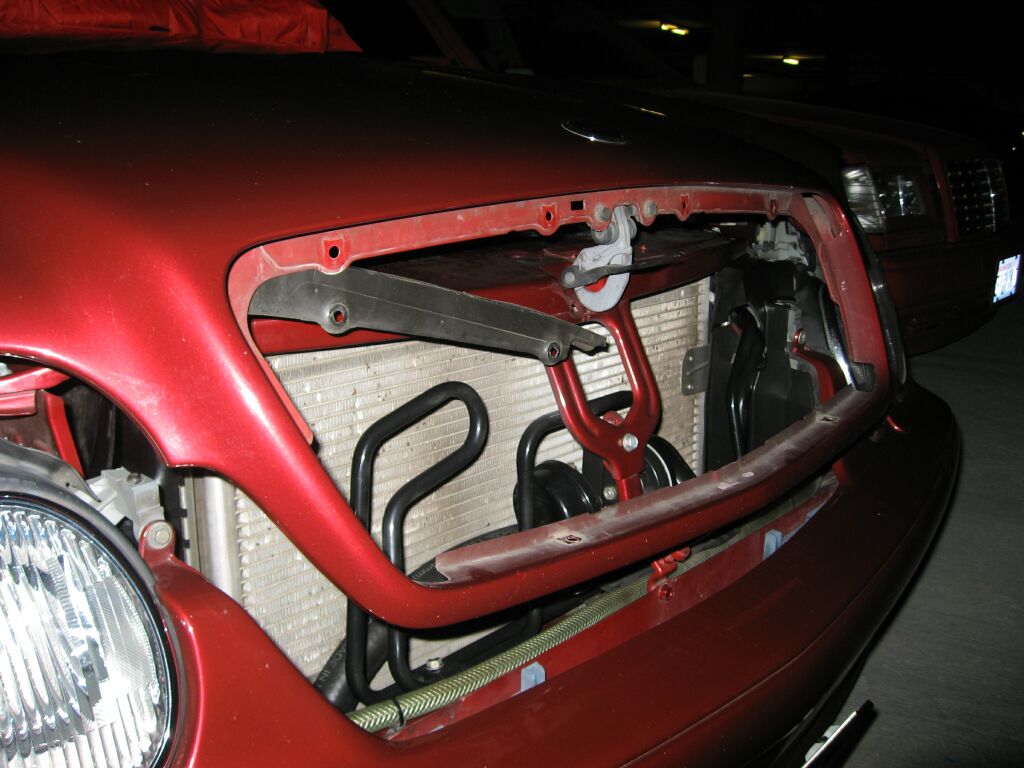 Once
the grill is out, its a good time to clean up the hood frame area before you
reinstall the grill.
Once
the grill is out, its a good time to clean up the hood frame area before you
reinstall the grill.
This
is the freshly painted grill. It keeps the original look/feel but adds a
distinctive personal touch.
Carbon Fiber Hood Installation
 I
bought this VIS carbon fiber hood locally for only $350. These are no
longer made but I believe VIS still has a few in stock for $1200. It is a
composite carbon fiber/fiberglass construction and weighs in at 15lbs. The
stock hood weighs 42lbs, so this upgrade shaved 27lbs off the curb weight of the
CLK.
I
bought this VIS carbon fiber hood locally for only $350. These are no
longer made but I believe VIS still has a few in stock for $1200. It is a
composite carbon fiber/fiberglass construction and weighs in at 15lbs. The
stock hood weighs 42lbs, so this upgrade shaved 27lbs off the curb weight of the
CLK.
 To
start, the windshield nozzles need to be removed, there is a pop-out panel here
that serves as a junction point for the electrical connectors. Then the
fluid hoses need to be disconnected and pulled out of the hood.
To
start, the windshield nozzles need to be removed, there is a pop-out panel here
that serves as a junction point for the electrical connectors. Then the
fluid hoses need to be disconnected and pulled out of the hood.
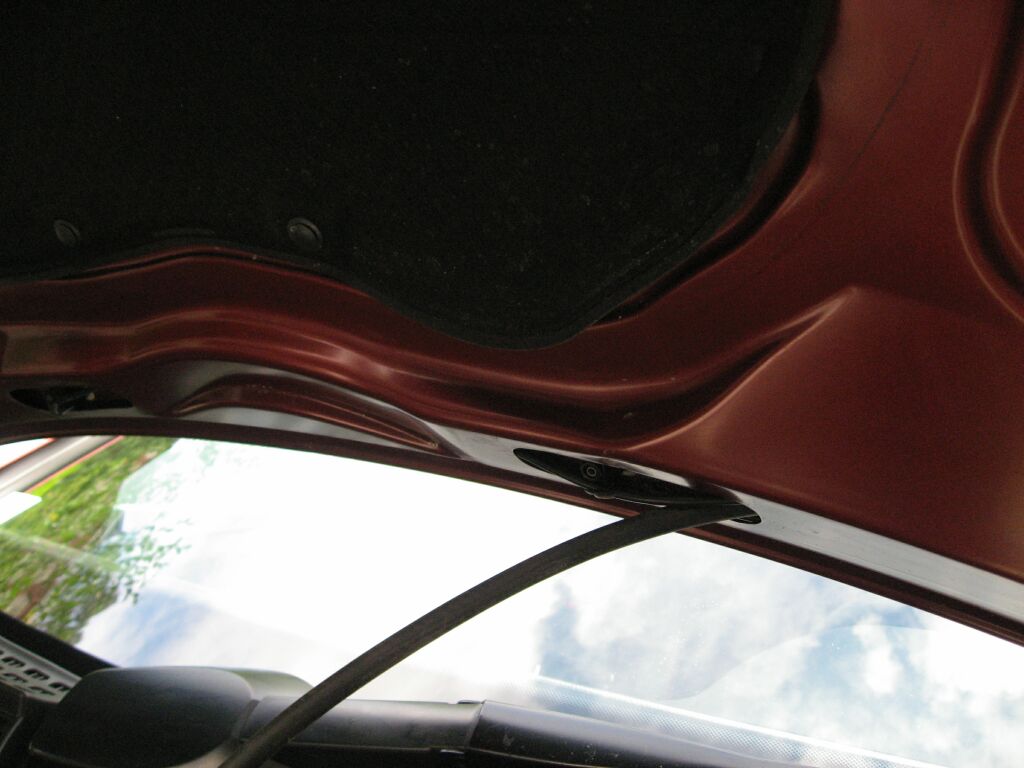 Another
picture of the fluid hoses on the passenger side of the hood. The nozzles
are clipped in, so you need to depress the clip to pull them out from the from
of the hood.
Another
picture of the fluid hoses on the passenger side of the hood. The nozzles
are clipped in, so you need to depress the clip to pull them out from the from
of the hood.
 Next
was to remove the hood security latch, which is held on with two 10mm bolts.
Also the actual hood latch's, also held on with two 10mm bolts.
Next
was to remove the hood security latch, which is held on with two 10mm bolts.
Also the actual hood latch's, also held on with two 10mm bolts.
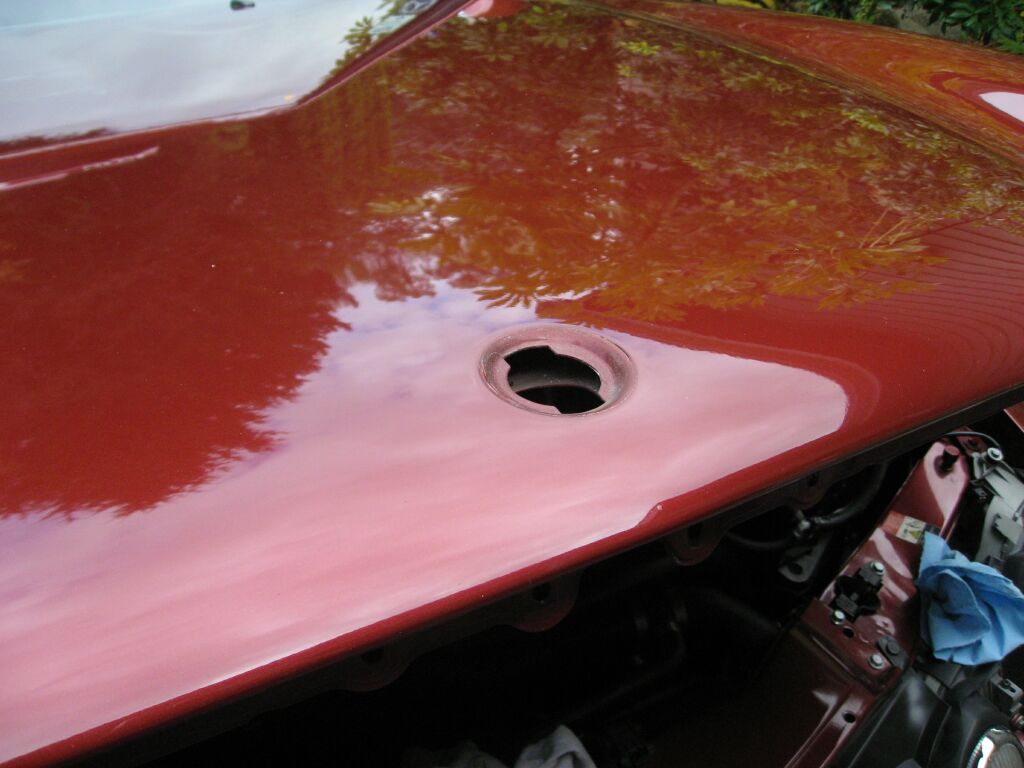 The
Lorinser hood emblem is held in place with a 6mm bolt.
The
Lorinser hood emblem is held in place with a 6mm bolt.
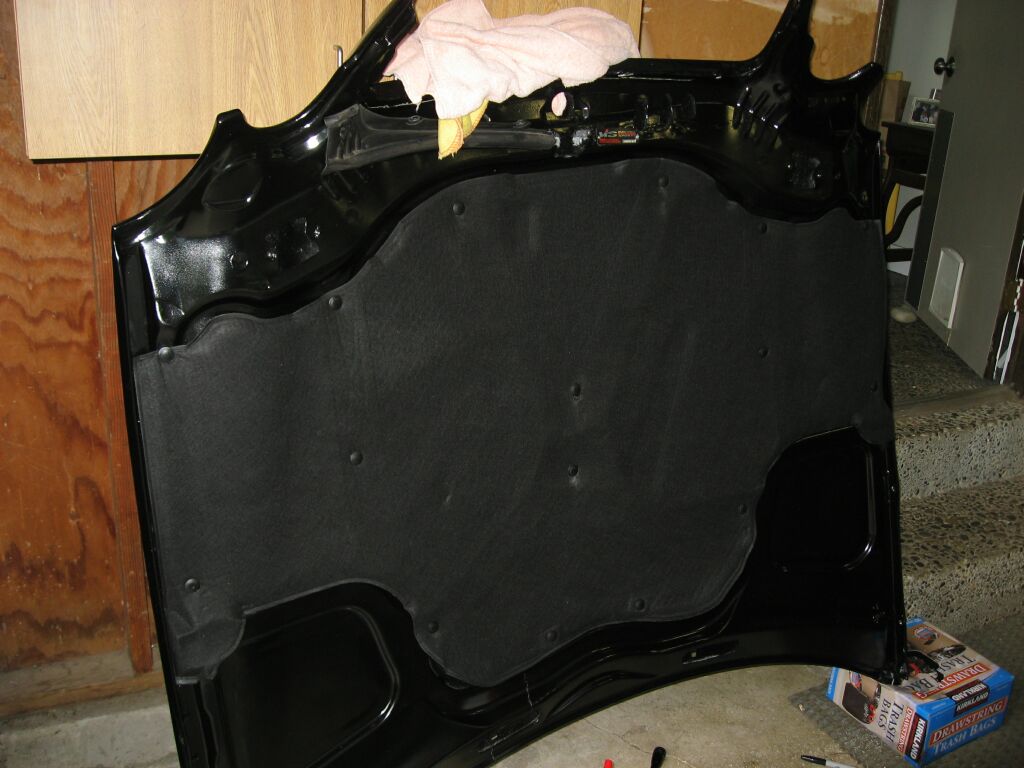
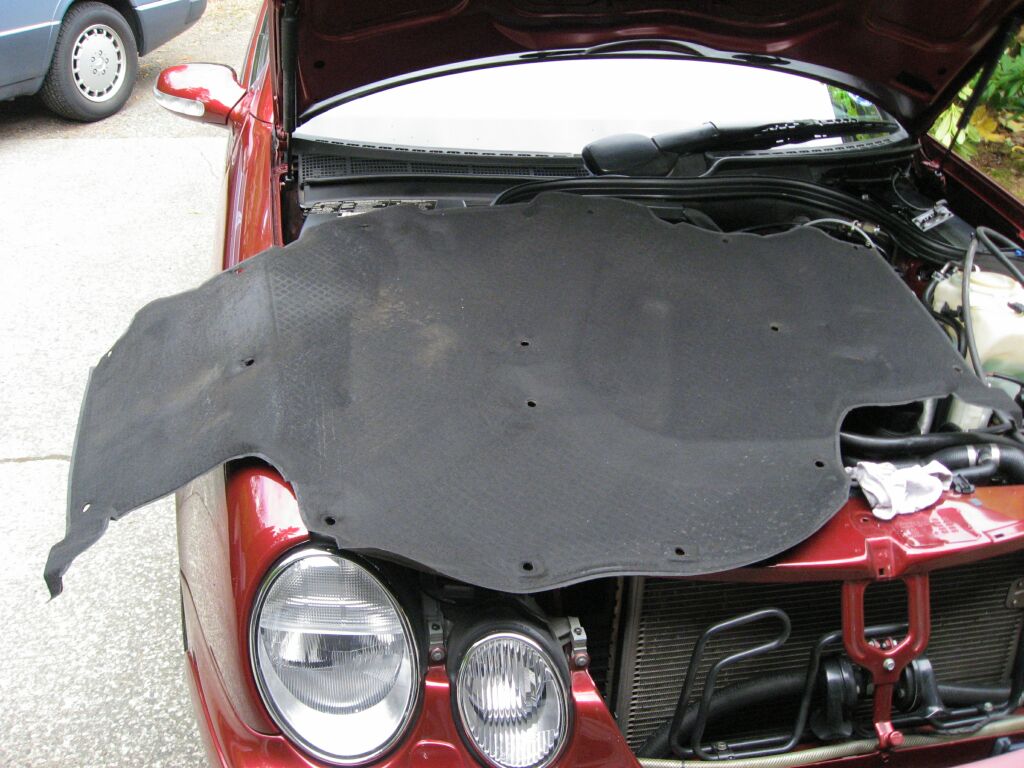 The
hood liner was next. It is held in place with pop in plastic rivets.
Once off the car, its a good idea to to take some degreaser and clean it up
before re-installation.
The
hood liner was next. It is held in place with pop in plastic rivets.
Once off the car, its a good idea to to take some degreaser and clean it up
before re-installation.
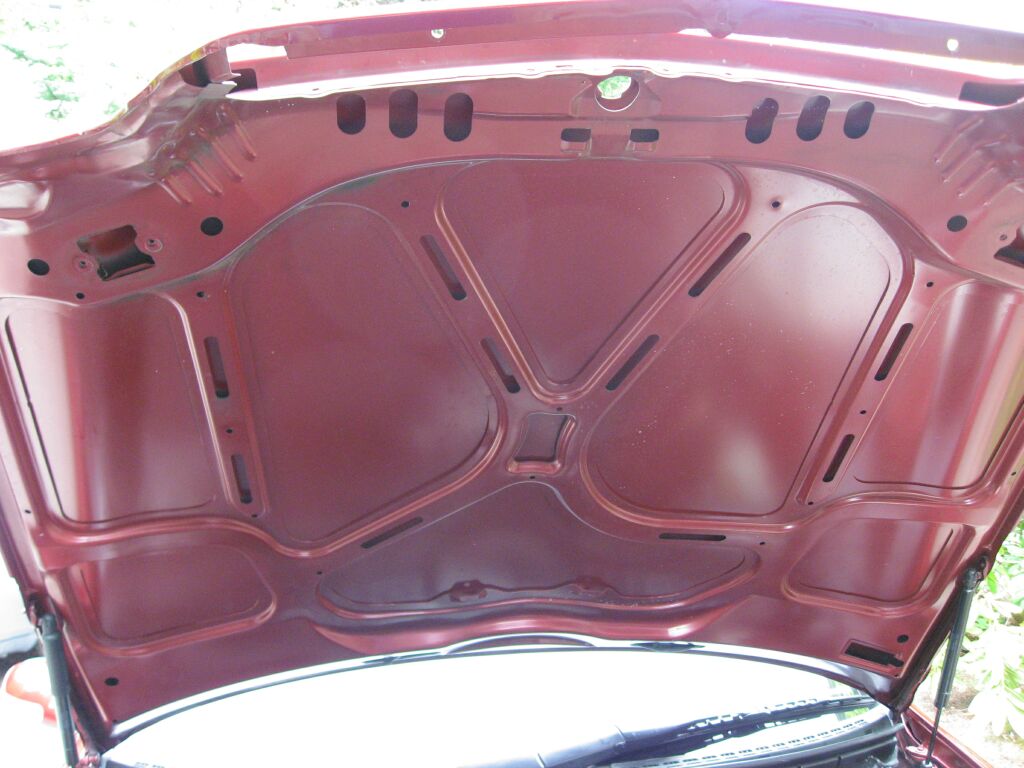 With
all the parts off of the hood, I took out the hydraulic hood supports, they are
held onto the mount by a C clip, which can be removed using a small flat blade
screw driver. With the hood supports removed, you can unbolt the three
10mm bolts on each of the hinges to remove the hood. Its best if you have
a couple of people to hold the hood as you unbolt it.
With
all the parts off of the hood, I took out the hydraulic hood supports, they are
held onto the mount by a C clip, which can be removed using a small flat blade
screw driver. With the hood supports removed, you can unbolt the three
10mm bolts on each of the hinges to remove the hood. Its best if you have
a couple of people to hold the hood as you unbolt it.
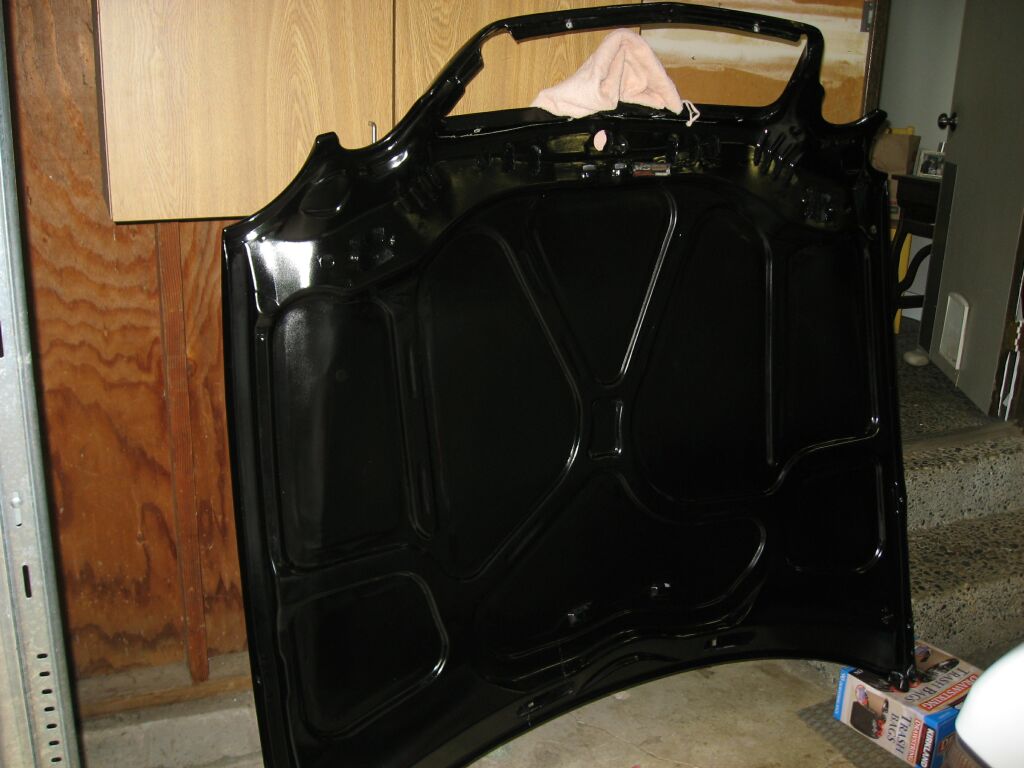
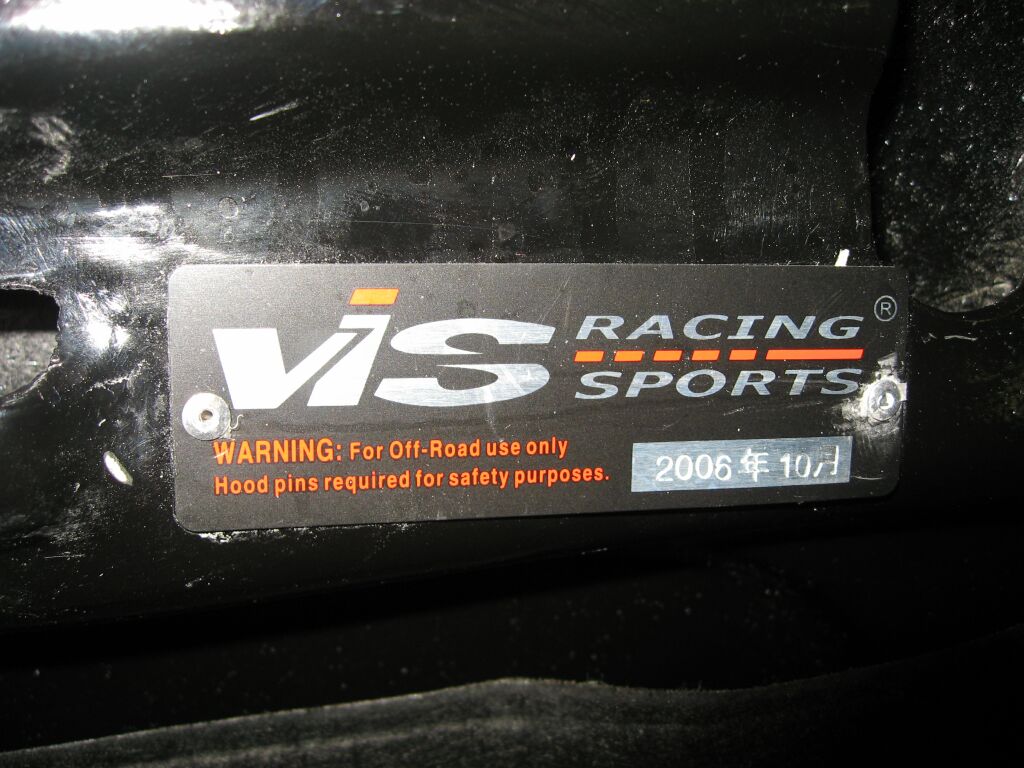 VIS
has a riveted plaque inside of the hood. From my research, VIS makes very
high quality carbon fiber products, but don't think that is is a simple "bolt on
and go" type of product. I spent a good six hours getting this to fit
right.
VIS
has a riveted plaque inside of the hood. From my research, VIS makes very
high quality carbon fiber products, but don't think that is is a simple "bolt on
and go" type of product. I spent a good six hours getting this to fit
right.
 Although
many of the holes for accessories were pre-drilled, the holes for the sound
insulation pad holes were not. You have to be very carefully drilling the
holes, as the carbon fiber outer layer is very close to where your drilling.
This was a time consuming task.
Although
many of the holes for accessories were pre-drilled, the holes for the sound
insulation pad holes were not. You have to be very carefully drilling the
holes, as the carbon fiber outer layer is very close to where your drilling.
This was a time consuming task.
 Once
all the accessories are bolted onto the carbon fiber hood, you can start your
installation. I had a couple of friends assisting me, as we needed to
place it, check that the holes aligned and made adjustments as necessary.
I discovered that the stock hood hinge bolts are not long enough to go through
the hood and into the hinge, so I use the 10mm bolts that the security latch
uses, they were long enough. I ended up purchasing more of these to finish
the job.
Once
all the accessories are bolted onto the carbon fiber hood, you can start your
installation. I had a couple of friends assisting me, as we needed to
place it, check that the holes aligned and made adjustments as necessary.
I discovered that the stock hood hinge bolts are not long enough to go through
the hood and into the hinge, so I use the 10mm bolts that the security latch
uses, they were long enough. I ended up purchasing more of these to finish
the job.
 The
grill also did not fit perfectly, requiring a bit of sanding and filing.
Same with the security latch. Then there was the hour or so spent with
aligning the hood latch's so the hood would actually close and securely latch.
The
grill also did not fit perfectly, requiring a bit of sanding and filing.
Same with the security latch. Then there was the hour or so spent with
aligning the hood latch's so the hood would actually close and securely latch.
 Some
additional pictures at a local MB show.
Some
additional pictures at a local MB show.
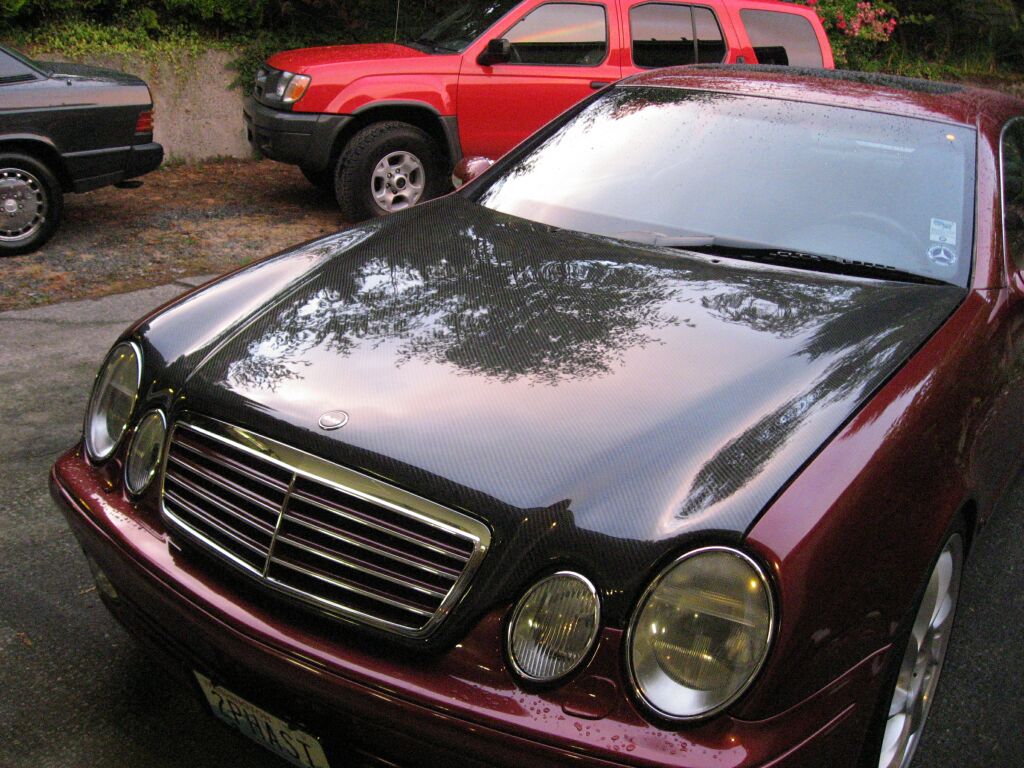
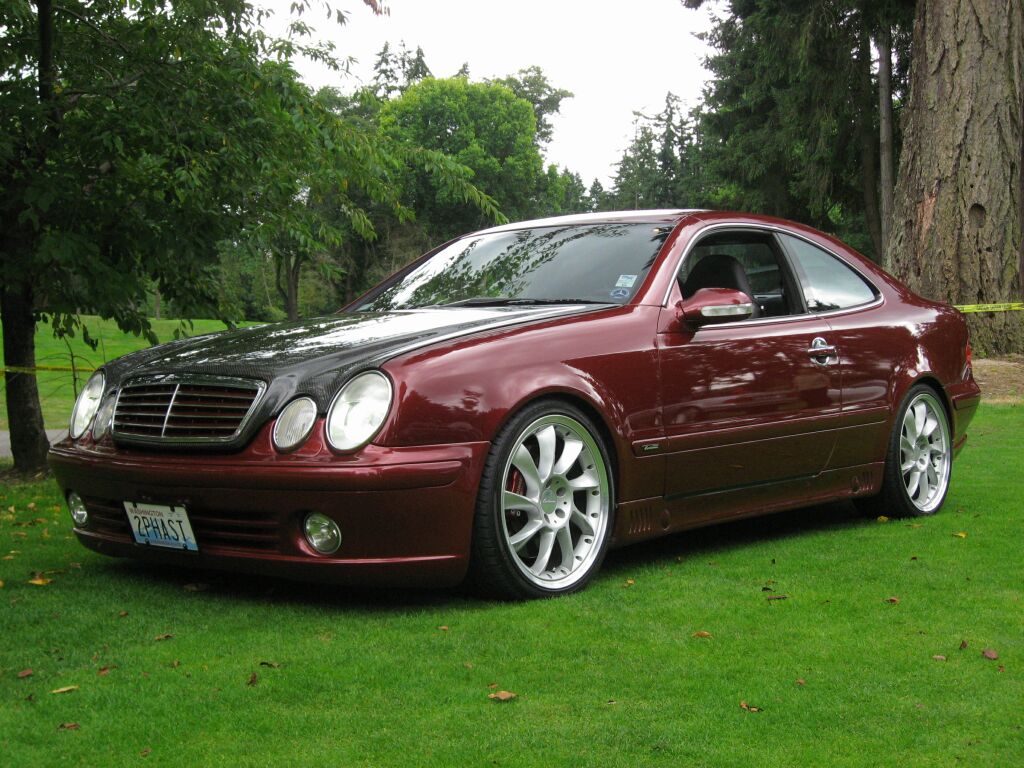 Another
profile view showing the hood.
Another
profile view showing the hood.
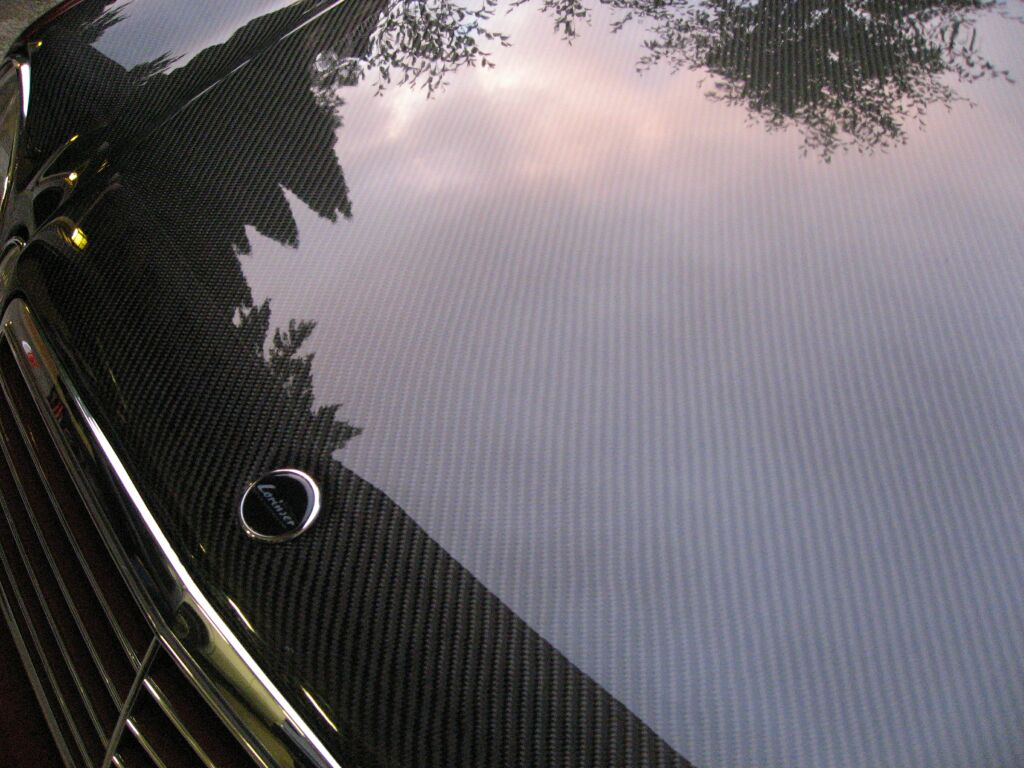 A
closer look at the CF finish.
A
closer look at the CF finish.
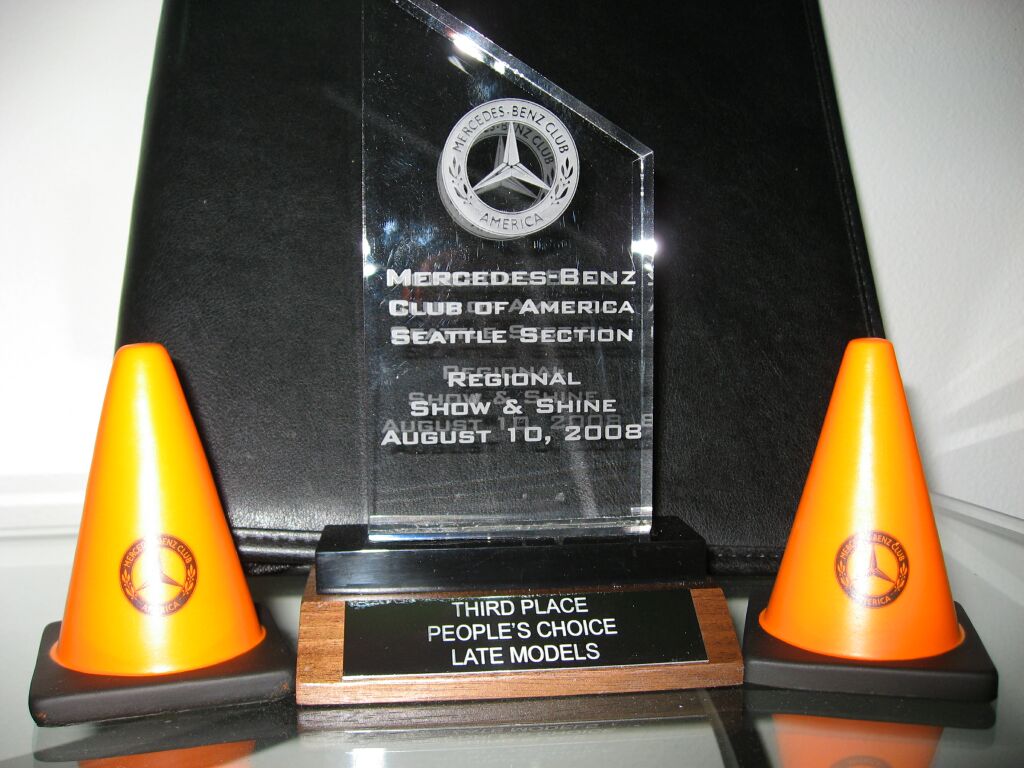 The
August 10th, 2008 MBCA show was where the CLK32k placed third in the late model
class. This was very surprising, as these shows are embraced by attendees
who's idea of a winner is a bone stock vehicle. To have a vehicle such as
mine place, is quite amazing. Of course the 1st and 2nd place vehicles
were bone stock cars, go figure.
The
August 10th, 2008 MBCA show was where the CLK32k placed third in the late model
class. This was very surprising, as these shows are embraced by attendees
who's idea of a winner is a bone stock vehicle. To have a vehicle such as
mine place, is quite amazing. Of course the 1st and 2nd place vehicles
were bone stock cars, go figure.

<Back
Information/pictures on this site are the property of Rik Johnson and are not
to be used without written permission.