Interior Wood Upgrades

Although I am a firm believer in the saying "Less is More". I do have some extra burl wood items in my CLK. Some people go overboard, so I have kept the additional wood to a minimum. This Schatz cover is one of those pieces that Mercedes should of included.
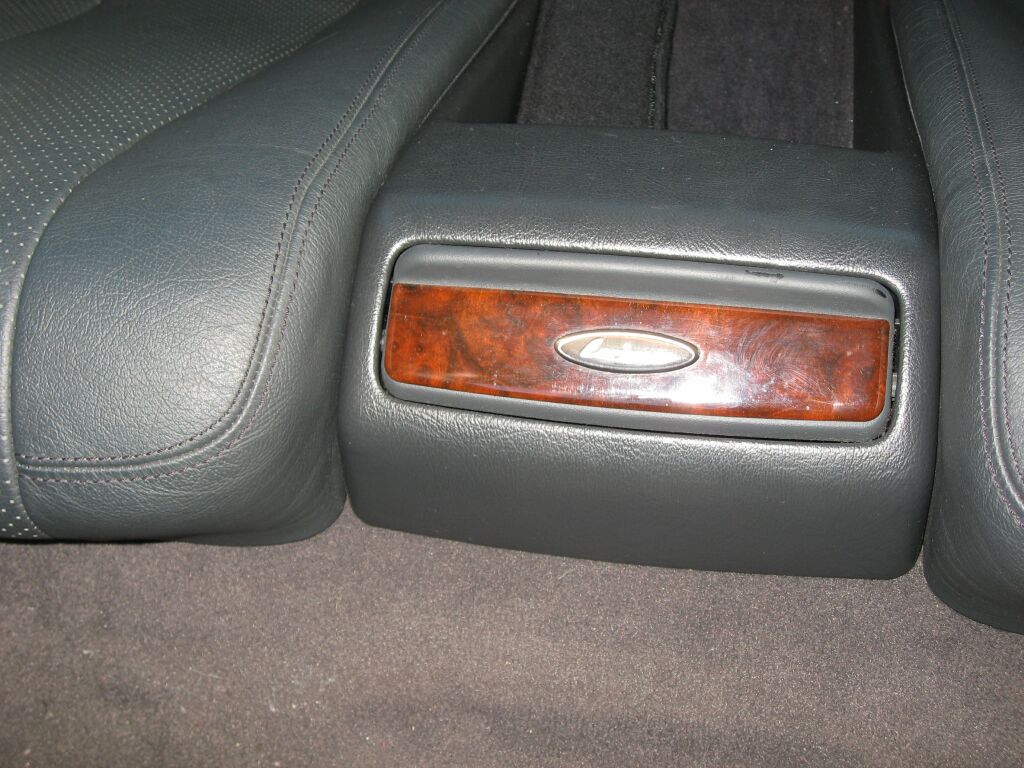 This is the rear console tray and the wood is installed on the ash tray door. Although not clearly visible, the emblem on this is a small Lorinser logo, the jury is still out on whether or not I will keep this emblem here, but the wood is a nice addition, as Mercedes did not provide any burl wood trim in the rear seating area.
 Here you can see that the door handle has additional
Schatz burl wood added and there is also a small piece of burl over the chrome handle as well. Although I will describe this in another section on this page, the lower portion of the door panel has been covered in black suede
Here you can see that the door handle has additional
Schatz burl wood added and there is also a small piece of burl over the chrome handle as well. Although I will describe this in another section on this page, the lower portion of the door panel has been covered in black suede
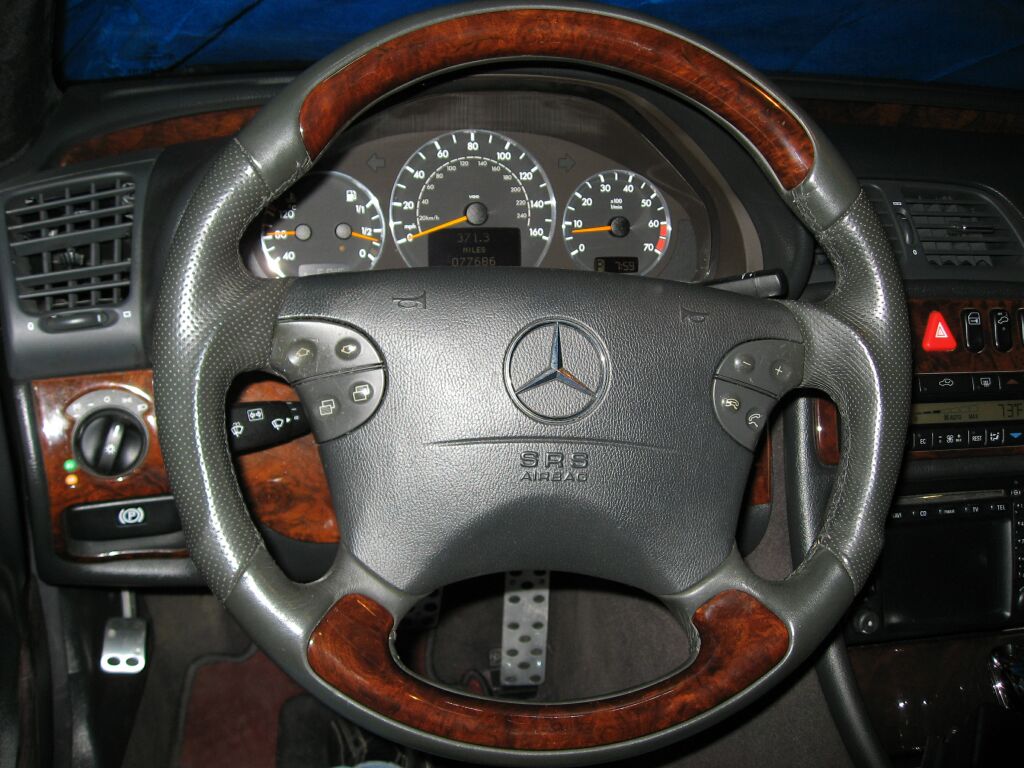
The steering wheel installed in the CLK is made by Victor, it is a black leather and burl wheel. It is also slightly smaller than the OE wheel.
Center Console Wood Replacement
 As
with most Mercedes, after years exposed to the sun, the interior wood fades and
cracks. In the case of this 8 year old CLK, its fade that has got the best
of the wood trim. Used replacement pieces are normally not in much better
shape, so for the most part you have no choice but to order the replacement
pieces through the dealer.
As
with most Mercedes, after years exposed to the sun, the interior wood fades and
cracks. In the case of this 8 year old CLK, its fade that has got the best
of the wood trim. Used replacement pieces are normally not in much better
shape, so for the most part you have no choice but to order the replacement
pieces through the dealer.
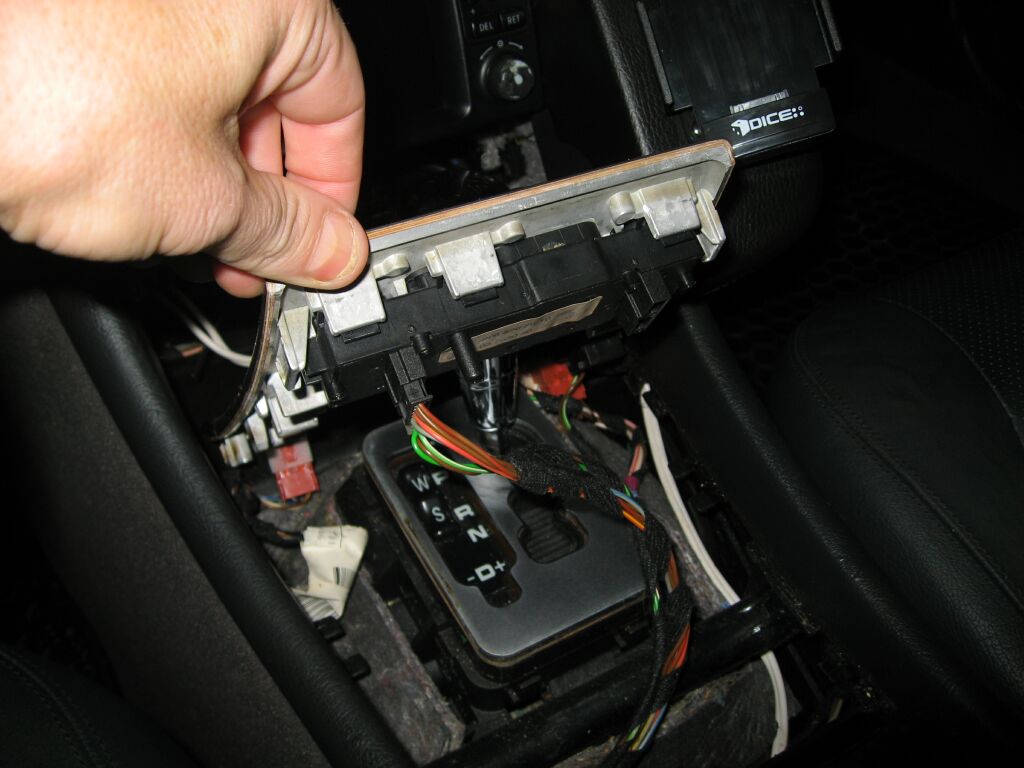
 To
get started, you need to remove the shifter trim ring, then open up the drink
holder and lift the center console wood up from this point. There are no
screws to remove and you do not need to remove the ash tray. (my ash tray was
broken at the time this photo was taken)
To
get started, you need to remove the shifter trim ring, then open up the drink
holder and lift the center console wood up from this point. There are no
screws to remove and you do not need to remove the ash tray. (my ash tray was
broken at the time this photo was taken)
 With
the console lifted up, you need to carefully unplug all the switch's so you can
remove the wood. Once you have the wood free, you need to remove all the
switch's. A small flat blade screw driver comes in handy to pop out all
the switch's.
With
the console lifted up, you need to carefully unplug all the switch's so you can
remove the wood. Once you have the wood free, you need to remove all the
switch's. A small flat blade screw driver comes in handy to pop out all
the switch's.
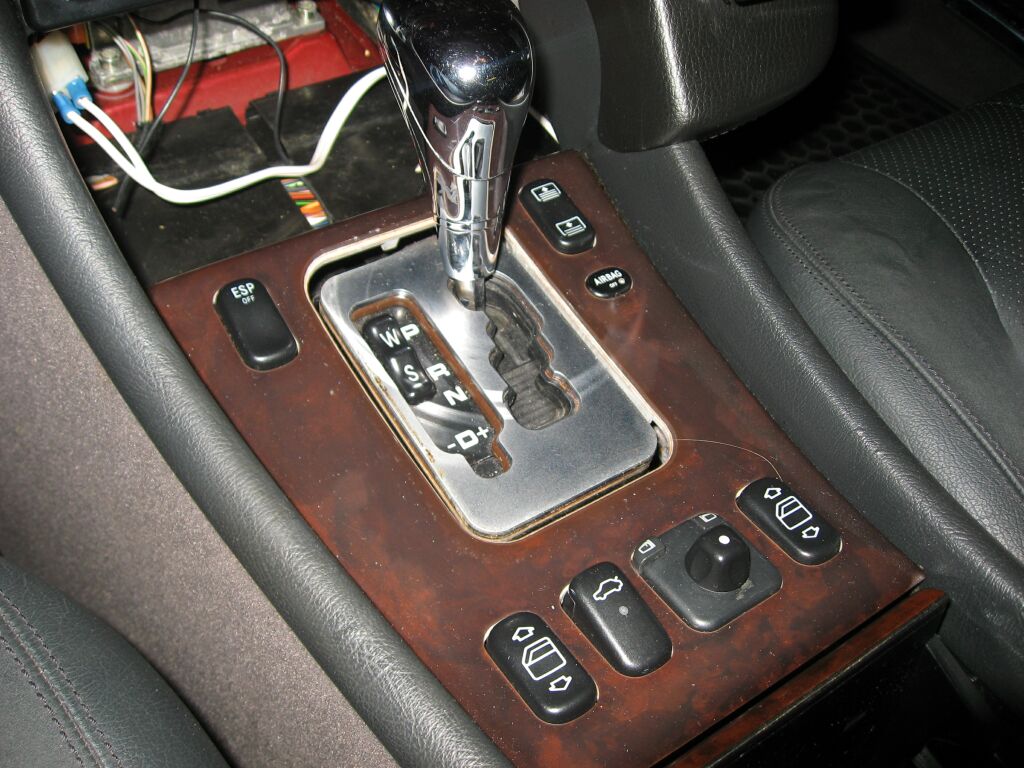
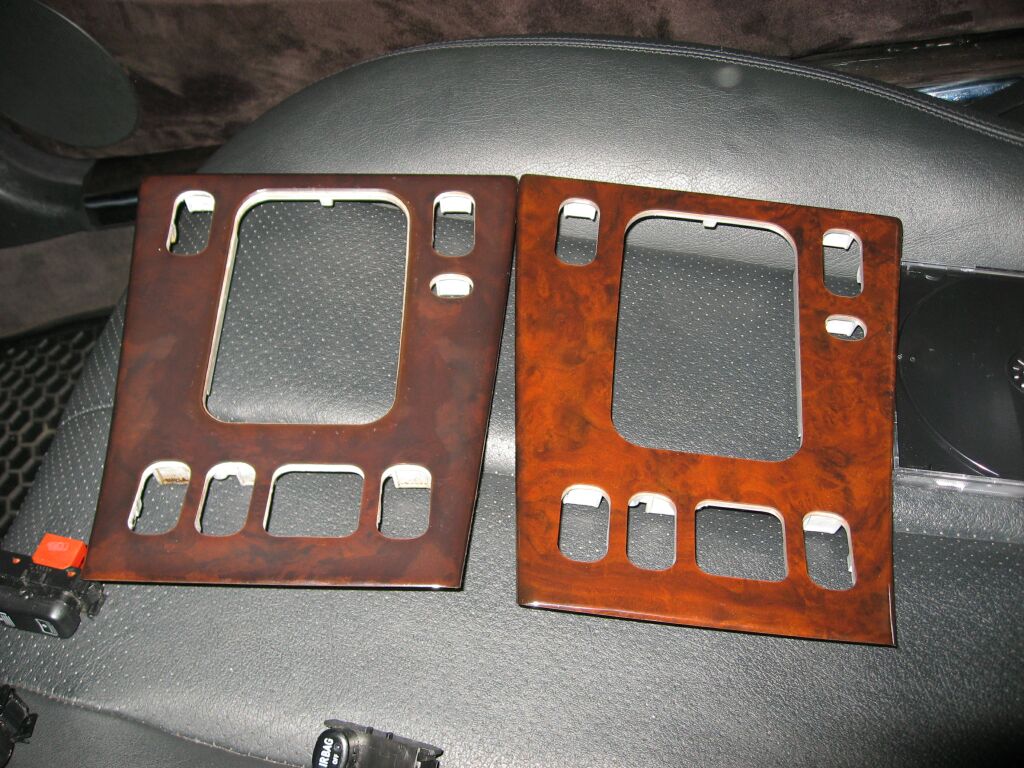 You
can see the drastic difference in color between the old piece (on the right)
compared to the new wood piece.
You
can see the drastic difference in color between the old piece (on the right)
compared to the new wood piece.
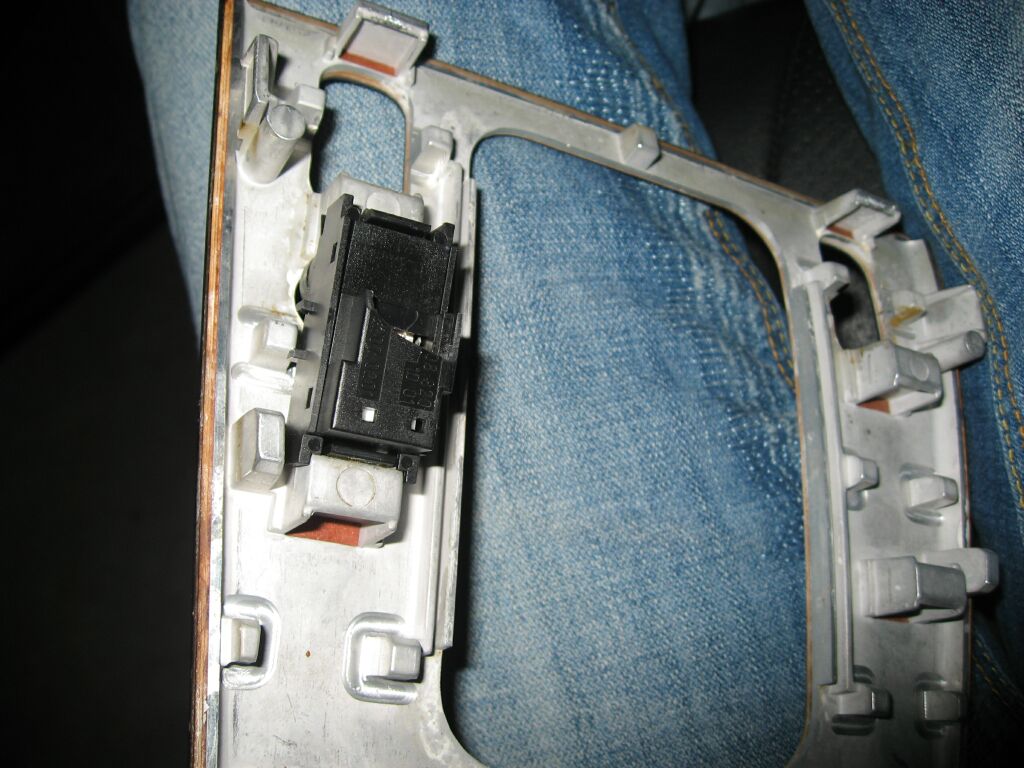 You
can see here how the switch's pop into the sockets, removal is the reverse.
You
can see here how the switch's pop into the sockets, removal is the reverse.

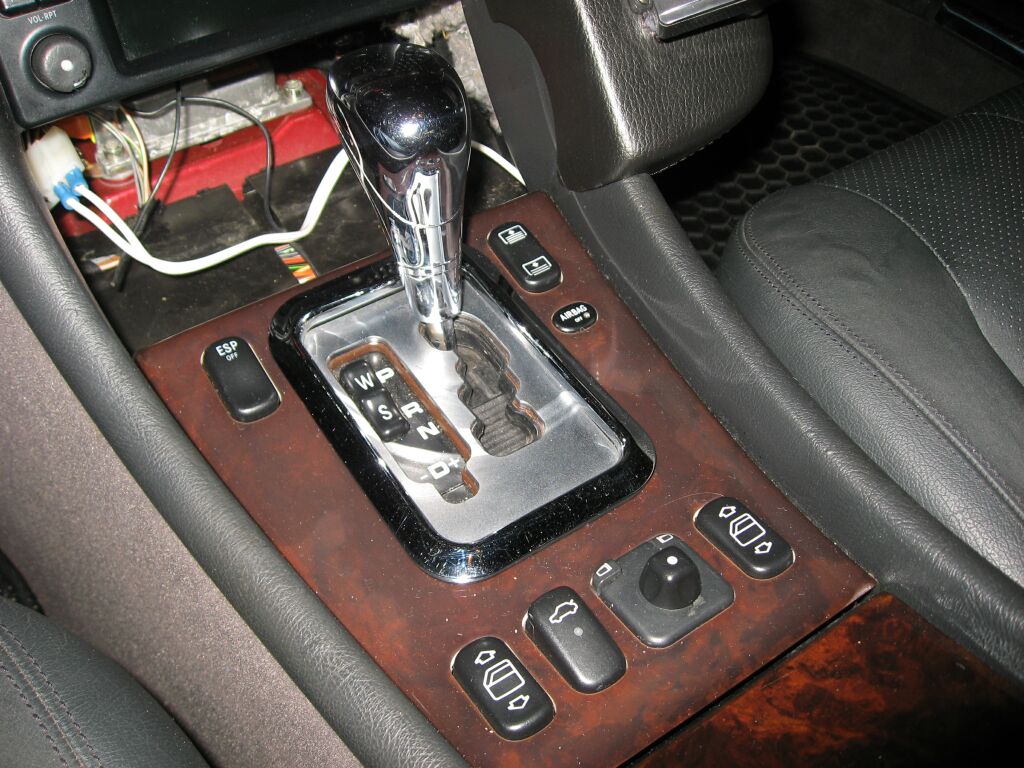
With the new wood installed, you can see how terrible it makes the rest
of the wood. It seems that once you replace one piece, you need to replace
them all to get a perfect match.
 So,
of course I ended up replacing the drink holder wood and ashtray wood,
just so all the pieces match.
So,
of course I ended up replacing the drink holder wood and ashtray wood,
just so all the pieces match.
Black Suede interior panels
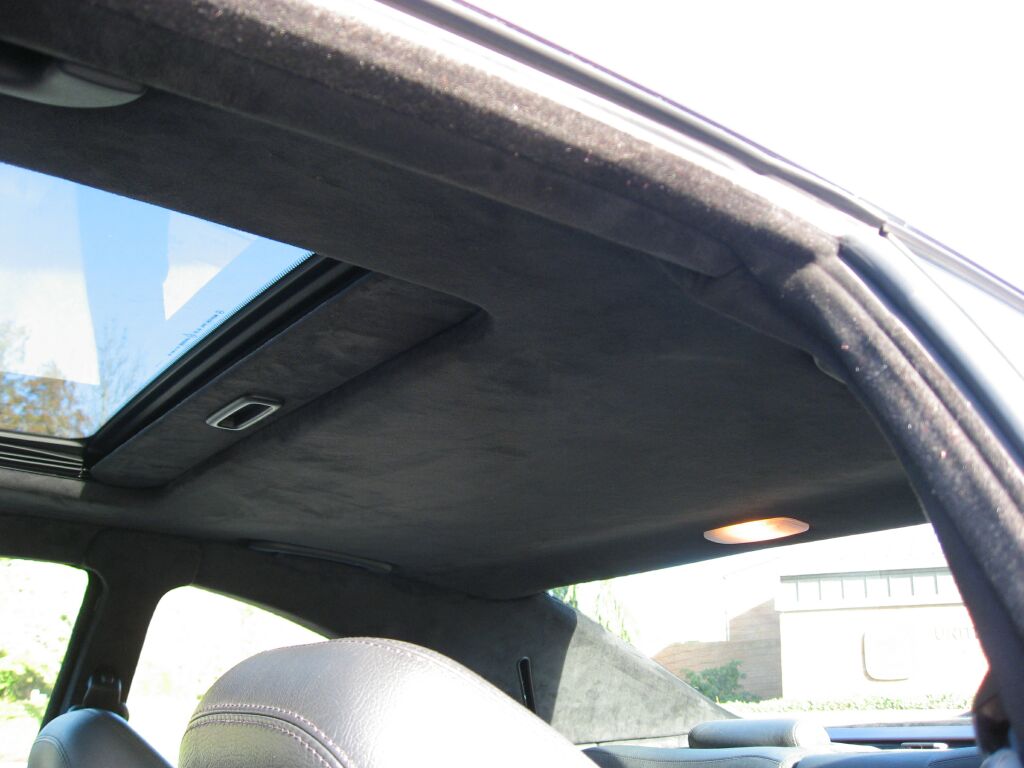 The OE headliner is gray and the interior is black, not sure why Mercedes chose this color combination, but the easy fix is to re-cover the headliner in black. In this example, the entire headliner has been done in black suede.
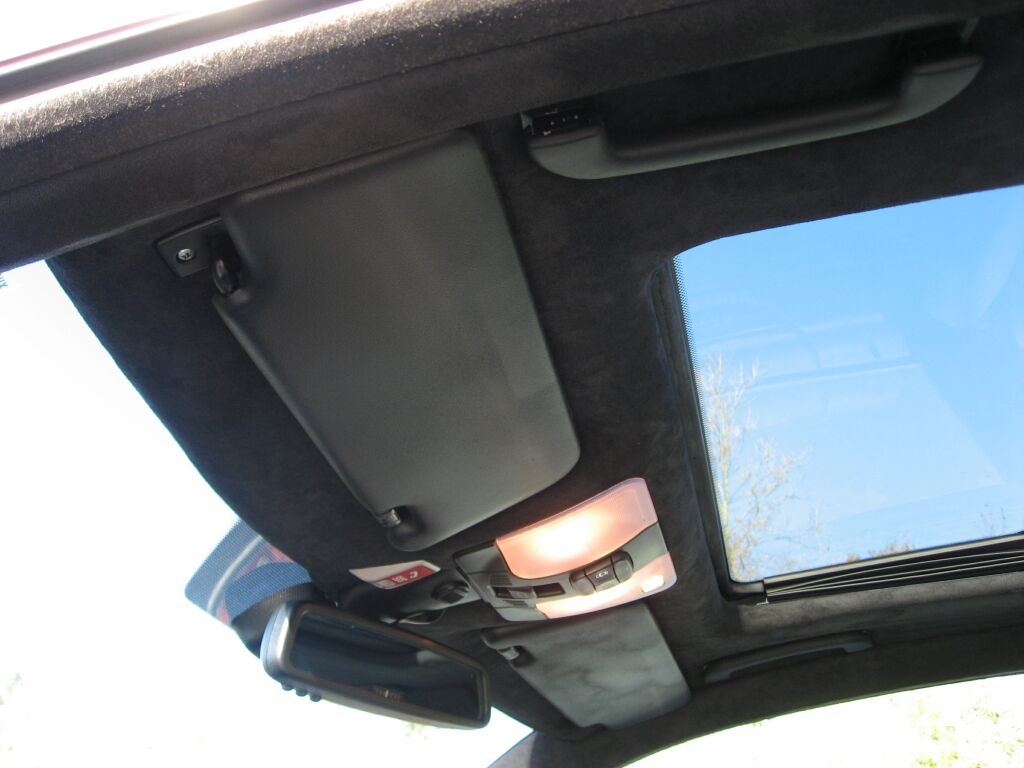 A picture of the front headliner area. The mirror and sun visors needed to be dyed black to match the new suede headliner
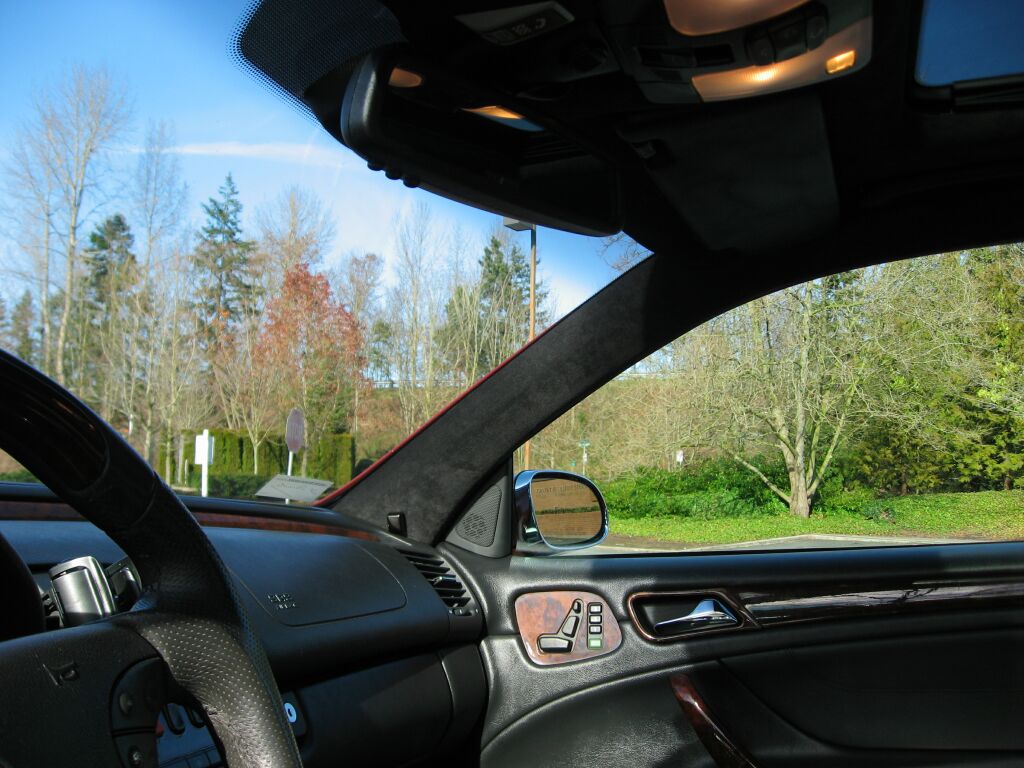 The black suede theme was carried down the front A-pilars as well.
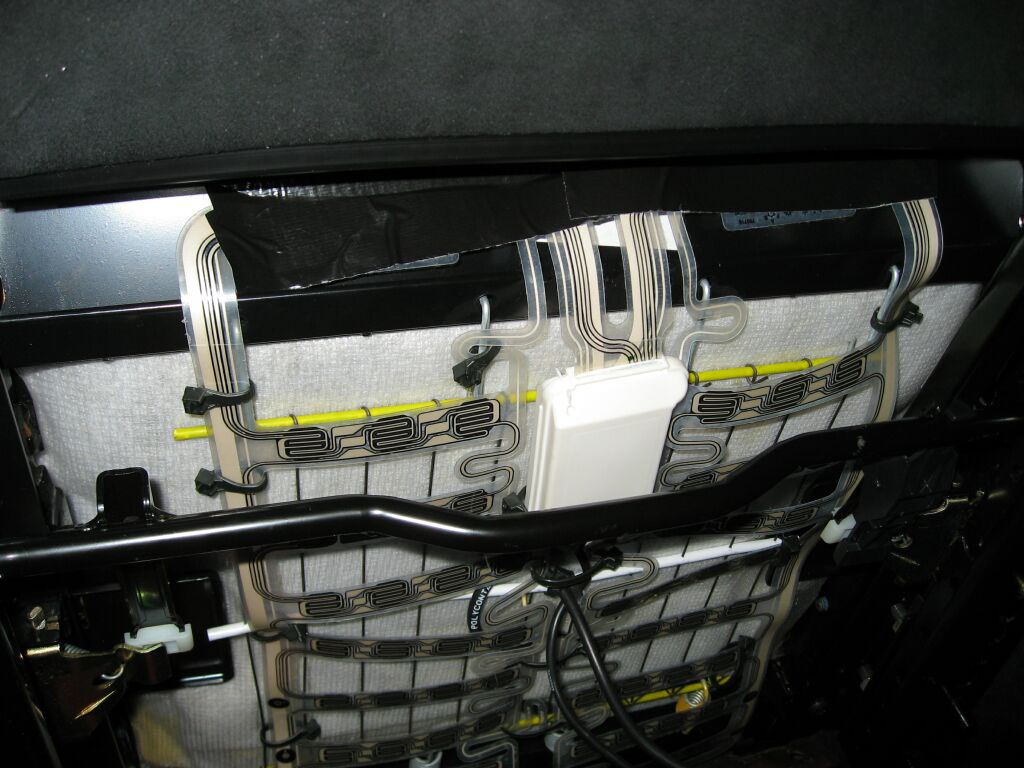
 Although not a very clear picture, you can see that the entire rear shelf was removed and also covered in black suede.
Misc. Interior Upgrades
 This chrome guage rings are readily available on Ebay and require you to pull the entire cluster and take it apart. The rings are installed through the guage face openings, so they do take some patience to get set correctly. Its a "bling" upgrade and in my opinion, not worth the time to install.
 My favorite phone holder is the Bracketron PHM-201 available on Ebay. These mounts are well made and adjustable, they include a 90 degree angle mount and the option to mount on either the vent (like shown here) or to a mount bracket. These phone holders are fully adjustable and will fit most phones. I chose to use the vent mounts and centered my phone in the center dash versus the drivers side vent. I don't really need my phone close, as the factory phone system in my car has been upgraded to bluetooth, so all phone functions go through the Comand system and dash display (more on that later!)
 Here you see the Lorinser pedal covers and the OE Mercedes all weather mats. The pedal covers are a bit tricky to install and require drilling. Another popular pedal cover option is the OE SLK pedal covers, see my 500e section for installation pictures of those.

Another picture of the front drivers side factory Mercedes all weather floor mats. I have used these kind of floor mats in four different Mercedes now and they are easy to clean, durable and look nice. Carpet mats get too dirty too quickly here in the Northwest.
 This is the floor mat in the rear of the CLK. I picked these up from Ebay for around $40 or so.
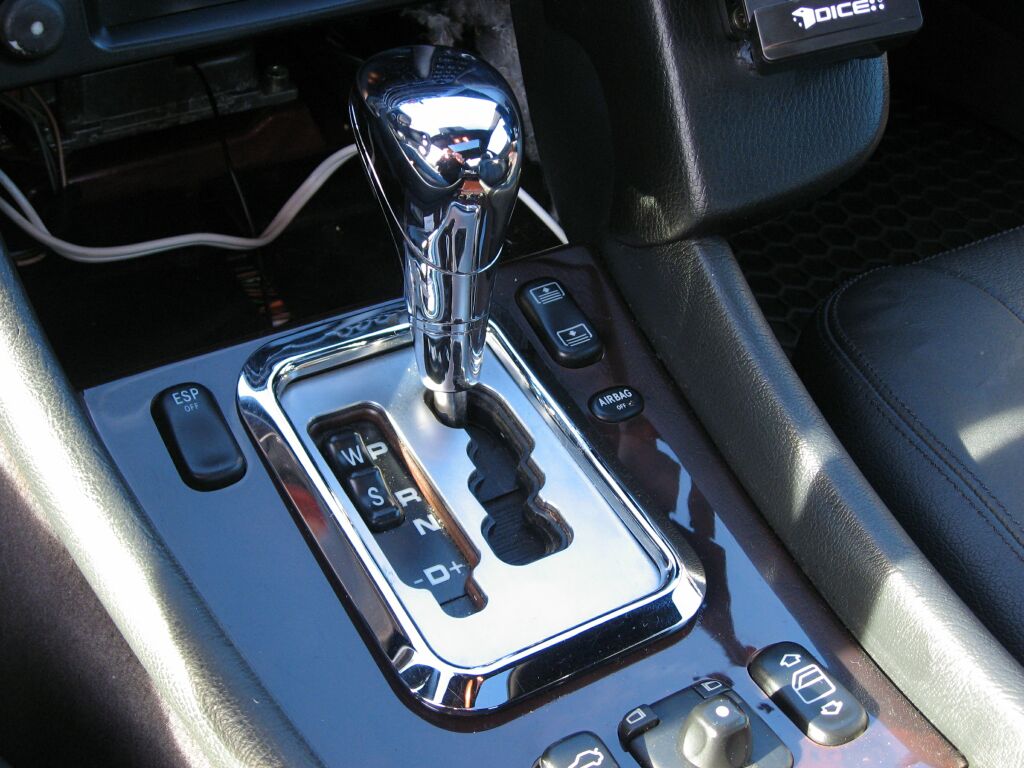 The OE shifter knob was replaced with a solid chome shifter knob, shifter surround and shifter insert. The only draw back here is the knob is pretty cold in the winter, which may or may not bother some people. These parts are readily available on Ebay.
Trunk Storage Pouch
 I
picked this up off of Ebay for about $17.00, it has four storage pockets and
some loops to hold a umbrella. It carries a Q part number and is a MB
offered option.
I
picked this up off of Ebay for about $17.00, it has four storage pockets and
some loops to hold a umbrella. It carries a Q part number and is a MB
offered option.
 On
the back side of the pouch, is strong velcro sewed into place, it definitely is
a well constructed item.
On
the back side of the pouch, is strong velcro sewed into place, it definitely is
a well constructed item.
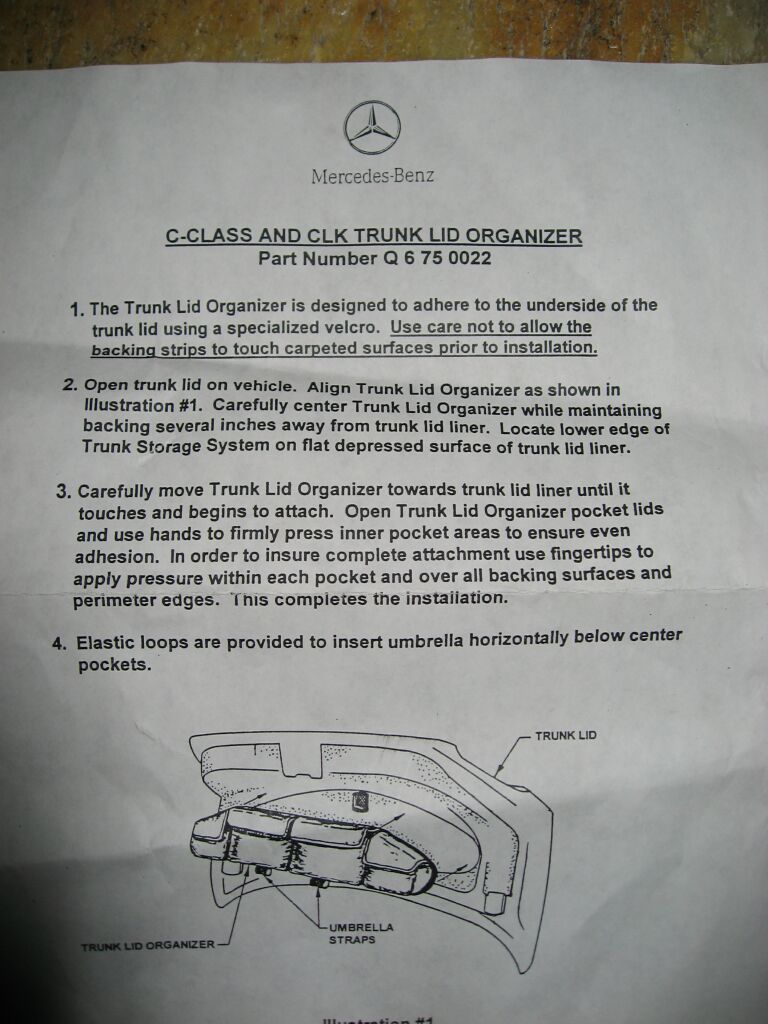 This
is the instructions that come with the pouch, it also has the MB part number on
it in case you are interested.
This
is the instructions that come with the pouch, it also has the MB part number on
it in case you are interested.
 The
pouch mounts to the underside of the trunk via the velcro installed on the back.
The
pouch mounts to the underside of the trunk via the velcro installed on the back.
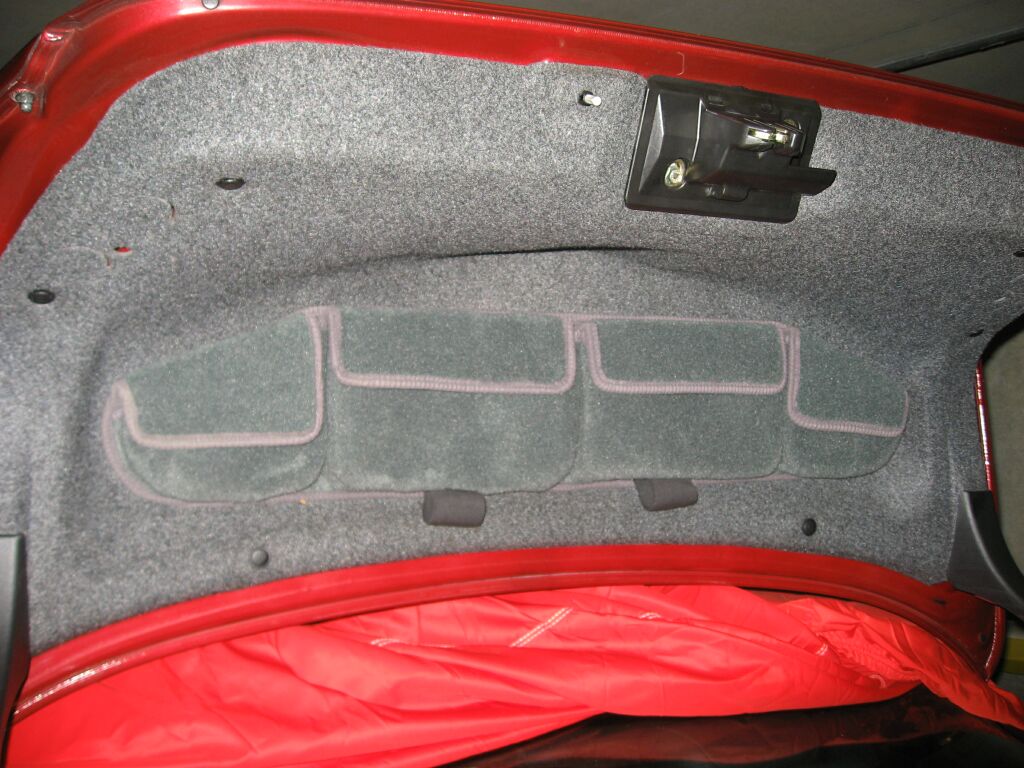 This
is the pouch installed. The color of the carpet is a good match, so it
blends in nice and the velco is strong to hold the pouch in place, even with
heavy items stored in it.
This
is the pouch installed. The color of the carpet is a good match, so it
blends in nice and the velco is strong to hold the pouch in place, even with
heavy items stored in it.
Recaro
Seat Installation
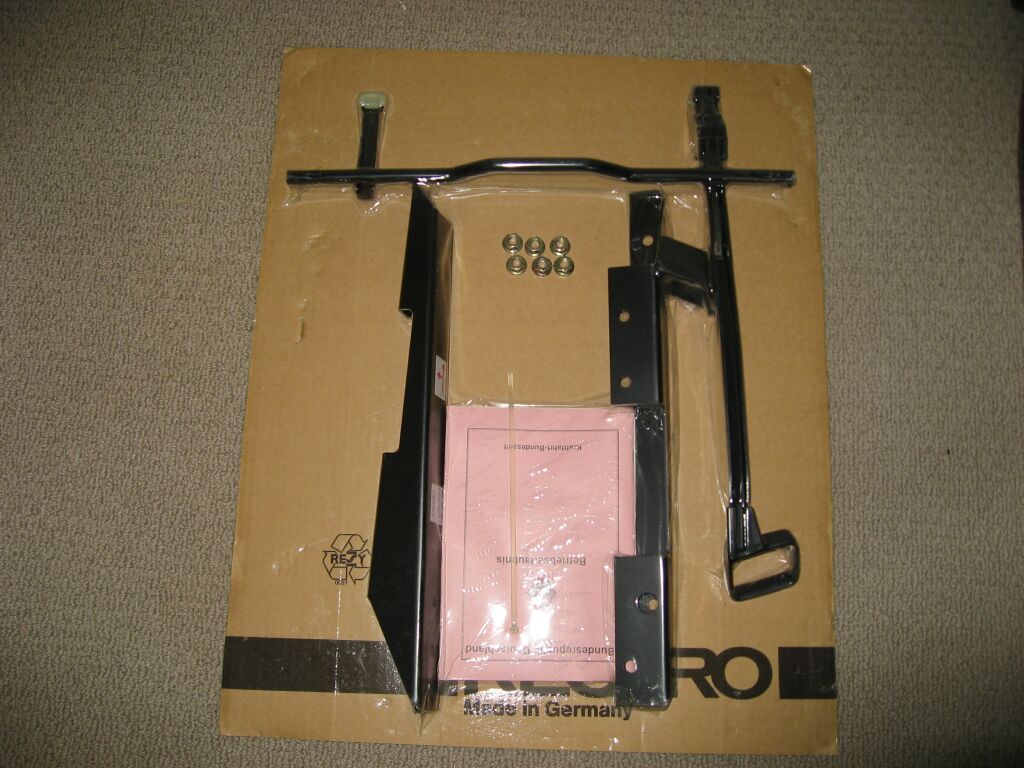 I
picked up a set of new CLK seat rails/sliders off of Ebay for a great price.
Normally these run around $350, but I picked them up for a mere $50.
I
picked up a set of new CLK seat rails/sliders off of Ebay for a great price.
Normally these run around $350, but I picked them up for a mere $50.
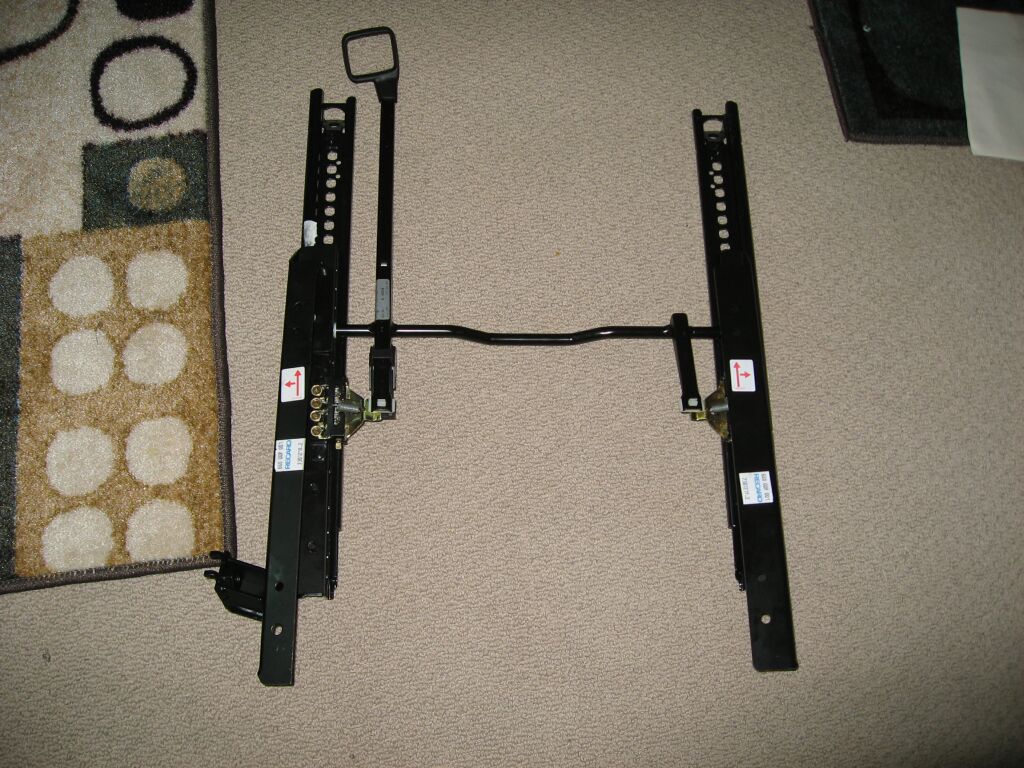 These
are the rails put together as a test fitting.
These
are the rails put together as a test fitting.
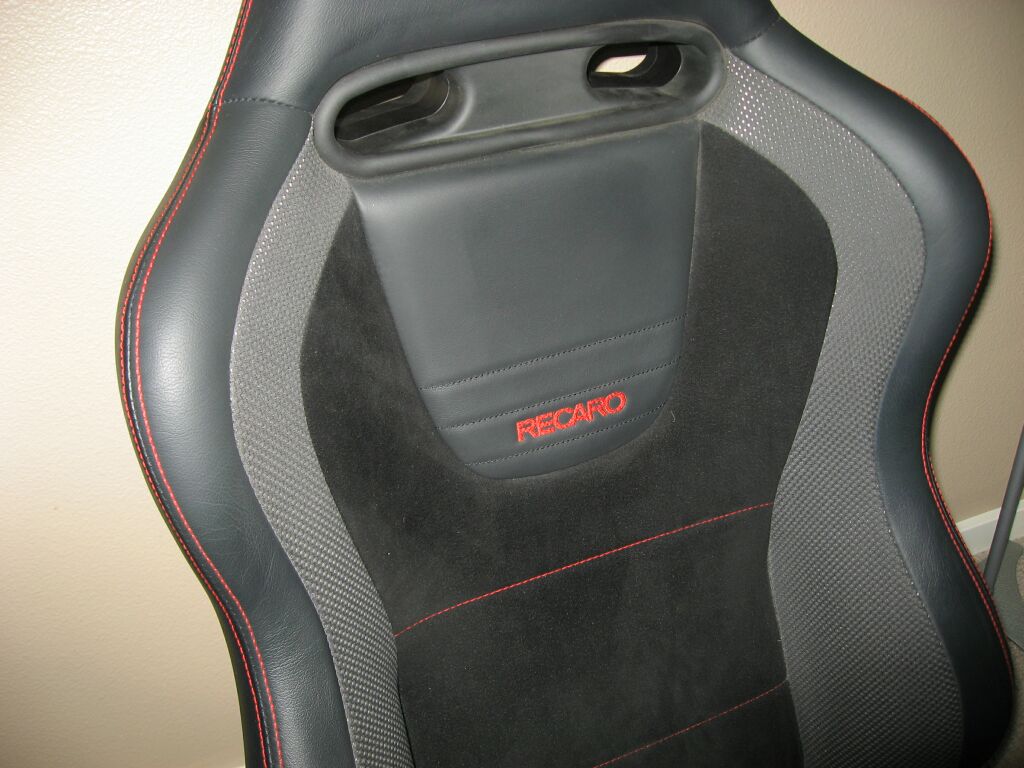
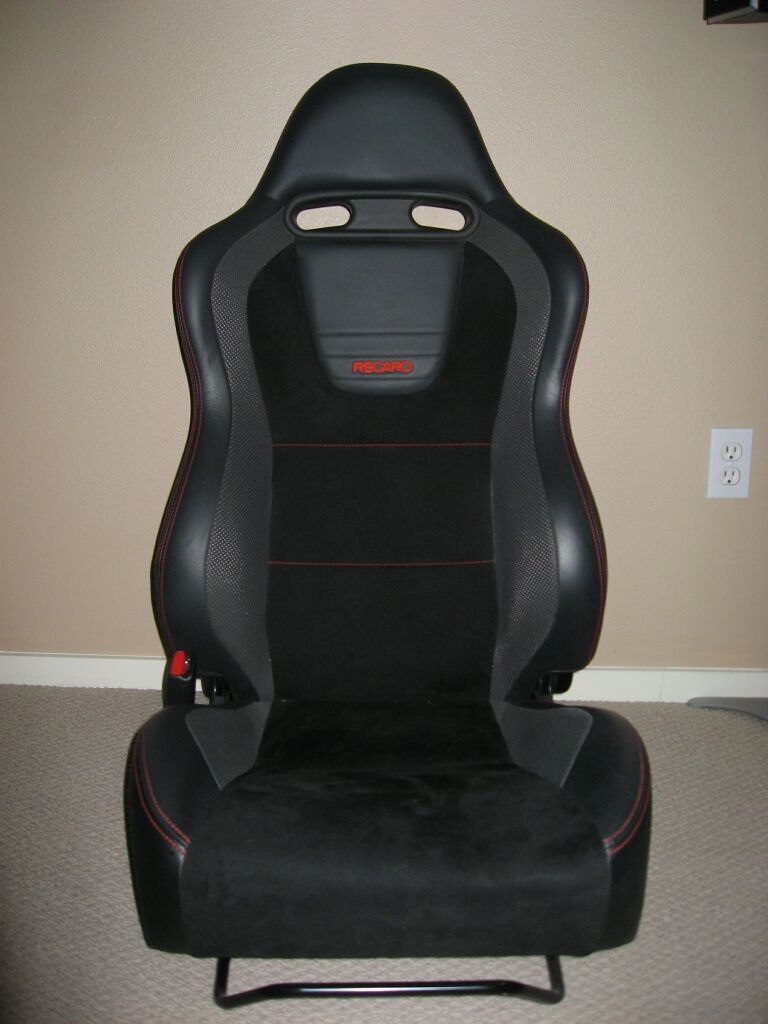 I
have been searching for a nice set of Recaro's for quite some time. I
found these locally, they are out of a EVO IX MR Limited and are black/alcantera
with red stitching, perfect condition! The owner decided to upgrade to
Bride seats.
I
have been searching for a nice set of Recaro's for quite some time. I
found these locally, they are out of a EVO IX MR Limited and are black/alcantera
with red stitching, perfect condition! The owner decided to upgrade to
Bride seats.
 Anytime
you elect to install seats made specifically for another vehicle, you run the
risk of the seats not fitting or being heavily modified for a particular
fitment. These seats were no exception. The slider bar had welded on
brackets and one side of the seat frame had 1cm spacers welded into place.
Lastly, the CLK rails did not match the mounting holes of the seat frame, so a
few millimeters of material needed to be removed.
Anytime
you elect to install seats made specifically for another vehicle, you run the
risk of the seats not fitting or being heavily modified for a particular
fitment. These seats were no exception. The slider bar had welded on
brackets and one side of the seat frame had 1cm spacers welded into place.
Lastly, the CLK rails did not match the mounting holes of the seat frame, so a
few millimeters of material needed to be removed.
 The
factory slider bar was held in place using some C clips as seen in this photo.
Removal of the C clips allowed me to remove the bar. The brackets were not
removable, but they did not interfere with the installation of the CLK rails.
The
factory slider bar was held in place using some C clips as seen in this photo.
Removal of the C clips allowed me to remove the bar. The brackets were not
removable, but they did not interfere with the installation of the CLK rails.
 This
is a better picture of the C clip holding the slider bar in place.
This
is a better picture of the C clip holding the slider bar in place.
 Factory
slider bar removed.
Factory
slider bar removed.
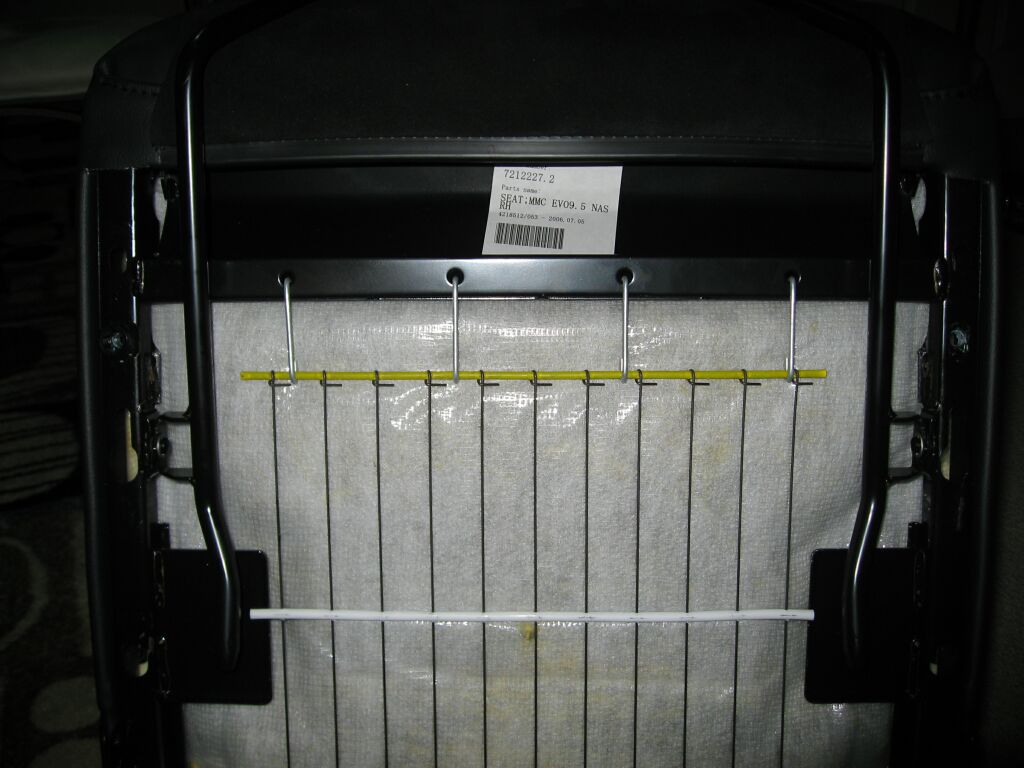
 Recaro
seat frame. You can see the spacers on the left side of the seat frame.
Recaro
seat frame. You can see the spacers on the left side of the seat frame.
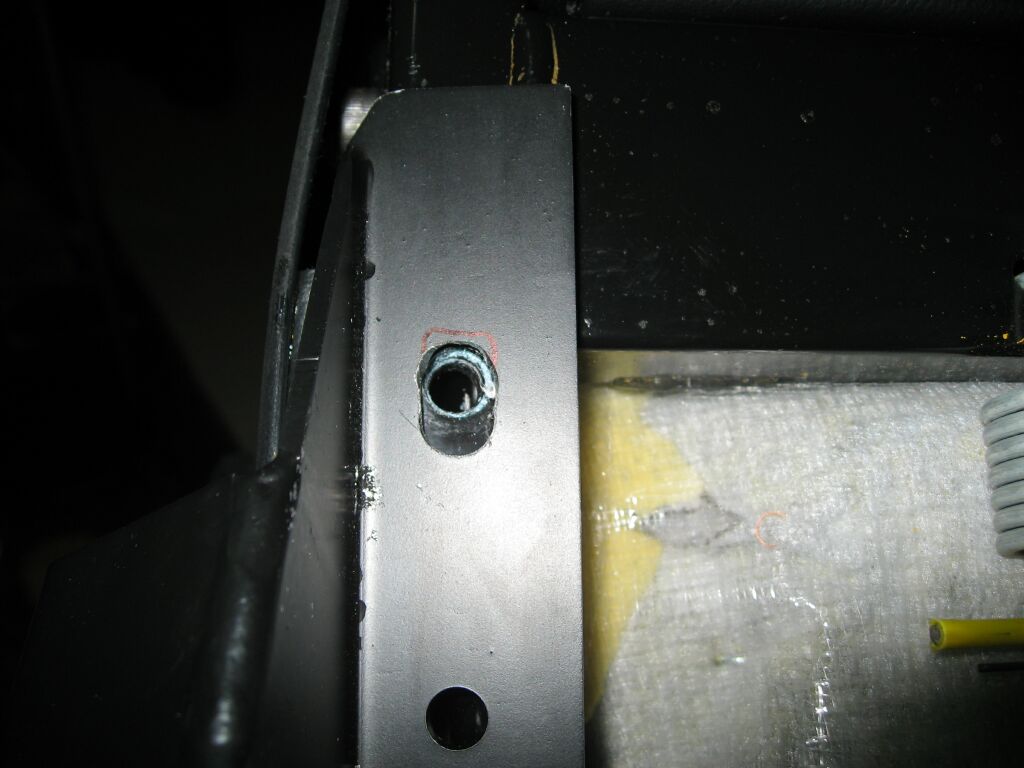 Here
you can see how much the rail hole needed to be enlarged. I used a
circular hand file to do this versus my trusty Dremel.
Here
you can see how much the rail hole needed to be enlarged. I used a
circular hand file to do this versus my trusty Dremel.
 A
closer view of the 1cm welded spacer. I guess the floor pan of the EVO is
not level, hence the spacers.
A
closer view of the 1cm welded spacer. I guess the floor pan of the EVO is
not level, hence the spacers.
 The
bolts holding the rails onto the seats were originally installed using Loctite,
so I reapplied Loctite before installing them.
The
bolts holding the rails onto the seats were originally installed using Loctite,
so I reapplied Loctite before installing them.
 To
equalize the other side of the seat, I just 7 stainless steel washers, which
equaled 1cm. I also painted them black so they would better blend in.
To
equalize the other side of the seat, I just 7 stainless steel washers, which
equaled 1cm. I also painted them black so they would better blend in.
 Rail
and bolt installed and torqued to proper specifications.
Rail
and bolt installed and torqued to proper specifications.
 This
side view shows the 7 washers installed to rail the other side of the rail.
This
side view shows the 7 washers installed to rail the other side of the rail.
 At
this point, I have the seat rails modified, spacers installed and every bolt
tightened down.
At
this point, I have the seat rails modified, spacers installed and every bolt
tightened down.
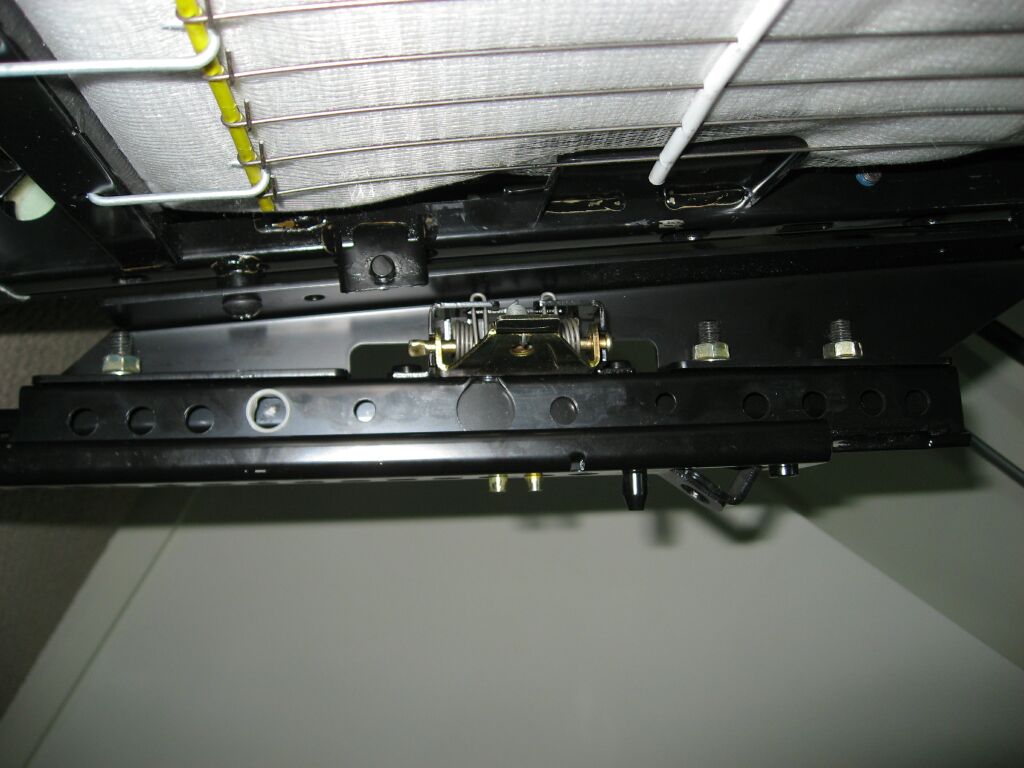 This
is the slider installed. There are three 13mm nuts that hold the slider
onto the rail.
This
is the slider installed. There are three 13mm nuts that hold the slider
onto the rail.
 Rails
and sliders installed with slider release bar in place.
Rails
and sliders installed with slider release bar in place.
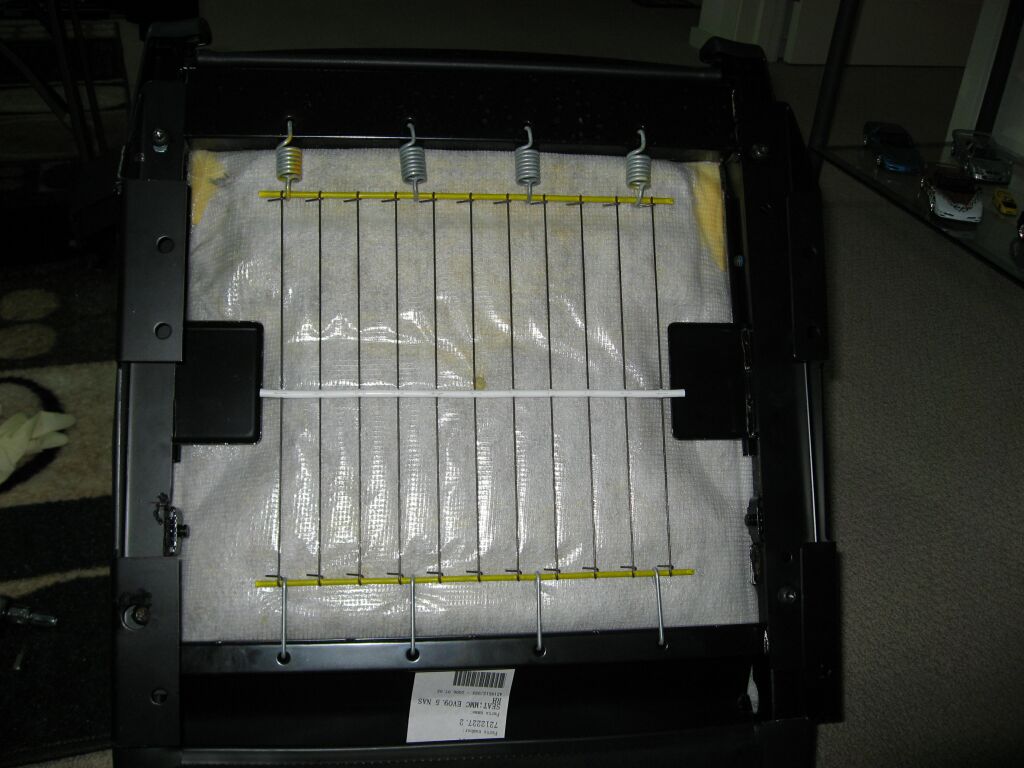
 This
is the factory CLK seat which is made by Lear. It weighs 76lbs, vs. 33lbs
for the Recaro. Total weight savings was 86lbs.
This
is the factory CLK seat which is made by Lear. It weighs 76lbs, vs. 33lbs
for the Recaro. Total weight savings was 86lbs.
 The
female part of the seat belt needs to be removed from the factory seat and
installed onto the Recaro. One T40 torx screw holds it in place.
The
female part of the seat belt needs to be removed from the factory seat and
installed onto the Recaro. One T40 torx screw holds it in place.
 The
wire harness for the seat belt needs to be removed from underneath the seat
The
wire harness for the seat belt needs to be removed from underneath the seat
 The
junction box for all the electrical plugs needs to be removed and the rear cover
popped off, so that the two plugs for the seat belt can be removed.
The
junction box for all the electrical plugs needs to be removed and the rear cover
popped off, so that the two plugs for the seat belt can be removed.
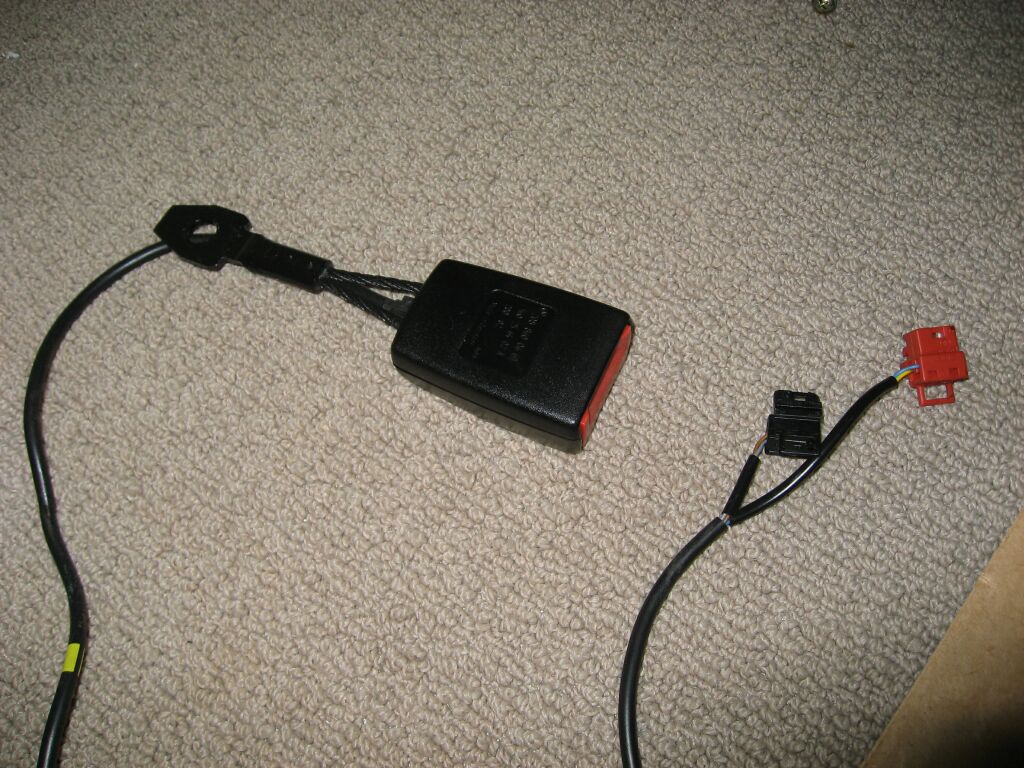 The
seat belt removed and awaiting installation onto the new Recaro seat.
The
seat belt removed and awaiting installation onto the new Recaro seat.
 The
CLK rail has a spot for the seat belt already welded into place.
The
CLK rail has a spot for the seat belt already welded into place.
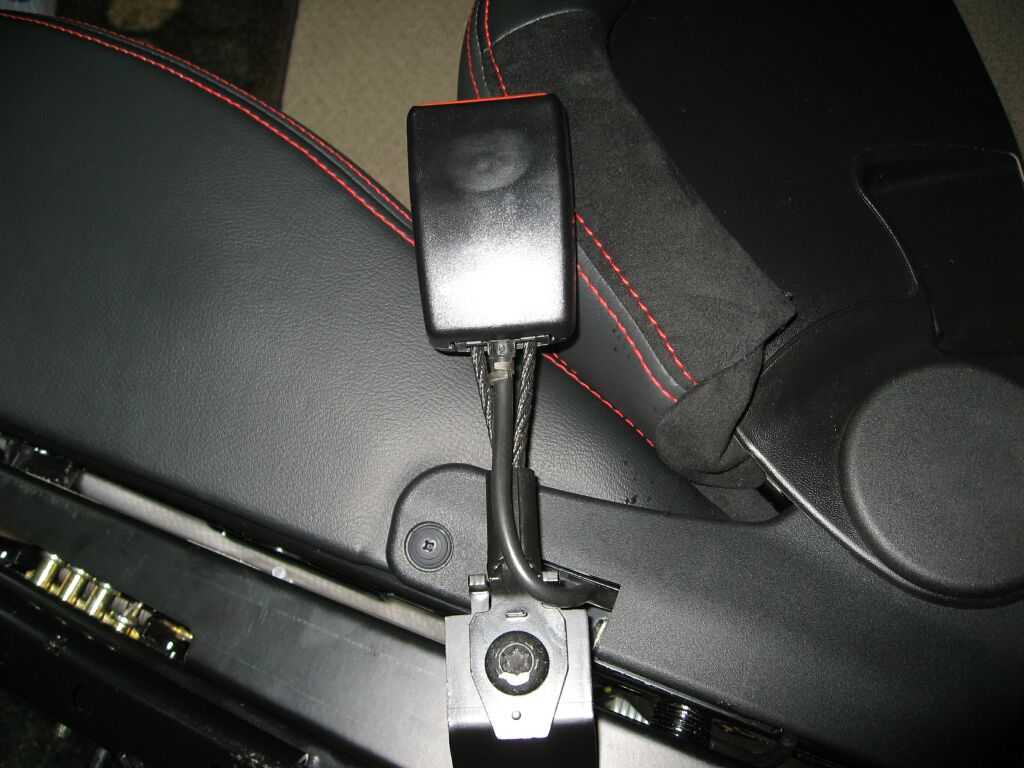 The
seat belt installed and torqued down. I routed the wires up under the
plastic cover and down under the seat.
The
seat belt installed and torqued down. I routed the wires up under the
plastic cover and down under the seat.
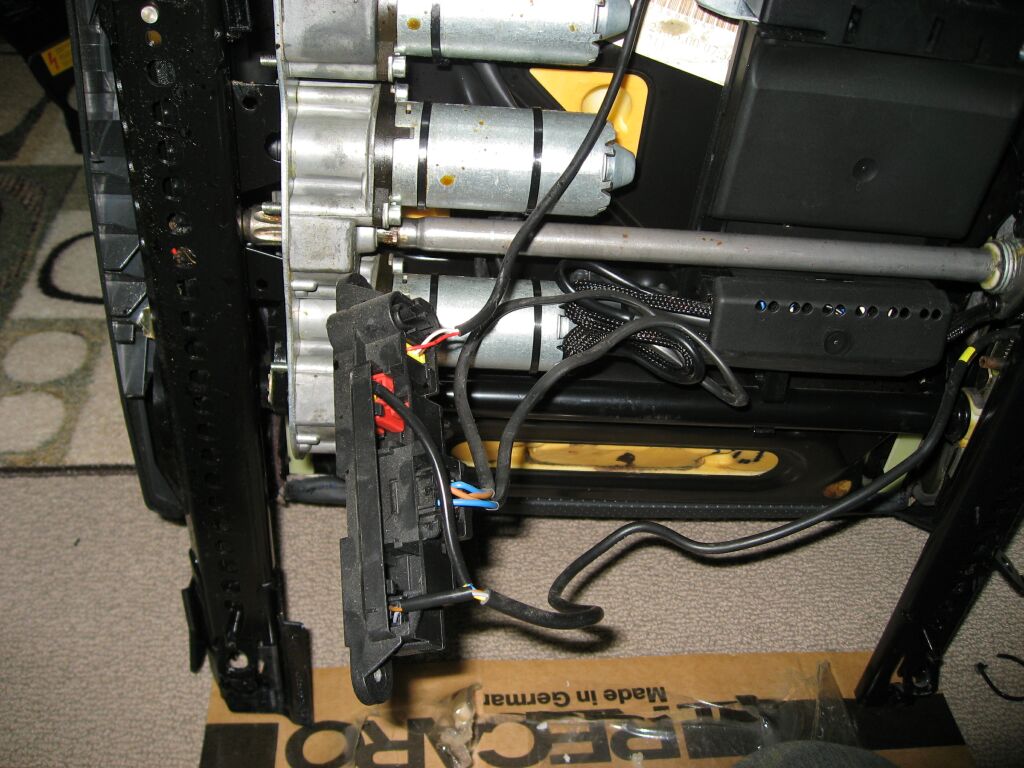
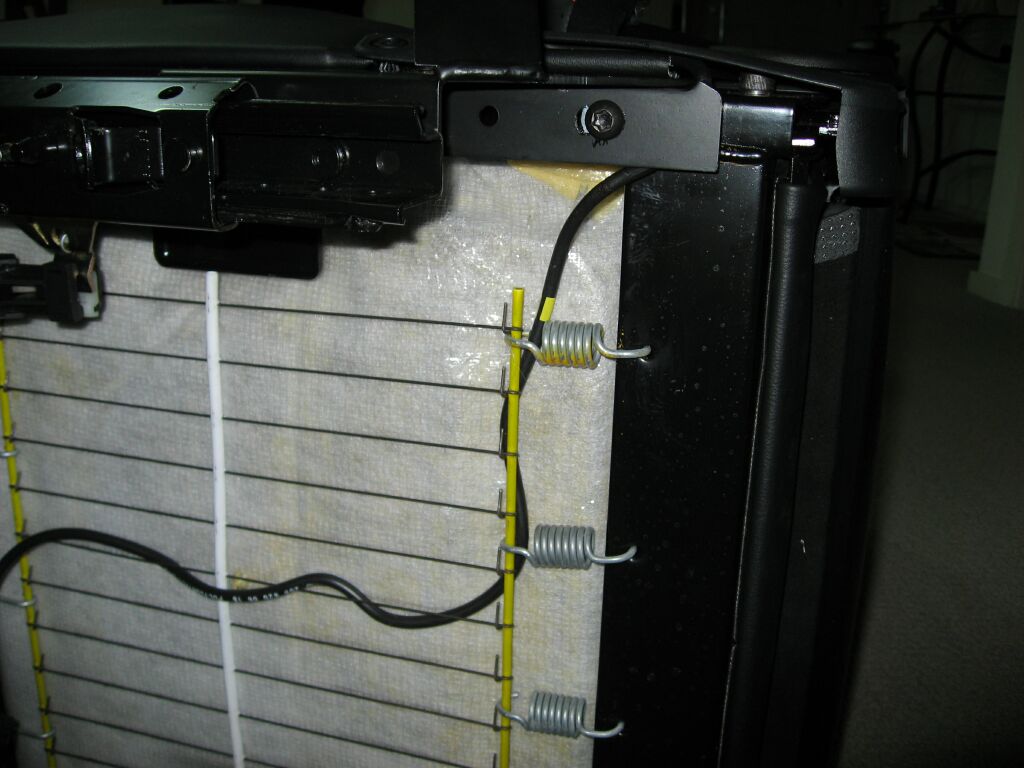 I
routed the wire harness up under the seat, through the springs and over to the
front of the seat. This should help it from getting tangled or caught up
in the rails.
I
routed the wire harness up under the seat, through the springs and over to the
front of the seat. This should help it from getting tangled or caught up
in the rails.
 Factory
seat removed and carpet all cleaned up. You can see the main seat wiring
harness to the right.
Factory
seat removed and carpet all cleaned up. You can see the main seat wiring
harness to the right.
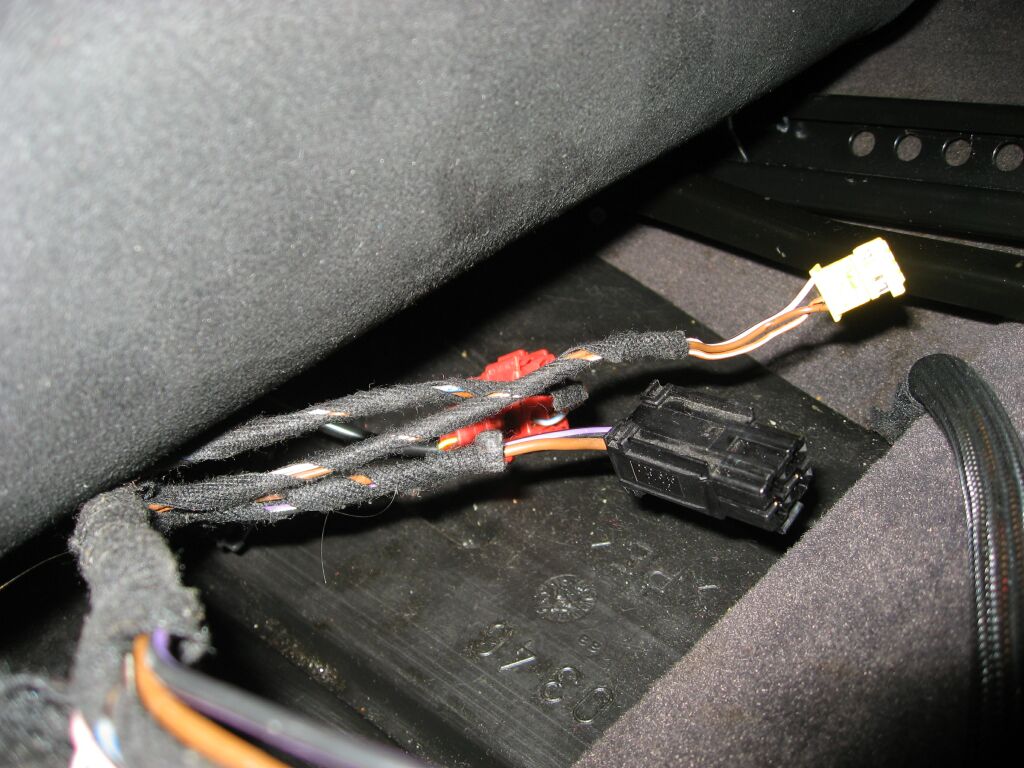 Plugging
in the main seat wire harness to the seat belt and tying up the wires to keep
them from binding or getting caught up when moving the seat forward/backward.
Plugging
in the main seat wire harness to the seat belt and tying up the wires to keep
them from binding or getting caught up when moving the seat forward/backward.
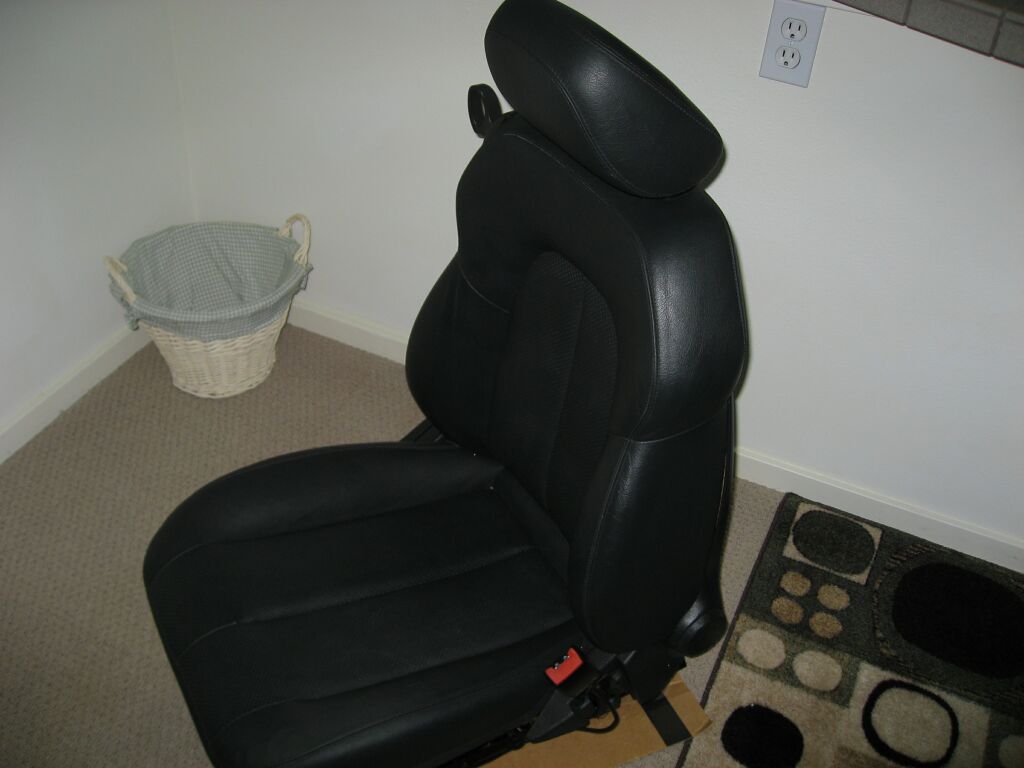
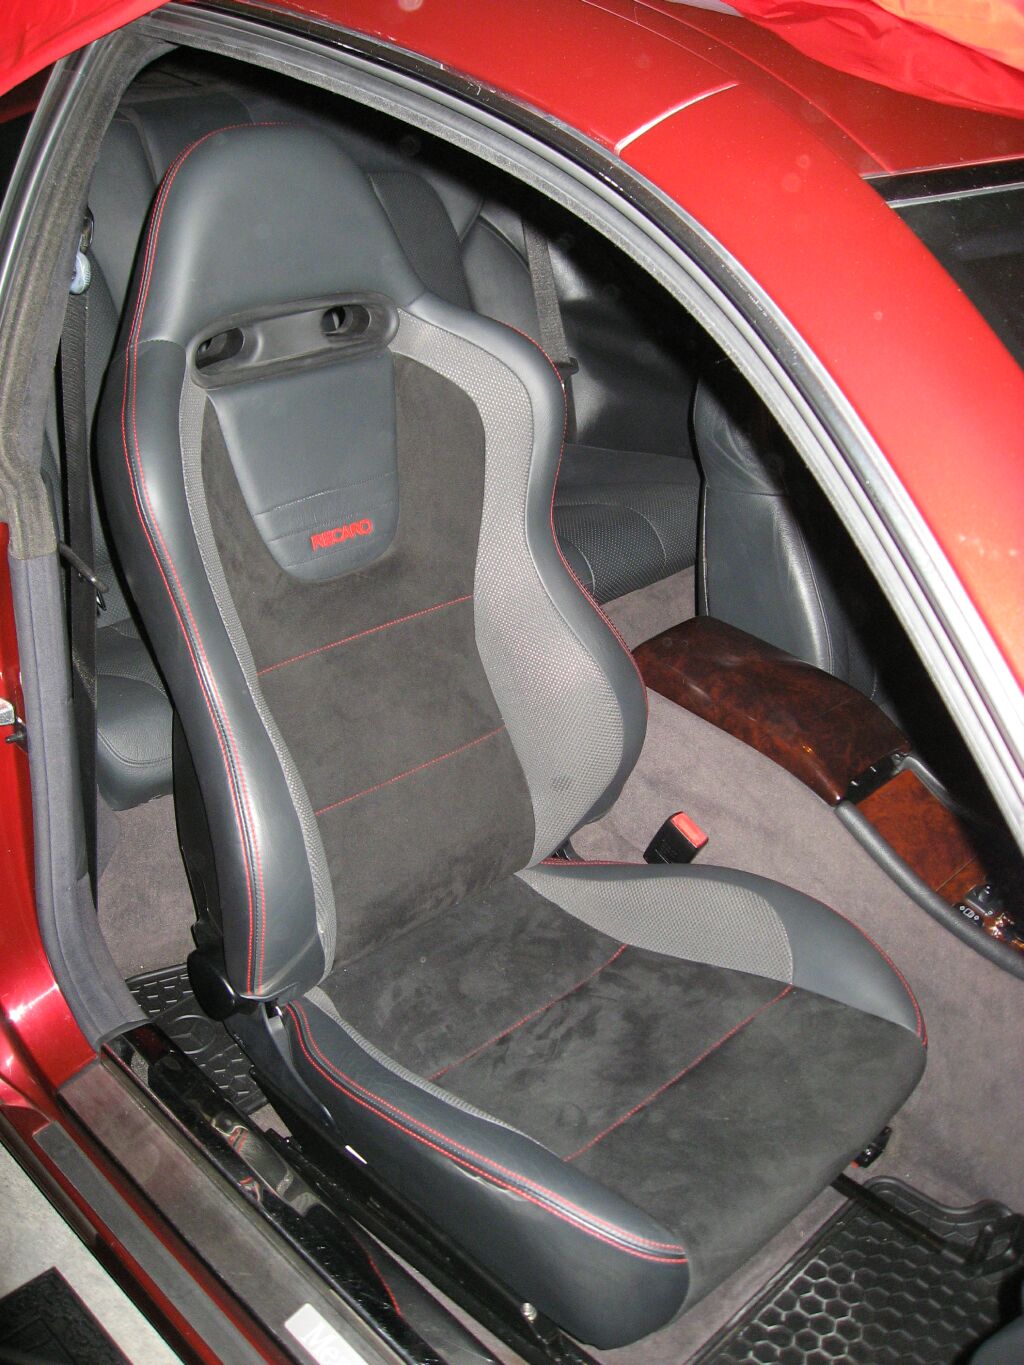 The
seats were a perfect fit, no clearance issues at all. The colors go well
with my interior and exterior!
The
seats were a perfect fit, no clearance issues at all. The colors go well
with my interior and exterior!
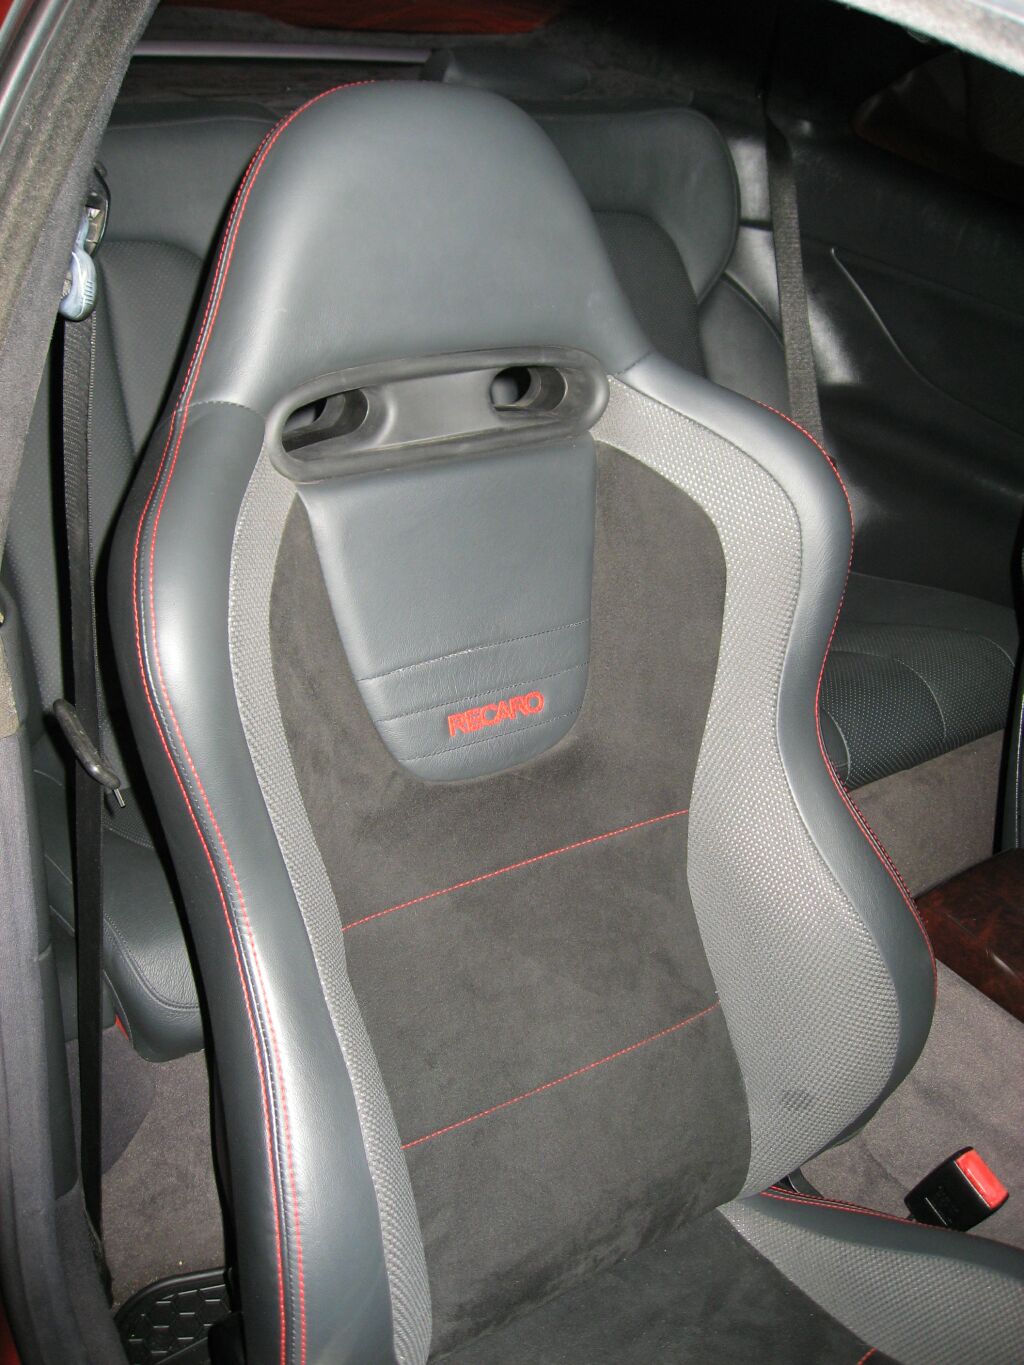 Another
view of the installed passenger side seat
Another
view of the installed passenger side seat
 No
clearance issues between the sill and the seat. There is actually more
room between the center console and seat now, then there was with the factory
CLK seat. The Recaro's are more supportive than the stock seats and I have
probably saved at least 100lbs by the swap. Another good thing is that
these seats are DOT approved, since they came out of a US spec Mitsubishi EVO.
No
clearance issues between the sill and the seat. There is actually more
room between the center console and seat now, then there was with the factory
CLK seat. The Recaro's are more supportive than the stock seats and I have
probably saved at least 100lbs by the swap. Another good thing is that
these seats are DOT approved, since they came out of a US spec Mitsubishi EVO.
 With
the transfer of the seat belt, that addressed the issue of the seat belt
tensioner working correctly and no error lights on the dash, but I ran into a
hitch with the passenger side "baby smart" seat sensor, with it disconnected,
the passenger side airbag was disabled, so in lieu of spending another $175 on a
new sensor, I elected to remove the sensor from the original seat, so you need
to start by removing the seat cushion.
With
the transfer of the seat belt, that addressed the issue of the seat belt
tensioner working correctly and no error lights on the dash, but I ran into a
hitch with the passenger side "baby smart" seat sensor, with it disconnected,
the passenger side airbag was disabled, so in lieu of spending another $175 on a
new sensor, I elected to remove the sensor from the original seat, so you need
to start by removing the seat cushion.
 After
removing the two torx screws at the front of the seat, these two torx screws
need to be removed. Then the cushion comes right out.
After
removing the two torx screws at the front of the seat, these two torx screws
need to be removed. Then the cushion comes right out.
 The
seat sensor plug is yellow and needs to be removed from the housing on the front
of the seat, you also need to remove the plug for the seat heating pad as well,
then you can lift our the entire cushion.
The
seat sensor plug is yellow and needs to be removed from the housing on the front
of the seat, you also need to remove the plug for the seat heating pad as well,
then you can lift our the entire cushion.
 At
this point, you need to remove the leather cover. The leather is curved
around the seat bottom and tucked into slots that run all around the seat, a
small flat blade screw driver will help you get the leather pulled up.
At
this point, you need to remove the leather cover. The leather is curved
around the seat bottom and tucked into slots that run all around the seat, a
small flat blade screw driver will help you get the leather pulled up.
 Once
you have the leather free, you still have to deal with plastic clips that attach
to inner metal rods, you can squeeze the metal rods together so that you can pop
the flip off, just be careful that you don't break the clips. You only
really need to do this on the front and one side, then you can life the cushion
material up like shown here.
Once
you have the leather free, you still have to deal with plastic clips that attach
to inner metal rods, you can squeeze the metal rods together so that you can pop
the flip off, just be careful that you don't break the clips. You only
really need to do this on the front and one side, then you can life the cushion
material up like shown here.
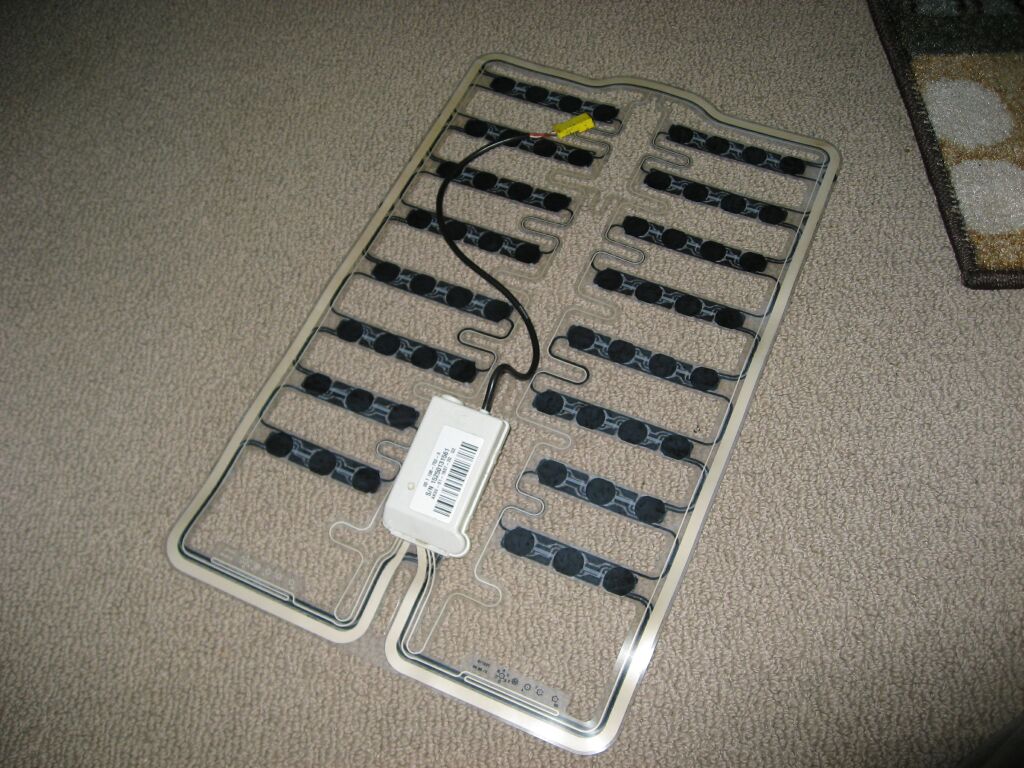 Be
careful with this item, it is thin. Also a good time to check to make sure
the sensor connecting wires are not broken or frayed. This seems to be a
common failure point on this items, at least for the W210 owners it is.
Be
careful with this item, it is thin. Also a good time to check to make sure
the sensor connecting wires are not broken or frayed. This seems to be a
common failure point on this items, at least for the W210 owners it is.
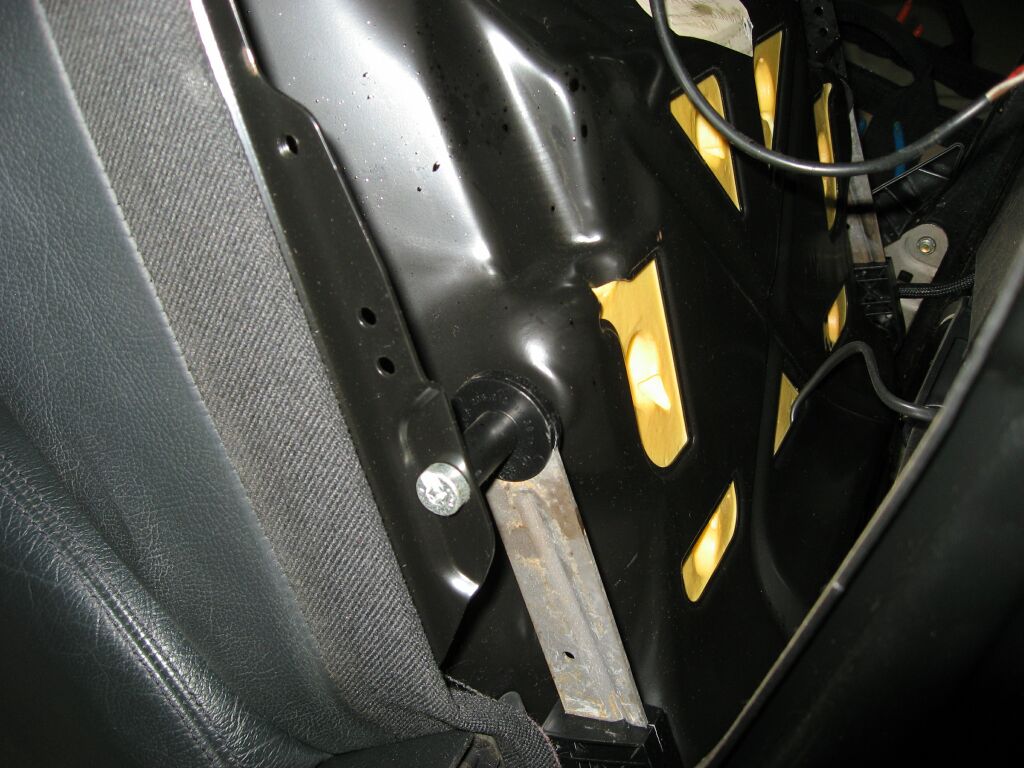
 The
seat sensor would never fit inside the Recaro, so I elected to attach it to the
underside of the seat, up out of the way of the moving mechanicals and up out of
the way of rear passenger feet. I used wire ties and a bit of black tape
to firmly secure it to the underside of the seat. At this point the wires
under the seat were also tied up neatly and arranged so that front/back movement
of the seat does not bind the harness in any way. Now my passenger side
airbag works!
The
seat sensor would never fit inside the Recaro, so I elected to attach it to the
underside of the seat, up out of the way of the moving mechanicals and up out of
the way of rear passenger feet. I used wire ties and a bit of black tape
to firmly secure it to the underside of the seat. At this point the wires
under the seat were also tied up neatly and arranged so that front/back movement
of the seat does not bind the harness in any way. Now my passenger side
airbag works!
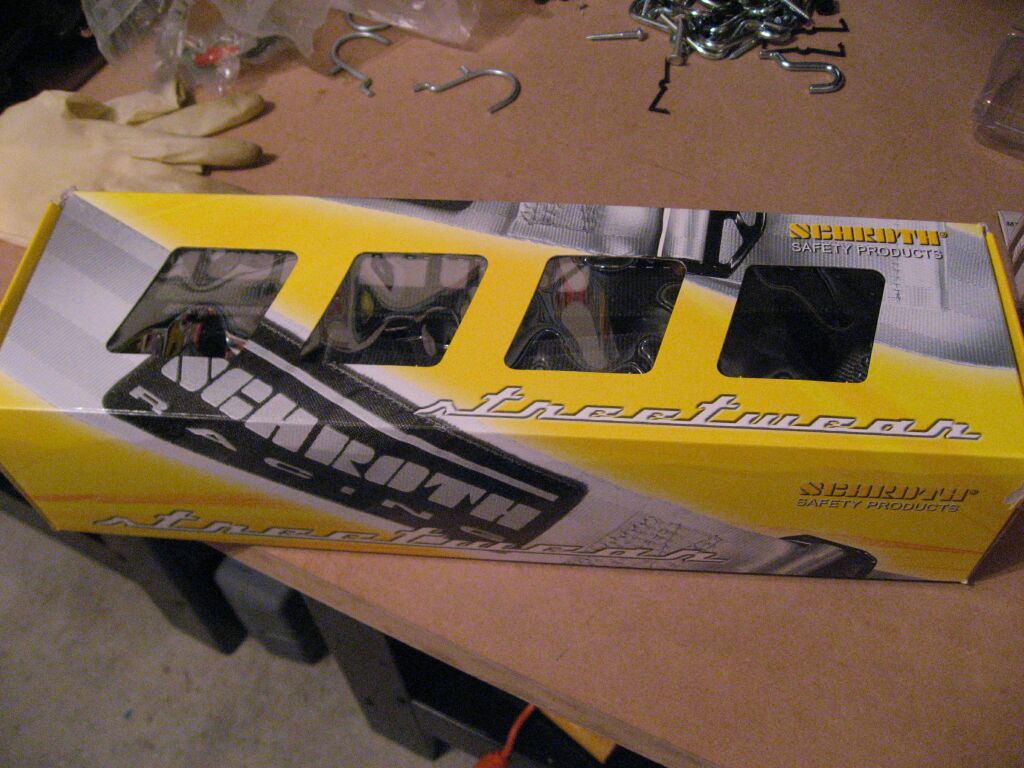
Schroth Rallye 4 Harness Belts
 For
driving events and lapping days, a good seat harness is paramount. Given
the dual duty of this vehicle, I wanted a DOT street legal harness and the
Schroth fits the requirement. In addition, the Schroth belts employ ASM
technology (anti submarine) which allows a 4 point harness to act like a 5 point
harness and prevent anti-submarining in the event of a accident. Schroth
makes harnesses for most car manufactures and after market harness companies.
I chose the Rallye 4 harness, which has quick disconnects to allow access to the
rear seat.
For
driving events and lapping days, a good seat harness is paramount. Given
the dual duty of this vehicle, I wanted a DOT street legal harness and the
Schroth fits the requirement. In addition, the Schroth belts employ ASM
technology (anti submarine) which allows a 4 point harness to act like a 5 point
harness and prevent anti-submarining in the event of a accident. Schroth
makes harnesses for most car manufactures and after market harness companies.
I chose the Rallye 4 harness, which has quick disconnects to allow access to the
rear seat.
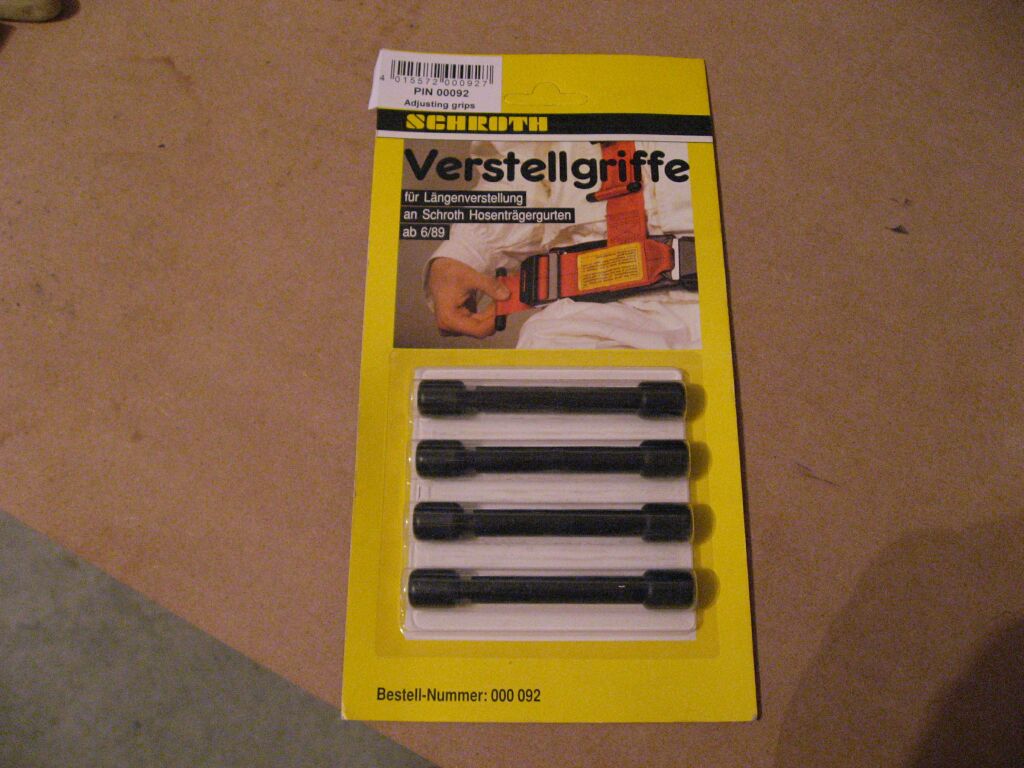
To aid in the tightening of the shoulder/lap belts, this add-on product give you something to grip other than the belt itself. With gloves on, these are necessary.
 I
also opted to to use the Schroth leather shoulder pads, which I found to look
much nicer than the cloth pads. Either pad is good enough if comfort is
your only concern.
I
also opted to to use the Schroth leather shoulder pads, which I found to look
much nicer than the cloth pads. Either pad is good enough if comfort is
your only concern.
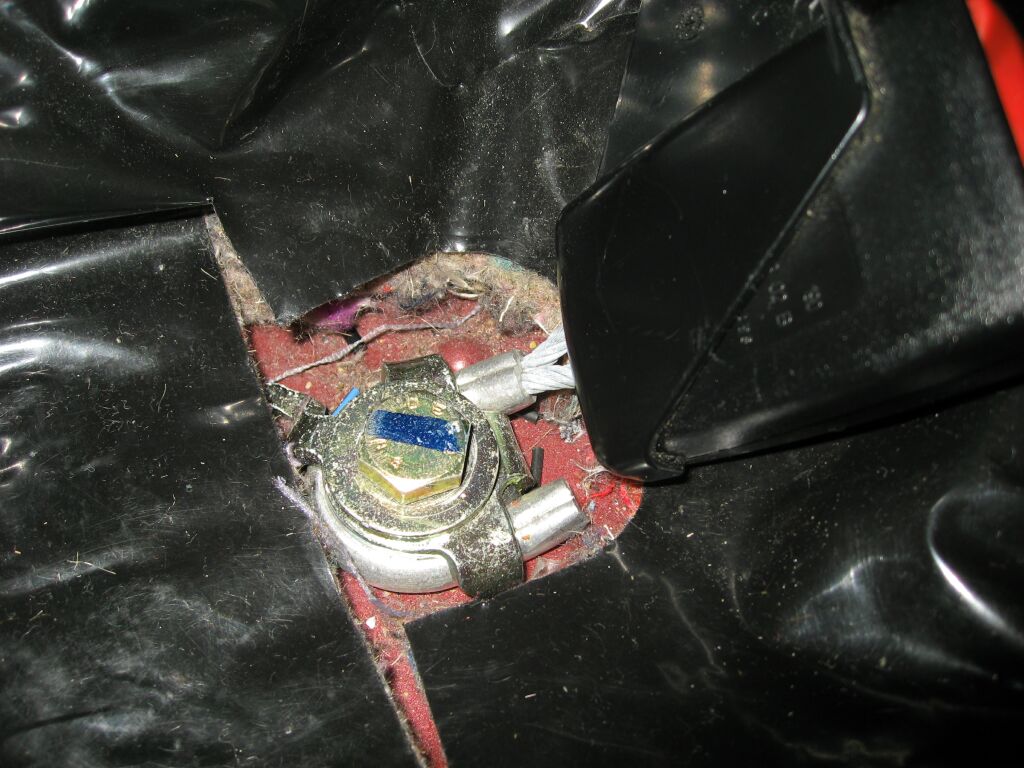
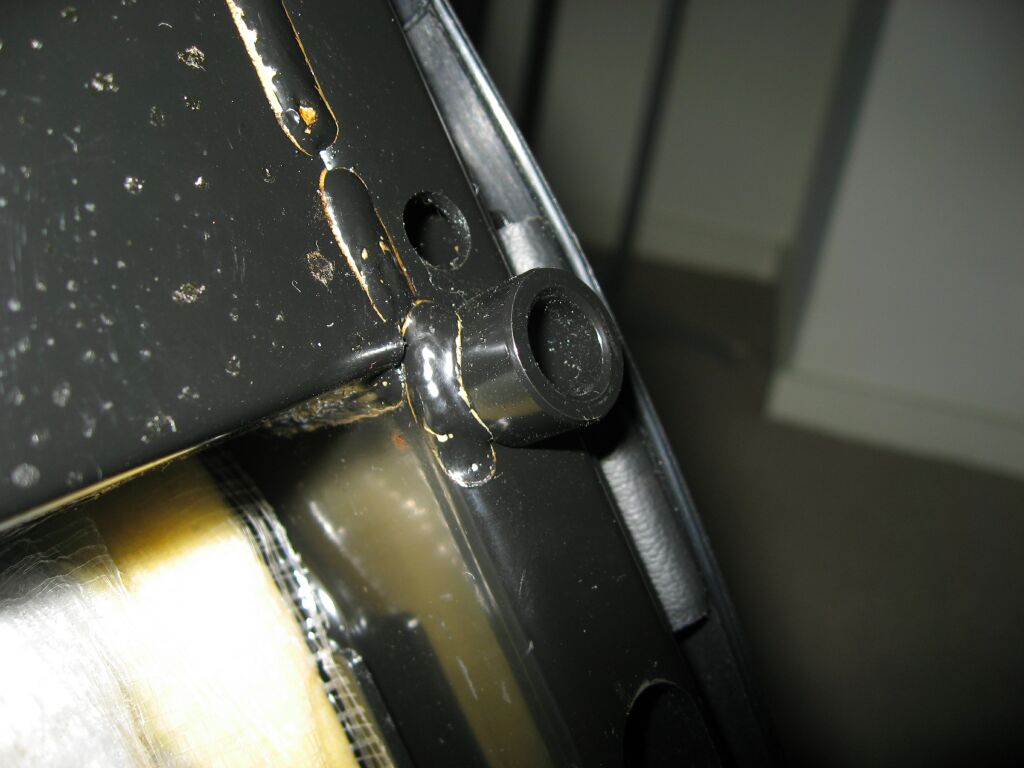
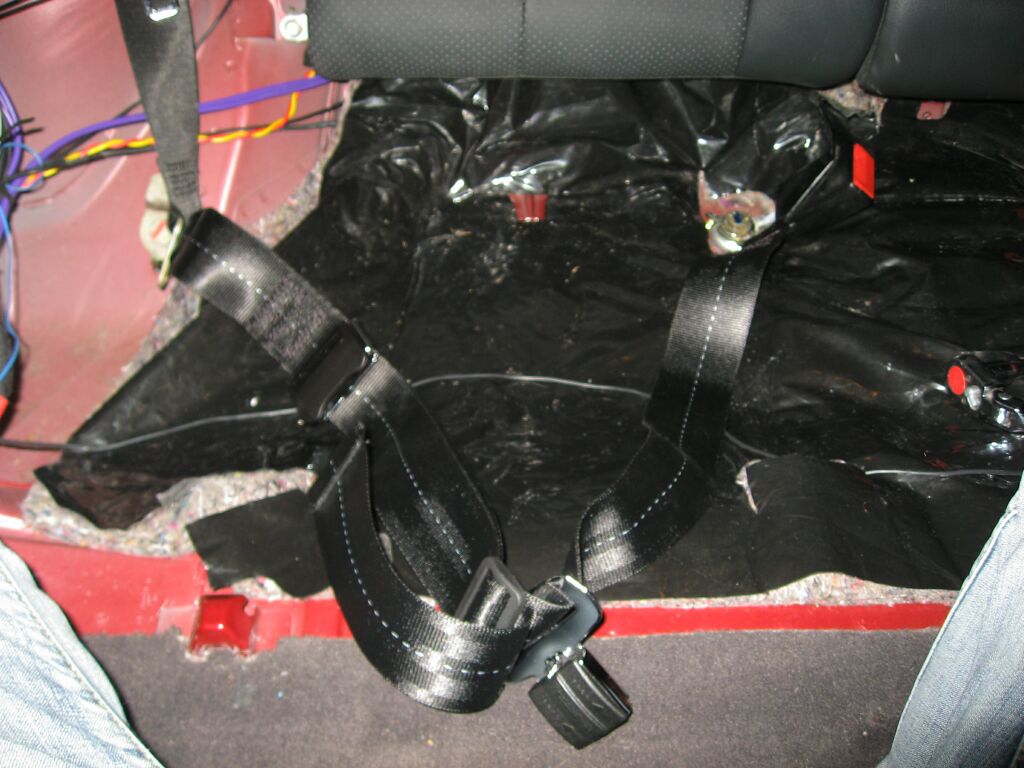
To be effective (and legal) the Schroth harnesses need to be mounted to
the factory seat belt locations. This picture shows one of the rear seat
belt locations.
 This
is the other rear seat belt mounting location (for the shoulder belt). On
the CLK, I needed to remove the rear seat, for illustration purposes, I have
removed the side panel as well. You may or may not need to do this on your
particular vehicle.
This
is the other rear seat belt mounting location (for the shoulder belt). On
the CLK, I needed to remove the rear seat, for illustration purposes, I have
removed the side panel as well. You may or may not need to do this on your
particular vehicle.
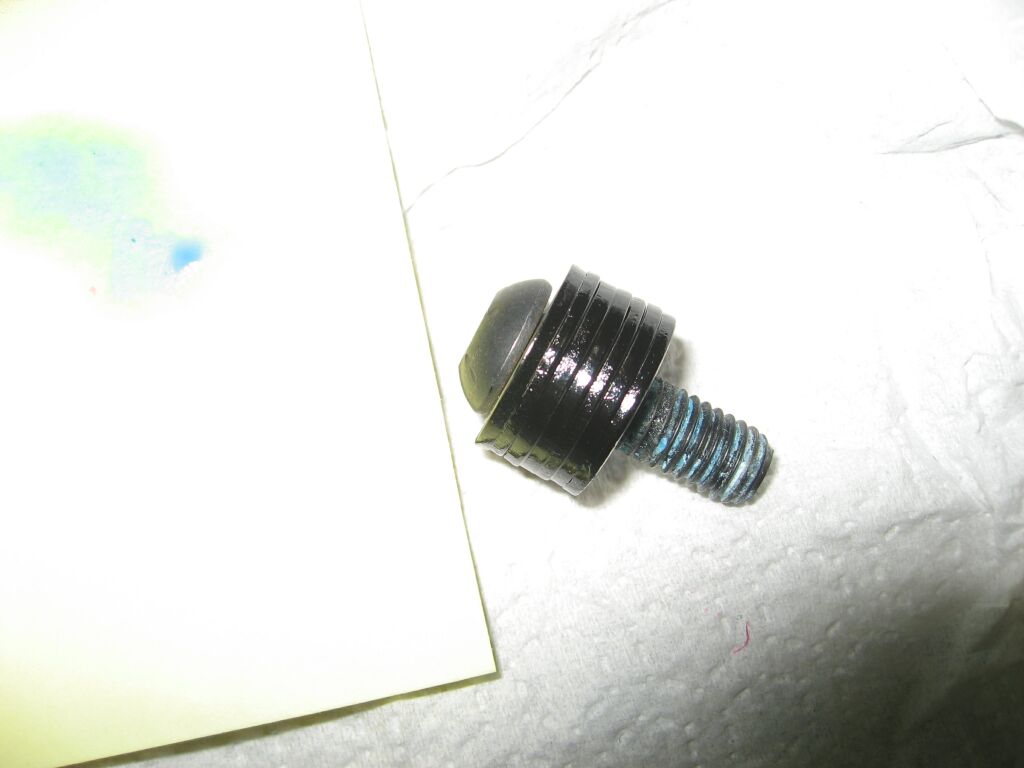
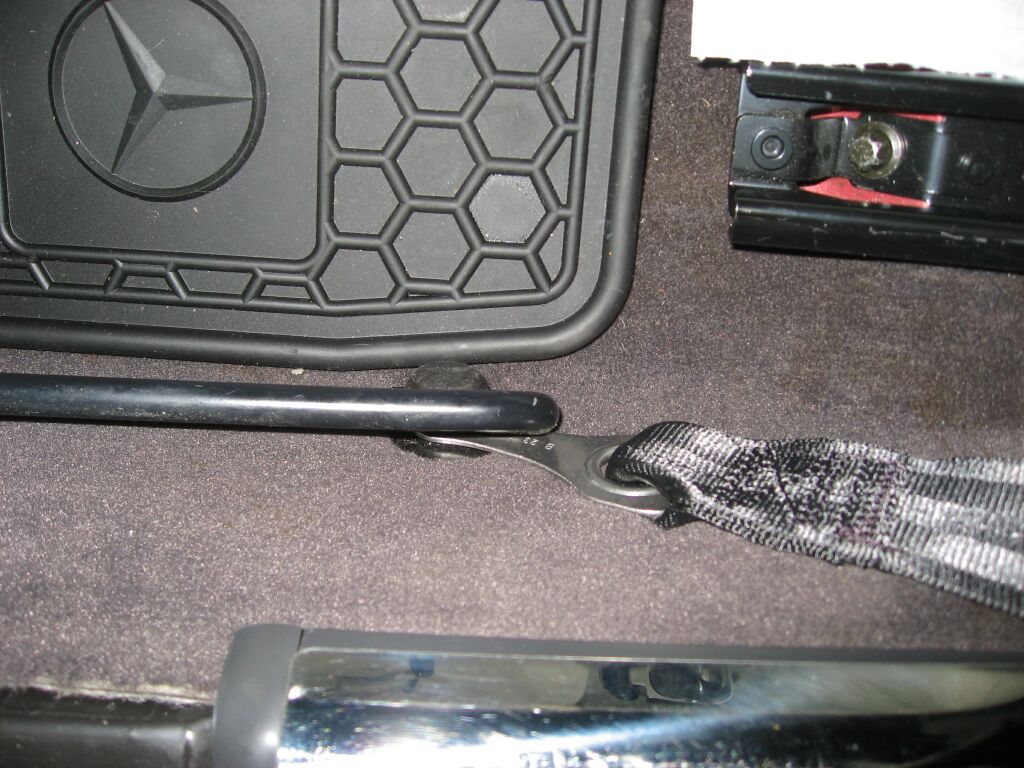
 Here
you see the Schroth belt mounted to the rear shoulder belt location and the side
panel re-installed. The Schroth harnesses ship with metal flanges which
can be bent a little to facilitate installation and angle. Schroth states
not to bend these mounts too much or repeatedly.
Here
you see the Schroth belt mounted to the rear shoulder belt location and the side
panel re-installed. The Schroth harnesses ship with metal flanges which
can be bent a little to facilitate installation and angle. Schroth states
not to bend these mounts too much or repeatedly.
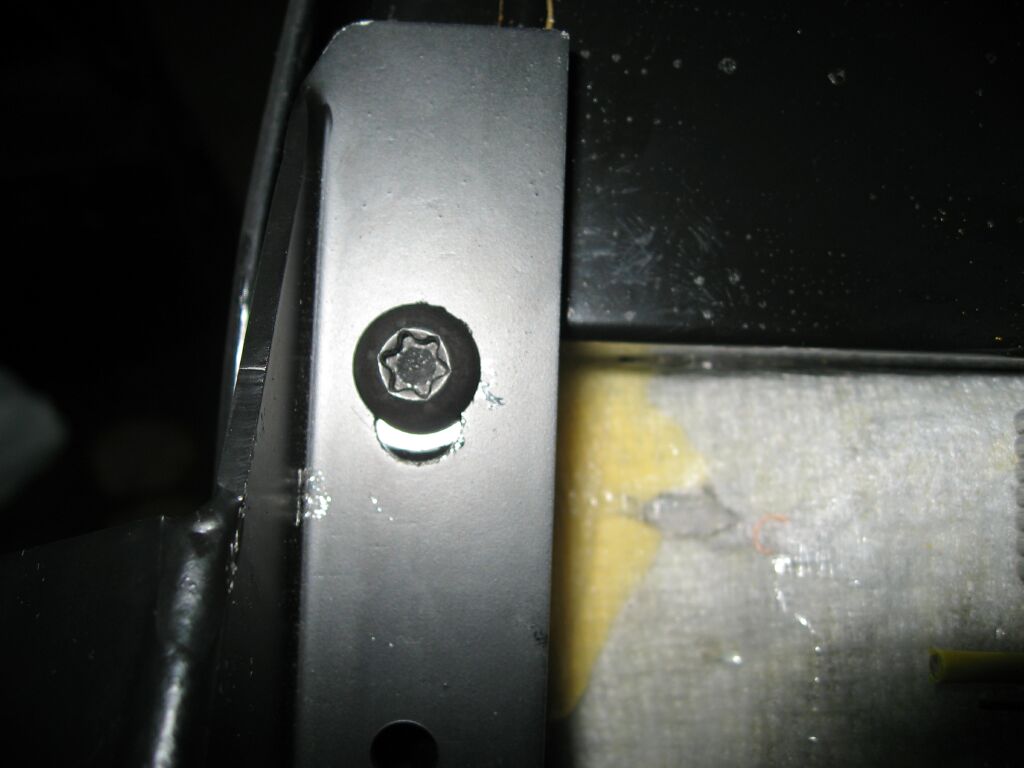
 Here
is the other Schroth harness belt mounted to the factory rear seat belt
location.
Here
is the other Schroth harness belt mounted to the factory rear seat belt
location.
 Now
that the rear belts are mounted, angles checked, bolts torqued to proper
specification. I can put the seat back in.
Now
that the rear belts are mounted, angles checked, bolts torqued to proper
specification. I can put the seat back in.
 Once
we are done with the rear, its time to install the front harness lap belts.
Again, we use the factory mount points. On the seat itself, the stock seat
belt receptacle is removed and the Schorth mounted in unison (not shown).
Once
we are done with the rear, its time to install the front harness lap belts.
Again, we use the factory mount points. On the seat itself, the stock seat
belt receptacle is removed and the Schorth mounted in unison (not shown).
 Feeding
the Schroth through the Recaro shoulder belt openings is challenging to say the
least, as the shoulder and lap belts are all connected, so the belt along with
the buckle needs to be forced through this small opening. Its doable, just
be patient.
Feeding
the Schroth through the Recaro shoulder belt openings is challenging to say the
least, as the shoulder and lap belts are all connected, so the belt along with
the buckle needs to be forced through this small opening. Its doable, just
be patient.
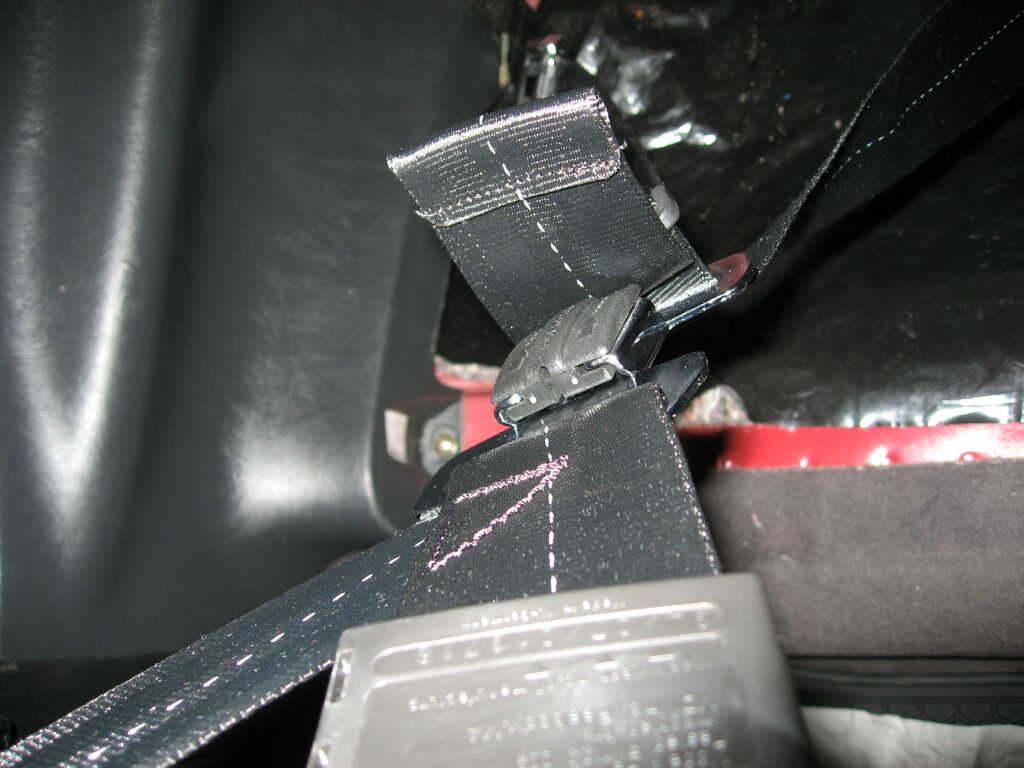 This
is a close up view of the harness quick disconnect, you can also see the black
plastic cap, which carries the DOT certification number and also serves as the
driving force behind the ASM technology. These belts are specific
left/right sided, otherwise the ASM technology will not function in the event of
a crash.
This
is a close up view of the harness quick disconnect, you can also see the black
plastic cap, which carries the DOT certification number and also serves as the
driving force behind the ASM technology. These belts are specific
left/right sided, otherwise the ASM technology will not function in the event of
a crash.
 Another
picture of the Schroth mount and the quick disconnect.
Another
picture of the Schroth mount and the quick disconnect.
 And
the finished product. Not only are the belts aesthetically pleasing, but
they are safe (DOT legal)
And
the finished product. Not only are the belts aesthetically pleasing, but
they are safe (DOT legal)

<Back
Information/pictures on this site are the property of Rik Johnson and are not
to be used without written permission.