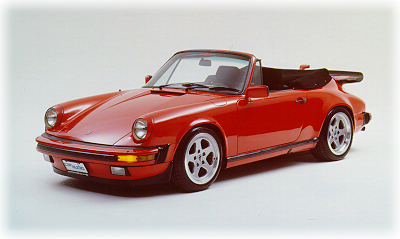
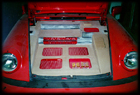
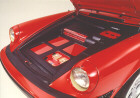
This photo shoot (for Car Audio
& Electronics magazine) was done at Bruce Carroll
 Studios in Seattle
Washington. It took us approximately two hours to set up
this particular angle. If you notice, the dark
shadow that runs the length of the vehicle. It was created by carefully
placing black boards to manipulate the light. (when you view the "behind the
scenes" photo you will know what I am referring to. Studios in Seattle
Washington. It took us approximately two hours to set up
this particular angle. If you notice, the dark
shadow that runs the length of the vehicle. It was created by carefully
placing black boards to manipulate the light. (when you view the "behind the
scenes" photo you will know what I am referring to.
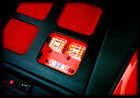
 This is a rear angle view of the car. If you
notice, the parking lights as well as the brake light is illuminated. To
illuminate the 3rd brake light, I had to lay on the floor of the car as the photographer
(John Skalicky) was taking the shots. This is a rear angle view of the car. If you
notice, the parking lights as well as the brake light is illuminated. To
illuminate the 3rd brake light, I had to lay on the floor of the car as the photographer
(John Skalicky) was taking the shots.
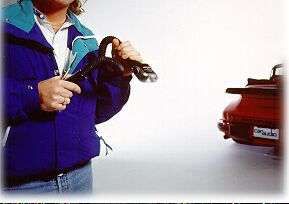
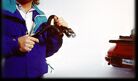 This particular shot was the photographers
idea (thanks John!). We spent This particular shot was the photographers
idea (thanks John!). We spent
about a hour with different
poses. I really was not prepared to be a model
that day. This photo was
a "outtake" and was not used in the actual Car
Audio article. (thank
God!). Oh yea, that thing in my hand is a Black &
Decker snake
light.
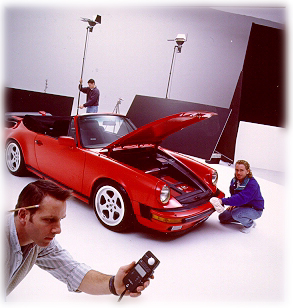
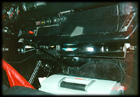
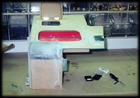
This was a "behind the scenes" shot as we
prepared the lighting in the studio as well
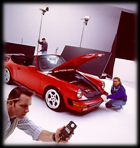 as some last minute clean up work on the
car. (typical Seattle weather, raining as usual) The guy
down front was a assistant for John (the photographer) I
never did get his name. The guy in the back was a fill in. My
friend Todd Meek was suppose to show up for the photo shoot and help. (Todd & I were
both in his photo shoot for his 1992 Honda Accord that was in the August 1995 issue of
AutoSound & Security) as some last minute clean up work on the
car. (typical Seattle weather, raining as usual) The guy
down front was a assistant for John (the photographer) I
never did get his name. The guy in the back was a fill in. My
friend Todd Meek was suppose to show up for the photo shoot and help. (Todd & I were
both in his photo shoot for his 1992 Honda Accord that was in the August 1995 issue of
AutoSound & Security)
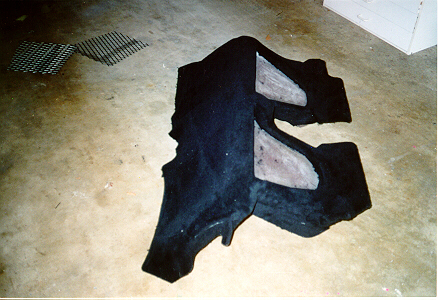
The Installation.......
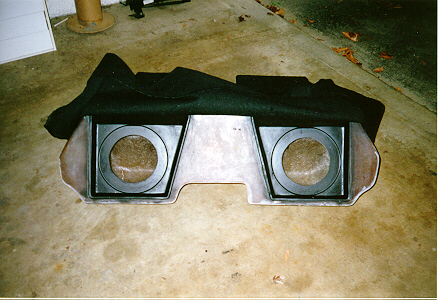
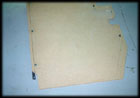
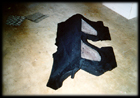 This is the fiberglass
Zbox sub enclosure that is designed to fit under the rear seats of a Porsche 911.
This cabinet is designed from reinforced fiberglass and has a net internal volume of
approx. two cubic feet. The seats from the Porsche fit into the recessed space on
top of the cabinet. This is the fiberglass
Zbox sub enclosure that is designed to fit under the rear seats of a Porsche 911.
This cabinet is designed from reinforced fiberglass and has a net internal volume of
approx. two cubic feet. The seats from the Porsche fit into the recessed space on
top of the cabinet.
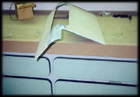
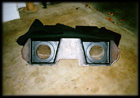 This is a front view of the Zbox
enclosure. You can see that the enclosure is shipped ready for 8" subs. This is a front view of the Zbox
enclosure. You can see that the enclosure is shipped ready for 8" subs.
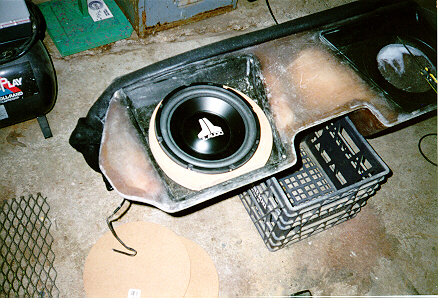
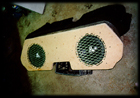
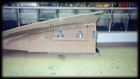
 Since I was going to use the JL Audio
10W6 subs, I had to increase the mounting depth in the cabinet to accommodate the double
magnet structure of the JL Audio subs. I used 3/4" medite to raise the subs up
1.5". If you look closely in the empty cavity on the right side of the sub
cabinet, you will notice that I added a material called Acousta-stuff to the
interior cavities. This material, in effect increases the internal volume of
the cabinet by 1/3. Since I was going to use the JL Audio
10W6 subs, I had to increase the mounting depth in the cabinet to accommodate the double
magnet structure of the JL Audio subs. I used 3/4" medite to raise the subs up
1.5". If you look closely in the empty cavity on the right side of the sub
cabinet, you will notice that I added a material called Acousta-stuff to the
interior cavities. This material, in effect increases the internal volume of
the cabinet by 1/3.
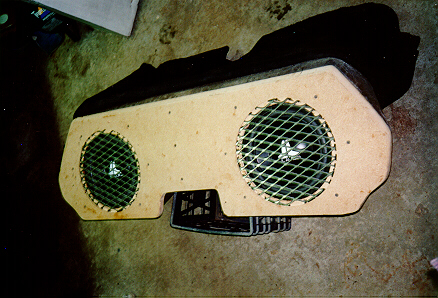
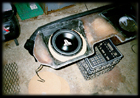
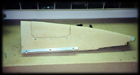
 This is the finished cabinet.
After the installation of the spacer rings for the JL Audio subs, it was necessary to
construct a new front panel that would allow the subs as well as the steel grills to be
mounted flush. This top panel was constructed of 3/4" medite & was secured
with drywall screws This is the finished cabinet.
After the installation of the spacer rings for the JL Audio subs, it was necessary to
construct a new front panel that would allow the subs as well as the steel grills to be
mounted flush. This top panel was constructed of 3/4" medite & was secured
with drywall screws
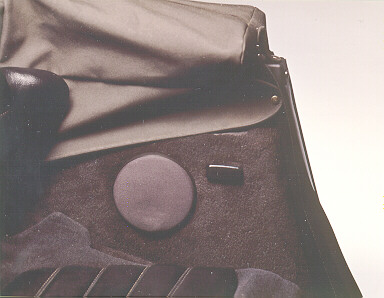
 This is a picture of
the Porsche before the Zbox sub cabinet was installed. The rear panels in this
picture show Zbox panels as well, but because of problems with the convertible top and
tonneau cover, I removed these panels and replaced them with the factory panels that you
will see in later pictures. This is a picture of
the Porsche before the Zbox sub cabinet was installed. The rear panels in this
picture show Zbox panels as well, but because of problems with the convertible top and
tonneau cover, I removed these panels and replaced them with the factory panels that you
will see in later pictures.
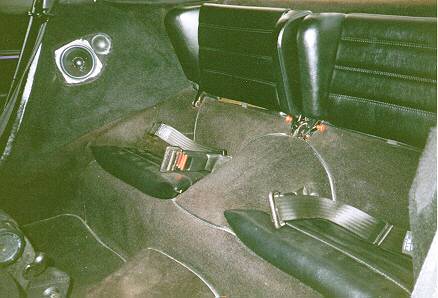
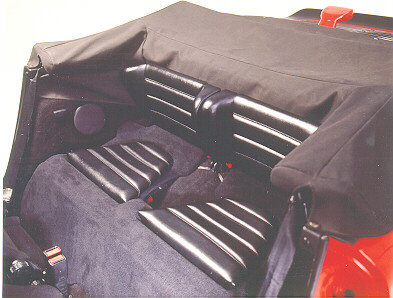
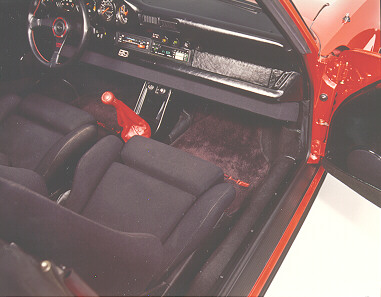
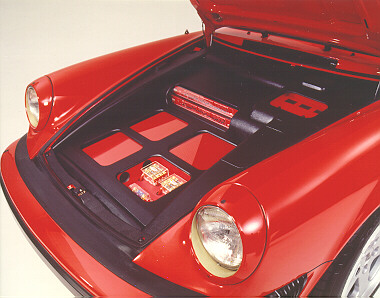
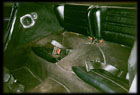
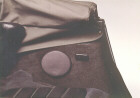
 Here is the rear seat
area after the installation of the Zbox sub cabinet. As you can tell, the rear seats
and seat belts are still completely usable. Most judges (as well as spectators) ask
the question "Where are the subs?" The installation is so seamless that most
people do not realize There is a sub cabinet under the seat. Here is the rear seat
area after the installation of the Zbox sub cabinet. As you can tell, the rear seats
and seat belts are still completely usable. Most judges (as well as spectators) ask
the question "Where are the subs?" The installation is so seamless that most
people do not realize There is a sub cabinet under the seat.
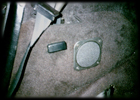 This is how Porsche shipped the car. A factory Becker 4"
dual purpose driver and plastic grill in the rear side panels. This is how Porsche shipped the car. A factory Becker 4"
dual purpose driver and plastic grill in the rear side panels.
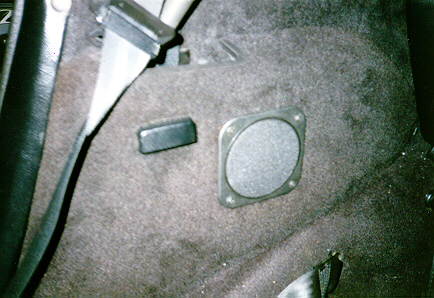
 This is the rear side
panel after the installation of the Bose 4" driver and a rounded grill assembly that
does not have protruding screws. The metal grill was covered with black grill cloth
that matches what is used throughout the rest of the vehicle. The factory panels
were kept after a problem arose with the Zbox side panels I had originally planned on
using. This is the rear side
panel after the installation of the Bose 4" driver and a rounded grill assembly that
does not have protruding screws. The metal grill was covered with black grill cloth
that matches what is used throughout the rest of the vehicle. The factory panels
were kept after a problem arose with the Zbox side panels I had originally planned on
using.
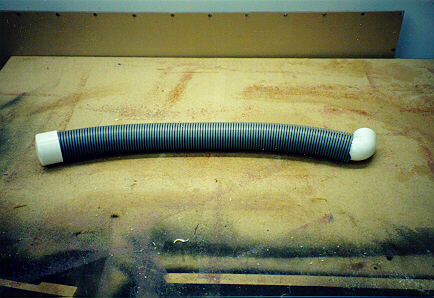
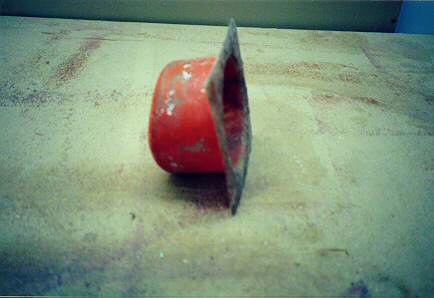
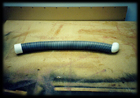 To get the appropriate amount of
volume for the Dynaudio 15W75 5.25" mid bass drivers (front doors). I arrived
at a clever solution. The flexible wet/dry vac tubing is very airtight and
firm. With the addition of a elbow and a PVC end cap, I was able to add additional
volume to the tight fiberglass door pod (seen below) A hole was drilled into the
bottom of the pod, then the wet/dry vac tube was inserted into the door cavity. The
pod was then mounted in the door and using some long needle nose pliers, I was able to
raise the PVC elbow into the opening of the pod and seal it into place. The wet/dry
vac tube runs the length of the door and does not interfere with the operation of the
window. I ended up with approx. .22 of a cubic foot which is sufficient for the
Dynaudio 15W75's (in a second order cabinet). Another benefit of this procedure is
that there is no panel vibrations or coloring of the mid range. To get the appropriate amount of
volume for the Dynaudio 15W75 5.25" mid bass drivers (front doors). I arrived
at a clever solution. The flexible wet/dry vac tubing is very airtight and
firm. With the addition of a elbow and a PVC end cap, I was able to add additional
volume to the tight fiberglass door pod (seen below) A hole was drilled into the
bottom of the pod, then the wet/dry vac tube was inserted into the door cavity. The
pod was then mounted in the door and using some long needle nose pliers, I was able to
raise the PVC elbow into the opening of the pod and seal it into place. The wet/dry
vac tube runs the length of the door and does not interfere with the operation of the
window. I ended up with approx. .22 of a cubic foot which is sufficient for the
Dynaudio 15W75's (in a second order cabinet). Another benefit of this procedure is
that there is no panel vibrations or coloring of the mid range.
 This is the fiberglass
door pod fabricated for the Porsche. This is the fiberglass
door pod fabricated for the Porsche.
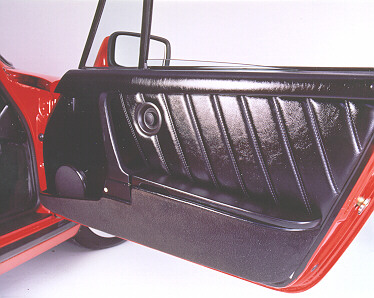
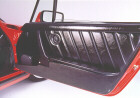 This is the end
result. Notice that I upgraded the factory grill to a newer flush style that does
not show any screws. The metal grill was covered with a grill cloth that matches
what is used throughout the entire vehicle. This is the end
result. Notice that I upgraded the factory grill to a newer flush style that does
not show any screws. The metal grill was covered with a grill cloth that matches
what is used throughout the entire vehicle.
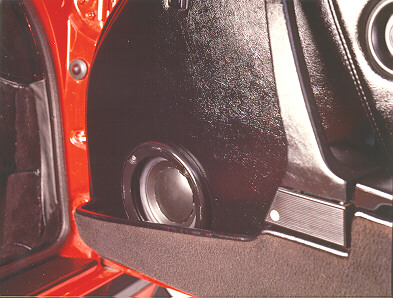
 Here is a picture of the
Dynaudio mid-bass driver without the grill in place. You can see that the driver is
recessed behind the grill assembly. The grill frame itself is only attached to the door
panel. This allows a little flexibility in angling the mid-bass inwards and upwards for
better imaging. Here is a picture of the
Dynaudio mid-bass driver without the grill in place. You can see that the driver is
recessed behind the grill assembly. The grill frame itself is only attached to the door
panel. This allows a little flexibility in angling the mid-bass inwards and upwards for
better imaging.
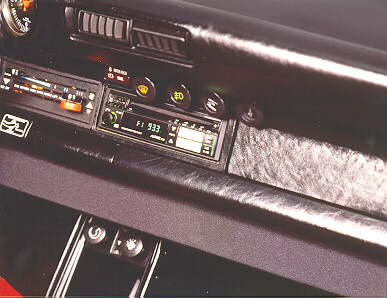
 You can see that the modified
Alpine 7909 is flushed in the dash of the Porsche. Fortunately, this car was designed with
a recessed opening for the factory Becker cassette. Flushing the 7909 was very simple in
this case. You can see that the modified
Alpine 7909 is flushed in the dash of the Porsche. Fortunately, this car was designed with
a recessed opening for the factory Becker cassette. Flushing the 7909 was very simple in
this case.
 The Image Dynamic CD-2 horns were
mounted equal distances from the corners of the Porsche and are secured by back strapping
material to factory mounting points. No permanent modifications or holes were
drilled. I did have to make adjustments in the heating ducts to accommodate
the TAD 2001 compression drivers (highly modified of
course) . The Image Dynamic CD-2 horns were
mounted equal distances from the corners of the Porsche and are secured by back strapping
material to factory mounting points. No permanent modifications or holes were
drilled. I did have to make adjustments in the heating ducts to accommodate
the TAD 2001 compression drivers (highly modified of
course) .
 The one piece grill runs the length
of the dash and curves inward to follow the curvature of the dash as well. This
grill was constructed before IASCA changed the rules concerning protective grilling over
the mouth of horns. Although I could now legally remove the metal grill material,
there is no noticeable difference in the sound or the staging. The one piece grill runs the length
of the dash and curves inward to follow the curvature of the dash as well. This
grill was constructed before IASCA changed the rules concerning protective grilling over
the mouth of horns. Although I could now legally remove the metal grill material,
there is no noticeable difference in the sound or the staging.
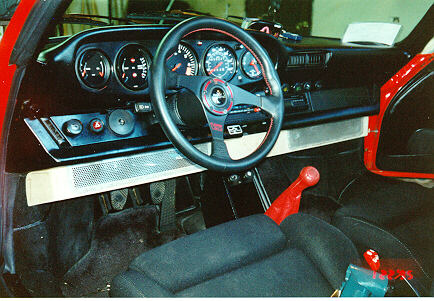
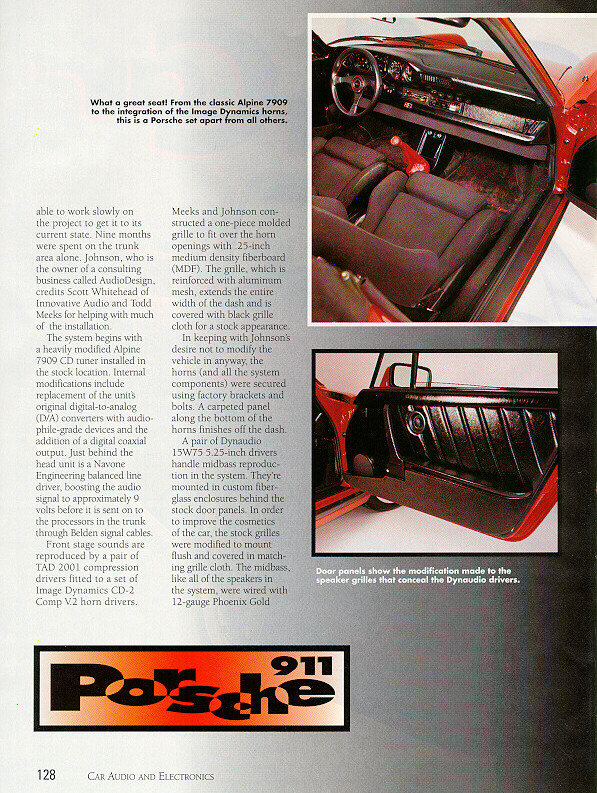
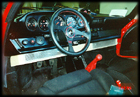
 This
is the grill after the installation of the grill cloth. You can
also see the Personal steering wheel and the red shift boot that
conceals a factory short shift kit from a 1985 911 Carrera.
While not completely visible, the seats are Recaro LXA. I
used the factory rails to bolt the seats right in. The Recaro's are much superior
than the factory sport seats. This
is the grill after the installation of the grill cloth. You can
also see the Personal steering wheel and the red shift boot that
conceals a factory short shift kit from a 1985 911 Carrera.
While not completely visible, the seats are Recaro LXA. I
used the factory rails to bolt the seats right in. The Recaro's are much superior
than the factory sport seats.
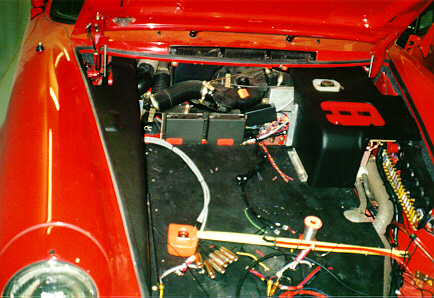
 This
is a picture of the upgrade battery (Optima 800). You will notice a tape measure attached
to the main power cable. This is to indicate to IASCA judging officials that the power run
from the main fuse assembly is less than 17". This
is a picture of the upgrade battery (Optima 800). You will notice a tape measure attached
to the main power cable. This is to indicate to IASCA judging officials that the power run
from the main fuse assembly is less than 17".
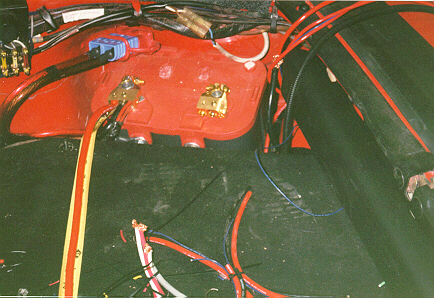
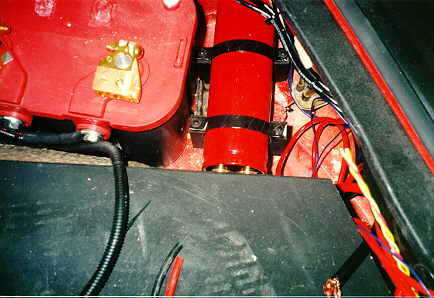
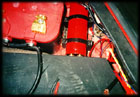 Here is another view of the Optima
battery and you can see the Phoenix Gold 1.2 farad capacitor that is color matched to the
Porsche. You can see that the cap is within a few inches of the battery as well as the
amplifiers. The power terminals for both the capacitor and battery are protected with
rubber covers. (not visible in this shot) Here is another view of the Optima
battery and you can see the Phoenix Gold 1.2 farad capacitor that is color matched to the
Porsche. You can see that the cap is within a few inches of the battery as well as the
amplifiers. The power terminals for both the capacitor and battery are protected with
rubber covers. (not visible in this shot)
 This
is the amp rack floor before painting. You can see the aluminum rails that are used to
secure the amp rack to the uneven floor of the Porsche. This rack was bolted to four
existing mounting points in the trunk. No holes were drilled in the trunk to mount any of
the sound system equipment. This
is the amp rack floor before painting. You can see the aluminum rails that are used to
secure the amp rack to the uneven floor of the Porsche. This rack was bolted to four
existing mounting points in the trunk. No holes were drilled in the trunk to mount any of
the sound system equipment.
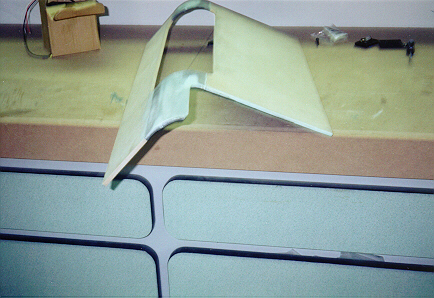
 This is a side view of the
processor cover. To achieve the curvature, sections of ABS tubing and body filler were
used to arrive at the appropriate angle. The rear of this panel was reinforced with
fiberglass mat. This is a side view of the
processor cover. To achieve the curvature, sections of ABS tubing and body filler were
used to arrive at the appropriate angle. The rear of this panel was reinforced with
fiberglass mat.
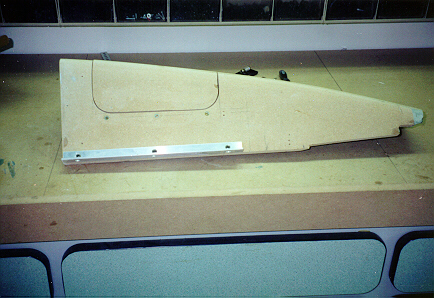
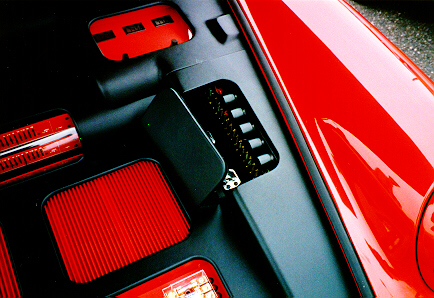
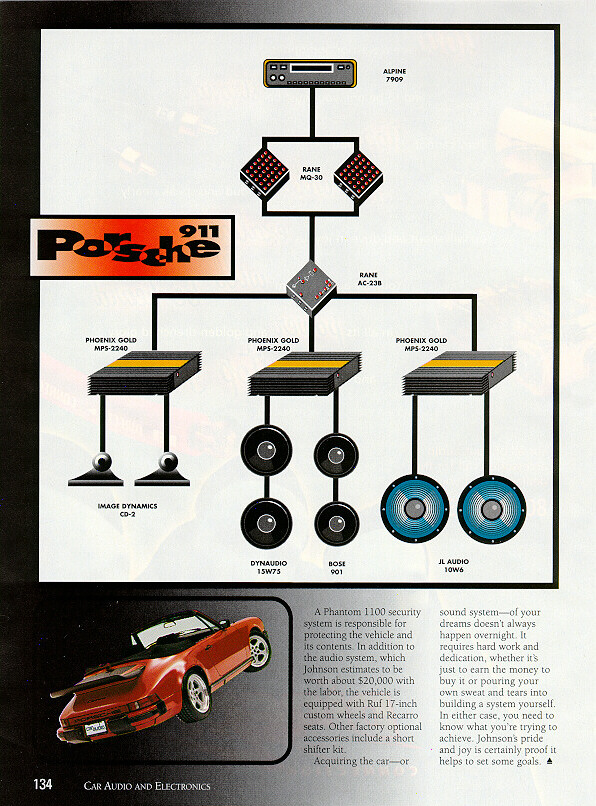
 This is the right side trunk
panel that covers the battery and factory fuse block assembly. This piece is pressure fit
into place and the aluminum rail secures to the amp rack floor. The hinged opening allows
access to the factory fuse assembly. This is the right side trunk
panel that covers the battery and factory fuse block assembly. This piece is pressure fit
into place and the aluminum rail secures to the amp rack floor. The hinged opening allows
access to the factory fuse assembly.
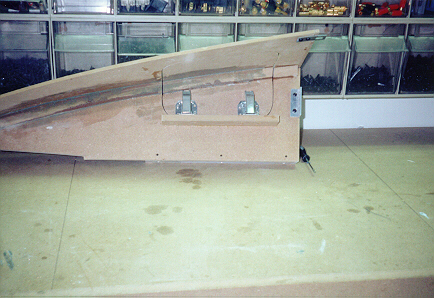
 This is the inside view of the right
side trunk panel. You can see additional brackets and the hinges that allow the fuse
assembly cover to open. This is the inside view of the right
side trunk panel. You can see additional brackets and the hinges that allow the fuse
assembly cover to open.
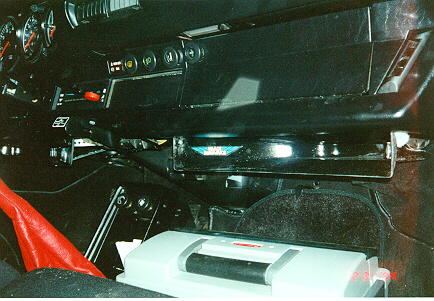
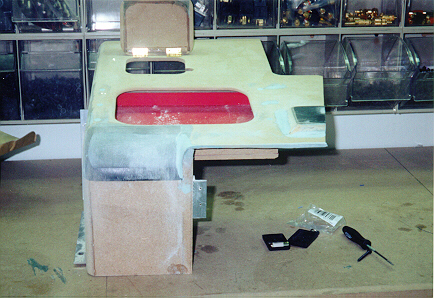
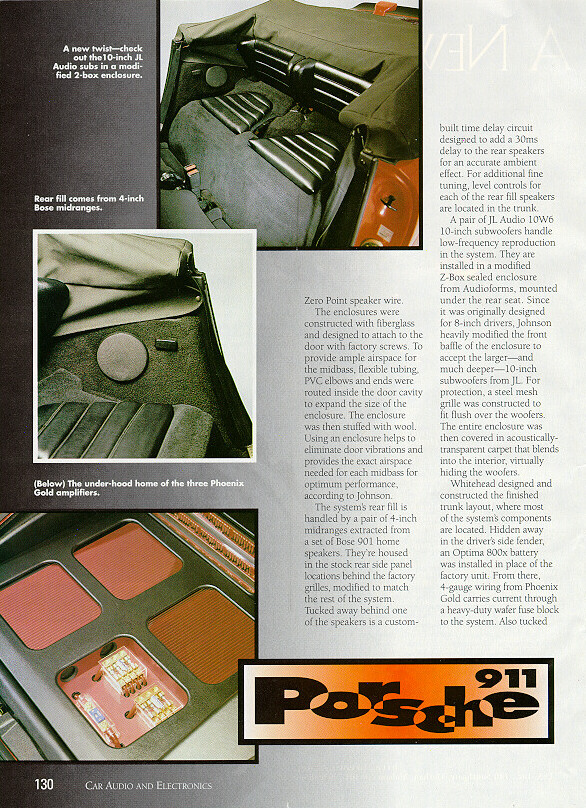
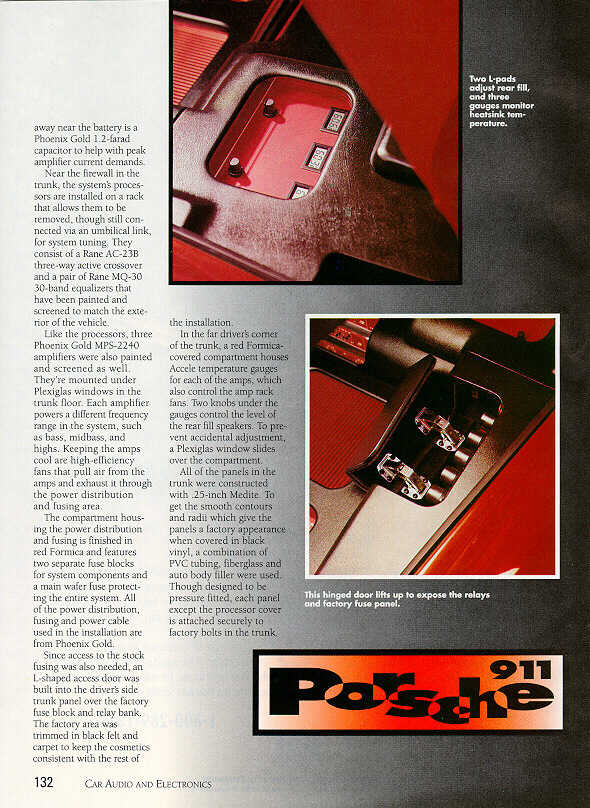
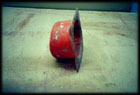
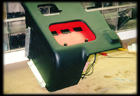
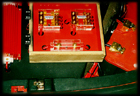
 This is the master cylinder
cover that resides in the upper right corner of the trunk. This was the most complex cover
to construct. We needed to clear the master cylinder and still have access to add fluid
(hence the hinged cover on top). The recessed red tray has a sliding plexi top that allows
access to three temperature gauges as well as the volume controls for the rear satellites.
The curved front plane was achieved using a section of ABS tubing, body filler and
fiberglass. This is the master cylinder
cover that resides in the upper right corner of the trunk. This was the most complex cover
to construct. We needed to clear the master cylinder and still have access to add fluid
(hence the hinged cover on top). The recessed red tray has a sliding plexi top that allows
access to three temperature gauges as well as the volume controls for the rear satellites.
The curved front plane was achieved using a section of ABS tubing, body filler and
fiberglass.
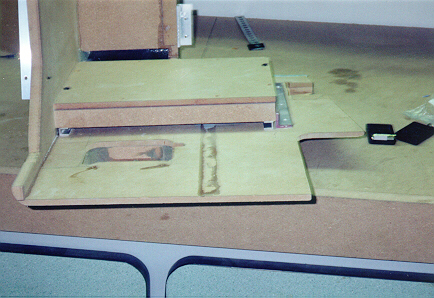
 Here is a view of the under side of the
master cylinder cover. You can see the aluminum rails that hold the plexi glass and allow
it to slide. Also visible is the aluminum mounting rails that attach to the amp rack and
other trim panels. Here is a view of the under side of the
master cylinder cover. You can see the aluminum rails that hold the plexi glass and allow
it to slide. Also visible is the aluminum mounting rails that attach to the amp rack and
other trim panels.
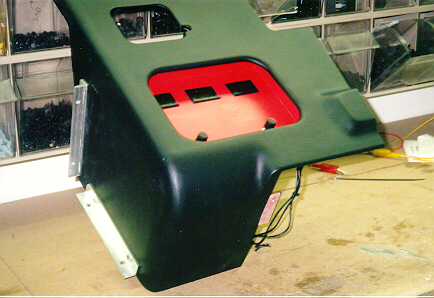
 This is the finished master
cylinder cover with the plexi glass installed as well as the temperature gauges and volume
controls. It took numerous attempts using a custom made "hot box" to vinyl this
piece. All that hard work did pay off, it turned out perfect! This is the finished master
cylinder cover with the plexi glass installed as well as the temperature gauges and volume
controls. It took numerous attempts using a custom made "hot box" to vinyl this
piece. All that hard work did pay off, it turned out perfect!
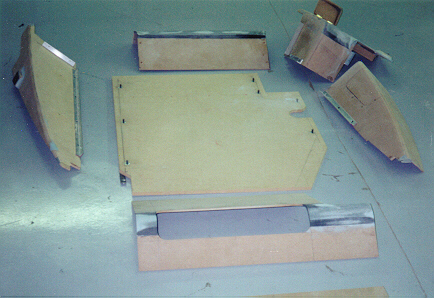
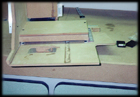
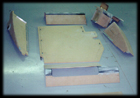 These are all of the panels
that go into the trunk of the Porsche. These are all of the panels
that go into the trunk of the Porsche.
 This is a view of the
trunk with several trim panels and the amp rack installed. You again will see the tape
measure connected to the main power cable. Also visible is some of the Canare 3 pin XLR
cables as well as other neatly loomed power cable runs. This is a view of the
trunk with several trim panels and the amp rack installed. You again will see the tape
measure connected to the main power cable. Also visible is some of the Canare 3 pin XLR
cables as well as other neatly loomed power cable runs.
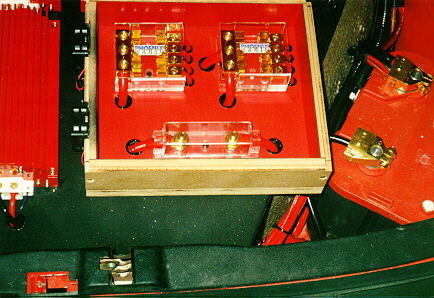
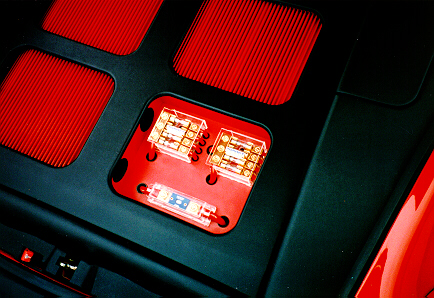
 Another view of the unfinished trunk
compartment. This close up shows a compartment that houses the Phoenix Gold fuse
assemblies and the main Phoenix Gold fuse. Notice the close proximity of the battery to
the main fuse. The inside of the compartment was color matched to the amplifiers. Another view of the unfinished trunk
compartment. This close up shows a compartment that houses the Phoenix Gold fuse
assemblies and the main Phoenix Gold fuse. Notice the close proximity of the battery to
the main fuse. The inside of the compartment was color matched to the amplifiers.
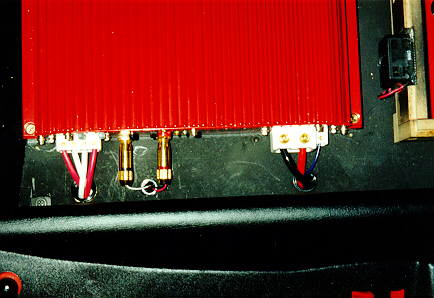
 This is a close up picture of
the Phoenix Gold MPS-2240 and its associated wiring. Notice that all cable is routed
through plastic grommets. The signal cable is Belden and the RCA ends are from Phoenix
Gold. The speaker cable is Phoenix Gold Zero Point Reference. All other power/ground is
Phoenix Gold 8 gauge. This is a close up picture of
the Phoenix Gold MPS-2240 and its associated wiring. Notice that all cable is routed
through plastic grommets. The signal cable is Belden and the RCA ends are from Phoenix
Gold. The speaker cable is Phoenix Gold Zero Point Reference. All other power/ground is
Phoenix Gold 8 gauge.
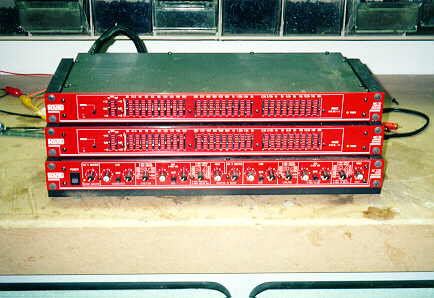
The Rane processing equipment consists of a pair of MQ-30 one third octave
equalizers and a AC-23B 24db electronic crossover. All processors have been
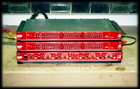 color matched to the vehicle and
silk screened in white and gray. These units were originally 120 volt and were converted
to 12vdc using 18v internal power supplies. The op amps in the processors have been
upgraded and the sub-sonic/ultra-sonic filters have been removed, thus cleaning up the
signal path. color matched to the vehicle and
silk screened in white and gray. These units were originally 120 volt and were converted
to 12vdc using 18v internal power supplies. The op amps in the processors have been
upgraded and the sub-sonic/ultra-sonic filters have been removed, thus cleaning up the
signal path.
 This view shows the equipment
layout in the trunk. The right side panel and top trim panels have been removed. This
picture was taken right after I powered up the system for the first time. (for testing
purposes) This view shows the equipment
layout in the trunk. The right side panel and top trim panels have been removed. This
picture was taken right after I powered up the system for the first time. (for testing
purposes)
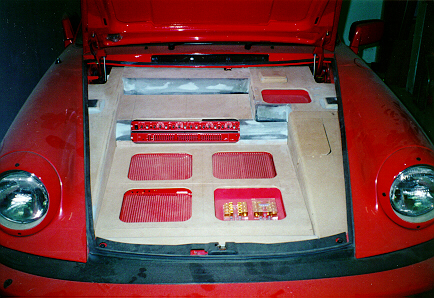
This view has all of the unfinished trim panels installed. The equipment at this point
 was not connected, but set in place to
confirm the fit. All these panels are pressure fit and the tolerances were very tight. The
light gray/white areas of these panels are where we used ABS tubing and body filler to
construct the curvature of the panels. was not connected, but set in place to
confirm the fit. All these panels are pressure fit and the tolerances were very tight. The
light gray/white areas of these panels are where we used ABS tubing and body filler to
construct the curvature of the panels.
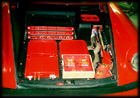
 Ah...the finished product! This
angle shows the amp cover (protected by plexi glass) and the compartment that holds the
Phoenix Gold fuse assemblies. You can also see the small fans that circulate air into the
amp compartment. Ah...the finished product! This
angle shows the amp cover (protected by plexi glass) and the compartment that holds the
Phoenix Gold fuse assemblies. You can also see the small fans that circulate air into the
amp compartment.
 Here again is the finished product with
emphasis on the compartment that opens for access to the factory fuse block. Here again is the finished product with
emphasis on the compartment that opens for access to the factory fuse block.
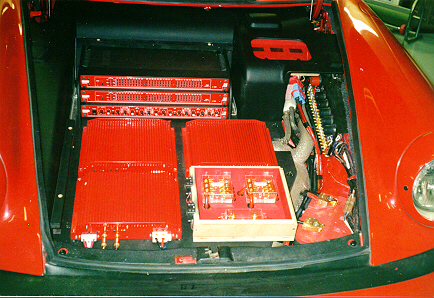
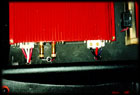
 This is a side view of the trunk. You can see the
three Phoenix Gold MPS-2240 amplifiers color matched to the car. You can also
see the three Rane processors (AC-23B Crossover & MQ-30 Equalizers) also color
matched to the car. This particular part of the installation took nine months
to complete. This is a side view of the trunk. You can see the
three Phoenix Gold MPS-2240 amplifiers color matched to the car. You can also
see the three Rane processors (AC-23B Crossover & MQ-30 Equalizers) also color
matched to the car. This particular part of the installation took nine months
to complete.
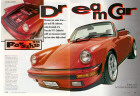
I scanned the complete article (on my
Porsche) from the June 1997 issue of Car Audio & Electronics. To keep loading times as
quick as possible, the pages were scanned at 75 dpi. (you will still need to be patient,
these images are full screen and quite large) Click on each thumbnail to view it full
size, use your browsers "back" button to return here. If the
images are reduced to fit on your screen (IE 6 users pay attention) click on
the image and then click on the small tab with four arrows on it to increase
the size of the picture.


Click here to read the
story behind this car
![[counter]](http://counter.digits.com/wc/-d/6/-z/-c/16/-f/ffff00/kcls)
|