| Sparco EVO seats & custom seat brackets |

|
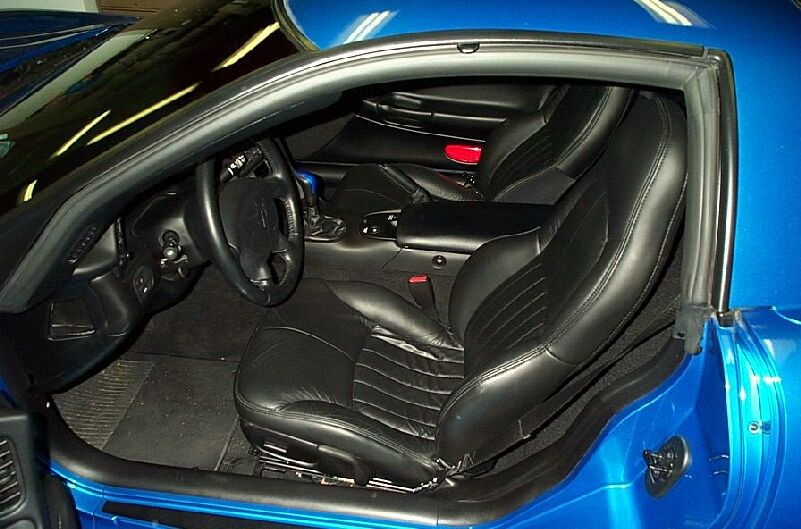
One bad thing about the C5 are its seats. The factory seat is made by Lear and leave's much to be desired if you attend any autocrosses or driving schools. Unfortunately, because of the C5 cockpit design, installing after market seats was just impossible.....until now, leave it to Gary Hoffman at Hardbar.net to come up with the answer. You see, Gary is a Aerospace engineer and along with his extensive knowledge base Gary has a shop full of expensive tools to fabricate just about anything you could imagine. Gary has used his expertise to make a set of seat rails for the C5, specifically designed for the Sparco EVO, but the rails should work with other seats if the dimensions are close to identical to the Sparo EVO. Now when I say there is limited room to put an aftermarket seat, I mean really limited, the tolerances are very very close, so any seat chosen for the C5 would have to be the diameter of the Sparo EVO or smaller. I don't know where this is going to leave uh, um lets say the "larger" driver since they may have a difficult time fitting in the Sparo EVO. Anyway, lets move on with this install. Remember to set aside a full day for this project and solicit a extra set of hands for assistance.
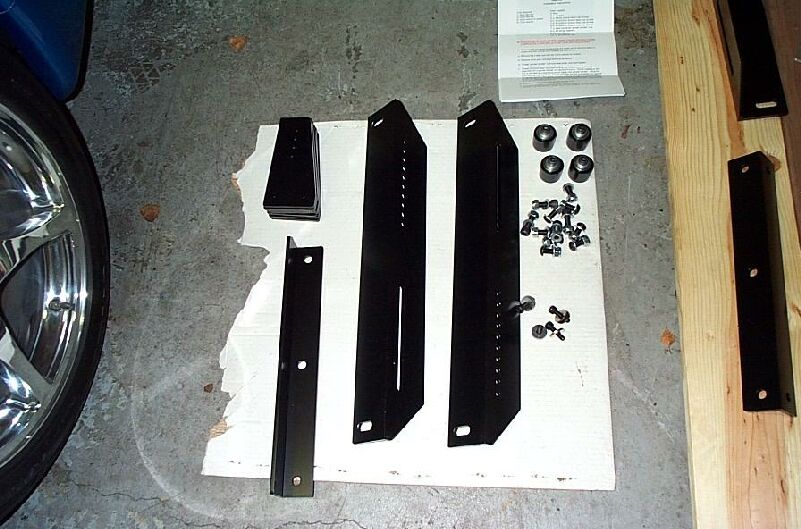
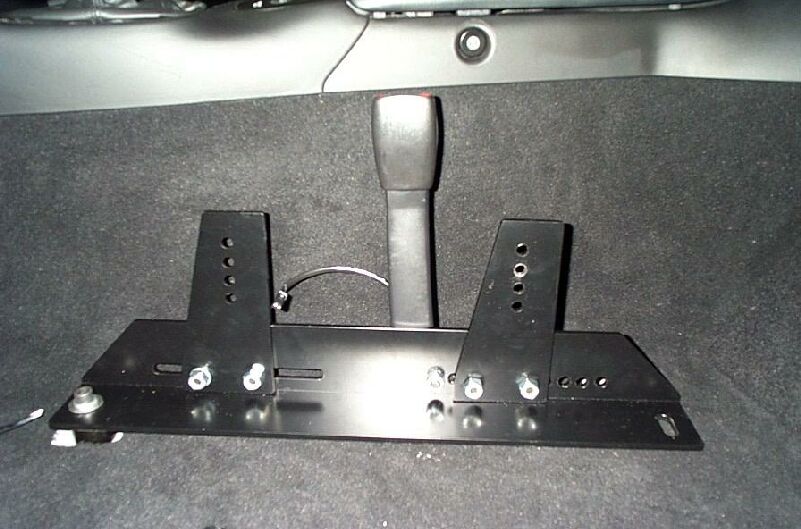
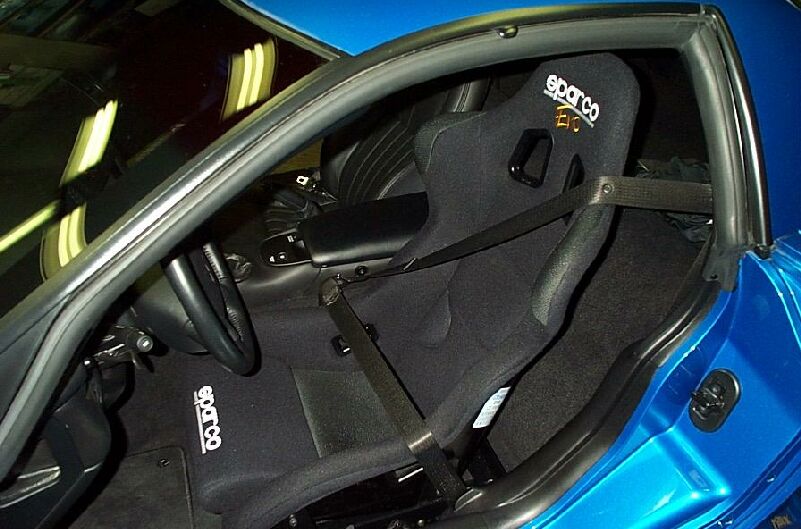
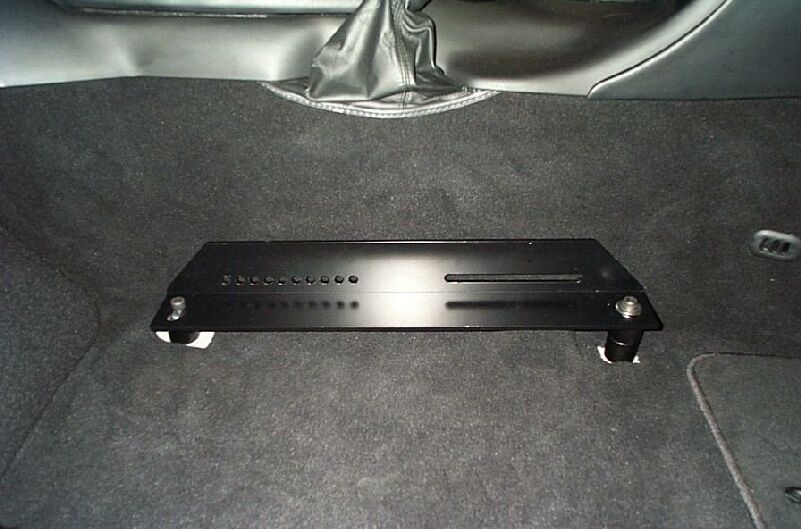
These first couple of pictures shows the stock base seats in the C5 FRC. These seats are very poor in supporting the driver. It would of been nice if GM made the sport seat option available in the FRC. Although a little better than the base seats, even the sport seat is no competition for the likes of a true performance seat like the Sparco. The third picture shows the components for assembly of the seat brackets. Since I am using a 5th harness belt (also known as an anti-submarine belt) that straps over your crotch (scary thought ;-), I have a extra bar that mounts in the rear.
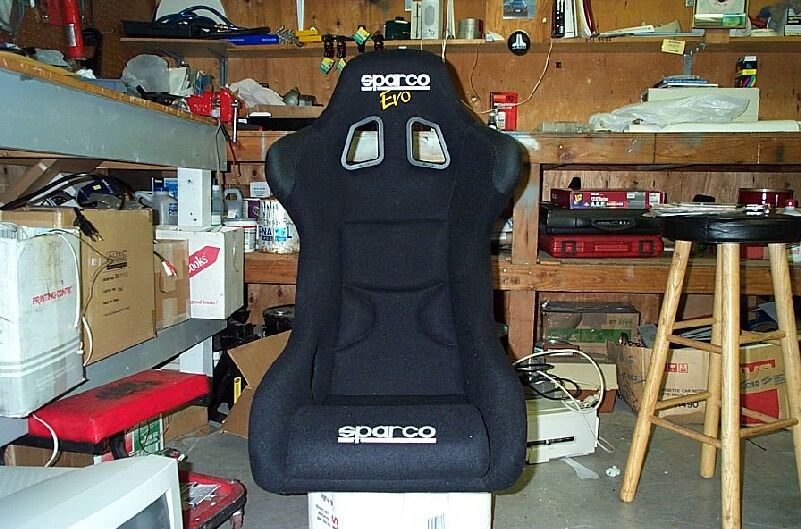
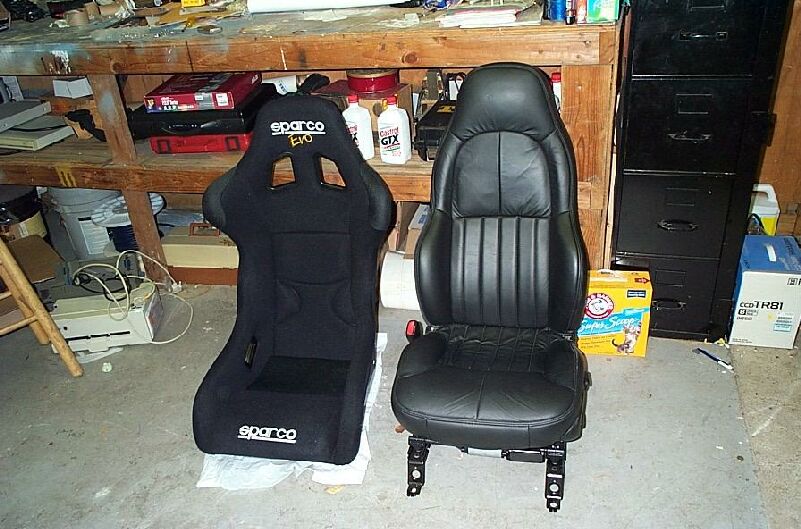
This first picture shows another angle of the mounting rails. Gary changed his design a little, the front of the rails now have a slotted design to facilitate easier installation and the possibility of using seats other than the Sparo Evo. The second picture is of the Sparo EVO seat. I originally ordered blue inserts for the seat but upon arrival I noticed that the seat bottom is in black and the rest of the insert was blue, it did not look to good so back to a solid black seat! First thing you need to do if remove the plastic covers from the seat bolts, use a flat blade screw driver to pry the pin out and then remove the entire plastic cap.
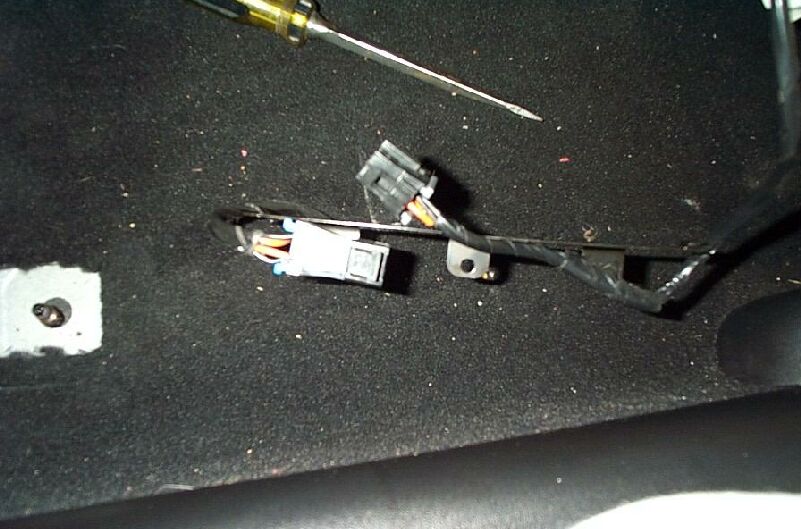
After the pin is removed, the plastic cap should slide right off. You need a 15 mm socket to remove the nuts. After removing all the nuts, tilt the seat back and unplug the wire harness from the floor of the C5 (if you have electric seats, if not, this wire harness should not be there). The last picture here shows the differences between the factory seat and the Sparo EVO
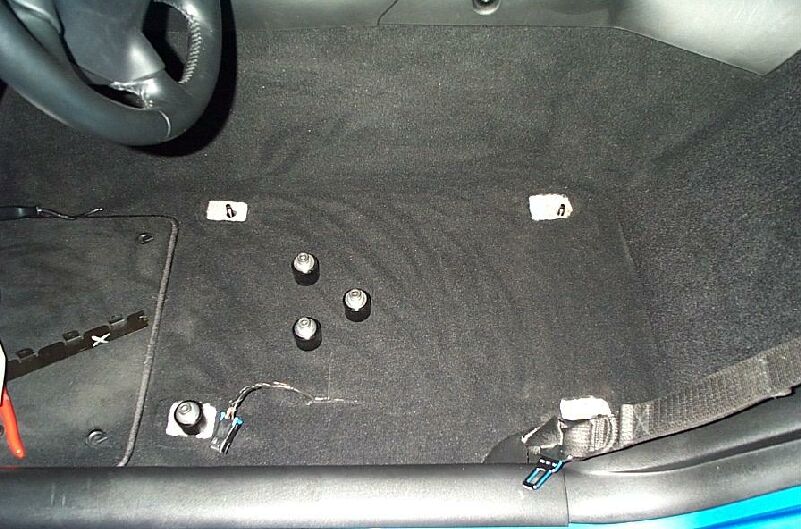
The studs that protrude from the floor pan need these round gender-benders. The second picture shows how to tighten these gender benders to the floor pan bolts. They need to go all the way down to the floor pan. One thing to note, not all C5's have the floor pan bolts that are the same, some are longer and some are shorter, in my case, my bolts were longer, so for my seat rails to bolt into place using the supplied allen head bolts, I had to use extra washers as spacers. This problem could be avoided if the the gender bender's were a bit longer. The last picture here shows one side of the seat rail assembled and set in place. Gary has specific instructions that should be followed to facilitate easy adjustment and installation.
If you plan on driving your C5 on the street with your aftermarket seats, you will have to take the time and install your factory 3 point harnesses receptacle. This can be unbolted from your factory seat using a 18 mm socket. One thing to note here in the 2nd photo, the factory seat belt receptacle has a inward notch on it. You need to either grind it off or in my case, add some washers as spacers so as to not have it catch on your brackets or gouge them up. The third picture shows the factory seat belt receptacle installed and using a supplied allen bolt and lock nut, it freely rotates up and down
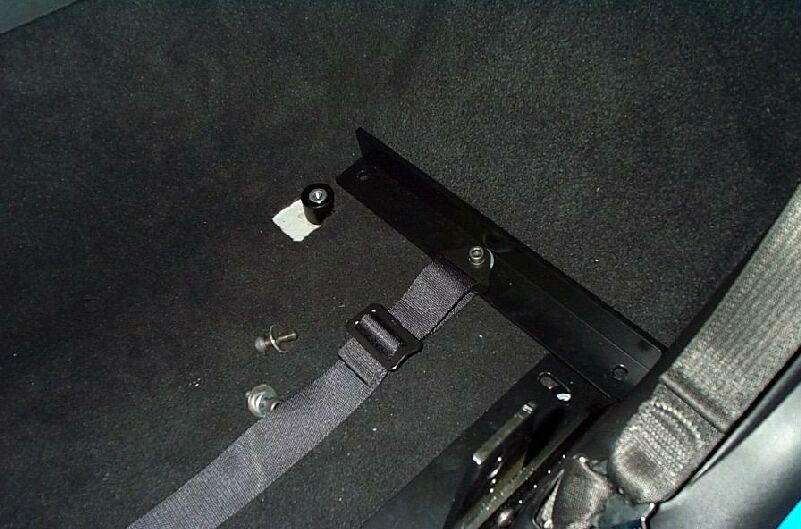
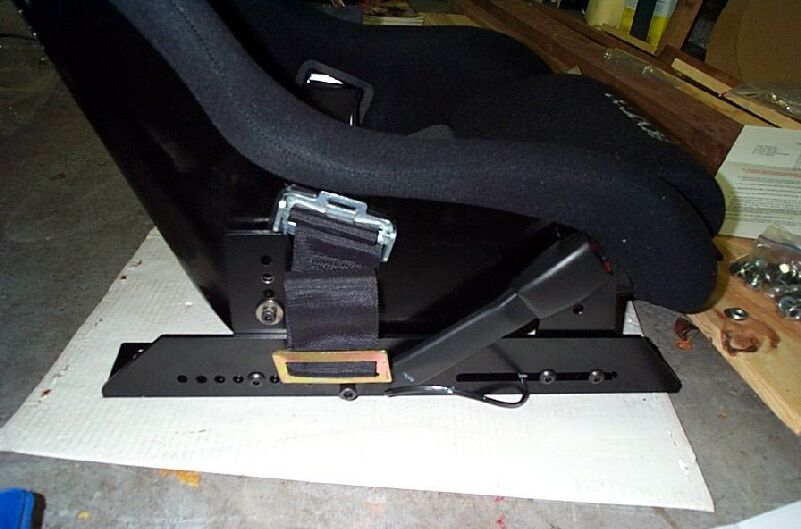
Here is the Hardbar bracket and factory seat belt receptacle mounted. All the included hardware is of very high quality and includes locknuts and washers. The second picture here shows the optional anti-submarine bar. This item attaches to the rear of your seat brackets and your belt attaches using supplied allen bolts and locknuts. The third picture here shows my Sparco harness lap belt mounted to the seat rail. The adjustments should be made while the seat is out of the car, there just is not enough room to make adjustments once the seat is installed (on the side that faces the transmission tunnel) Again, Gary provides you with the necessary hardware to mount your belts.
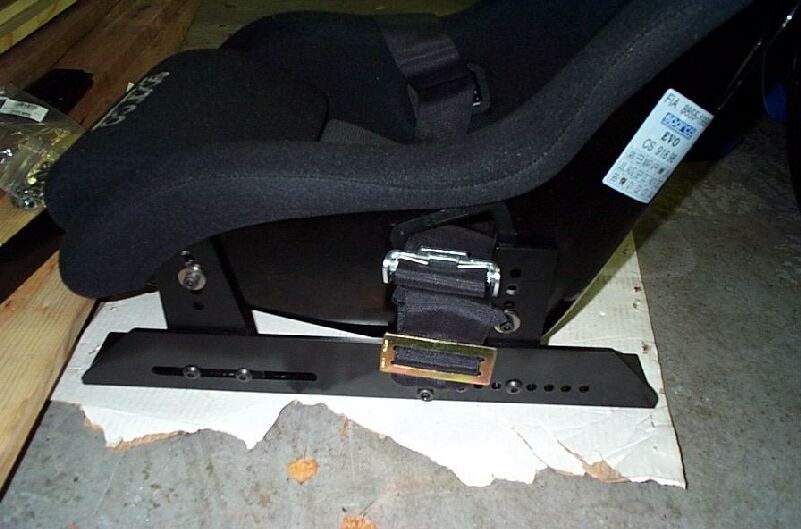
This first picture shows the other side of the seat and the harness belt in place. The second picture shows the seat installed and the lap harnesses and anti submarine belt in place (the shoulder harnesses are not installed yet). The last picture here shows the harness belts tucked out of the way and the factory three point belt in place Another note here, the harness that is closet to the door jam can be stored between the seat rail and scuff plate, there is not much room on the other side between the seat and transmission tunnel. Since I have the Sparco harnesses with a pull up quick release buckle, I need to tuck this through the seat opening to get it out of the way. If you have a similar harness belt with quick release, it is a tight fit to get it through the opening of the Sparco. Several times I pulled the plastic trim ring apart from the seat, so be careful, that trim ring is a royal pain to snap back together. Racing harnesses are technically not legal for use on the street, so you need to use your three point harness for day to day driving. One other note worth mentioning. There is no provision for front to back adjustment via sliding rails. To adjust your front to back position, you must remove your entire seat, unbolt it from the brackets and re-position the seat. I only had to do this a couple of times before I got it right where I want it. This could provide problems if multiple people drive your car. In my case, I am the only one who drives it and the service personnel at the dealership are just going to have to deal with sitting so close to the steering wheel ;-)
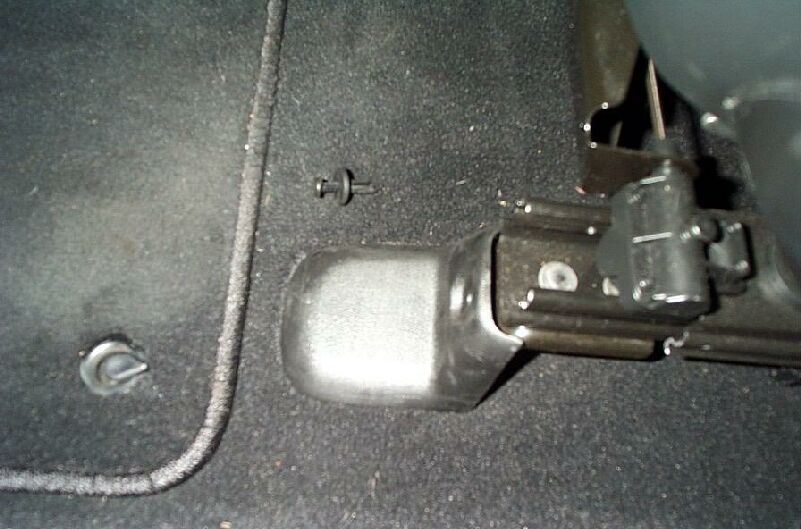
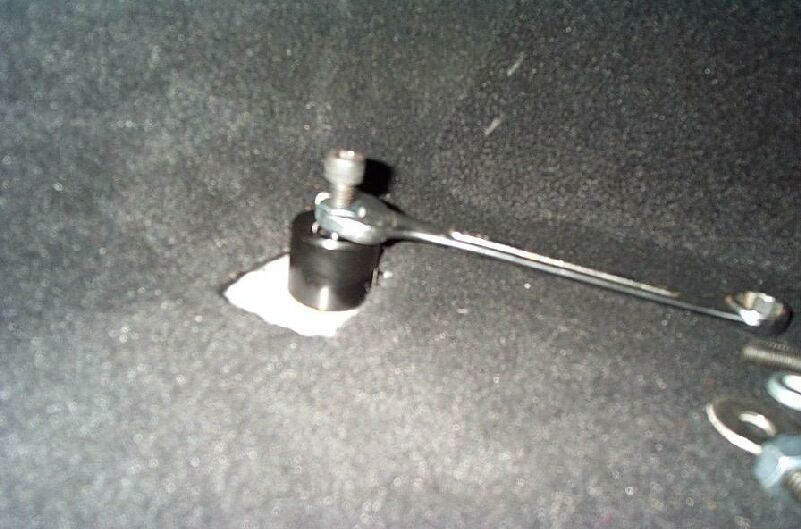
Well that took care of the drivers side, but how about the passenger side? If you elect to include a passenger Sparco seat and you have active handling as a option, your going to have some problems. It seems that GM installed a yaw sensor directly behind the seat bolt in the front closest to the transmission tunnel. GM also has stated not to move this sensor from its location. Any attempt to relocate this sensor will result in the active handling system not working correctly. The first picture shows you the sensor in relation to the seat bolt. The second picture shows you my solution to the problem. I stacked two of Gary's gender benders together to raise up the front of the seat rails. Gary is making me some custom gender benders (top one has no threads only the bottom one does) and he is sending me out some longer allen bolts. I will have to raise the rear of the seat bracket a bit using washers, but I should be able to compensate for the incline here by adjusting the passenger side Sparco seat so it sits lower in the seat brackets. These Harbar brackets are top notch quality and I opted to have them powder coated black (looks much better IMHO) They ran me about $200 for each seat and come with all brackets, bolts washers etc. My C5 is so much more comfortable with the Sparo seats in it. I can also shift, double clutch, steer and brake much better as well. There is a night and day difference between the soft, un-supportive stock seats and these Sparco's. As for getting into and out of the car, the Sparco seat sides are taller than the factory seats, so this is how I get in and out of the C5 (it helps allot if you have a tilt steering wheel). Getting in the car is no problem, just plant your butt on the side of the Sparco and slide in, no problem. As for getting out, tilt your steering wheel out of the way, slide your feet out of the car while swinging your thighs over the side of the Sparco. Now using your right hand, grab your door handle and use it as leverage to help you out. If you can live with the non-adjustability and fixed back of the Sparcos I highly recommend this upgrade.
Copyright ©2000 Rik Johnson. All rights reserved. |